
Eğer bir uygulama geliştiriyorsanız, kullandığınız AngularJS, muhtemelen HTTP interceptor'lardan (kesicilerden) haberdarsınızdır. Ancak bu HTTP interceptor'lar Angular 4.3 sürümüne kadar mevcut değildi. Bu eğitimde, HTTP isteklerini ve yanıtlarını yönetmek ve hataları işlemek için Angular'da interceptor'ları kullanacağız.
Gereksinimler
Angular uygulamaları Node.js çalışma zamanını kullanır. Bu eğitimi tamamlamak için makinenizde Node.js'in kurulu olması gerekir. Neyse ki Node.js'i kurmak oldukça kolaydır. Şurada eksiksiz bir kılavuzumuz var: Ubuntu 18.04 üzerinde Node.js Nasıl Kurulur.
Ayrıca, Angular bilmeniz ve Angular uygulamaları oluşturmak için Angular CLI kullanmaya aşina olmanız sizin için faydalı olacaktır. Node v8.12.0 ve npm v6.4.1 kullanacağız.
Adım 1: Angular Uygulaması Oluşturun
Başlamak için, Angular CLI kullanarak yeni bir Angular uygulaması oluşturalım. Uygulamamıza Angular-Interceptor adını vereceğiz. Uygulamayı oluşturmak için aşağıdaki komutu çalıştırın:
|
1 |
npx @angular/cli@7.0.6 new Angular-Interceptor |
Size bazı seçenekler sunulacaktır. Varsayılan değerleri girin ve devam edin:

Ardından, uygulama dizinine gidin ve uygulamayı başlatmak için aşağıdaki komutu çalıştırın:
|
1 |
npx ng serve --open |

Ardından, uygulamayı görmek için tarayıcınızda http://localhost:4200 adresini görüntüleyin. Artık temel bir Angular uygulaması yapılandırdınız.
Adım 2: Angular Uygulamasını Stilize Edin
Burada Angular uygulamamızı Angular Material kullanarak stilize edeceğiz. Projenize Angular Material kurmak için aşağıdaki komutu çalıştırın:
|
1 |
npm install --save @angular/material@7.0.4 @angular/cdk@7.0.4 @angular/animations@7.0.4 |
Bu işlem projenize @angular/material, @angular/cdk, ve @angular/animation kuracaktır. Ardından, projede bir animasyon ayarlayacağız. BrowserAnimationsModule modülünü src/app/module.ts dosyanıza ekleyin:
|
1 2 3 4 5 6 7 8 9 10 11 12 13 |
... import { BrowserAnimationsModule } from '@angular/platform-browser/animations'; @NgModule({ ... imports: [ ... BrowserAnimationsModule ], ... }) export class AppModule { } |
Angular Material'dan Dialog bileşenini kullanacağız. Dialog bileşenini kullanmak için, MatDialogModule modülünü src/app/app.module.ts dosyasında içe aktarmamız gerekir:
|
1 2 3 4 5 6 7 8 9 10 11 12 13 |
... import { MatDialogModule } from '@angular/material'; @NgModule({ ... imports: [ ... MatDialogModule ], ... }) export class AppModule { } |
Arayüzü daha çekici hale getirmek için, indigo-pink.css dosyasını styles.scss dosyanıza ekleyelim:
|
1 |
@import "~@angular/material/prebuilt-themes/indigo-pink.css"; |
Adım 3: Angular Interceptor'ınızı Oluşturun
Under the app klasörünün altında, interceptor adında yeni bir klasör oluşturacağız. Bu yeni oluşturulan klasörün içinde, yeni bir httpconfig.interceptor.ts dosyası oluşturun.
Interceptor'ımızın çalışması için httpconfig.interceptor.ts dosyamızda bazı bağımlılıkları içe aktarmamız gerekiyor. Bu bağımlılıklar şunlardır: HttpInterceptor, HttpRequest, HttpResponse, ve HttpHandler, HttpEvent, HttpErrorResponse.
Our httpconfig.interceptor.ts dosyamız içe aktarmadan sonra aşağıdaki gibi görünecektir:
|
1 2 3 4 5 6 7 8 9 10 11 12 13 |
import { Injectable } from '@angular/core'; import { HttpInterceptor, HttpRequest, HttpResponse, HttpHandler, HttpEvent, HttpErrorResponse } from '@angular/common/http'; import { Observable, throwError } from 'rxjs'; import { map, catchError } from 'rxjs/operators'; |
Ardından, bir HttpConfigInterceptor sınıfı oluşturun ve HttpInterceptor. Bu bir örnektir:
|
1 2 3 4 5 6 7 |
@Injectable() export class HttpConfigInterceptor implements HttpInterceptor { intercept(request: HttpRequest<any>, next: HttpHandler): Observable<HttpEvent<any>> { // ... } } |
Aşağıdaki kodu httpconfig.interceptor.ts dosyasına ekleyin:
|
1 2 3 4 5 6 7 8 9 10 11 12 13 14 15 16 17 18 19 20 21 22 23 24 25 26 27 |
... @Injectable() export class HttpConfigInterceptor implements HttpInterceptor { intercept(request: HttpRequest<any>, next: HttpHandler): Observable<HttpEvent<any>> { const token: string = localStorage.getItem('token'); if (token) { request = request.clone({ headers: request.headers.set('Authorization', 'Bearer ' + token) }); } if (!request.headers.has('Content-Type')) { request = request.clone({ headers: request.headers.set('Content-Type', 'application/json') }); } request = request.clone({ headers: request.headers.set('Accept', 'application/json') }); return next.handle(request).pipe( map((event: HttpEvent<any>) => { if (event instanceof HttpResponse) { console.log('event--->>>', event); } return event; })); } } |
Çalışması için, httpconfig.interceptor.ts dosyasını app.module.ts dosyamıza import etmeliyiz:
|
1 2 3 4 5 6 7 8 9 10 11 12 13 |
... import { HttpClientModule, HTTP_INTERCEPTORS } from '@angular/common/http'; ... import { HttpConfigInterceptor } from './interceptor/httpconfig.interceptor'; @NgModule({ ... imports: [ ... HttpClientModule ], ... }) |
Add HttpConfigInterceptor sınıfını providers dizisine ekleyin. multi: true değerini, birden fazla interceptor'ı işlemek için ayarlayacağız:
|
1 2 3 4 5 6 7 8 9 10 |
... @NgModule({ ... providers: [ ... { provide: HTTP_INTERCEPTORS, useClass: HttpConfigInterceptor, multi: true } ], ... }) ... |
Bir sonraki bölümde, hataları ele almak için servisimizi oluşturacağız.
Adım 4: Hataları Ele Almak için Servis
Burada hataları ele almak için kod yazacağız. Hataları yakalamamız ve son kullanıcılara uygun şekilde göstermemiz gerekecek. Özetle, takip edeceğimiz adımlar aşağıdadır:
- Şu adla bir klasör oluşturun: error-dialog (konum: app klasörü).
- Şu isimde bir hata servisi oluşturun: errorDialogService, şu isimli dosya içinde: errordialog.service.ts.
- Aşağıdaki kodu şu dosyaya ekleyin: errordialog.service.ts :
|
1 2 3 4 5 6 7 8 9 10 11 12 13 14 15 16 17 18 19 20 21 22 23 24 25 26 27 |
import { Injectable } from '@angular/core'; import { MatDialog, MatDialogRef, MAT_DIALOG_DATA } from '@angular/material'; import { ErrorDialogComponent } from './errordialog.component'; @Injectable() export class ErrorDialogService { public isDialogOpen: Boolean = false; constructor(public dialog: MatDialog) { } openDialog(data): any { if (this.isDialogOpen) { return false; } this.isDialogOpen = true; const dialogRef = this.dialog.open(ErrorDialogComponent, { width: '300px', data: data }); dialogRef.afterClosed().subscribe(result => { console.log('İletişim kutusu kapatıldı'); this.isDialogOpen = false; let animal; animal = result; }); } } |
|
1 2 3 4 5 6 7 8 9 10 11 12 |
import { Component, Inject } from '@angular/core'; import { MAT_DIALOG_DATA } from '@angular/material'; @Component({ selector: 'app-root', templateUrl: './errordialog.component.html' }) export class ErrorDialogComponent { title = 'Angular-Interceptor'; constructor(@Inject(MAT_DIALOG_DATA) public data: string) {} } |
|
1 2 3 4 5 6 7 8 9 10 |
<div> <div> <p> Sebep: {{data.reason}} </p> <p> Durum: {{data.status}} </p> </div> </div> |
Özetlemek gerekirse, aşağıdaki adımları listeleyelim:
- Şunu içe aktararak (import) başlayın: errordialog.service.
- Ardından, şunun için yapıcı metodu (constructor) ekleyeceğiz: errorDialogService.
- Ayrıca, hata yanıtını işlemek için şu yöntemleri kullanan kodu ekleyeceğiz: catchError ve throwError.
- Şunları içe aktarın (import): errordialog.service ve errordialog.component şunun içine: AppModule.
Değişiklikleri yaptıktan sonra iki dosya değiştirilmiş olacak: app.module.ts ve httpconfig.interceptor.ts:
|
1 2 3 4 5 6 7 8 9 10 11 12 13 14 15 16 17 18 |
... import { ErrorDialogComponent } from './error-dialog/errordialog.component'; ... import { ErrorDialogService } from './error-dialog/errordialog.service'; ... @NgModule({ ... declarations: [ ... ErrorDialogComponent ], ... providers: [ ... ErrorDialogService ], entryComponents: [ErrorDialogComponent], }) |
|
1 2 3 4 5 6 7 8 9 10 11 12 13 14 15 16 17 18 19 20 21 22 23 24 25 26 |
... import { ErrorDialogService } from '../error-dialog/errordialog.service'; ... @Injectable() export class HttpConfigInterceptor implements HttpInterceptor { constructor(public errorDialogService: ErrorDialogService) { } intercept(request: HttpRequest<any>, next: HttpHandler): Observable<HttpEvent<any>> { ... return next.handle(request).pipe( map((event: HttpEvent<any>) => { if (event instanceof HttpResponse) { console.log('event--->>>', event); } return event; }), catchError((error: HttpErrorResponse) => { let data = {}; data = { reason: error && error.error && error.error.reason ? error.error.reason : '', status: error.status }; this.errorDialogService.openDialog(data); return throwError(error); })); } } |
Adım 5: Örnek Servislerin Oluşturulması
Bu adımda örnek olarak iki servis oluşturacağız:
- Giriş API'si
- Müşteri Detay API'si
Şu adla yeni bir klasör oluşturun: services şunun içinde: src klasörü. Ardından, yeni oluşturulan bu klasörün içinde şu adla yeni bir dosya oluşturun: login.service.ts, ve iki fonksiyon ekleyin:
|
1 2 3 4 5 6 7 8 9 10 11 12 13 14 15 16 |
import { Injectable } from '@angular/core'; import { HttpClient } from '@angular/common/http'; @Injectable() export class LoginService { constructor(private http: HttpClient) { } login(data) { data = { email: 'admin', password: 'admin' }; return this.http.post('http://localhost:3070/api/login', data); } getCustomerDetails() { return this.http.get('http://localhost:3070/customers/details'); } } |
Adım 6: HTTP İstemci Servisini Çağırma
Son olarak, eğitimimizin son bölümündeyiz. HTTP servisimizi şuradan çağıracağız: app.component.ts dosyası. İki LoginService fonksiyonunu şuraya ekleyin: app.component.ts. Giriş API'sini onload ile ve customers/details API'sini ise şununla çağırın: onclick:
|
1 2 3 4 5 6 7 8 9 10 11 12 13 14 15 16 17 18 19 20 21 22 |
import { Component } from '@angular/core'; import { LoginService } from './services/login.service'; @Component({ selector: 'app-root', templateUrl: './app.component.html', styleUrls: ['./app.component.scss'] }) export class AppComponent { title = 'Angular-Interceptor'; constructor(public loginService: LoginService) { this.loginService.login({}).subscribe(data => { console.log(data); }); } getCustomerDetails() { this.loginService.getCustomerDetails().subscribe((data) => { console.log('----->>>', data); }); } } |
Şimdi şunun içine bir UI öğesi eklemeliyiz: app.component.html, böylece kullanıcı buna tıklayabilir:
|
1 |
<h2 (click)="getCustomerDetails()">Müşteri detaylarını getir</h2> |
Bitirmek için, şunları dahil etmeniz gerekecek: LoginService şuraya: providers şunun içindeki: AppModule:
|
1 2 3 4 5 6 7 8 9 10 11 12 |
... import { LoginService } from './services/login.service'; ... @NgModule({ ... providers: [ ... LoginService ] ... }) |
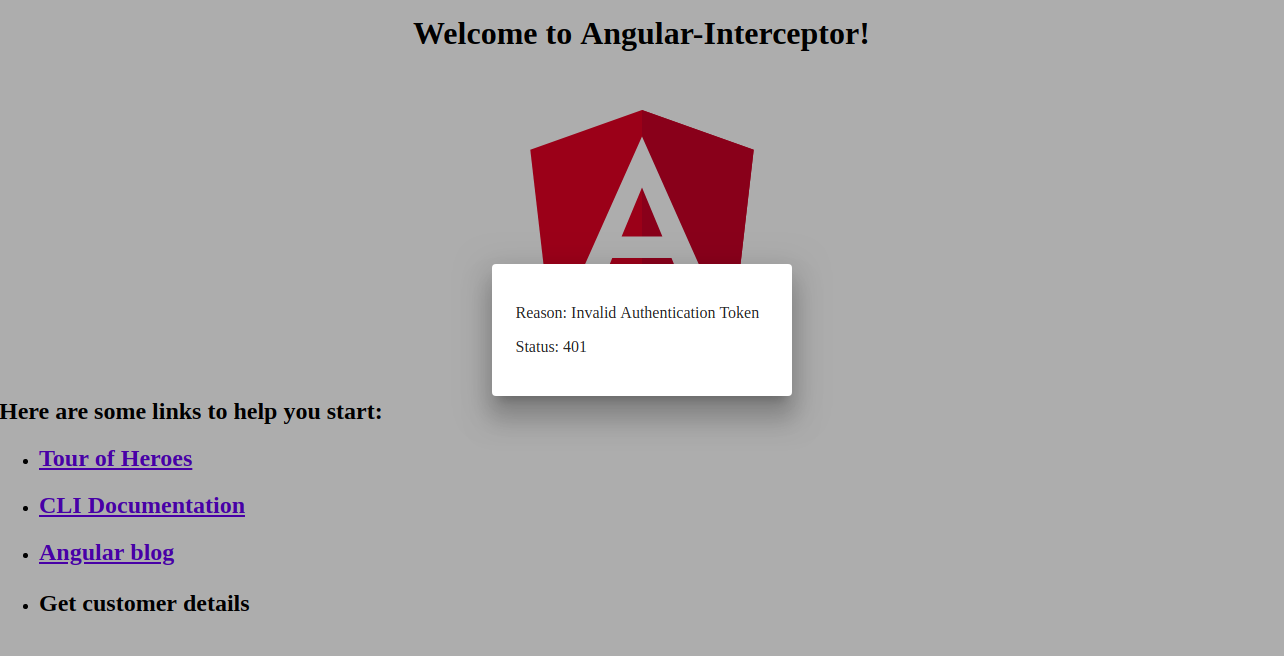
Aşağıda, hata işleyici iletişim kutusunun bir ekran görüntüsünü bulabilirsiniz:
Sonuç
Bu eğitimde, Angular interceptor'larını kullanarak HTTP isteklerini ve yanıtlarını nasıl yöneteceğimizi öğrendik. Ayrıca Angular Material'daki iletişim kutusunu (dialog) kullanarak hataları nasıl ele alacağımızı da öğrendik.
Angular uygulamaları çalışma zamanı olarak Node.js kullanır. Node.js hakkında daha fazla bilgi edinmek ve Node.js uygulamalarını Docker üzerinde nasıl dağıtacağınızı öğrenmek istiyorsanız, Ubuntu 20.04 üzerinde Docker ile Node.js (Express.js) Uygulaması Nasıl Dağıtılır kılavuzumuza göz atın. Ayrıca Node.js ile Ubuntu 20.04 Üzerinde Üretim Görevleri Nasıl Gerçekleştirilir ve CentOS 8'e Node.js Kurulumu: Tam Bir Kılavuz.
Keyifli Kodlamalar!
Yorumlar
Henüz yorum yapılmamış. İlk siz olun.