
Ruby to potężny język programowania. Jest to interpretowany, wysokopoziomowy język ogólnego przeznaczenia, który łączy w sobie wiele paradygmatów programowania. Yukihiro Matsumoto, twórca języka Ruby, połączył różne elementy swoich ulubionych języków programowania, takich jak Perl, Ada, Lisp, Eiffel, Smalltalk itp., i stworzył Ruby. Jak sam mówi, jego intencją było uczynienie języka Ruby „bardziej naturalnym, a nie prostym”.
Większość popularności języka Ruby wynika z Ruby on Rails. To potężny framework webowy zbudowany na bazie języka Ruby. Służy jako backend dla wielu aplikacji internetowych, na przykład Airbnb, Spotify, GitHub, SoundCloud i innych. Filozofią Ruby on Rails jest oferowanie intuicyjnego frameworka w celu przyspieszenia budowy solidnych i wydajnych stron internetowych.
Jako framework webowy, Ruby on Rails może współpracować z popularnymi silnikami baz danych, na przykład SQLite, MySQL/MariaDB, oraz PostgreSQL. Ten przewodnik pokaże, jak zbudować fundamenty aplikacji Ruby on Rails, która używa MySQL jako silnika bazy danych.
Wymagania wstępne
- Wszystkie kroki przedstawione w tym przewodniku są wykonywane na systemie Ubuntu 21.04. Dowiedz się więcej o konfiguracji serwera Ubuntu tutaj.
- Pokażemy również szybką demonstrację instalacji i konfiguracji serwera MySQL. Więcej informacji można znaleźć w tym przewodniku dotyczącym konfiguracji MySQL.
- Do instalacji i zarządzania językiem Ruby użyjemy rbenv. Jest to narzędzie zaprojektowane, aby pomóc w zarządzaniu środowiskiem Ruby. W porównaniu do RVM, rbenv ma swoje różnice.
Krok 1: Instalacja i konfiguracja MySQL
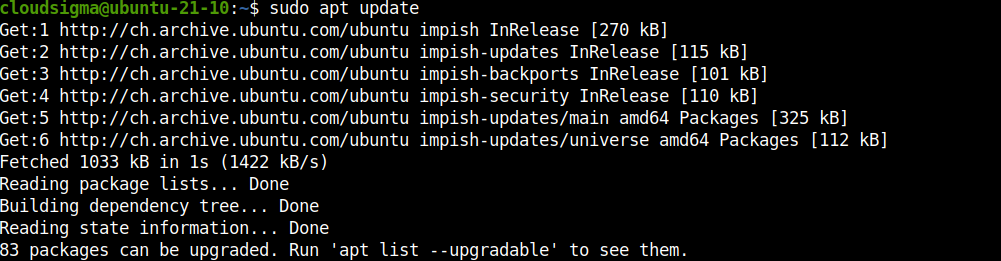
MySQL posłuży jako backend bazy danych dla naszej aplikacji Ruby on Rails. Zakładając, że nie masz jeszcze zainstalowanego i skonfigurowanego MySQL, postępuj zgodnie z instrukcjami. Uruchom terminal i zaktualizuj pamięć podręczną APT:
|
1 |
sudo apt update |
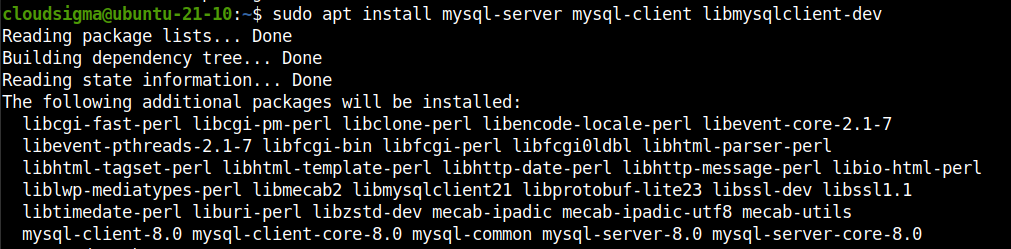
Następnie zainstaluj komponenty MySQL:
|
1 |
sudo apt install install mysql-server mysql-client libmysqlclient-dev |
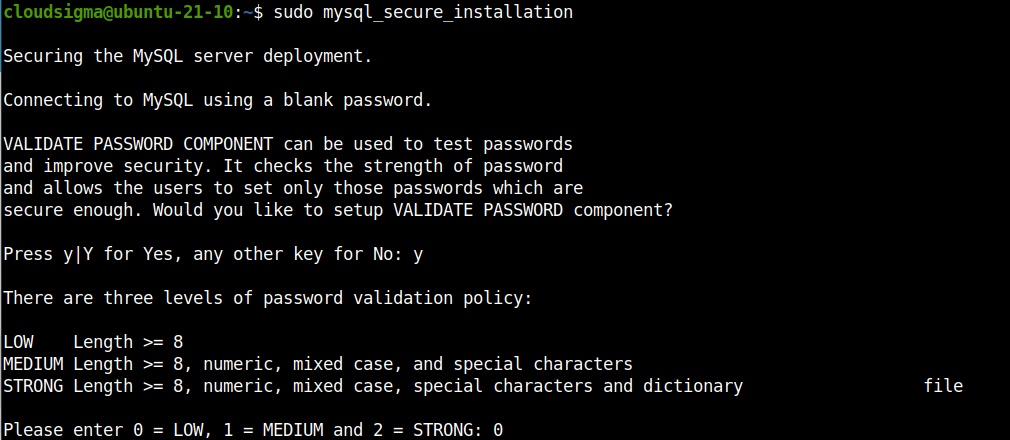
Po zakończeniu instalacji uruchom następujący skrypt MySQL. Wykona on szybką konfigurację poinstalacyjną:
|
1 |
sudo mysql_secure_installation |
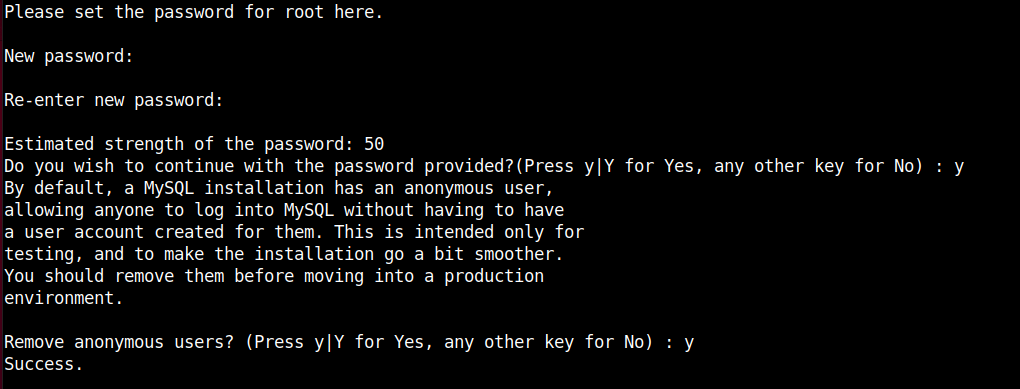
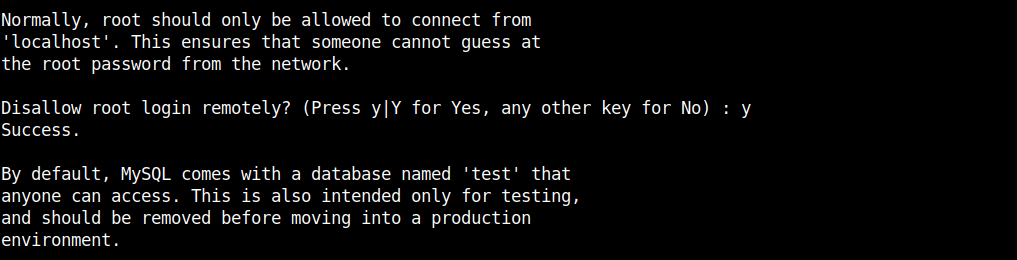
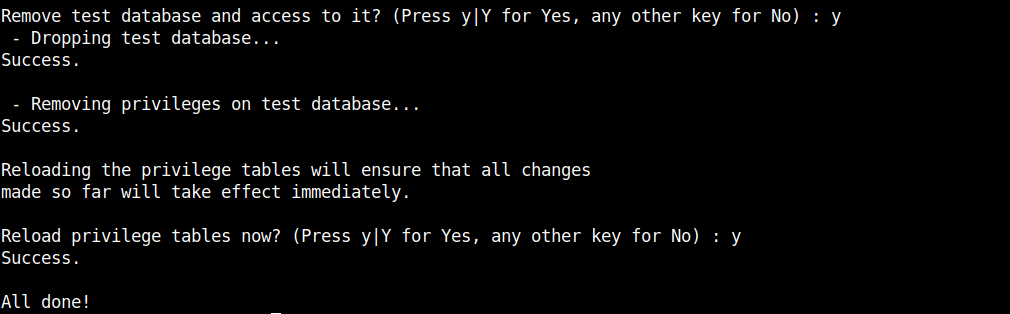
Skrypt zada kilka pytań. Wykonaj kroki, aby ukończyć wstępną konfigurację:
-
Dodatkowy krok
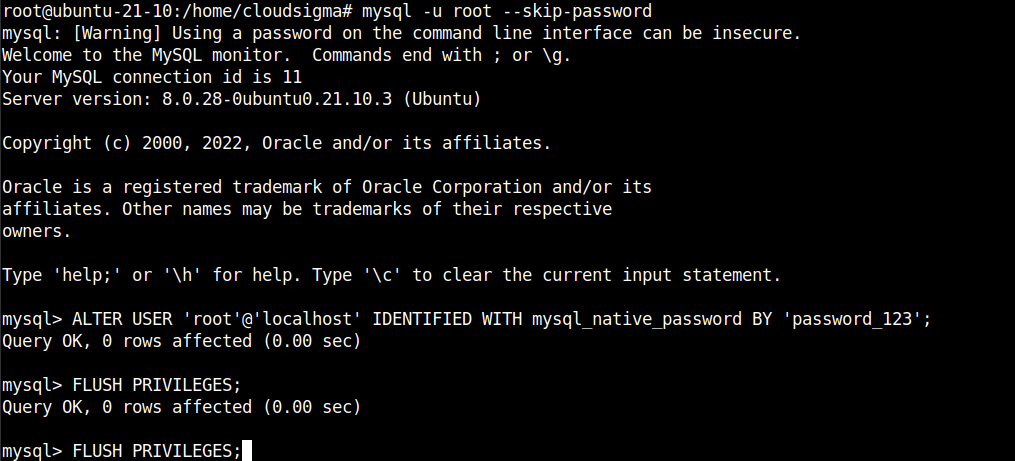
Poniższy krok jest opcjonalny i należy go wykonać tylko wtedy, gdy w dalszej części samouczka Ruby on Rails nie będzie mogło połączyć się z serwerem MySQL. Ustawia on użytkownika root w MySQL na korzystanie z mysql_native_password w celu umożliwienia tradycyjnego logowania hasłem. Uzyskaj dostęp do konta root w systemie Ubuntu:
|
1 |
sudo su |
Now, launch the MySQL root shell without password check:
|
1 |
mysql -u root --skip-password |
Następnie uruchom następujące zapytanie, aby zmienić hasło i ustawić mysql_native_password jako metodę uwierzytelniania:
|
1 2 |
ALTER USER 'root'@'localhost' IDENTIFIED WITH mysql_native_password BY '<password>'; FLUSH PRIVILEGES; |
Krok 2: Instalacja i konfiguracja Ruby oraz Ruby on Rails
Nasz serwer bazy danych jest gotowy do produkcji. Teraz musimy zainstalować Ruby. Jak wspomniano wcześniej, będziemy używać rbenv jako menedżera wersji Ruby dla naszego projektu. Ruby on Rails jest dostępny jako gem Ruby.
-
Instalacja rbenv
Menedżer Ruby rbenv jest bezpośrednio dostępny z oficjalnego serwera pakietów Ubuntu. W przypadku innych dystrybucji zapoznaj się z oficjalnym przewodnikiem instalacji rbenv.
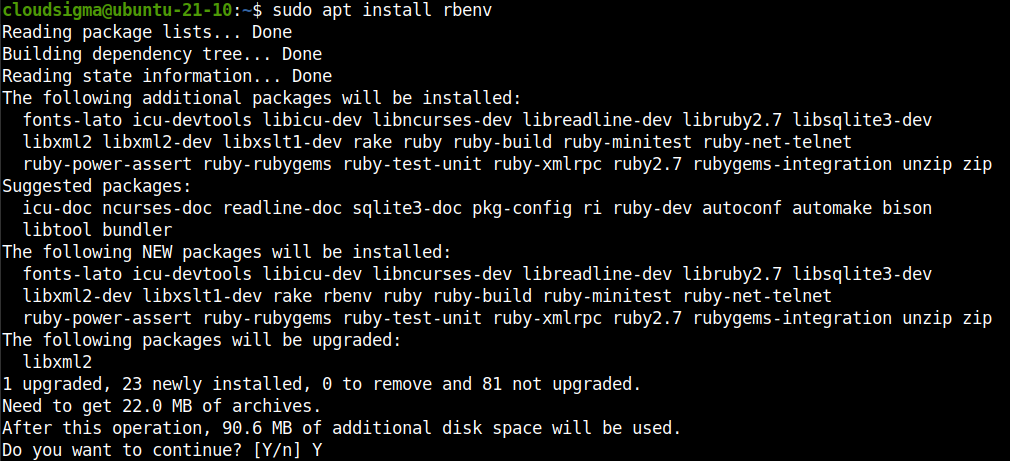
Uruchom terminal i zainstaluj go od razu:
|
1 |
sudo apt install rbenv |
Następnie musimy zintegrować rbenv z domyślną powłoką. Uruchom następujące polecenie rbenv:
|
1 |
rbenv init |

Jak mówi wynik, dla basha musimy dołączyć tę linię w lokalnym pliku bashrc. Nie wchodząc w szczegóły, plik bashrc jest ładowany za każdym razem, gdy użytkownik otwiera nową powłokę w trybie interaktywnym. Otwórz plik w edytorze tekstu i dodaj następujący tekst:
|
1 |
nano ~/.bashrc |

Zapisz plik i zamknij edytor. Zaleca się ponowne uruchomienie terminala, aby zmiany weszły w życie. Alternatywnie możesz przeładować plik bashrc w bieżącej powłoce:
|
1 |
source ~/.bashrc |
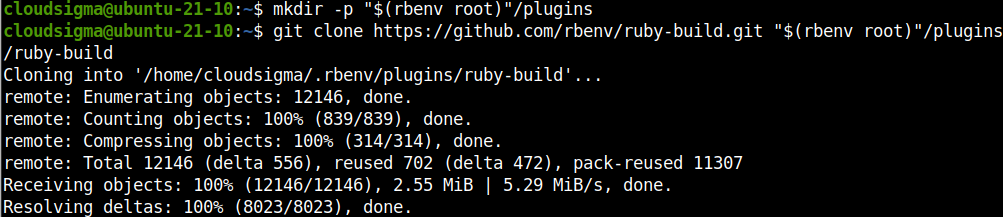
Next, we’ll install a rbenv plugin to provide the support for the rbenv install command. This plugin is directly available from the rbenv GitHub repo. Run the following commands:
|
1 2 |
mkdir -p "$(rbenv root)"/plugins git clone https://github.com/rbenv/ruby-build.git "$(rbenv root)"/plugins/ruby-build |
To test our rbenv configuration, run the rbenv-doctor script:
|
1 |
curl -fsSL https://github.com/rbenv/rbenv-installer/raw/main/bin/rbenv-doctor | bash |

It will check for various components and report if everything is ok.
-
Installing Ruby
Once rbenv is configured, we’re ready to install Ruby. The following command will list all the available versions of Ruby:
|
1 |
rbenv install -l |

The output will be a bit long, so it’s advised to pass it through more or less for better browsing. The list also contains various builds of Ruby. For the purpose of this guide, we’ll focus on the latest official Ruby build. At the time of writing this article, it’s Ruby v3.0.3.
Now, install Ruby:
|
1 |
rbenv install <ruby_version> |

The next command will declare the installed Ruby as the global version available to all applications:
|
1 |
rbenv global <ruby_version> |
Verify the Ruby installation:
|
1 |
ruby --version |

-
Installing Ruby on Rails
The web framework is available as a gem for Ruby. Although Ruby on Rails is directly available from the Ubuntu package servers, installing it as a gem offers more flexibility.
First, install the gem Bundler. It’s a tool that resolves gem dependencies. Rails is dependent on it:
|
1 |
gem install bundler |

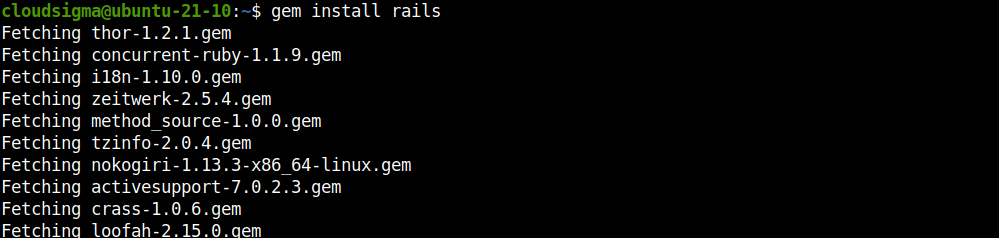
Running the next command will install the latest stable version of Ruby on Rails as a gem:
|
1 |
gem install rails |
If you want a specific version installed, then the command structure would look like this:
|
1 |
gem install rails <rails_version> |
Once the gems are installed, run the following command:
|
1 |
rbenv rehash |
![]()
The Ruby manager rbenv works by creating dedicated directories for shims that point to the files of the current Ruby version enabled. The rehash sub-command tells rbenv to maintain shims in that directory to match every Ruby command across every installed version of Ruby on the server. It should be run every time you install a new version of Ruby or a gem that provides commands similar to Rails.
Verify the Rails installation:
|
1 |
rails -v |
Step 3: Installing MySQL gem
To connect to the MySQL server, Rails needs an adapter. We’ll use mysql2 gem for this functionality. Install mysql2 gem:
|
1 |
gem install mysql2 |

Step 4: Creating and Configuring a New Rails App
-
Creating a Sample App
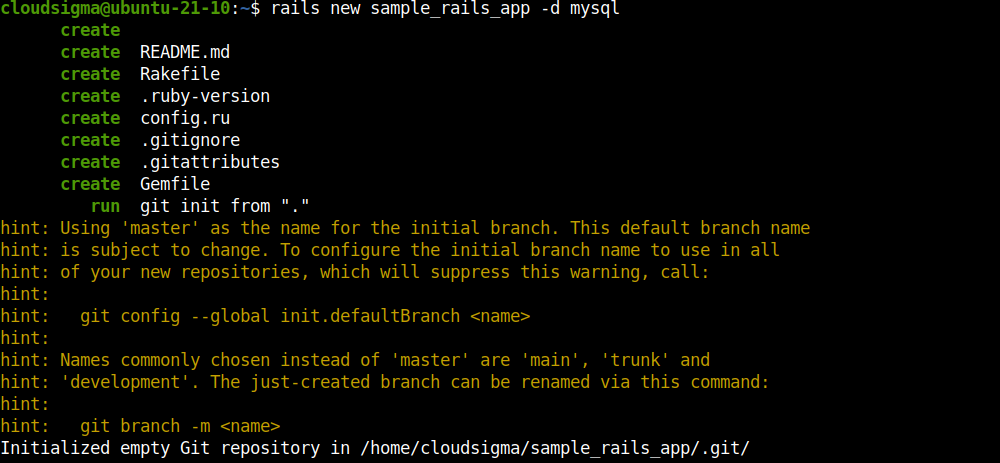
So far, we’ve configured all the necessary components to establish our Rails app. The following command will create a dedicated directory for the app and place all the necessary files with MySQL support:
|
1 |
rails new <app_name> -d mysql |
-
Configuring MySQL Connection
Now, we need to dial in the necessary MySQL info so that Rails can connect to the database and exchange data. By default, Rails connects to MySQL as root. Open the Rails database configuration file:
|
1 2 |
cd <app_dir> nano config/database.yml |
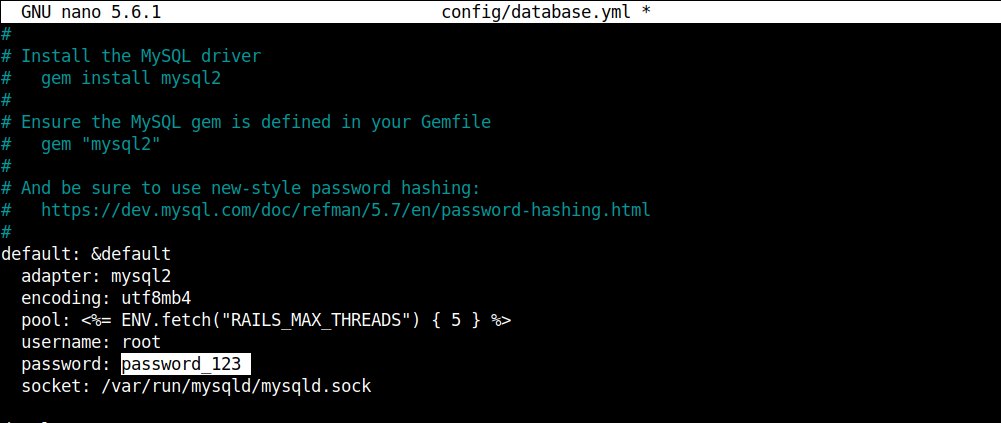
Scroll down to the following section and enter the root password for MySQL. Then, save the file and close the editor.
-
Implementing Database Changes
If everything went fine, then Rails should now be able to connect to MySQL and perform necessary database operations. The following command will create the necessary databases:
|
1 |
rake db:create |

Step 5: Testing the Configuration
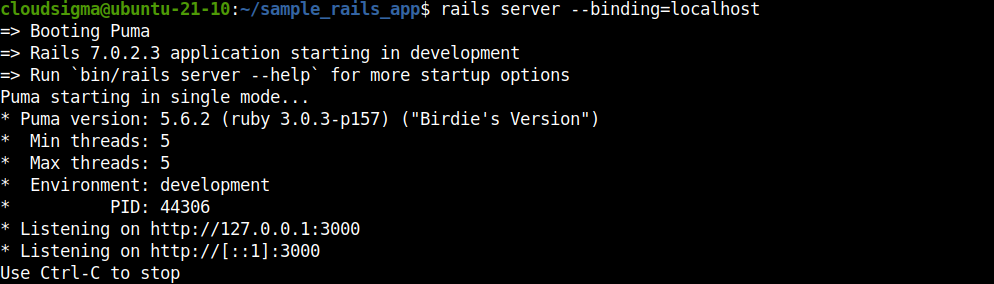
Start the Rails development server:
|
1 |
rails server --powiązanie=<server_public_ip> |
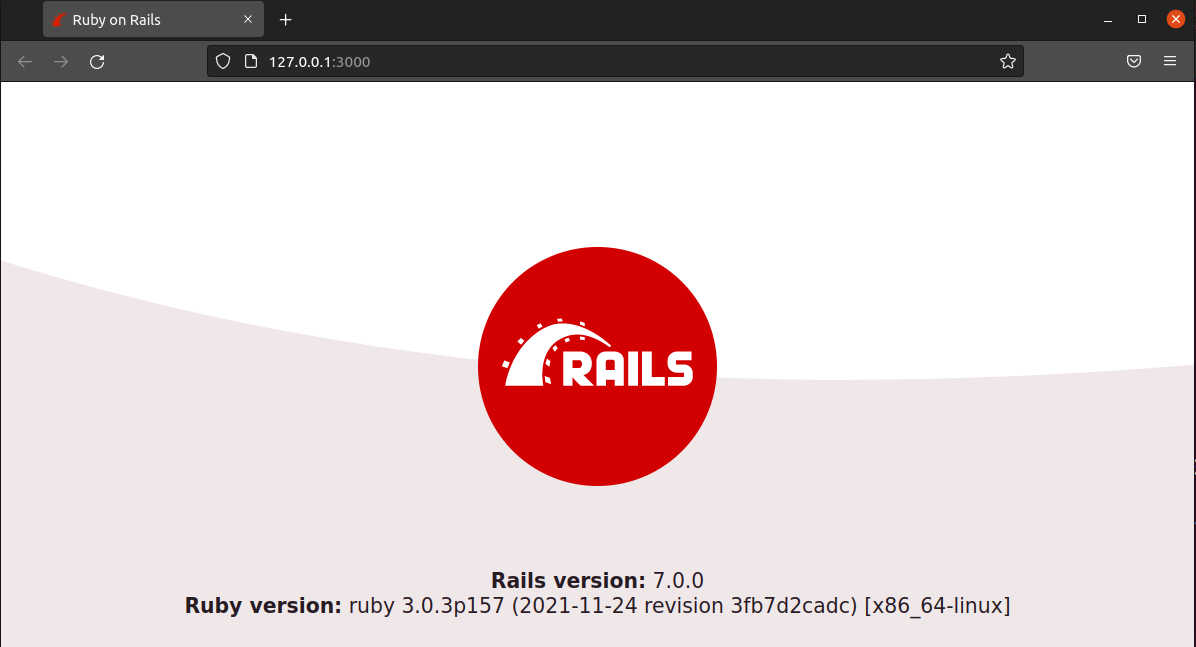
Powinieneś mieć dostęp do strony powitalnej pod następującym adresem URL:
|
1 |
http://<server_public_ip>:3000 |
Podsumowanie
W tym poradniku zainstalowaliśmy Ruby za pomocą rbenv, zainstalowaliśmy gem Rails oraz skonfigurowaliśmy przykładową aplikację Rails do połączenia z bazą danych MySQL i używania jej jako silnika bazy danych. Służy to jako świetny szkielet dla skalowalnej i scentralizowanej aplikacji internetowej.
Aby dowiedzieć się, jak zainstalować Ruby on Rails za pomocą RVM na Ubuntu 20.04, zapoznaj się z poniższym samouczkiem Instalacja Ruby on Rails z RVM na Ubuntu 20.04. Aby dowiedzieć się, jak skonfigurować Ruby on Rails z PostgreSQL, zapoznaj się z poniższym samouczkiem: Konfiguracja Ruby on Rails z PostgreSQL.
Miłego korzystania!
Komentarze
Brak komentarzy. Bądź pierwszy.