

A CSV est un fichier en texte brut qui stocke des données sous forme de tableau. Dans la plupart des cas, les fichiers CSV utilisent la virgule (,) comme délimiteur, d’où le nom CSV (Comma Separated Values). Il est utilisé lorsque la compatibilité des données est un enjeu, car les fichiers CSV peuvent être ouverts avec n’importe quel éditeur de texte, tableur ou autre outil spécialisé. De fait, de nombreux langages de programmation offrent une prise en charge native du CSV.
Dans ce guide, nous allons apprendre à utiliser le CSV dans un exemple d’application Node.js application.
Le CSV avec Node.js
Node.js est un environnement d’exécution JavaScript open source et multiplateforme. Il est devenu l’un des backends les plus populaires, alimentant d’innombrables services web sur tout l’internet. Même de grandes entreprises comme Netflix et Uber utilisent Node.js pour leurs services.
Node.js dispose également de nombreux modules déployables pour ajouter des fonctionnalités supplémentaires à un projet. En ce qui concerne le CSV, de nombreux modules sont disponibles, par exemple, node-csv, fast-csv, et papaparse etc.
As the title of the guide suggests, we are going to use node-csv pour lire les fichiers CSV à l’aide des flux Node.js. Nous montrerons aussi comment exploiter les données analysées, par exemple en les transférant dans une SQLite base de données.
Prérequis
-
Pour réaliser les étapes décrites dans ce guide, vous aurez besoin des composants suivants :
-
Un système Linux correctement configuré. Apprenez-en plus sur l’installation et la configuration d’un serveur cloud Ubuntu sur CloudSigma.
-
Access to a non-root user with sudo les privilèges. Consultez la gestion des permissions sudo avec sudoers.
-
Un éditeur de texte adapté, par exemple, Brackets, VS Code, Sublime Text, Vim/NeoVim, etc.
-
Autres logiciels :
-
Node.js LTS
-
SQLite
-
Étape 1 – Installation des logiciels nécessaires
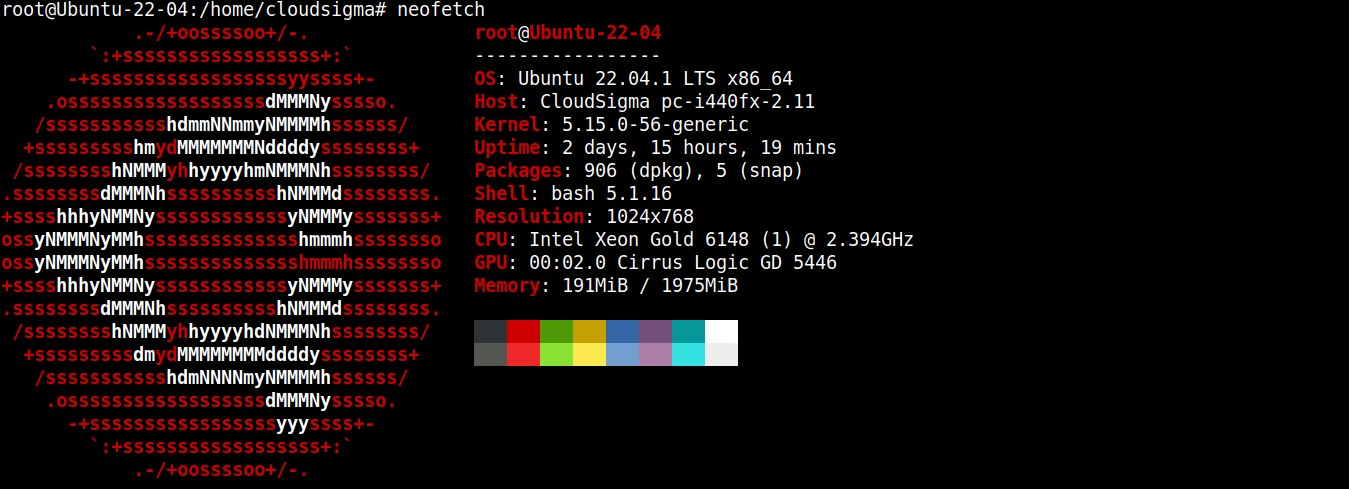
Pour ce guide, j’ai créé un serveur léger sous Ubuntu 22.04 LTS (connecté via SSH) :
Nous allons maintenant y installer Node.js et SQLite.
-
Installation de Node.js LTS
Node.js est directement disponible dans les dépôts de paquets officiels d’Ubuntu. Cependant, ce n’est pas la version la plus récente. C’est pourquoi nous allons nous appuyer sur un dépôt tiers (Nodesource) pour obtenir les derniers paquets Node.js.
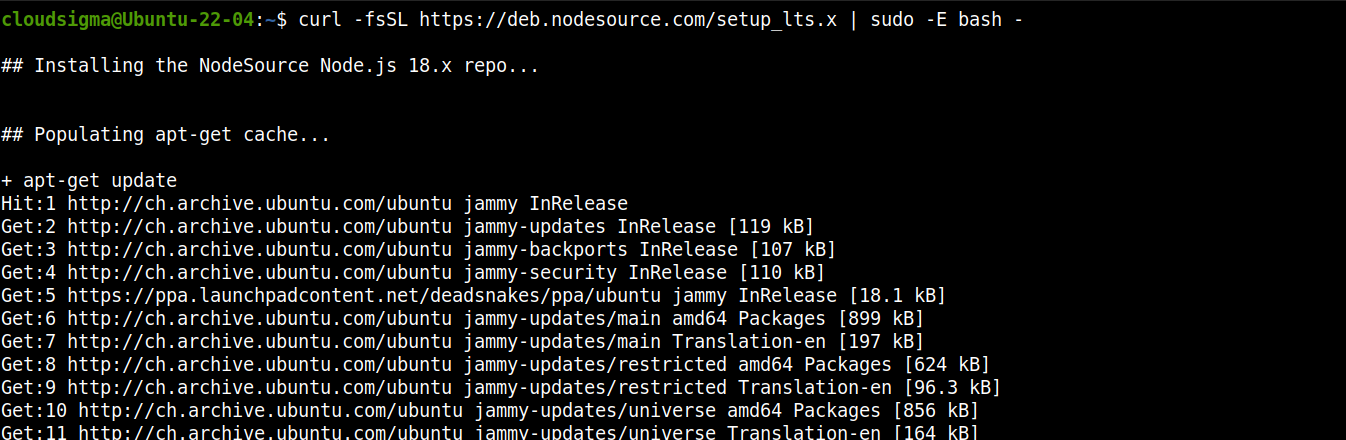
Ajoutez le dépôt pour Node.js LTS :
|
1 |
curl -fsSL https://deb.nodesource.com/setup_lts.x | sudo -E bash - |
Maintenant, installez Node.js LTS :
|
1 |
sudo apt install nodejs -y |

-
Installer SQLite
Nous allons installer SQLite directement depuis les dépôts de paquets d’Ubuntu. Exécutez les commandes suivantes :
|
1 |
sudo apt install sqlite3 -y |

Étape 2 – Configuration du répertoire du projet
Dans cette section, nous allons préparer un répertoire dédié à notre projet. Il hébergera tous les fichiers du projet ainsi que les modules supplémentaires.
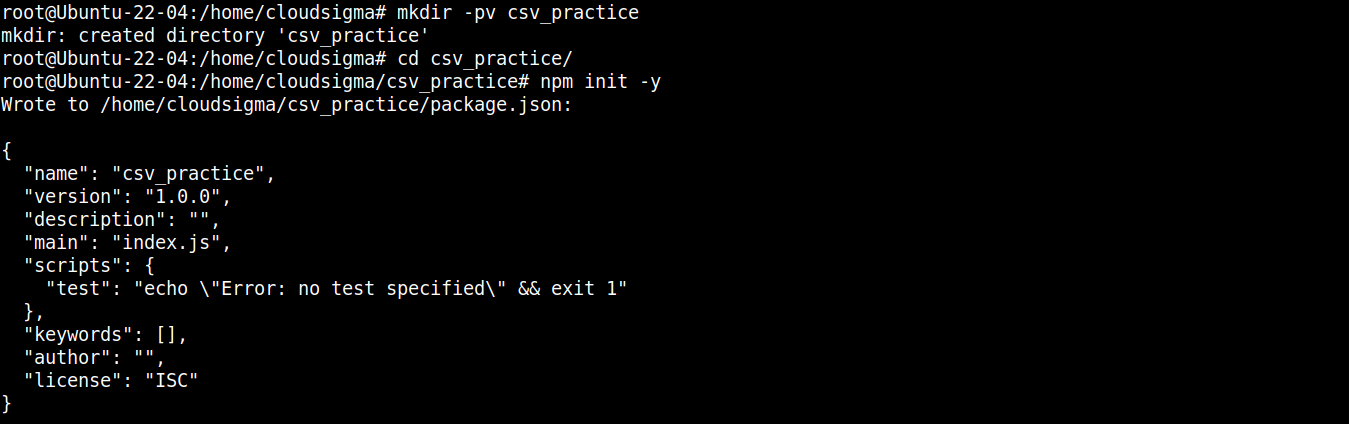
Créez un nouveau répertoire :
|
1 |
mkdir -pv csv_practice |
Accédez au répertoire :
|
1 |
cd csv_practice/ |
Next, run the following command to declare the directory as an npm projet :
|
1 |
npm init -y |
Once the project folder is initialized, we can start installing the necessary packages and modules. First, we are going to install node-csv:
|
1 |
npm install csv |

Le module node-csv est en réalité une collection de plusieurs autres modules : csv-generate, csv-parse (analyse des fichiers CSV), csv-stringify (écriture des données dans un CSV), et stream-transform.
Ensuite, il nous faut le module pour communiquer avec SQLite. La commande suivante installera le node-sqlite3 module :
|
1 |
npm install sqlite3 |

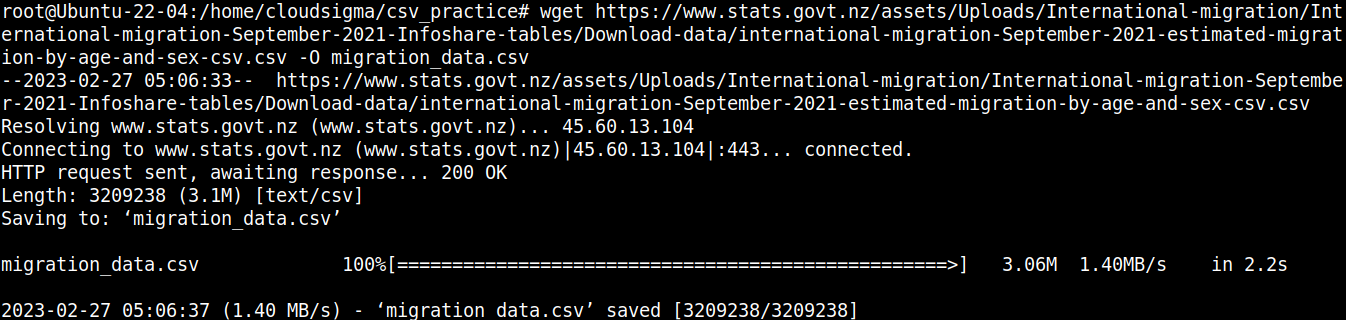
Le composant dont nous avons besoin pour notre projet est un fichier CSV. À des fins de démonstration, nous allons utiliser le fichier CSV des migrations en Nouvelle-Zélande :
|
1 |
wget https://www.stats.govt.nz/assets/Uploads/International-migration/International-migration-September-2021-Infoshare-tables/Download-data/international-migration-September-2021-estimated-migration-by-age-and-sex-csv.csv -O migration_data.csv |
Jetons un coup d’œil rapide au contenu du fichier :
|
1 |
cat migration_data.csv | less |

Ici,
-
La première ligne décrit les noms des colonnes.
-
Les lignes suivantes contiennent les valeurs de ces champs.
-
Each row is separated by a new line (\n).
-
Each data point is separated by a comma (,).
However, CSV isn’t limited to using commas as the delimiter. Other common delimiters include colons (:), semicolons (;), and tabs (\td).
Étape 3 – Lecture du CSV
Dans cette section, nous allons montrer comment implémenter un programme d’exemple qui lit et analyse les données du fichier CSV.
Créez un nouveau fichier JavaScript :
|
1 |
touch read_csv.js |
Ouvrez le fichier dans votre éditeur de texte préféré :
|
1 |
nano read_csv.js |
First, we are going to import the fs and csv-parse modules:
|
1 2 |
const fs = require("fs"); const { parse } = require("csv-parse"); |
Ici,
-
First, the fs variable is assigned the fs object that returns the Node.js require() method upon importing the module.
-
Next, the parse method is extracted from the object returned by the require() method into the parse variable using the destructuring syntax.
Ensuite, nous allons ajouter du code pour lire le fichier CSV :
|
1 2 3 4 5 |
fs.createReadStream("./migration_data.csv") .pipe(parse({ delimiter: ",", from_line: 2 })) .on("data", function (row) { console.log(row); }) |
Ici,
-
We’re invoking the createReadStream() from the fs module and passing the CSV file we want to read as the argument. It then creates a readable stream by breaking the larger file into smaller chunks.
-
After creating the stream, the pipe() method forwards chunks of the stream data to another stream. This new stream is created upon invoking the parse() method from csv-module.
-
The csv-module deploys a readable/writable transform stream that takes a data chunk and transforms it into another form.
-
The parse() method accepts objects with properties. The object further processes the parsed data. Here, the object is taking the following properties:
-
delimiter: The delimiter character to separate values. In the case of our target CSV, it’s comma (,).
-
from_line: The number of lines from where the parser will start parsing. With the given value 2, the parser will skip line 1 and start at line 2. With this arrangement, we are avoiding the column names from being integrated into the parsed data.
-
Next, we are going to attach a streaming event using the on() method from Node.js:
|
1 2 3 4 5 6 7 8 9 10 11 12 13 |
fs.createReadStream("./migration_data.csv") .pipe(parse({ delimiter: ",", from_line: 2 })) .on("data", function (row) { console.log(row); }) .on("end", function () { console.log("finished"); }) .on("error", function (error) { console.log(error.message); }); |
Ici,
-
Upon emitting a certain event, a streaming event allows a method to consume a chunk of data.
-
When data parsed by parse() method is ready to be consumed, it triggers the data event.
-
To access the data, we are passing a callback to the on() method that takes a parameter row.
-
The row parameter is a chunk of data in the form of an array (result from parsing).
-
Finally, the data is logged in the console using console.log().
Pour terminer le programme, nous allons ajouter des événements de flux supplémentaires afin de gérer les erreurs et d’afficher un message de succès une fois toutes les données du fichier CSV consommées. Mettez à jour le code comme suit :
|
1 2 3 4 5 6 7 8 9 10 11 12 13 14 |
fs.createReadStream("./migration_data.csv") .pipe(parse({ delimiter: ",", from_line: 2 })) .on("data", function (row) { console.log(row); }) .on("end", function () { console.log("finished"); }) .on("error", function (error) { console.log(error.message); }); |
Ici,
-
The end event emits when all the data in the CSV file is consumed. It results in calling the console.log() method that prints a success message.
-
The error event emits when encountering an error while parsing the CSV data. It results in calling the console.log() method that prints an error message.
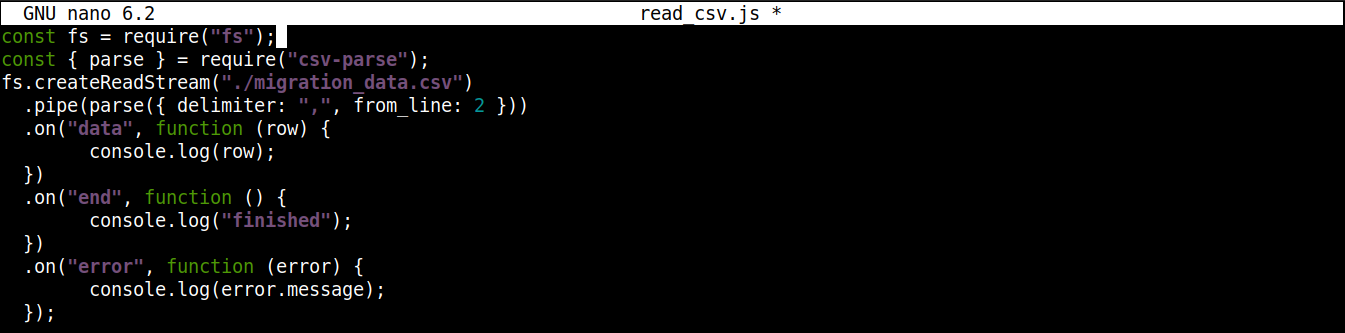
Le code final devrait ressembler à ceci :
|
1 2 3 4 5 6 7 8 9 10 11 12 13 14 15 |
const fs = require("fs"); const { parse } = require("csv-parse"); fs.createReadStream("./migration_data.csv") .pipe(parse({ delimiter: ",", from_line: 2 })) .on("data", function (row) { console.log(row); }) .on("end", function () { console.log("finished"); }) .on("error", function (error) { console.log(error.message); }); |
Enregistrez le fichier et fermez l’éditeur. Nous sommes maintenant prêts à exécuter le programme. Lancez-le avec Node.js :
|
1 |
node read_csv.js |
La sortie devrait ressembler à ceci :
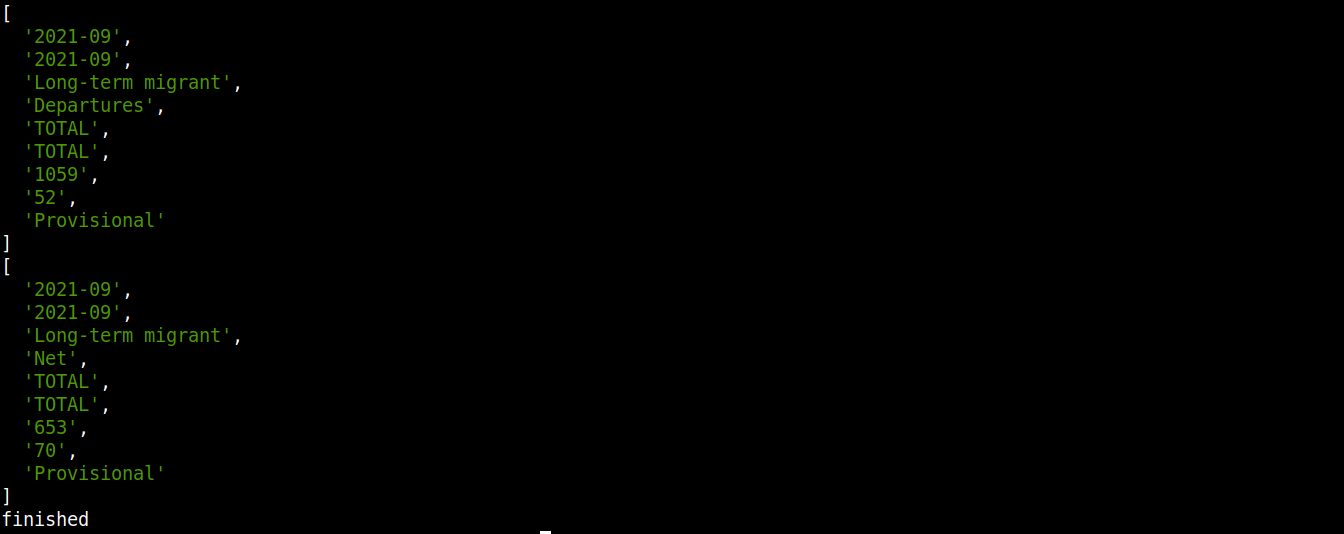
Notez que les données sont consommées, transformées et affichées dans la console. Comme il s’agit d’un processus continu, on aura l’impression que les données sont téléchargées plutôt qu’affichées d’un seul coup.
Step 4 – Transferring CSV Data to a Database
So far, we’ve learned how to parse a CSV file using node-csv. Cette section montre comment transférer les données analysées dans une base de données (SQLite).
Créez un nouveau fichier JavaScript pour interagir avec la base de données :
|
1 |
touch csv-to-sqlite3.js |
Maintenant, ouvrez le fichier dans un éditeur de texte :
|
1 |
nano csv-to-sqlite3.js |
![]()
Nous allons commencer notre programme avec le code suivant :
|
1 2 3 |
const fs = require("fs"); const sqlite3 = require("sqlite3").verbose(); const filepath = "./population.db"; |

Ici,
-
In the first line, we are importing the fs module.
-
In the third line, the variable filepath contains the path of the SQLite database.
-
At this point, the database doesn’t exist yet. However, it will be necessary when working with node-sqlite3.
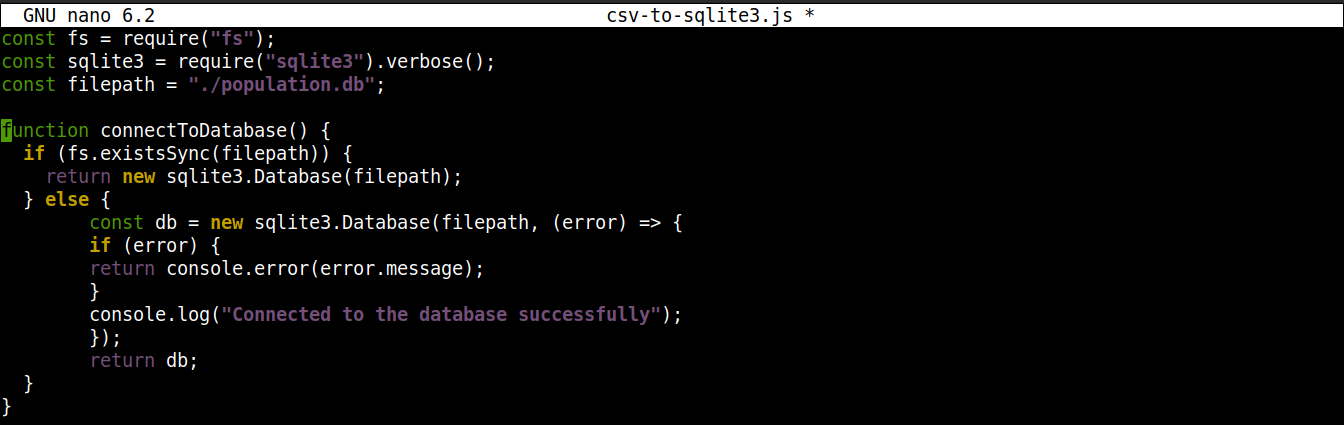
Ensuite, ajoutez les lignes suivantes pour établir une connexion à la base de données SQLite :
|
1 2 3 4 5 6 7 8 9 10 11 12 13 |
function connectToDatabase() { if (fs.existsSync(filepath)) { return new sqlite3.Database(filepath); } else { const db = new sqlite3.Database(filepath, (error) => { if (error) { return console.error(error.message); } console.log("Connected to the database successfully"); }); return db; } } |
Ici,
-
The method connectoToDatabase() establishes a connection to the database.
-
Within connectToDatabase(), we are invoking the existsSync() method from the fs module within an if statement. The if statement checks the existence of the database in the specified location.
-
If the condition evaluation is true, then the Database() class of the node-sqlite3 module is. Once the connection is established, the function returns an object and exists.
-
If the condition evaluation is false (the database doesn’t exist), then the execution will jump to the else block. There, the Database() class will initiate with two arguments: a path to the database file and a callback.
-
Basically, the database will be created if it does not exist. However, if any error occurs during the creation process, it will set the error object and print the error message.
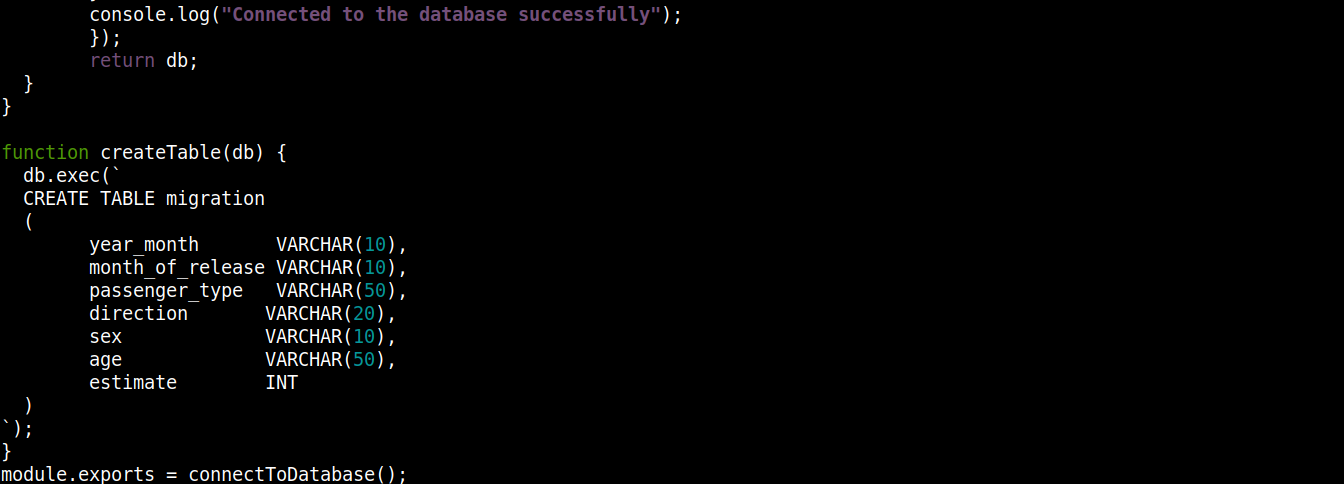
Ensuite, nous allons introduire du code pour créer une table si la base de données n’existe pas :
|
1 2 3 4 5 6 7 8 9 10 11 12 13 14 15 16 17 18 19 20 21 22 23 24 25 26 27 28 29 30 31 32 33 34 35 36 37 |
const fs = require("fs"); const sqlite3 = require("sqlite3").verbose(); const filepath = "./population.db"; function connectToDatabase() { if (fs.existsSync(filepath)) { return new sqlite3.Database(filepath); } else { const db = new sqlite3.Database(filepath, (error) => { if (error) { return console.error(error.message); } createTable(db); console.log("Connected to the database successfully"); }); return db; } } function createTable(db) { db.exec(` CREATE TABLE migration ( year_month VARCHAR(10), month_of_release VARCHAR(10), passenger_type VARCHAR(50), direction VARCHAR(20), sex VARCHAR(10), age VARCHAR(50), estimate INT ) `); } module.exports = connectToDatabase(); |
Ici,
-
The connectToDatabase() invokes the createTable() function that accepts the objects stored in db as an argument.
-
Outside connectToDatabase(), we defined the createTable() method that accepts the connection object db as a parameter.
-
The exec() method on db takes a SQL statement as argument. Within this SQL statement, we defined the creation of a table migration with 7 columns, each column corresponding to the column headings in migration_data.csv file.
-
Finally, we are invoking the connectToDatabase() method and exporting the connection object it returns so that we can use it in other files.
Enregistrez le fichier et fermez l’éditeur.
Ensuite, nous allons créer un autre programme pour insérer les données analysées dans la base de données :
|
1 |
nano insert_data.js |
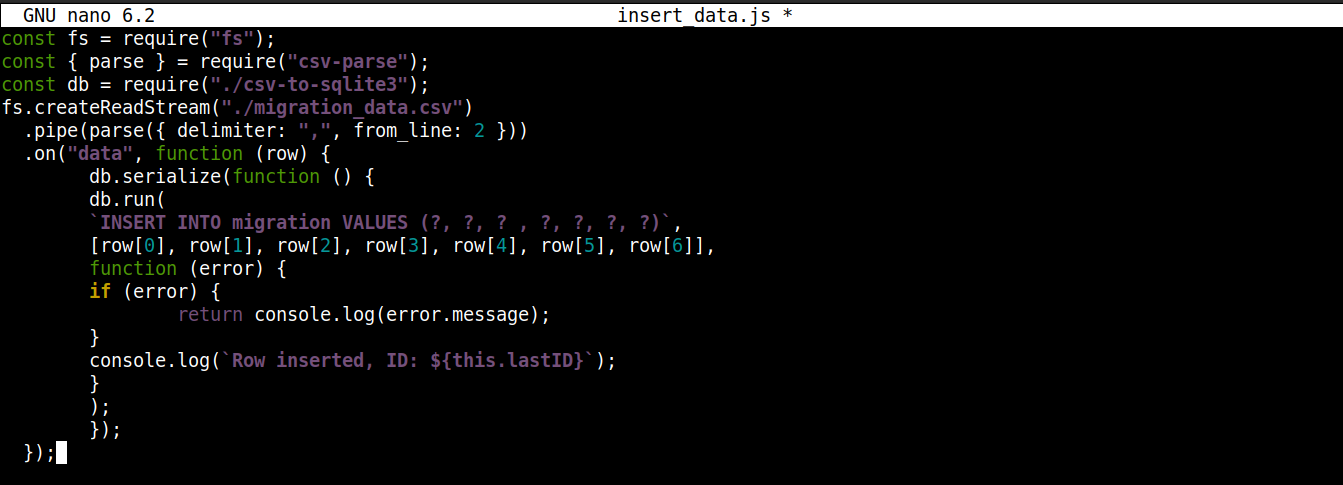
Enter the following code in insert_data.js:
|
1 2 3 4 5 6 7 8 9 10 11 12 13 14 15 16 17 18 19 20 |
const fs = require("fs"); const { parse } = require("csv-parse"); const db = require("./csv-to-sqlite3"); fs.createReadStream("./migration_data.csv") .pipe(parse({ delimiter: ",", from_line: 2 })) .on("data", function (row) { db.serialize(function () { db.run( `INSERT INTO migration VALUES (?, ?, ? , ?, ?, ?, ?)`, [row[0], row[1], row[2], row[3], row[4], row[5], row[6]], function (error) { if (error) { return console.log(error.message); } console.log(`Row inserted, ID: ${this.lastID}`); } ); }); }); |
Ici,
-
We are storing the connection object obtained from csv-to-sqlite3.js in the variable db.
-
Inside the data event callback (attached to the fs module stream), we are invoking the serialize() method on the connection object. It ensures that one SQL statement finishes executing before the next one starts, preventing database race conditions (system running competing operations simultaneously).
-
The serialize() accepts three arguments:
-
The first argument is the SQL statement.
-
The second argument is an array.
-
The third argument is a callback that runs when data is successfully or unsuccessfully inserted into the database.
-
We are ready to execute the program. Run insert_data.js using Node.js:
|
1 |
node insert_data.js |
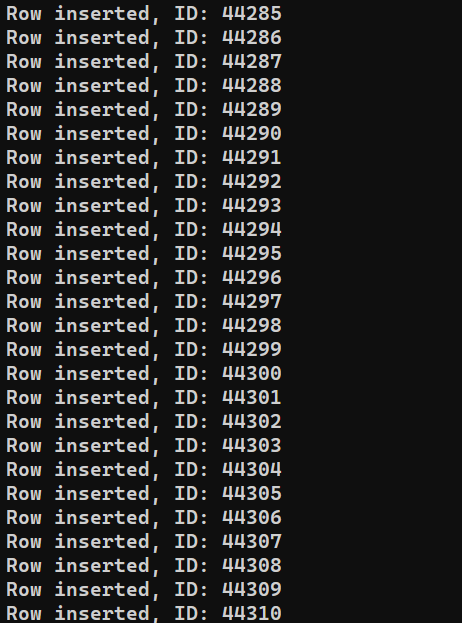
Selon les performances du système, le processus peut prendre un certain temps. Cependant, une fois terminé, la sortie devrait ressembler à ceci :
Étape 5 – Écriture des données dans un CSV
After the last section, we have a database containing all the records we parsed from migration_data.csv. Dans cette section, nous allons lire les données de la base de données et les écrire dans un fichier CSV distinct.
Créez un nouveau fichier JavaScript pour stocker le programme :
|
1 |
nano write_csv.js |
First, add the following lines to import fs and csv-stringify along with the database connection object from csv-to-sqlite3.js:
|
1 2 3 |
const fs = require("fs"); const { stringify } = require("csv-stringify"); const db = require("./csv-to-sqlite3"); |
Ensuite, nous allons ajouter une variable contenant le nom du fichier CSV dans lequel écrire, ainsi qu’un flux accessible en écriture :
|
1 2 3 4 5 6 7 8 9 10 11 |
const filename = "saved_from_db.csv"; const writableStream = fs.createWriteStream(filename); const columns = [ "year_month", "month_of_release", "passenger_type", "direction", "sex", "age", "estimate", ]; |
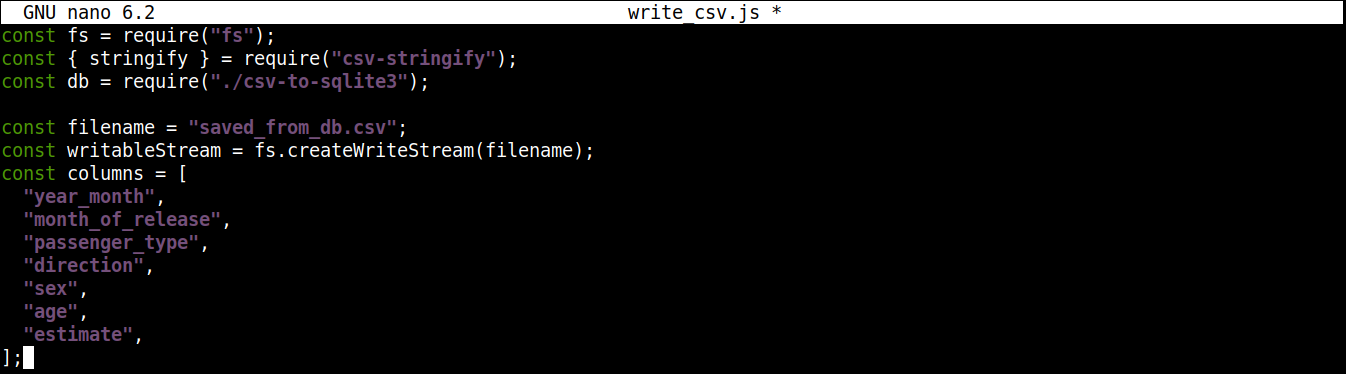
Ici,
-
The createWriteStream() method takes the filename to write to as an argument. We are going to name the file saved_from_db.csv.
-
The column variable stores an array that contains all the names of the header for the CSV data.
Next, add the following lines of code to read data from the database and write it to saved_from_db.csv:
|
1 2 3 4 5 6 7 8 9 10 11 |
const stringifier = stringify({ header: true, columns: columns }); db.each(`select * from migration`, (error, row) => { if (error) { return console.log(error.message); } stringifier.write(row); }); stringifier.pipe(writableStream); console.log("finished writing to CSV"); |
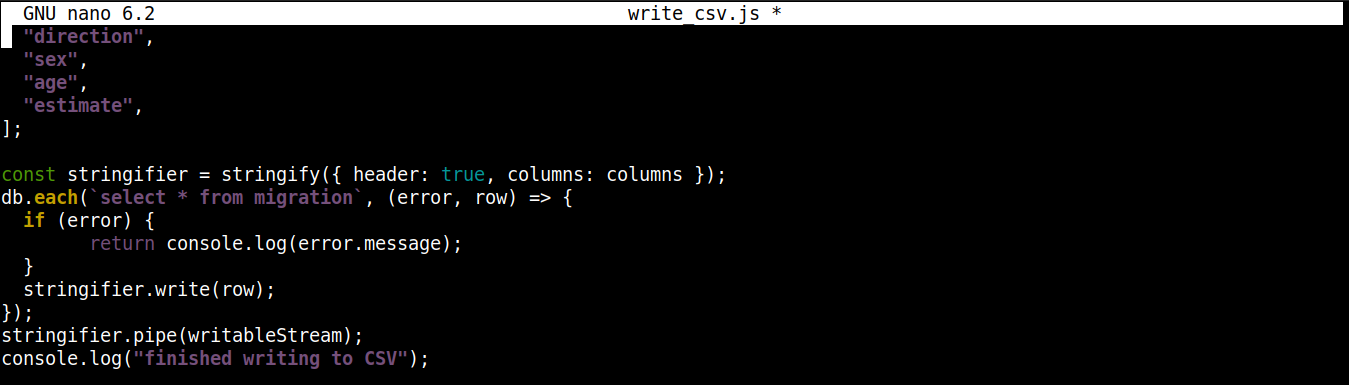
Ici,
-
We are invoking the stringify() method with an object as an argument. It results in a transform stream that converts the data from an object to CSV format. The object passed to stringify() has two properties:
-
header: Accepts a Boolean value. If the value is true, then a header is generated.
-
columns: Accepts an array that contains the column names to be written in the first line of the CSV file if header is true.
-
-
The each() method from the csv-to-sqlite3 connection object is invoked with two arguments: the SQL statement (reading data from the database) and a callback (handling success/error).
-
Upon each iteration of each(), pipe() (from the stringifier stream) starts sending data in chunks to the writable stream writableStream. Each chunk of data is then written to saved_from_db.csv.
-
When all the data is written to the CSV file, a success message is printed on the console screen.
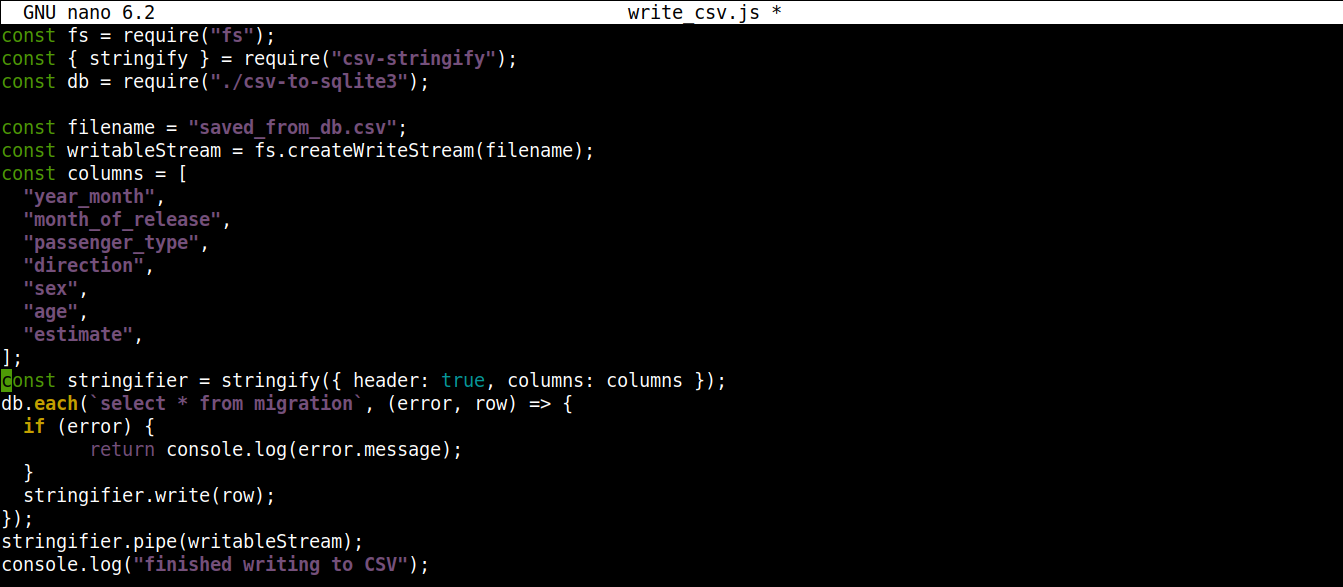
Le code final devrait ressembler à ceci :
|
1 2 3 4 5 6 7 8 9 10 11 12 13 14 15 16 17 18 19 20 21 22 23 24 25 26 27 |
const fs = require("fs"); const { stringify } = require("csv-stringify"); const db = require("./csv-to-sqlite3"); const filename = "saved_from_db.csv"; const writableStream = fs.createWriteStream(filename); const columns = [ "year_month", "month_of_release", "passenger_type", "direction", "sex", "age", "estimate", ]; const stringifier = stringify({ header: true, columns: columns }); db.each(`select * from migration`, (error, row) => { if (error) { return console.log(error.message); } stringifier.write(row); }); stringifier.pipe(writableStream); console.log("finished writing to CSV"); |
Save the file and close the editor. We can now run the program using Node.js:
|
1 |
node write_csv.js |
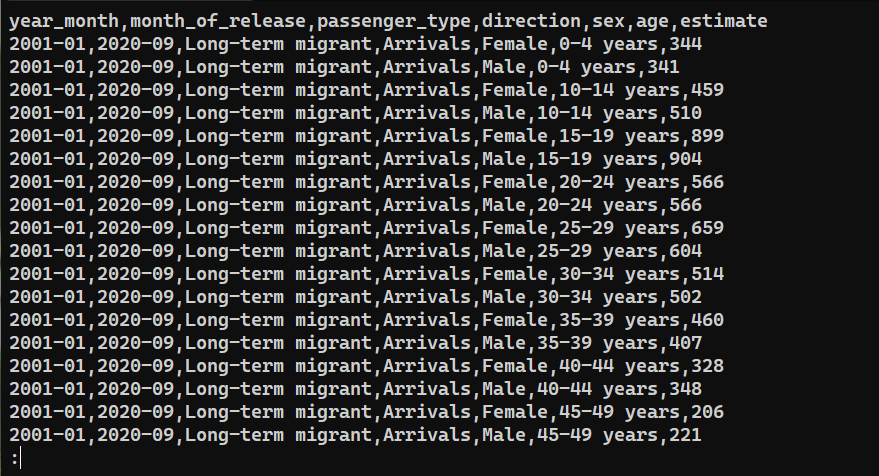
To confirm whether the data was successfully exported, check the content of saved_from_db.csv:
|
1 |
cat saved_from_db.csv | less |
Final Thoughts
In this guide, we demonstrated working with CSV files in Node.js using node-csv and node-sqlite3 modules. We created multiple programs to achieve various tasks, for example, parsing data from CSV, pushing the data into an SQLite database, and writing data to a new CSV file.
This guide demonstrates only a small portion of the capability of the node-csv module. Learn more about all its features at CSV Project. To learn more about node-sqlite3, check out the official documentation on GitHub. Another module worth mentioning is event-stream to simplify working with streams.
Interested in growing your Node.js project further? Here are some Node.js tutorials that you should check out:
-
How to Deploy a Node.js (Express.js) App with Docker on Ubuntu 20.04
-
Setting up Node.js Applications: How to Perform Production Tasks on Ubuntu 20.04 with Node.js
Happy Computing!
Commentaires
Aucun commentaire pour l'instant. Soyez le premier.