
简介
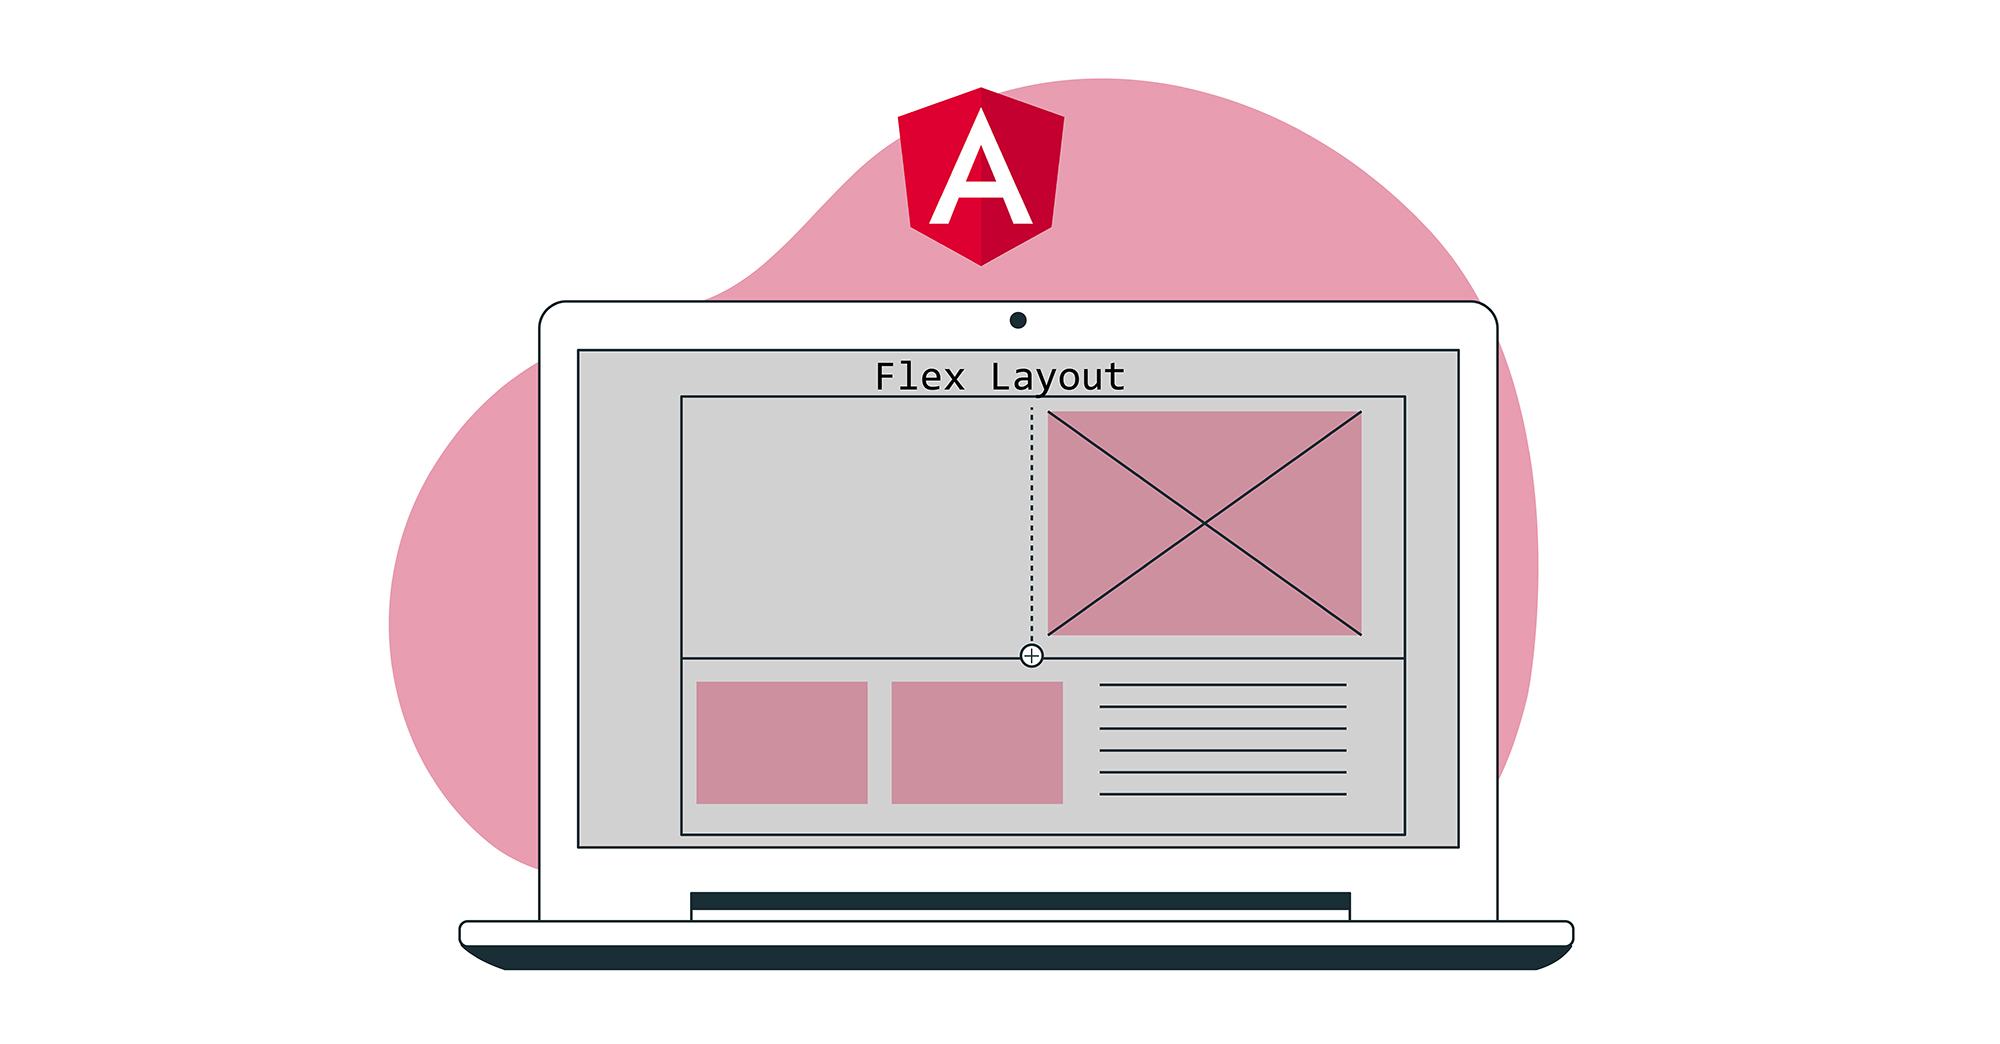
CSS Flex Layout 用于创建灵活的流式布局。然而,在使用 Angular 时,在某些场景下我们需要对布局进行更动态的控制。此外,使用 CSS Flexbox 需要复杂的样式,这对于许多开发人员来说可能很困难。Flex Layout 是一个旨在解决这个问题的组件引擎。它提供了一组可用于在您的应用程序中实现的指令。
Flex Layout 使用 Typescript,这使其成为 Angular 应用程序的理想选择。不需要外部样式表,并且可以使用不同的指令来创建响应式布局。在本教程中,我们将创建一个简单的 Angular 应用程序并注入 Flex Layout 来排列我们的组件.
让我们开始吧!
前提条件
-
Angular 应用程序使用 Node.js 运行时。要完成本教程,您需要在开发机器上安装 Node.js。我们有一份完整的指南 如何在 Ubuntu 18.04 上安装 Node.js,它将帮助您轻松设置 Node.js。
-
您还需要对以下内容有一定的了解:使用 Angular 组件 和 设置 Angular 项目.
项目配置
在这里我们需要执行两个步骤:
- 我们需要设置一个新的 Angular 应用程序。
- 我们需要从以下位置安装 Flex Layout: npx,以便我们可以在应用程序中导入并使用它。
要创建一个新的 Angular 应用程序,请打开终端并运行以下命令:
|
1 |
npx @angular/cli new angular-flex-example --style=css --routing=false --skip-tests |
在这里,我们正在使用以下工具创建一个新的 Angular 应用程序: @angular/cli。我们的应用程序名称是 angular-flex-example。我们将使用 CSS 而不是 Sass 或 Less 作为样式。此外,我们将指定不需要路由。我们也不关心测试,所以我们也跳过它们。
现在您的应用程序已准备就绪,导航到应用程序目录并运行以下命令以安装 Flex Layout:
|
1 2 |
cd angular-flex-example npm install @angular/flex-layout@10.0.0-beta.32 |
上述命令完成安装后,在您的应用模块中添加以下代码以导入 FlexLayoutModule:
|
1 2 3 4 5 6 7 8 9 10 11 12 13 14 15 16 17 18 19 20 21 |
import { BrowserModule } from '@angular/platform-browser'; import { NgModule } from '@angular/core'; import { FlexLayoutModule } from "@angular/flex-layout"; import { AppComponent } from './app.component'; @NgModule({ declarations: [ AppComponent ], imports: [ BrowserModule, FlexLayoutModule ], providers: [], bootstrap: [AppComponent] }) export class AppModule { } |
接下来,运行以下命令以确保一切按预期运行:
|
1 |
npm start |
您的应用程序默认将在 localhost:4200 上运行。在 Web 浏览器中导航到此 URL。您将看到消息: “angular-flex-example is running!。完成此设置后,让我们使用 Flex Layout 设计我们的模板。
创建 Flex Layout
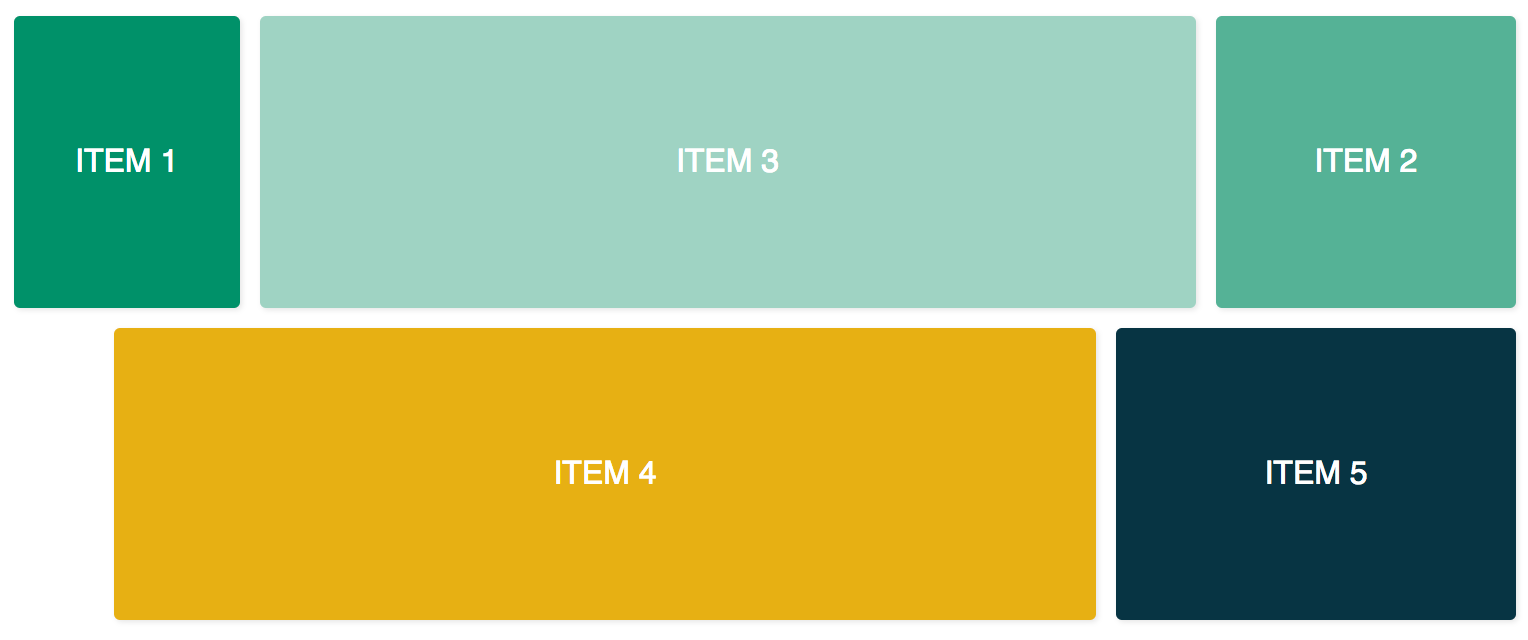
在这里,我们将在 app.component.html 中添加代码,以便将 Flex Layout 与 FlexLayoutModule 结合使用。我们的最终结果将类似于下图:
要实现上述结果,请在编辑器中打开 app.component.css 并添加以下代码行:
|
1 2 3 4 5 6 7 8 9 10 11 12 13 14 15 16 17 18 19 20 21 22 23 24 25 26 27 28 29 30 31 32 |
.container { margin: 10px; } .item { border-radius: .2em; color: #ffffff; font-family: sans-serif; font-size: 2em; padding: 4em 1em; text-transform: uppercase; } .item-1 { background-color: #009169; } .item-2 { background-color: #55b296; } .item-3 { background-color: #9fd3c3; } .item-4 { background-color: #e7b013; } .item-5 { background-color: #073443; } |
添加上述代码后,打开 app.component.html 文件并添加以下代码。此代码有两个容器 divs 和五个内部 divs:
|
1 2 3 4 5 6 7 8 9 10 11 12 13 14 15 16 17 18 19 20 21 22 23 24 25 |
<div class="container"> <div class="item item-1"> 项目 1 </div> <div class="item item-2"> 项目 2 </div> <div class="item item-3"> 项目 3 </div> </div> <div class="container"> <div class="item item-4"> 项目 4 </div> <div class="item item-5"> 项目 5 </div> </div> |
之后,编译并运行您的应用程序。您将看到五个 div 堆叠在一起,因为到目前为止我们还没有提供任何布局。要添加 fxLayout 添加以下代码:
|
1 2 3 4 5 6 7 8 9 10 11 12 13 14 15 16 17 18 19 20 21 22 23 24 25 26 |
<div class="container" fxLayout> <div class="item item-1"> 项目 1 </div> <div class="item item-2"> 项目 2 </div> <div class="item item-3"> 项目 3 </div> </div> <div class="container" fxLayout> <div class="item item-4"> 项目 4 </div> <div class="item item-5"> 项目 5 </div> </div> |
在上述代码中,应用此 fxLayout, CSS 属性 display:flex 和 flex-direction:row 样式将应用于容器 divs. 现在运行应用程序时,第一行将有三个 div,底行将有两个 div。
接下来,我们添加 fxLayoutAlign 和 fxLayoutGap 来增强我们的布局:
|
1 2 3 4 5 6 7 8 9 10 11 12 13 14 15 16 17 18 19 20 21 22 23 24 |
<div class="container" fxLayout fxLayoutAlign="center" fxLayoutGap="10px"> <div class="item item-1"> 项目 1 </div> <div class="item item-2"> 项目 2 </div> <div class="item item-3"> 项目 3 </div> </div> <div class="container" fxLayout fxLayoutAlign="center" fxLayoutGap="10px"> <div class="item item-4"> 项目 4 </div> <div class="item item-5"> 项目 5 </div> </div> |
这将应用 place-content: stretch center 和 align-items: stretch 样式到容器 div。它还将应用 10px 的弹性项目之间的间距。
现在我们已经应用了 fxLayout,是时候让我们的布局实现响应式了:
|
1 2 3 4 5 6 7 8 9 10 11 12 13 14 15 16 17 18 19 20 21 22 23 24 |
<div class="container" fxLayout fxLayout.xs="column" fxLayoutAlign="center" fxLayoutGap="10px" fxLayoutGap.xs="0"> <div class="item item-1"> 项目 1 </div> <div class="item item-2"> 项目 2 </div> <div class="item item-3"> 项目 3 </div> </div> <div class="container" fxLayout fxLayout.xs="column" fxLayoutAlign="center" fxLayoutGap="10px" fxLayoutGap.xs="0"> <div class="item item-4"> 项目 4 </div> <div class="item item-5"> 项目 5 </div> </div> |
此代码将为超小 xs 屏幕设置断点。屏幕将把布局从默认的行(row)更改为列(column),并且间距大小在超小屏幕中将从 “10px” 减少到 “0px”。您可以通过运行应用程序并将窗口大小调整为 xs(宽度小于 599px)。您将观察到样式发生变化。
对于不同的屏幕尺寸,我们有不同的后缀:
-
sm – 小
-
md – 中
-
lg – 大
-
xl – 超大
我们也有针对子元素的指令。添加 fxFlex 如下面代码所示:
|
1 2 3 4 5 6 7 8 9 10 11 12 13 14 15 16 17 18 19 20 21 22 23 24 25 26 |
<div class="container" fxLayout fxLayoutAlign="center" fxLayoutGap="10px" fxLayoutGap.xs="0"> <div class="item item-1" fxFlex="15%"> 项目 1 </div> <div class="item item-2" fxFlex="20%"> 项目 2 </div> <div class="item item-3" fxFlex> 项目 3 </div> </div> <div class="container" fxLayout fxLayout.xs="column" fxLayoutAlign="center" fxLayoutGap="10px" fxLayoutGap.xs="0"> <div class="item item-4" fxFlex> 项目 4 </div> <div class="item item-5" fxFlex="200px"> 项目 5 </div> </div> |
这将应用 flex-grow: 1, flex-shrink: 1,以及 flex-basis: 100% 到布局。如果您指定宽度值,它将应用 max-width 属性。
让我们添加 fxFlexOrder 和 fxFlexOffset:
|
1 2 3 4 5 6 7 8 9 10 11 12 13 14 15 16 17 18 19 20 21 22 23 24 25 |
<div class="container" fxLayout fxLayoutAlign="center" fxLayoutGap="10px" fxLayoutGap.xs="0"> <div class="item item-1" fxFlex="15%"> 项目 1 </div> <div class="item item-2" fxFlex="20%" fxFlexOrder="3"> 项目 2 </div> <div class="item item-3" fxFlex> 项目 3 </div> </div> <div class="container" fxLayout fxLayout.xs="column" fxLayoutAlign="center" fxLayoutGap="10px" fxLayoutGap.xs="0"> <div class="item item-4" fxFlex fxFlexOffset="30px" fxFlexOffset.xs="0"> 项目 4 </div> <div class="item item-5" fxFlex="200px"> 项目 5 </div> </div> |
使用此代码,我们应用了 order: 3 到第二个项目。它还会将 margin-left: 50px 应用到第四个项目。现在,如果您运行该应用程序,您将看到第二个项目位于行的第三个位置,而第四个项目从起始位置获得 30px 的间距。
总结
在本教程中,我们学习了如何在 Angular 应用中实现 Flex Layout。这将非常有用,因为我们将能够使用开箱即用的 Flexbox CSS 布局,而无需自己编写样式代码。如果您需要更多信息,请参考 Flex Layout Wiki,位于 GitHub 页面上。
为了在本教程中保持简单,我们没有在组件类中使用绑定来绑定值。然而,在组件类中,单向和双向绑定都是可以实现的 [fxLayout]="您的布局方向"。这将使您能够更灵活地控制构建布局,并处理动态使用场景。
Angular 应用使用 Node.js 作为其运行时。如果您想了解更多关于 Node.js 以及如何在 Docker 上部署 Node.js 应用的信息,请查看我们的 如何在 Ubuntu 20.04 上使用 Docker 部署 Node.js (Express.js) 应用 教程。要了解更多关于 Angular 的信息,请查看我们的教程 Angular Router 中的 RouterLink、Navigate 和 NavigateByUrl 导航.
祝您编程愉快!
评论
暂无评论。发表第一条评论吧。