
Node.js is an open-source cross-platform Javascript runtime environment. For the last few years, it has become a popular choice for back-end web development due to its fast Input/Output (I/O) performance and unbeatable JavaScript syntax. Also, its adaptive nature allows quick customization, making this server technology stand out from its competitors.
Node.js Package Manager — An Overview
Node.js Package Manager or npm is the default package manager for JavaScript. Npm is often used to install project scripts and operate external modules in a Node.js project. Besides, it keeps track of the modules installed in a project using the package.json file, which is located in the project’s directory. Npm stores and records the following information:
- Modules required for a project and their installed versions, if any.
- Metadata description of a project that includes details of author, and license, to name a few.
- Executable scripts to automate project-related or goal-oriented tasks.
In this tutorial, we’ll walk you through the steps of using Node.js modules with npm and package.json.
Let’s Start!
Prerequisites
To follow along with this tutorial, you’ll need the following:
- Node.js must be installed in your system.
- Follow along to install Node.js on Ubuntu 18.04
-
The latest version of Ubuntu installed on your system.
Step 1: Create a package.json file
Let’s start our tutorial by taking an example of a dummy project using the Node.js locator module. The project aims to collect the user’s IP address and share output as the user’s country of origin. As we are focused on understanding the use of Node.js modules with npm, there is no need to write the modules manually. Instead, we will be using the pre-installed and customisable packages in our project.
JSON or JavaScript Object Notation is a standard format used for sharing and transmitting data. Initially, we’ll create a JSON file that will store and manage software dependencies. However, creating a package.json manually is strenuous and time-consuming. For simplicity, we will use the init command to create the package.json file instead of putting our efforts in writing extra blocks of code for writing our JSON from scratch.
-
init command
First, let’s create a new folder using the mkdir command and name it locator:
|
1 |
mkdir locator |
Next, use the cd command to move to the newly created folder:
|
1 |
cd locator |
Then, ENTER npm to initialise the interactive prompt:
|
1 |
npm init |
After that, you will see the output:
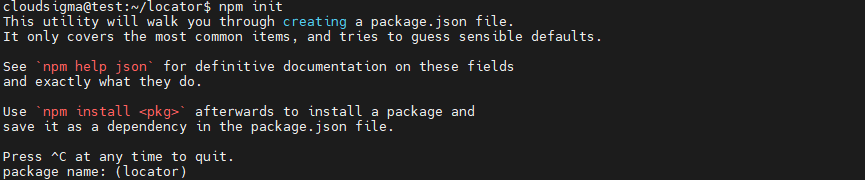
1. name
You will be directed to the name of your new project; the current folder. You will see the default values in parenthesis (). To keep this tutorial simple and easy to understand, we will go with the default options. Hit ENTER to accept and continue.
2. version
The next value is the version name which is a key requirement if you share your project in the npm package repository.
|
Note: Node.js packages follow the Semantic Versioning (semver) guide. First number: The MAJOR version and it changes only when the API changes. Second Number: The MINOR version that changes when additional features are added. Last number: The PATCH version that changes an error or bug is resolved. |
3. description
The description is an informative string that describes the work process of the Node.js module. In our demo, the locator project will get the user’s IP address and return the country of origin.
|
Note: Mostly, modules have an index.js file as the entry point. This is also the main property of package.json, the entrance point for npm modules. However, if package.json is not found, Node.js will load index.js automatically. |
4. test command
It is an executable script or command to run your project tests. As testing is beyond the scope of our tutorial, let’s skip it and hit ENTER.
5. init command
The init command will ask for the project’s GitHub Repository. Again, let’s skip this part and continue.
6. keywords
Keywords are an array of strings used to search for a repository. It is recommended to keep the keywords accurate and relevant to your project so that they are seamlessly trackable.
List these keywords as strings and separate them using commas. In our project, type ip, country, latitude, and longitude at the prompt and you’ll see them included as keywords in package.json.
7. author
Treat the author field as feedback and a way of interacting with your users. For instance, if users detect an error in your module, they can use this field to notify you and get the error addressed.
-
Format: "Name \<Email\> (Website)".
-
Demo: "Paul\<paul@your_domain\> (https://your_domain)"
-
Adding email and website data is optional. However, you can specify a valid author and add your contact details as an author. Confirm the details and hit ENTER.
8. license
The license field illustrates the legal terms and conditions users must know while using your module. As Node.js modules are open source, npm configures it to ISC-license automatically.
Navigate to the open source license page and choose the Open Source Initiative that best suits your needs. Type UNLICENSED at the prompt if you don’t need a license for your repository. In our tutorial, we’ll use the default ISC license. Press ENTER to complete this process.
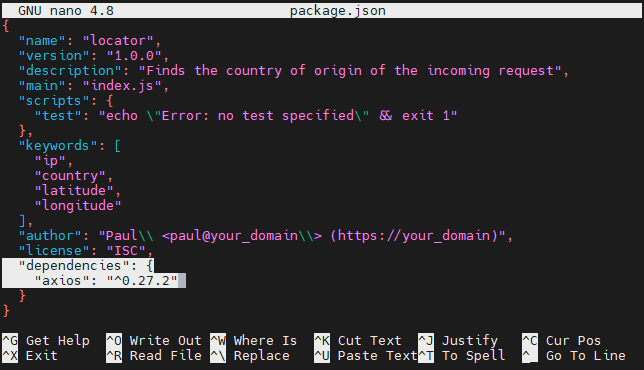
The init command will create the package.json file and display the result:
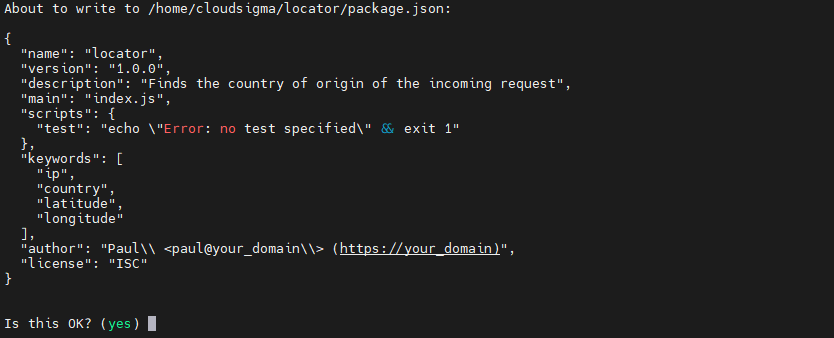
Next, press ENTER to continue and create the package.json file. Our JSON file will keep a record of all the modules and packages we will install in our project.
In the next step, we’ll be installing dependencies and Node.js modules.
Step 2: Install Dependencies and Modules
Creating customized external libraries is time-consuming and requires strenuous efforts. Alternatively, the most effective way is to install pre-defined dependencies and external libraries. In our tutorial, we will use the HTTP library to allow our demo locator module to make an external API request to collect geographical data.
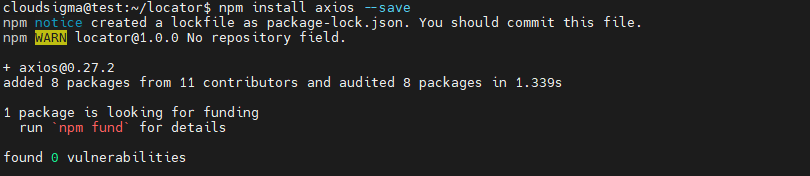
In this guide, we’ll use the axios library to make HTTP requests. First, let’s install axios:
|
1 |
npm install axios --save |
Start with installing the npm package followed by listing them through separate spacing. Also, include the --save tag to make sure that the project is saved as a project dependency.
You will see the output:
Open the package.json using nano or any text editor of your choice:
|
1 |
nano package.json |
Notice the newly-added property highlighted at the bottom of the code block:
-
Download Development Dependencies
Development dependencies are packages used in project development and have no use in the production or maintenance of the project. While these dependencies may sound ineffective in production areas, they play a significant role in writing and rewriting codes.
Like code linters, development dependencies play a vital role in software development. Mostly, developers use code linters to maintain uniformity and consistency in styling during project development, which is otherwise futile in production.
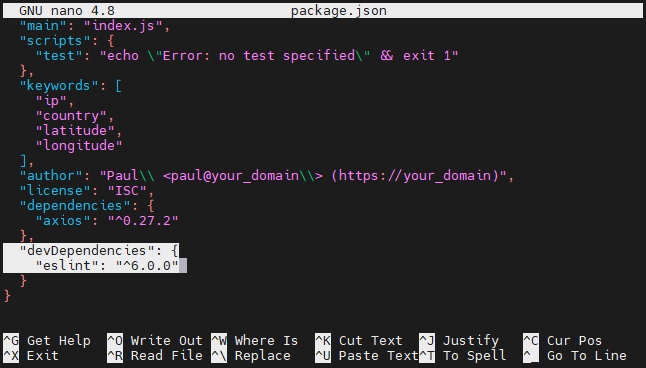
Let’s install a linter as a development dependency for your project. Also, use the --save-dev flag to save eslint as a dependency required for development:
|
1 |
npm i eslint@6.0.0 --save-dev |
We added @6.0.0 to our dependency so that when we update modules, they get tagged with a version. The symbol @ will notify npm to search for a specific tag you want to install. Now, reopen the package.json file:
|
1 |
nano package.json |
You will see the output:
- Self-generated files: node_modules and package-lock.json
In the beginning, while installing a package to the Node.js project, the package.json and package-lock.json files get created automatically. Confirm these files in the working directory:
![]()
As most of the installed dependencies are stored in the node_modules folder, it is advisable not to commit this folder into your version-controlled repository. With an increase in the number of installed dependencies, the size of the node_modules also increases.
Conversely, the package-lock.json file keeps a record of the exact versions installed, so there is no need to include node_modules explicitly. Unlike the node_modules folder, you can commit this file to your version-controlled repository because it gives a detailed representation of all your dependencies along with their versions.
- Install using package.json
The package.json and package-lock.json files allow you to set up the same project dependencies before initiating the project development. Navigate to your directory tree and create a new folder in the same directory level as the locator. Name the new folder as cloned_locator:
|
1 2 |
cd .. mkdir cloned_locator |
Next, move to the cloned_locator:
|
1 |
cd cloned_locator |
Import package.json and package-lock.json files from locator to cloned_locator:
|
1 |
cp ../locator/package.json ../locator/package-lock.json . |
The . signifies the current folder. Install the required modules using the following command:
|
1 |
npm i |
Initially, npm will check the package-lock.json file to install the modules. If the lock file is unavailable, it reads the package.json file to determine the installations.
In general, installing from package-lock.json is simple because the lock file contains the exact version of modules and their dependencies. That means when you are installing using the package.json, npm will save the extra time required for figuring out a compatible and stable version.
Ignore the development dependencies by adding the --production tag:
|
1 |
npm i --production |
After that, go back to the locator:
|
1 |
cd ../locator |
- Global Installations
Until now, we have installed npm modules locally. However, you also get an alternative to install packages globally and use them via shell command or CLI. For instance, you can navigate the current locator project using the Hexo library and manage your static website. Use the following command with the -g tag to install the Hexo CLI globally :
|
1 |
npm i hexo-cli -g |
|
Note: If you get an error while installing packages globally, try this command sudo npm i hexo-cli -g with root credentials. |
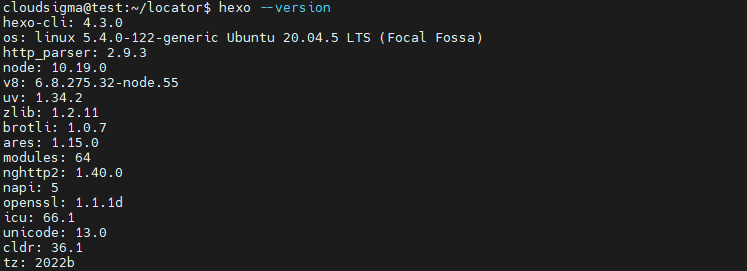
Use the following command to verify that the package was successfully installed:
|
1 |
hexo --version |
You will see the output:
Step 3: Manage and Update Modules
A package manager has more to do than merely installing the Node.js modules. There are plenty of customization options where you can list, update, uninstall, or even add a security layer at your convenience.
In this section, we will learn how to:
-
List modules
-
Update modules
-
Uninstall modules
-
Audit modules
Let’s discuss each in detail:
-
List Modules
Listing modules, as the name suggests, will give you the details on all the modules installed on the project. Instead of reading the package.json file, you can use the ls or list command to learn your project modules in detail:
|
1 |
npm ls |
You will see the output:
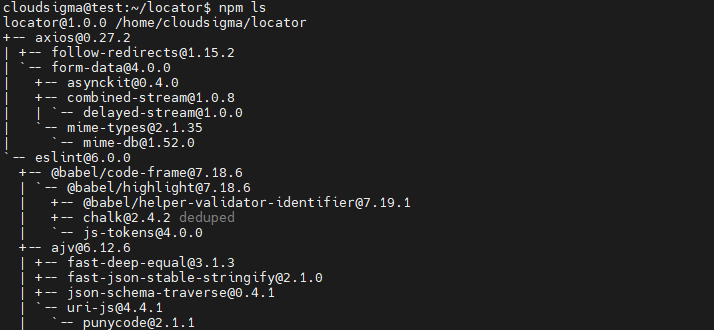
By default, the ls command lists the whole dependency tree that includes the project dependencies and the module it depends on. However, you can get a bird-eye view and explicitly target a specific module as well. Use the following command to check the modules you have installed without their dependencies:
|
1 |
npm ls --depth 0 |
You’ll see the output:

-
Update Modules
It is always advisable to keep your npm module updated so that you don’t face any software crashes or conflicts. Use the following command to check if there is a need for an update:
|
1 |
npm outdated |
You’ll see the output:

Let’s understand each term in detail:
- Package: It lists the current Package installed in your project.
- Current: This shows the Current version of the package.
- Wanted: Shows the npm version that best fits the version requirement in package.json.
- Latest: It shows the latest npm released that you must update if required.
- Location: The package Location in the dependency tree.
As suggested, we can update our npm to a stable version. Use the following command to update your current package:
|
1 |
npm up eslint |
You’ll see the output:
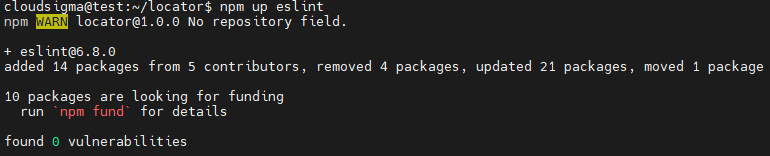
Instead of updating them one by one, you can also update all the modules at once using the up command:
|
1 |
npm up |
-
Uninstall Modules
Many times, a dependency may not show the expected output and you need to create a customized dependency. Under such scenarios, you have an option to uninstall dependencies from your package.json and package-lock.json files. Suppose, you have axios as a dependency and it fails to provide a satisfactory result. You will undoubtedly remove this repository from your project. Use the uninstall or un command to remove axios:
|
1 |
npm un axios |
You’ll see the output:
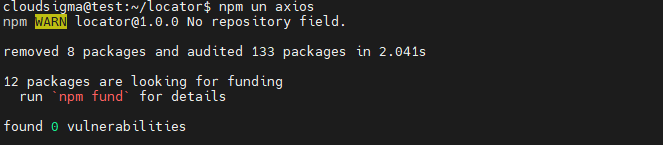
Though the uninstall command removed the dependency, we didn’t receive any notification of its removal. Let’s list the dependencies to see how many dependencies we have now:
|
1 |
npm ls --depth 0 |
You’ll see the output with no axios dependency present in the list:

-
Audit Modules
If the dependencies installed in your project are prone to any potential security threat, you can detect them. At first, you need to install an outdated version of the request module to see how audit module works:
|
1 |
npm i request@2.60.0 |
You’ll see the output prompting to fix threats or vulnerabilities:

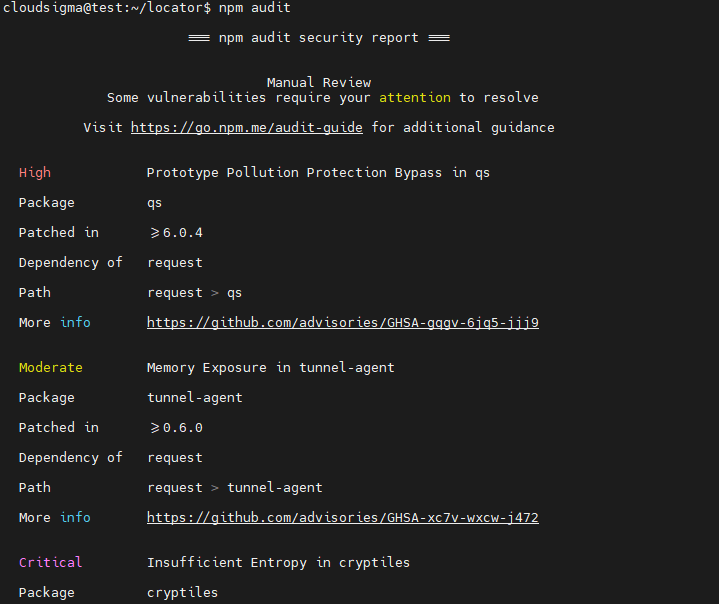
To expand details on vulnerabilities and threats, use the
audit command:
|
1 |
npm audit |
You’ll see a detailed security report:
To resolve these vulnerabilities, use the fix command:
|
1 |
npm audit fix |
You’ll see the output:

You may have noticed that two out of nine vulnerabilities were fixed. However, the remaining seven vulnerabilities persist in your dependencies because the audit fix doesn’t resolve all issues. In order to solve this problem, you may need to update your dependency to a higher version using a different API. Be careful when updating because there is a probability that you may break code higher up in the dependency tree. Use the following command to confirm that the vulnerabilities have disappeared:
|
1 |
npm audit fix --force |
Be mindful when using a different API to solve vulnerability threats because if you are unsure about it, it may cost to break up the code functionality.
Conclusion
In conclusion, we demonstrated how to use Node.js modules with npm and package.json. In addition, we went over the methods of listing, updating, managing, auditing, and uninstalling our package dependencies. As a next challenge, we encourage you to use the concepts discussed in this guide and experiment with installing and testing packages yourself. You can also try to build Node.js applications and configure dependencies to elevate your learning.
Besides, there are many other learning materials on Node.js and Javascript topics that you can find on our blog:
- Installing Node.js on CentOS 8: a Complete Guide
- Connecting PostgreSQL with Node.js Applications: A Tutorial
- Using HTTP client Axios in a React Application: A Tutorial
- How to Deploy a Node.js (Express.js) App with Docker on Ubuntu 20.04
Happy Computing!
- How to Deploy WordPress with Persistent Volume on Kubernetes Cluster - March 17, 2023
- Deploying Applications on Kubernetes Using Argo CD and GitOps - October 26, 2022
- Using Node.js Modules with npm and package.json: A Tutorial - October 6, 2022
- Using Ansible to Install and Configure WordPress with LAMP on Ubuntu - September 23, 2022
- Creating Views in the Django Web Application Framework - September 22, 2022