
Ruby is a powerful programming language. It’s an interpreted, high-level, and general-purpose language that incorporates multiple programming paradigms. Yukihiro Matsumoto, the creator of Ruby, blended various parts of his favorite programming languages like Perl, Ada, Lisp, Eiffel, Smalltalk, etc., and created Ruby. In his own words, he intended to make Ruby “more natural, not simple”.
Much of the popularity of Ruby comes from Ruby on Rails. It’s a powerful web framework built on top of Ruby. It serves as a backend to numerous web applications, for example, Airbnb, Spotify, GitHub, SoundCloud, and more. The philosophy of Ruby on Rails is to offer an intuitive framework to speed up building robust and high-performance web pages.
Being a web framework, Ruby on Rails can work with popular database engines, for example, SQLite, MySQL/MariaDB, and PostgreSQL. This guide will showcase building the foundation of a Ruby on Rails app that uses MySQL as its database engine.
Prerequisites
- All the steps demonstrated in this guide are performed on Ubuntu 21.04. Learn more about setting up an Ubuntu server here.
- We’ll also showcase a quick demonstration on installing and configuring a MySQL server. For more info, refer to this guide on setting up MySQL.
- As for installing and managing Ruby, we’ll use rbenv. It’s a tool designed to help manage the Ruby environment. Compared to RVM, rbenv comes with its differences.
Step 1: Installing and Configuring MySQL
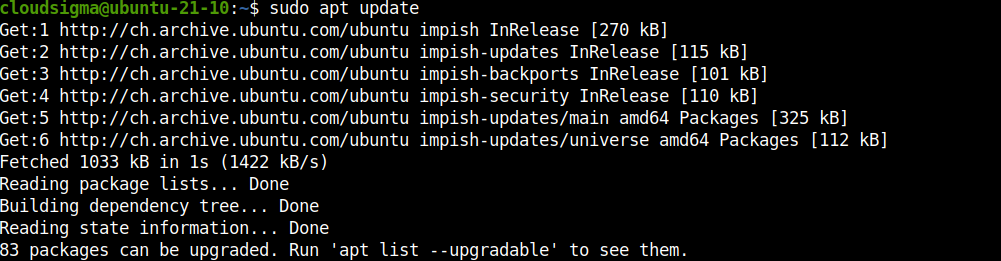
MySQL will serve as the database backend for our Ruby on Rails app. Assuming you don’t have MySQL installed and configured already, follow along. Launch a terminal and update the APT cache:
|
1 |
sudo apt update |
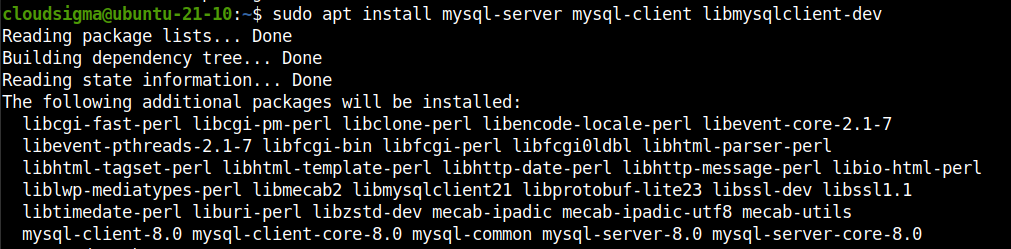
Then, install the MySQL components:
|
1 |
sudo apt install install mysql-server mysql-client libmysqlclient-dev |
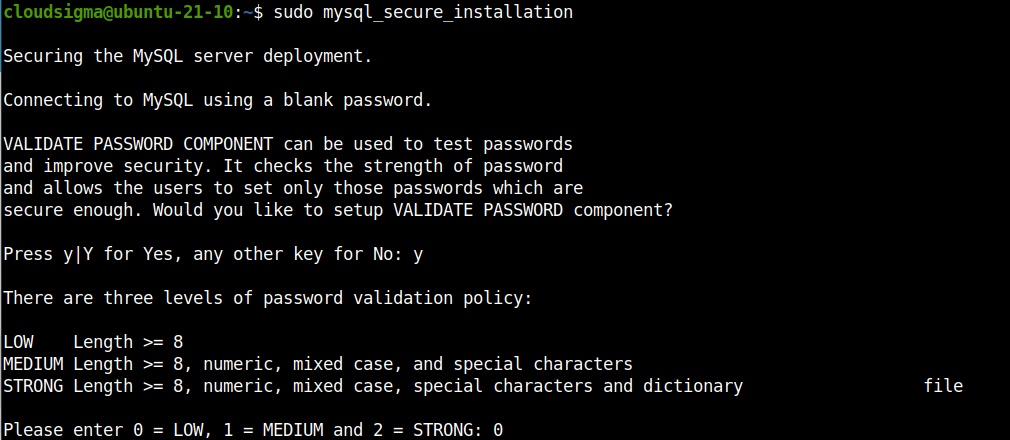
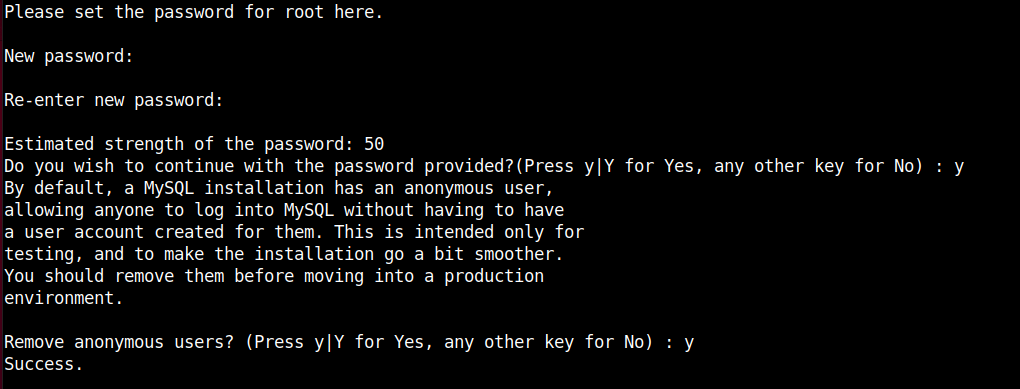
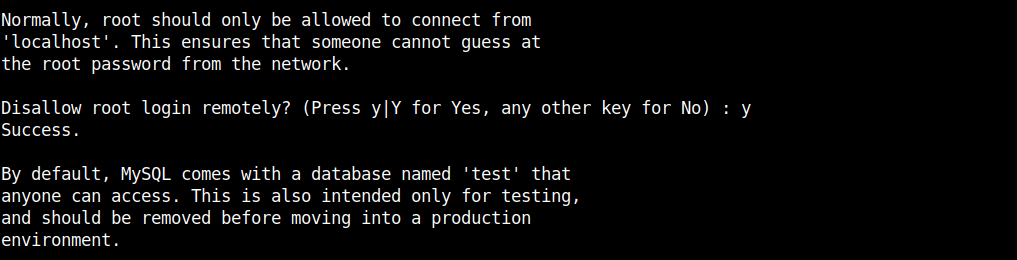
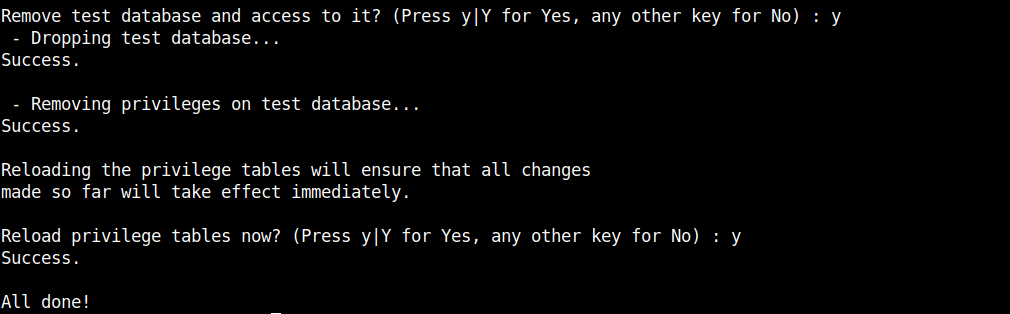
Once the installation is complete, run the following MySQL script. It will perform a quick post-installation configuration:
|
1 |
sudo mysql_secure_installation |
The script will ask multiple questions. Complete the steps to finish the initial configuration:
-
Additional Step
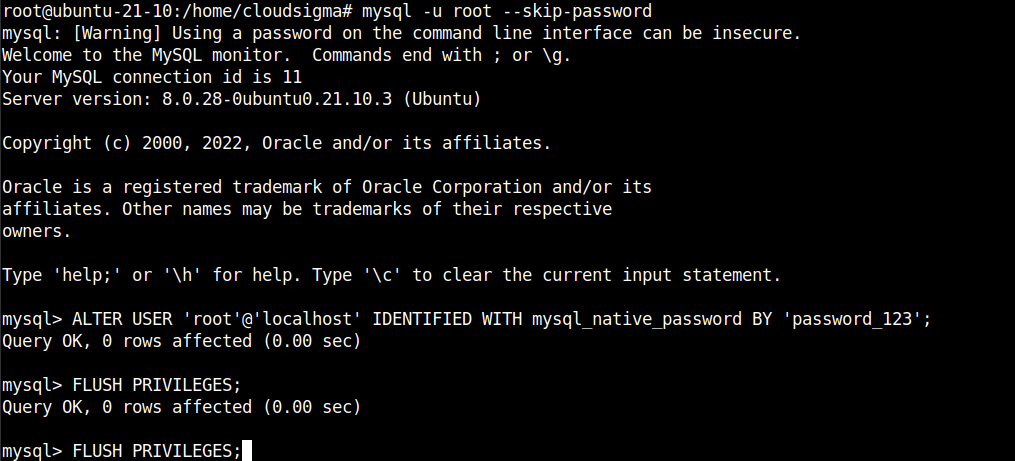
The following step is optional and should only be done when further down the tutorial, Ruby on Rails fails to connect to MySQL server. It sets the root user in MySQL to use
mysql_native_password to allow traditional password logins. Access the
root account on Ubuntu:
|
1 |
sudo su |
Now, launch the MySQL
root shell without password check:
|
1 |
mysql -u root --skip-password |
Next, run the following query to change the password and set
mysql_native_password as the authentication method:
|
1 2 |
ALTER USER 'root'@'localhost' IDENTIFIED WITH mysql_native_password BY '<password>'; FLUSH PRIVILEGES; |
Step 2: Installing and Configuring Ruby and Ruby on Rails
Our database server is ready for production. We now need to install Ruby. As mentioned earlier, we’ll be using rbenv as the Ruby version manager for our project. Ruby on Rails is available as a Ruby gem.
-
Installing rbenv
The Ruby manager rbenv is directly available from the official Ubuntu package server. For other distros, check out the official rbenv installation guide.
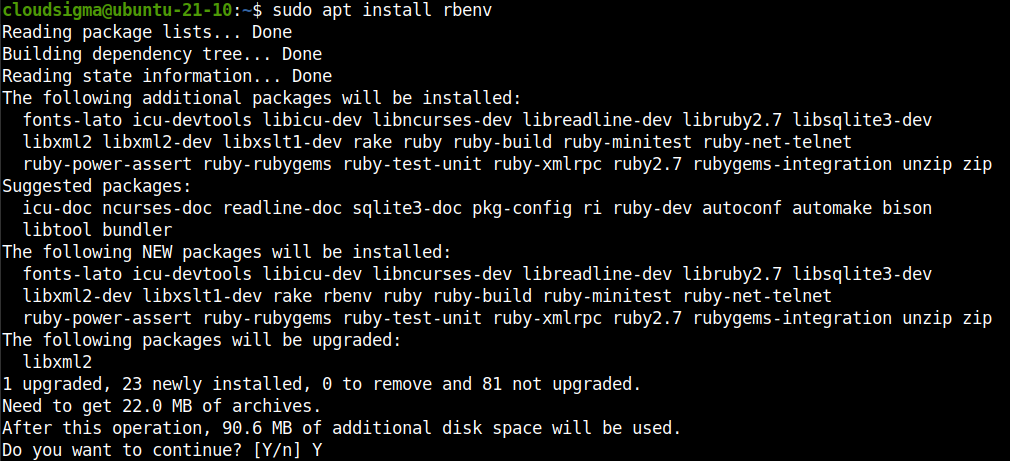
Fire up a terminal and install it right away:
|
1 |
sudo apt install rbenv |
Next, we have to integrate rbenv with the default shell. Run the following rbenv command:
|
1 |
rbenv init |

As the output says, for bash, we need to include the line in the local bashrc file. Without going into too much detail, the bashrc file is loaded every time the user opens a new shell in interactive mode. Open the file in a text editor and add the following text:
|
1 |
nano ~/.bashrc |

Save the file and close the editor. It’s recommended to restart the terminal to take the changes into effect. Alternatively, you can reload the bashrc file into the current shell:
|
1 |
source ~/.bashrc |
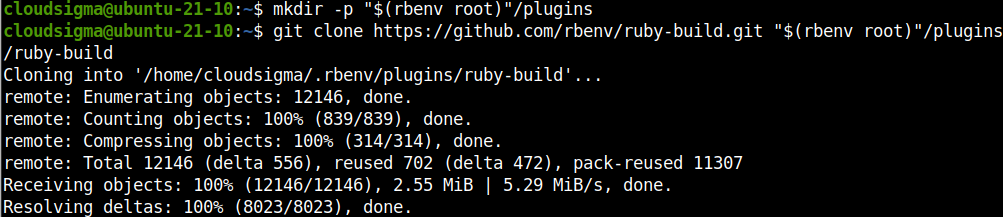
Next, we’ll install a rbenv plugin to provide the support for the rbenv install command. This plugin is directly available from the rbenv GitHub repo. Run the following commands:
|
1 2 |
mkdir -p "$(rbenv root)"/plugins git clone https://github.com/rbenv/ruby-build.git "$(rbenv root)"/plugins/ruby-build |
To test our rbenv configuration, run the rbenv-doctor script:
|
1 |
curl -fsSL https://github.com/rbenv/rbenv-installer/raw/main/bin/rbenv-doctor | bash |

It will check for various components and report if everything is ok.
-
Installing Ruby
Once rbenv is configured, we’re ready to install Ruby. The following command will list all the available versions of Ruby:
|
1 |
rbenv install -l |

The output will be a bit long, so it’s advised to pass it through more or less for better browsing. The list also contains various builds of Ruby. For the purpose of this guide, we’ll focus on the latest official Ruby build. At the time of writing this article, it’s Ruby v3.0.3.
Now, install Ruby:
|
1 |
rbenv install <ruby_version> |

The next command will declare the installed Ruby as the global version available to all applications:
|
1 |
rbenv global <ruby_version> |
Verify the Ruby installation:
|
1 |
ruby --version |

-
Installing Ruby on Rails
The web framework is available as a gem for Ruby. Although Ruby on Rails is directly available from the Ubuntu package servers, installing it as a gem offers more flexibility.
First, install the gem Bundler. It’s a tool that resolves gem dependencies. Rails is dependent on it:
|
1 |
gem install bundler |

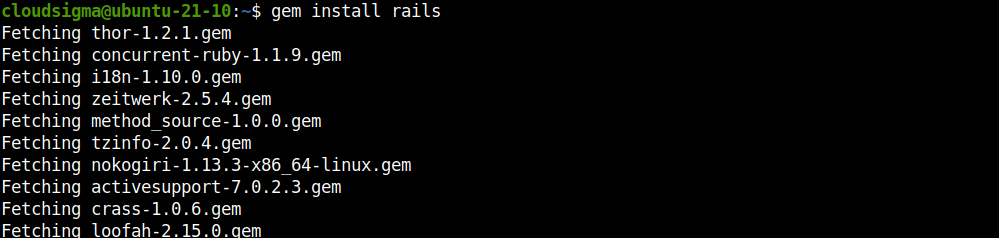
Running the next command will install the latest stable version of Ruby on Rails as a gem:
|
1 |
gem install rails |
If you want a specific version installed, then the command structure would look like this:
|
1 |
gem install rails <rails_version> |
Once the gems are installed, run the following command:
|
1 |
rbenv rehash |
![]()
The Ruby manager rbenv works by creating dedicated directories for shims that point to the files of the current Ruby version enabled. The rehash sub-command tells rbenv to maintain shims in that directory to match every Ruby command across every installed version of Ruby on the server. It should be run every time you install a new version of Ruby or a gem that provides commands similar to Rails.
Verify the Rails installation:
|
1 |
rails -v |
Step 3: Installing MySQL gem
To connect to the MySQL server, Rails needs an adapter. We’ll use
mysql2 gem for this functionality. Install
mysql2 gem:
|
1 |
gem install mysql2 |

Step 4: Creating and Configuring a New Rails App
-
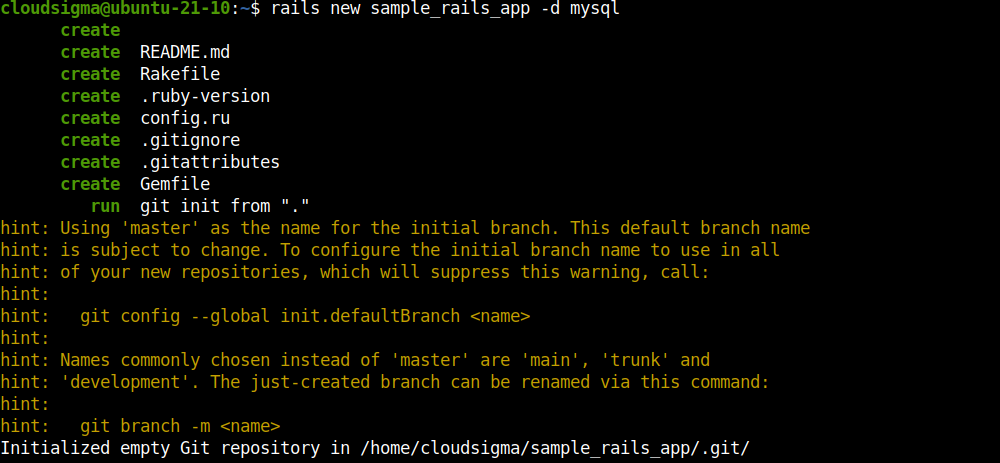
Creating a Sample App
So far, we’ve configured all the necessary components to establish our Rails app. The following command will create a dedicated directory for the app and place all the necessary files with MySQL support:
|
1 |
rails new <app_name> -d mysql |
-
Configuring MySQL Connection
Now, we need to dial in the necessary MySQL info so that Rails can connect to the database and exchange data. By default, Rails connects to MySQL as
root. Open the Rails database configuration file:
|
1 2 |
cd <app_dir> nano config/database.yml |
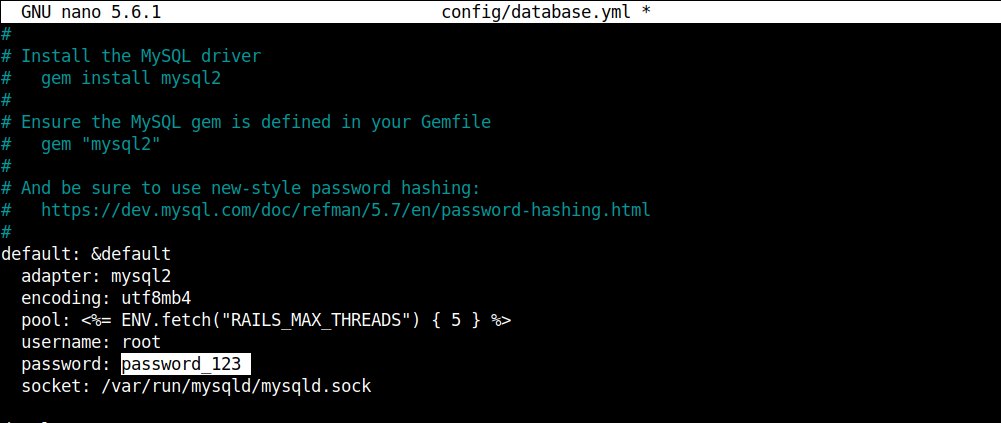
Scroll down to the following section and enter the root password for MySQL. Then, save the file and close the editor.
-
Implementing Database Changes
If everything went fine, then Rails should now be able to connect to MySQL and perform necessary database operations. The following command will create the necessary databases:
|
1 |
rake db:create |

Step 5: Testing the Configuration
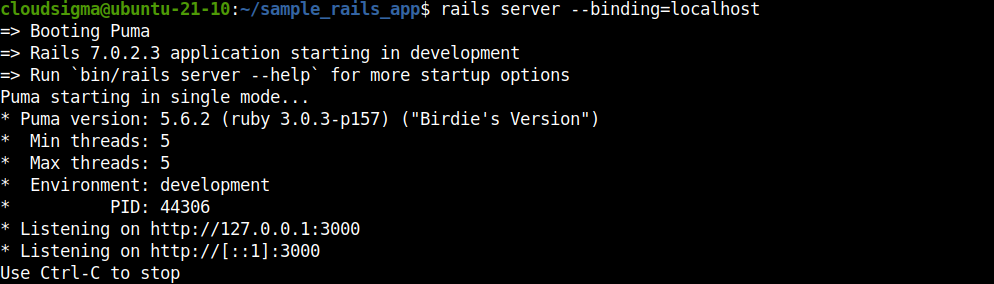
Start the Rails development server:
|
1 |
rails server --binding=<server_public_ip> |
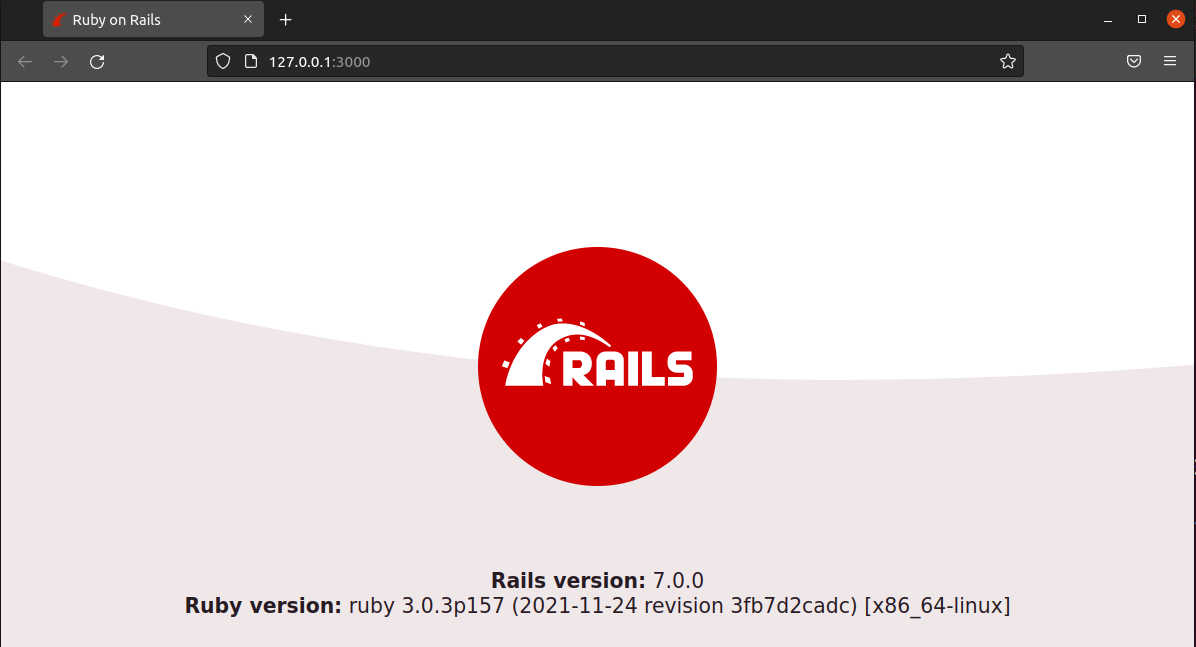
You should be able to access the welcome page at the following URL:
|
1 |
http://<server_public_ip>:3000 |
Final Thoughts
In this guide, we’ve installed Ruby using rbenv, installed Rails gem, and configured a sample Rails app to connect to MySQL and use it as the database engine. It serves as a great skeleton for a scaling and centralized web app.
To learn how to install Ruby on Rails with RVM on Ubuntu 20.04 check the following tutorial Installing Ruby on Rails with RVM on Ubuntu 20.04. To learn how to set up Ruby on Rails with PostgreSQL, check out the following tutorial: Setting up Ruby on Rails with PostgreSQL.
Happy Computing!
- How To Enable, Create and Use the .htaccess File: A Tutorial - March 8, 2023
- An Overview of Queries in MySQL - October 28, 2022
- Introduction to Cookies: Understanding and Working with JavaScript Cookies - October 25, 2022
- An Overview of Data Types in Ruby - October 24, 2022
- The Architecture of Iptables and Netfilter - October 10, 2022