
Git is an open-source version control system (VCS) that can handle projects of every size. This DevOps tool is free and open-source (Git source code on GitHub). It tracks changes in the source code, allowing multiple developers to work in sync on a non-linear development. Git was first introduced back in 2005 by Linus Torvalds. This guide will showcase how to work with Git branches.
Prerequisites
It requires the following prerequisites to perform the steps in this guide:
- A modern Linux distro. Learn more about installing and configuring an Ubuntu server on CloudSigma.
- Git properly installed and configured. Here’s an in-depth guide demonstrating how to install Git on Ubuntu.
- You will also benefit from reading our tutorial on best practices of using Git effectively.
Although we are using Linux as the platform, the Git-specific commands will work on other platforms as well.
Step 1 – Creating a Sample Repo
Git works by managing repos. A Git repo is a specialized space that Git knows how to navigate through. Git tracks changes in the repo files and updates its tracking accordingly. For demonstration purposes, we are going to work on a local repo. If you want to work on a remote repo, then it’s recommended to make a copy of it on your local system and push the changes to the remote repo.
First, create a dedicated directory for our local Git repo:
|
1 |
mkdir -pv <dir_name> |

Next, initiate the Git repo using the
init command:
|
1 |
git init |

After that, create a dummy file and commit it to the repo:
|
1 2 3 |
touch helloWorld.py git add . git commit -m "<commit_message>" |

With this action, Git created the master branch on the local repo. It’s the default branch for any repo just created.
Step 2 – Listing Branches
A repo can contain multiple branches. In Git, a
branch refers to a separate version of the main/original branch. The following command will print all the existing branches on the repo:
|
1 |
git branch -a |

Here, the flag -a tells Git to list all the branches (even those that are not part of our local workspace).
Step 3 – Creating Branches
The default branch (
master) will be treated as the production branch. As such, it’s recommended to create a separate branch for working on the project (
developing,
testing, etc.). The following Git command will create a new branch:
|
1 2 |
git branch <branch_name> git branch -a |

Note that there can’t be multiple branches with the same name. If you try, Git will throw the following error:
|
1 |
git branch <existing_branch_name> |

Step 4 – Switching Branches
We got multiple branches on our repo. However, how can we swap the branches to work on them? To switch to a different branch, use the following command:
|
1 2 |
git checkout <branch_name> git branch -a |


Note that when checking for the branch list, the current branch will be highlighted with an asterisk. What if the branch does not exist? It will throw the error instead:

Step 5 – Making Changes on the Development Branch
In our local repo, we have the following branches so far:
- master: The main branch that hosts the production codes.
- develop: The development branch that the developers will work on.
Given this hierarchy, we would be working on our
develop branch. How to make changes in that branch? First, switch to the develop branch:
|
1 2 |
git checkout develop git branch -a |
For demonstration, create some additional Python scripts:
|
1 |
touch helloWorld-{1..3}.py |

The next command will instruct Git to add the newly-created files to its tracklist:
|
1 |
git add helloWorld-* |
Now, commit the files to the
develop branch:
|
1 |
git commit -m "<commit_message>" develop |

The files will now exist on the
develop branch only, not the
master branch (not yet, at least). We’re about to find it out. Check the files of the develop branch using the
ls command:
|
1 2 |
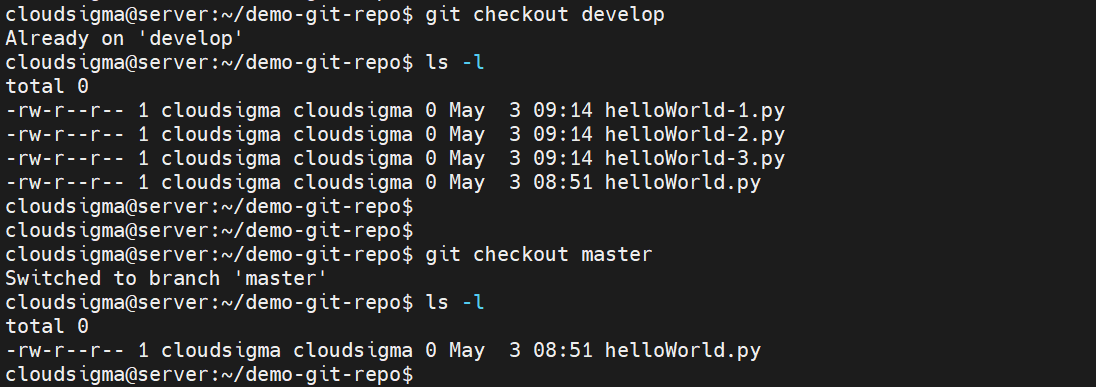
git checkout develop ls -l |

Now, check the list of files on the
master branch:
|
1 2 |
git checkout master ls -l |

Notice the difference? The changes made to the develop branch stay there. However, we can merge the codes of these two branches so that the master branch is updated with the latest codebase from the develop branch.
Step 6 – Merging Codes between Branches
In this section, we will demonstrate how to move the code from the
develop branch to the
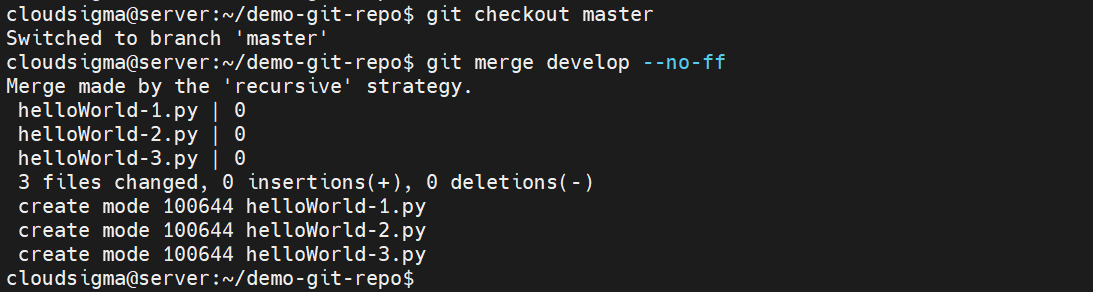
master branch. Based on our repo structure, this means that the development codes are ready to be pushed to the production line. Switch to the
master branch:
|
1 2 |
git checkout master ls -l |
Next, we need to tell Git to merge the
develop branch contents to
master. The additional flag
--no-ff tells Git to preserve the commit messages prior to the merge. This helps track the code changes in the future. Run the following command:
|
1 |
git merge develop --no-ff |
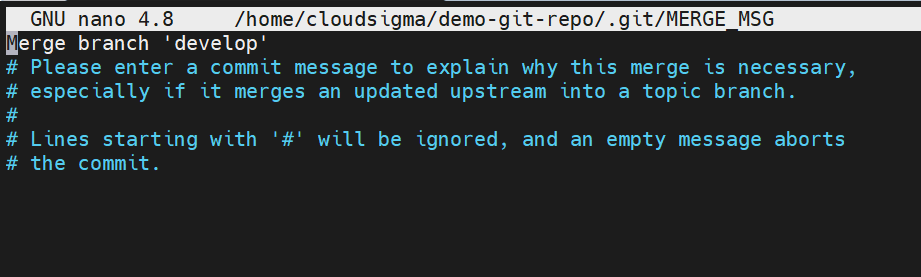
Git will open a text file in the default text editor. It will ask for a merge message (similar to the commit messages). Enter your message and close the editor:
With the merge message, Git will commit the changes to the master branch. The output would look something like this:
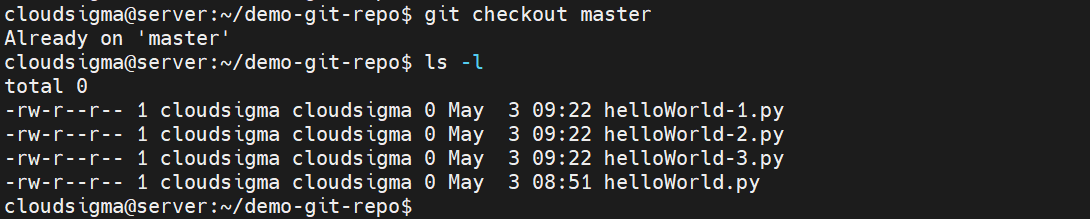
Check the content of the master branch. It should contain all the changes from the develop branch:
Note that in most projects, it’s not recommended to directly merge the development branch with the production branch. Generally, there are three layers of branches:
- master: The main branch hosting the production codes.
- testing: The testing branch. It receives the codes from the development branch for the purpose of testing/debugging.
- development: The development branch where the developers work on.
As the description suggests, before pushing to the master branch, codes from the development branch must pass the testing to ensure that the code is actually working.
Final Thoughts
This guide successfully demonstrates the basics of using branches on Git. Here, we implemented a dual-branch workflow setup and showcased how to transfer codes around. Although demonstrated with two branches, the concepts apply to multi-branch repos as well.
Interested in learning more about Git? Check out our Git-focused tutorials:
- Creating a Pull Request on GitHub
- How to Configure Automatic Deployment with Git with a VPS
- How To Set Up GitLab Continuous Integration (CI) Pipelines on Ubuntu 20.04
Happy Computing!
- How to Deploy WordPress with Persistent Volume on Kubernetes Cluster - March 17, 2023
- Deploying Applications on Kubernetes Using Argo CD and GitOps - October 26, 2022
- Using Node.js Modules with npm and package.json: A Tutorial - October 6, 2022
- Using Ansible to Install and Configure WordPress with LAMP on Ubuntu - September 23, 2022
- Creating Views in the Django Web Application Framework - September 22, 2022