
Introduction
There are always times when we need to have new servers configured. This could be to distribute the workload or if we simply need more servers. When setting up new servers, users need to utilize server automation to configure them. This is done in order to minimize manual intervention. Ansible is one of the configuration management tools that can be used to automatically configure a new server reducing the chances of human error when manually setting the server up.
Ansible is a feature-rich tool while being simple in architecture. It facilitates the configuration of servers through scripts. Due to its concise architecture, Ansible does not require any other software to be installed across the nodes.
In this tutorial, we will show you how to use Ansible to automate the installation of WordPress with the LAMP stack running on an Ubuntu server. WordPress is a CMS that is used to create blogs and websites utilizing PHP as coding language and MySQL database to store data. Once we have WordPress installed, users can administer the site using the web frontend.
Prerequisites
- Since this tutorial is based on Ubuntu, you will need to have the latest Ubuntu version installed with sudo permissions. If you do not have Ubuntu installed, you can follow our How to set up your Ubuntu server.
- We will also need to have an Ansible control node. It must have a control node with sudo permissions and firewall enabled. Installing and Configuring Ansible on Ubuntu 20.04 contains a detailed guide on how to configure Ansible.
- We also need remote Ansible hosts running the latest Ubuntu. The hosts are essentially the managed nodes in Ansible.
Ansible Playbook Actions Summary
In this section, we will see what our Ansible Playbook does when we execute it. This procedure is an alternative to the manual setup provided here: How to Install WordPress with LAMP on Ubuntu 20.04.
When we run the Playbook, Ansible will:
- Install aptitude which is a preferred Ansible package manager.
- Install and configure PHP extensions and LAMP packages.
- Create a new Apache VirtualHost for the WordPress website.
- Enable the mod_rewrite module and disable the default website offered by Apache.
- Set the password for the MySQL root user.
- Remove the anonymous MySQL accounts and test database.
- Create a new user and a new database. These will be used by the WordPress website.
- Set up UFW to allow HTTP traffic on the configured port ( 80 by default).
- Download and unpack WordPress.
- Setup the directory permissions and ownerships.
- Configure a new wp-config.php file using its template.
WordPress on LAMP Ansible Playbook Guide
First, we will have to obtain the WordPress on LAMP playbook and its dependencies from the do-community/ansible-playbooks repository. We will clone this repository inside the Ansible Control Node.
You can run the
git pull command as mentioned below:
|
1 2 3 4 5 |
cd ~ git clone https://github.com/do-community/ansible-playbooks.git cd ansible-playbooks |
Make sure you have the updated pull of the above mentioned repository. This is if you have cloned the repository before. Below is how you can take the updated:
|
1 2 3 |
cd ~/ansible-playbooks git pull |
Now we have to locate the files inside the wordpress-lamp_ubuntu folder. The name of this folder can be different depending upon the version of Ubuntu you are using. At a glance, you will see the following structure in this directory:

Let’s summarize the purpose of these files below:
- files/apache.conf.j2: Apache uses VirtualHost. This file is used to specify the settings for VirtualHost.
- files/wp-config.php.j2: This file contains settings for configuring WordPress.
- vars/default.yml: It configures the playbook settings.
- playbook.yml: If there are tasks that need to be executed on a remote server, this file is used to configure them.
- readme.md: Guide to using the playbook.
We have to edit the playbook’s variable file in order to customize the installation. First, open the
vars/default.yaml file which is located inside the above mentioned directory:
|
1 2 3 |
cd wordpress-lamp_ubuntu1804 nano vars/default.yml |
This file is quite lengthy. It has a number of configurations to help us with our installation:
|
1 2 3 4 5 6 7 8 9 10 11 12 13 14 |
--- #System Settings php_modules: [ 'php-curl', 'php-gd', 'php-mbstring', 'php-xml', 'php-xmlrpc', 'php-soap', 'php-intl', 'php-zip' ] #MySQL Settings mysql_root_password: "mysql_root_password" mysql_db: "wordpress" mysql_user: "sammy" mysql_password: "password" #HTTP Settings http_host: "your_domain" http_conf: "your_domain.conf" http_port: "80" |
Here we are concerned with the following variables:
- php_modules: An array containing PHP extensions that should be installed to support your WordPress setup. If you want to install more modules you can specify this here.
- mysql_root_password: The password for the root MySQL account.
- mysql_db: This specifies the name of the MySQL database which WordPress will be using.
- mysql_user: The name of the MySQL user that should be created for WordPress.
- mysql_password: The password for the new MySQL user.
- http_host: Domain name or the IP of the server.
- http_conf: The name of the configuration file that will be created within Apache.
- http_port: HTTP port for this virtual host. This port is used to access the website. The default value is 80.
Next, enter the values in the above file and save and close. For the users using the nano editor, press CTRL+X, Y, and press ENTER.
Now you are ready to run this playbook. You can run this playbook on one or more servers. If you want to run this playbook on any specific server, you can use -l flag. Further, if you need to specify the user to connect to the remote server, specify the user using the -u flag.
Suppose that we want to execute our playbook on any one server,
srvr1 using the user
u1, we can run the below command:
|
1 |
ansible-playbook playbook.yml -l server1 -u cloudsigma |
Once you run the above command you will get an output like below:
|
1 2 3 4 5 6 7 8 9 |
PLAY [all] ******************************************************************************** TASK [Gathering Facts] ******************************************************************************** ok: [server1] TASK [Install prerequisites] ******************************************************************************** ok: [server1] |
Wait until the playbook execution is completed. Then, navigate to the
server_name on your web browser:
|
1 |
http://server_host_or_ip/ |
You will see the screen:
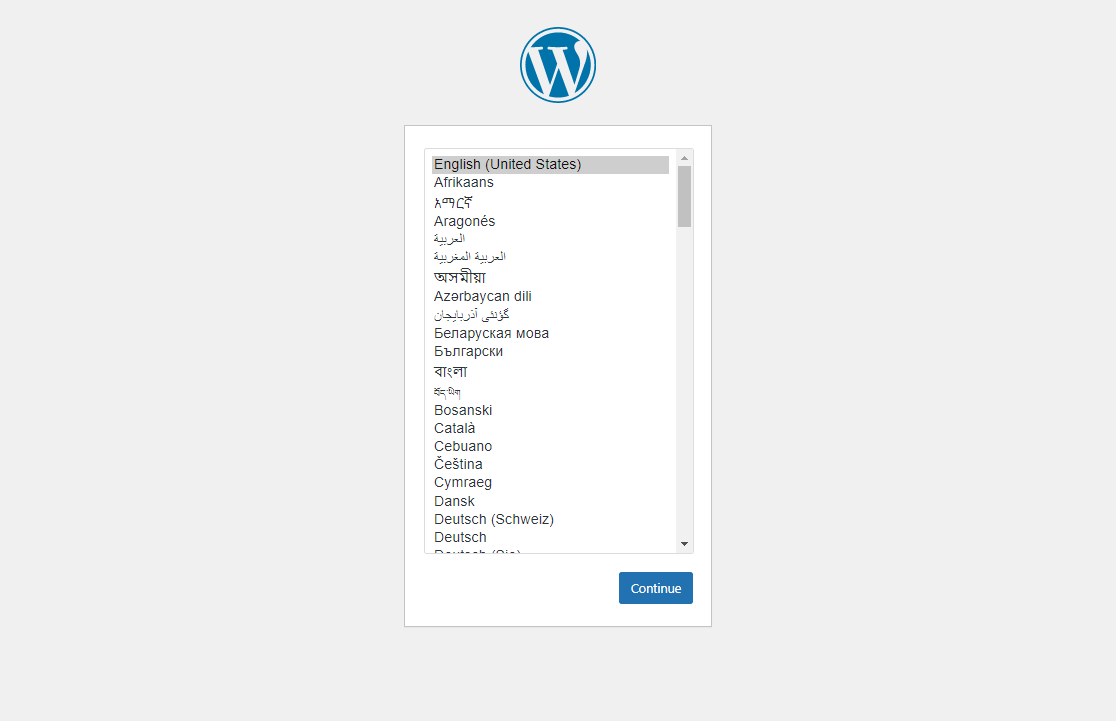
Next, select the language of your choice and press Continue. You will get the next screen prompting some details to conclude the installation:
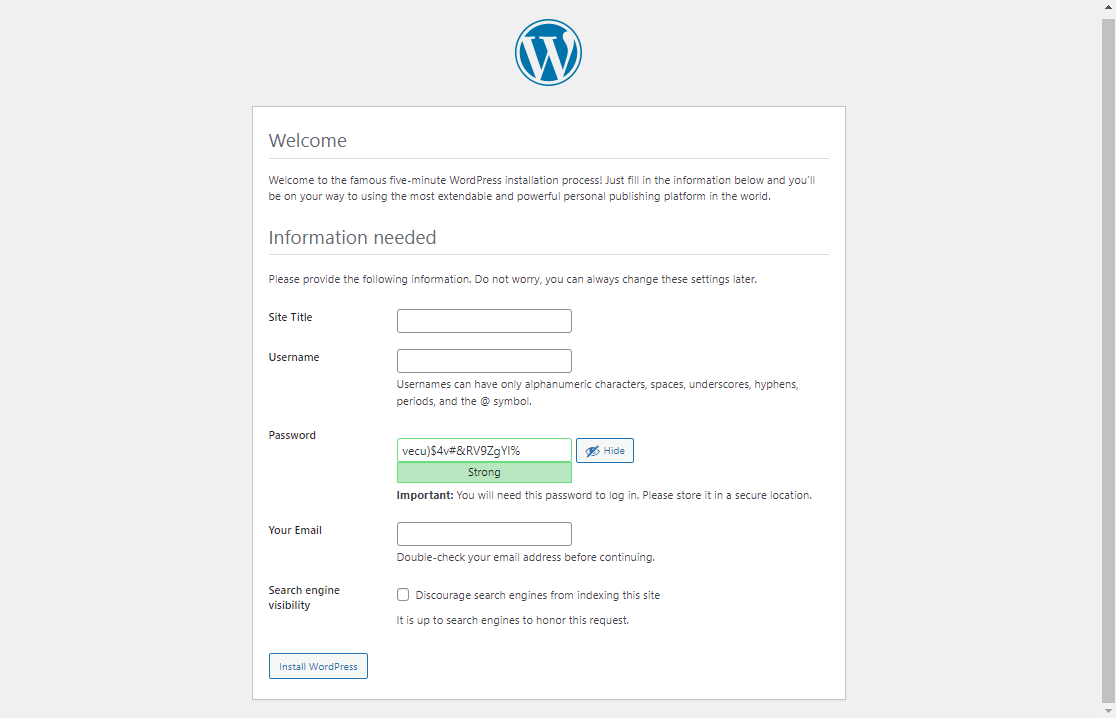
After that, enter the information and press Install WordPress. It will take some time and then you will see a screen like below:
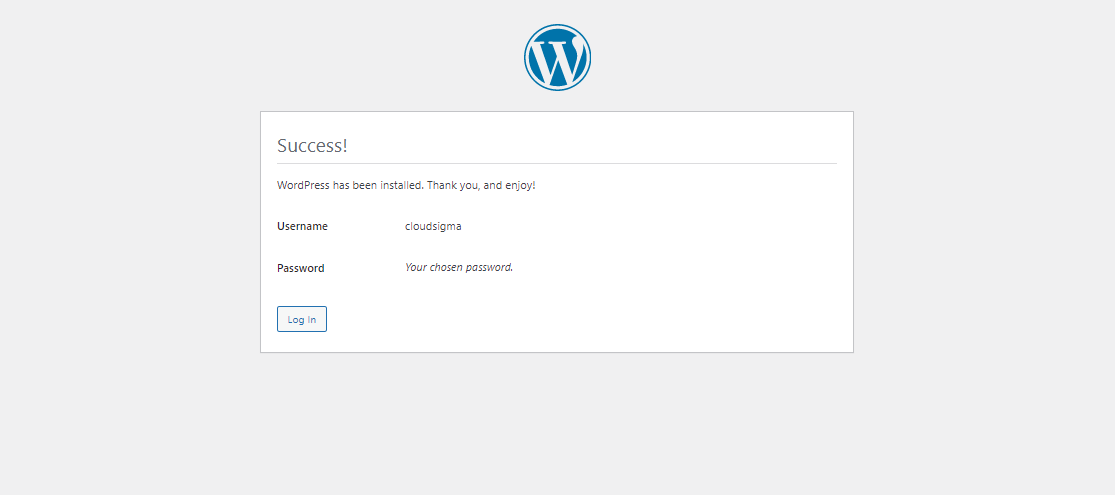
Select Login to login into your website and configure the settings:
Ansible Playbook Content
Remember the wordpress-lamp_ubuntu folder. It contains a few files inside it. So let us go over them one at a time:
● vars/default.yml
This file contains values that are used to configure settings for your WordPress website:
|
1 2 3 4 5 6 7 8 9 10 11 12 13 |
#System Settings php_modules: [ 'php-curl', 'php-gd', 'php-mbstring', 'php-xml', 'php-xmlrpc', 'php-soap', 'php-intl', 'php-zip' ] #MySQL Settings mysql_root_password: "mysql_root_password" mysql_db: "wordpress" mysql_user: "sammy" mysql_password: "password" #HTTP Settings http_host: "your_domain" http_conf: "your_domain.conf" http_port: "80" |
● files/apache.conf.j2
This file is used to configure the Apache VirtualHost:
|
1 2 3 4 5 6 7 8 9 10 11 12 13 14 15 16 17 |
<VirtualHost *:{{ http_port }}> ServerAdmin webmaster@localhost ServerName {{ http_host }} ServerAlias www.{{ http_host }} DocumentRoot /var/www/{{ http_host }} ErrorLog ${APACHE_LOG_DIR}/error.log CustomLog ${APACHE_LOG_DIR}/access.log combined <Directory /var/www/{{ http_host }}> Options -Indexes </Directory> <IfModule mod_dir.c> DirectoryIndex index.php index.html index.cgi index.pl index.xhtml index.htm </IfModule> </VirtualHost> |
● files/wp-config.php.j2
This file is used to configure WordPress. It contains unique keys and salts generated by hash functions:
|
1 2 3 4 5 6 7 8 9 10 11 12 13 14 15 16 17 18 19 20 21 22 23 24 25 26 27 28 29 30 31 32 33 34 35 36 37 38 39 40 41 42 43 44 45 46 47 48 49 50 51 52 53 54 55 56 57 58 59 60 61 62 63 64 65 66 67 68 69 70 71 72 73 74 75 76 77 78 79 80 81 82 83 84 85 86 87 88 89 90 |
<?php /** * The base configuration for WordPress * * The wp-config.php creation script uses this file during the * installation. You don't have to use the web site, you can * copy this file to "wp-config.php" and fill in the values. * * This file contains the following configurations: * * * MySQL settings * * Secret keys * * Database table prefix * * ABSPATH * * @link https://codex.wordpress.org/Editing_wp-config.php * * @package WordPress */ // ** MySQL settings - You can get this info from your web host ** // /** The name of the database for WordPress */ define( 'DB_NAME', '{{ mysql_db }}' ); /** MySQL database username */ define( 'DB_USER', '{{ mysql_user }}' ); /** MySQL database password */ define( 'DB_PASSWORD', '{{ mysql_password }}' ); /** MySQL hostname */ define( 'DB_HOST', 'localhost' ); /** Database Charset to use in creating database tables. */ define( 'DB_CHARSET', 'utf8' ); /** The Database Collate type. Don't change this if in doubt. */ define( 'DB_COLLATE', '' ); /** Filesystem access **/ define('FS_METHOD', 'direct'); /**#@+ * Authentication Unique Keys and Salts. * * Change these to different unique phrases! * You can generate these using the {@link https://api.wordpress.org/secret-key/1.1/salt/ WordPress.org secret-key service} * You can change these at any point in time to invalidate all existing cookies. This will force all users to have to log in again. * * @since 2.6.0 */ define( 'AUTH_KEY', '{{ lookup('password', '/dev/null chars=ascii_letters length=64') }}' ); define( 'SECURE_AUTH_KEY', '{{ lookup('password', '/dev/null chars=ascii_letters length=64') }}' ); define( 'LOGGED_IN_KEY', '{{ lookup('password', '/dev/null chars=ascii_letters length=64') }}' ); define( 'NONCE_KEY', '{{ lookup('password', '/dev/null chars=ascii_letters length=64') }}' ); define( 'AUTH_SALT', '{{ lookup('password', '/dev/null chars=ascii_letters length=64') }}' ); define( 'SECURE_AUTH_SALT', '{{ lookup('password', '/dev/null chars=ascii_letters length=64') }}' ); define( 'LOGGED_IN_SALT', '{{ lookup('password', '/dev/null chars=ascii_letters length=64') }}' ); define( 'NONCE_SALT', '{{ lookup('password', '/dev/null chars=ascii_letters length=64') }}' ); /**#@-*/ /** * WordPress Database Table prefix. * * You can have multiple installations in one database if you give each * a unique prefix. Only numbers, letters, and underscores please! */ $table_prefix = 'wp_'; /** * For developers: WordPress debugging mode. * * Change this to true to enable the display of notices during development. * It is strongly recommended that plugin and theme developers use WP_DEBUG * in their development environments. * * For information on other constants that can be used for debugging, * visit the Codex. * * @link https://codex.wordpress.org/Debugging_in_WordPress */ define( 'WP_DEBUG', false ); /* That's all, stop editing! Happy publishing. */ /** Absolute path to the WordPress directory. */ if ( ! defined( 'ABSPATH' ) ) { define( 'ABSPATH', dirname( __FILE__ ) . '/' ); } /** Sets up WordPress vars and included files. */ require_once( ABSPATH . 'wp-settings.php' ); |
● playbook.yml
This file contains all the tasks defined from this setup. It begins by listing a group of servers that are targeted by this setup. It includes the
vars/default.yml variable file to load configuration options:
|
1 2 3 4 5 6 7 8 9 10 11 12 13 14 15 16 17 18 19 20 21 22 23 24 25 26 27 28 29 30 31 32 33 34 35 36 37 38 39 40 41 42 43 44 45 46 47 48 49 50 51 52 53 54 55 56 57 58 59 60 61 62 63 64 65 66 67 68 69 70 71 72 73 74 75 76 77 78 79 80 81 82 83 84 85 86 87 88 89 90 91 92 93 94 95 96 97 98 99 100 101 102 103 104 105 106 107 108 109 110 111 112 113 114 115 116 117 118 119 120 121 122 123 124 125 126 127 128 129 130 131 132 133 134 135 136 137 138 139 140 141 142 143 144 145 146 147 148 149 150 151 |
--- - hosts: all become: true vars_files: - vars/default.yml tasks: - name: Install prerequisites apt: name=aptitude update_cache=yes state=latest force_apt_get=yes tags: [ system ] - name: Install LAMP Packages apt: name={{ item }} update_cache=yes state=latest loop: [ 'apache2', 'mysql-server', 'python3-pymysql', 'php', 'php-mysql', 'libapache2-mod-php' ] tags: [ system ] - name: Install PHP Extensions apt: name={{ item }} update_cache=yes state=latest loop: "{{ php_modules }}" tags: [ system ] # Apache Configuration - name: Create document root file: path: "/var/www/{{ http_host }}" state: directory owner: "www-data" group: "www-data" mode: '0755' tags: [ apache ] - name: Set up Apache VirtualHost template: src: "files/apache.conf.j2" dest: "/etc/apache2/sites-available/{{ http_conf }}" notify: Reload Apache tags: [ apache ] - name: Enable rewrite module shell: /usr/sbin/a2enmod rewrite notify: Reload Apache tags: [ apache ] - name: Enable new site shell: /usr/sbin/a2ensite {{ http_conf }} notify: Reload Apache tags: [ apache ] - name: Disable default Apache site shell: /usr/sbin/a2dissite 000-default.conf notify: Restart Apache tags: [ apache ] # MySQL Configuration - name: Set the root password mysql_user: name: root password: "{{ mysql_root_password }}" login_unix_socket: /var/run/mysqld/mysqld.sock tags: [ mysql, mysql-root ] - name: Remove all anonymous user accounts mysql_user: name: '' host_all: yes state: absent login_user: root login_password: "{{ mysql_root_password }}" tags: [ mysql ] - name: Remove the MySQL test database mysql_db: name: test state: absent login_user: root login_password: "{{ mysql_root_password }}" tags: [ mysql ] - name: Creates database for WordPress mysql_db: name: "{{ mysql_db }}" state: present login_user: root login_password: "{{ mysql_root_password }}" tags: [ mysql ] - name: Create MySQL user for WordPress mysql_user: name: "{{ mysql_user }}" password: "{{ mysql_password }}" priv: "{{ mysql_db }}.*:ALL" state: present login_user: root login_password: "{{ mysql_root_password }}" tags: [ mysql ] # UFW Configuration - name: "UFW - Allow HTTP on port {{ http_port }}" ufw: rule: allow port: "{{ http_port }}" proto: tcp tags: [ system ] # WordPress Configuration - name: Download and unpack latest WordPress unarchive: src: https://wordpress.org/latest.tar.gz dest: "/var/www/{{ http_host }}" remote_src: yes creates: "/var/www/{{ http_host }}/wordpress" tags: [ wordpress ] - name: Set ownership file: path: "/var/www/{{ http_host }}" state: directory recurse: yes owner: www-data group: www-data tags: [ wordpress ] - name: Set permissions for directories shell: "/usr/bin/find /var/www/{{ http_host }}/wordpress/ -type d -exec chmod 750 {} \\;" tags: [ wordpress ] - name: Set permissions for files shell: "/usr/bin/find /var/www/{{ http_host }}/wordpress/ -type f -exec chmod 640 {} \\;" tags: [ wordpress ] - name: Set up wp-config template: src: "files/wp-config.php.j2" dest: "/var/www/{{ http_host }}/wordpress/wp-config.php" tags: [ wordpress ] handlers: - name: Reload Apache service: name: apache2 state: reloaded - name: Restart Apache service: name: apache2 state: restarted |
You can modify these files as needed to fit your specific needs for the website you are building.
Conclusion
In this tutorial, we demonstrated how you can automate the installation and setup of a WordPress website running on the LAMP stack on the latest Ubuntu operating system with Ansible.
For more guides on working with Ansible, you can check out the following tutorials on our blog:
- Using Ansible with CloudSigma
- Automating Server Setup using Ansible and Ubuntu 20.04
- Installing and Configuring LAMP on Ubuntu 20.04 with Ansible
Happy Computing!
- How to Deploy WordPress with Persistent Volume on Kubernetes Cluster - March 17, 2023
- Deploying Applications on Kubernetes Using Argo CD and GitOps - October 26, 2022
- Using Node.js Modules with npm and package.json: A Tutorial - October 6, 2022
- Using Ansible to Install and Configure WordPress with LAMP on Ubuntu - September 23, 2022
- Creating Views in the Django Web Application Framework - September 22, 2022