

React is one of the most popular JavaScript libraries for developing front-end apps. It’s an open-source library that was originally developed by Facebook. React quickly became popular for creating fast applications with JSX – a programming paradigm that combines JavaScript with an HTML-like syntax.
Previously, setting up a React project would have been a complex process. It required configuring the following components manually:
- A build system
- Code transpiler (converts modern syntaxes into browser-readable codes)
- The base directory structure for the project
Thankfully, those days are long gone, thanks to the Create React App. It’s a wonderful tool that automates all of these steps. Create React App takes care of code transpiling, linting, testing, and building systems. In addition, it comes with a server that supports hot reloading, which means refreshing the web pages as changes are made. Of course, all of these are done within an organized directory structure.
In short, no need to go through the manual labors of configuring build systems like Webpack, or transpiler like Babel. With fewer things to worry about, you’re free to fully focus on the front-end development. Create React App allows you to get started with React with minimal preparation.
In this guide, we’ll showcase how to use Create React App and have a basic React application up and running. It can serve as the foundation for any future application project.
Prerequisites
To perform the steps demonstrated in this tutorial, you’ll need the following software configured prior.
-
- A properly-configured Ubuntu server. You can follow the steps of configuring an Ubuntu server on CloudSigma.
- The latest version of Node.js installed. Here is a step-by-step guide on installing Node.js on Ubuntu.
Step 1: Create a Dedicated npm Project Directory
For Node.js packages, npm is the default package manager. We’ll use npm to create a dedicated project directory. It will host important files like package.json that store all the metadata about the project and additional Node.js dependency modules. JSON is a standard format of data sharing based on JavaScript objects. Refer to this guide if you want to learn more about JSON.
First, create a dedicated directory:
|
1 |
mkdir -pv cloudsigma-node-tutorial |
Next, we’ll tell
npm to initiate a development environment inside the file. It will create the
package.json file needed for the project. Change the current directory:
|
1 |
cd cloudsigma-node-tutorial/ |
Run the
npm init command:
|
1 |
npm init |
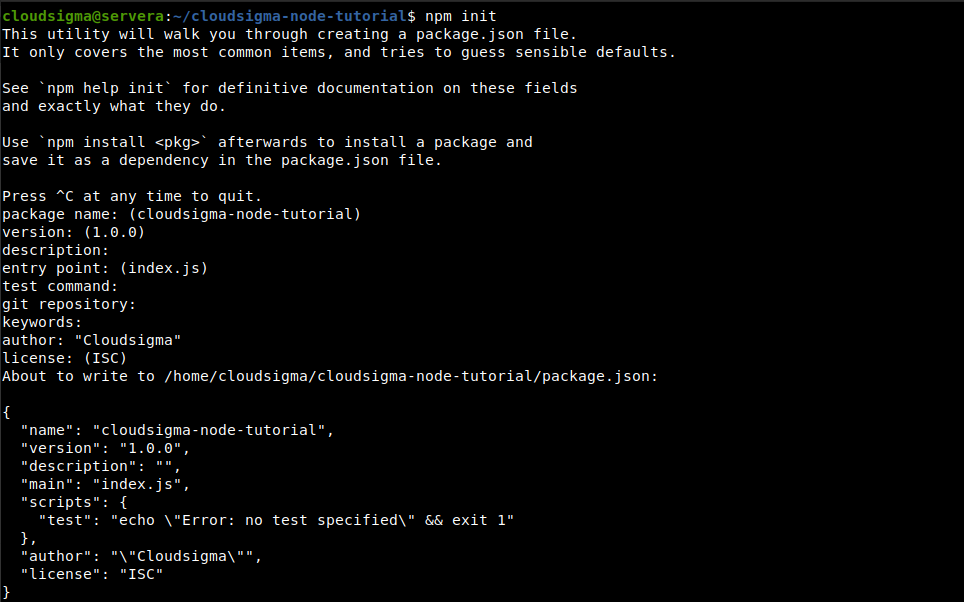
Note that if you want this directory to be part of a git repo, then it’s recommended to set it first. The initialization script will automatically detect it and configure everything accordingly. Once finished, there should be a
package.json file in the directory. Check it out with a text editor:
|
1 |
nano package.json |

Step 2: Create a React Project with Create React App
In this step, we’ll invoke the Create React App to establish our sample React project. This script will copy everything necessary into a new directory along with all the dependencies. The npm package manager also comes with the tool npx. It’s used to run executable packages. We’ll use it to run the Create React App script without actually downloading the project.
The execution will run
create-react-app on the directory specified. It will also run
npm install commands to install the dependencies. For ease of use, we will be using the name
cloudsigma-react-react-tutorial. Run the following command:
|
1 |
npx create-react-app cloudsigma-react-tutorial |
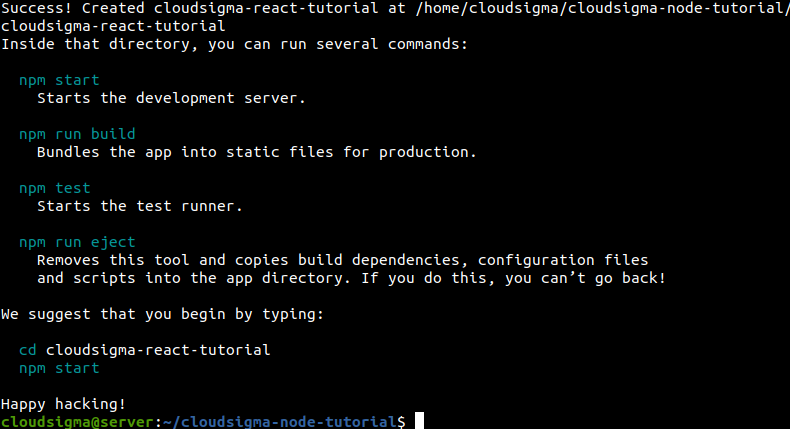
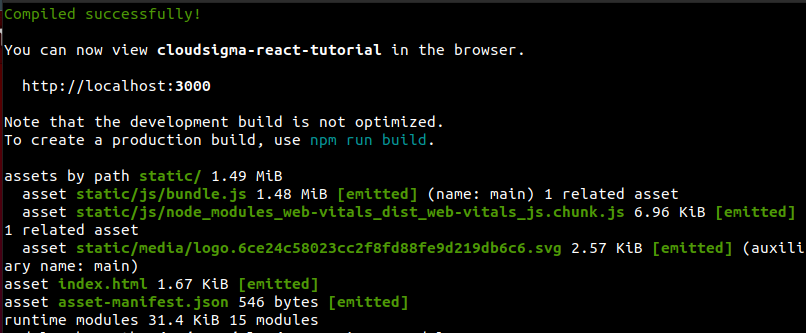
At the end of the process, you’ll see the following notice. It’s the success message if the installation went successfully. It also reports the location where the project was created.
Step 3: Apply React-Scripts
Now, we’ll have a brief overview of the various react-scripts that were installed during the installation.
-
- We’ll run the test script to execute the test code.
- The build script will create a minified version of our project (for the production environment).
- Finally, the eject script offers complete control over customization.
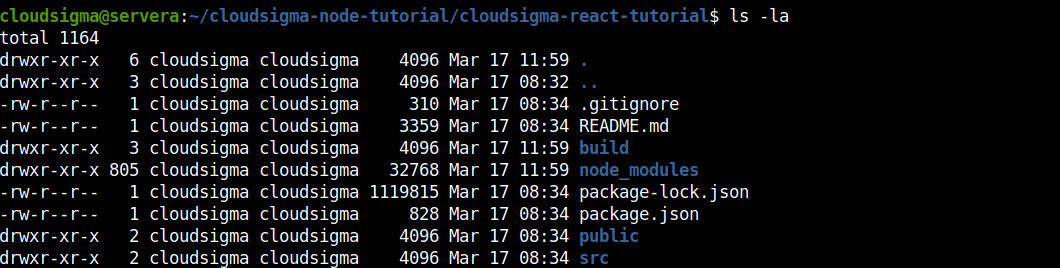
First, check the content of the React project directory:
|
1 |
ls -la |
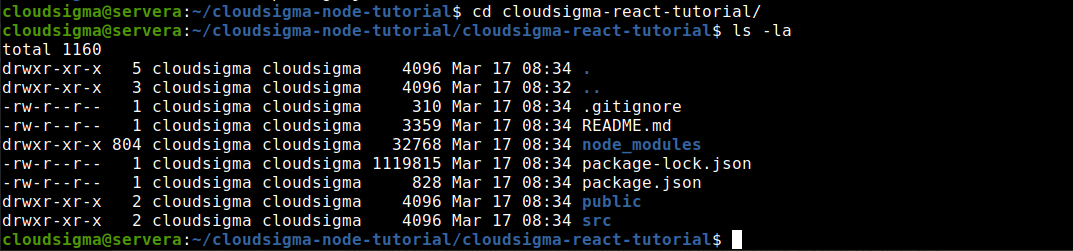
Here is a description of each file:
-
- node_modules/: This directory contains all the external JavaScript libraries to be used by the app. It’s rarely necessary to tinker around here.
- public/: It hosts some base HTML, JSON, and image files. It serves as the root of the project.
- src/: This directory contains the React JavaScript codes for our project. This is where we’ll spend most of our time. We’ll explore this directory further in the next part of the guide.
- .gitignore: It’s a file that describes what directories git will ignore, for example, the node_modules directory. Generally, it’s better to exclude directories that contain large files or host log files that aren’t necessary to be included in version control. In this case, it will also include some React-specific directories.
- README.md: It’s a markdown file containing lots of useful info about Create React App. For example, it includes a summary of commands links for advanced configuration. For now, we don’t have business with it. However, as the project progresses, you’ll add more documentation about the project.
The files package.json and package-lock.json are used by npm. When running the initial npx command, it created the base project. When the additional dependencies were installed, it created package-lock.json. npm uses package-lock.json to ensure that packages are matching the exact versions. This way, if someone else installs your project, they also get identical dependencies. As it’s created and managed automatically, you rarely need to touch it.
The last file we need to talk about is
package.json. It contains metadata about the project. For example, the metadata could entail a project title, version number, and dependencies. It also includes the scripts you can use to run the project. Check out the content of the
package.json file:
|
1 |
nano package.json |
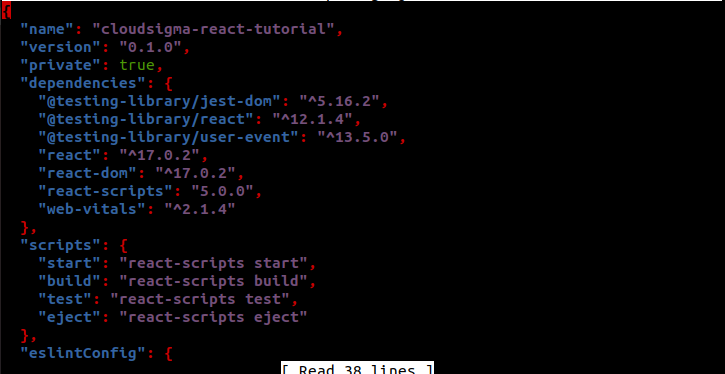
It’s a JSON file with various objects. Have a look at the object scripts. It contains four different scripts:
-
- start
- build
- test
- eject
These scripts are listed according to their importance. The start script initiates the local development server. Next, we will elaborate on how you can use the rest of the scripts.
-
-
The Build Script
-
For running an
npm script, the command structure is as follows:
|
1 |
npm run <script_name> |
To run the
build script, use the following command:
|
1 |
npm run build |

It will start the process of compiling the codes into a usable bundle. Once finished, check out the output directory:
|
1 |
ls -la |
Notice that there’s a new directory build/ available. It contains a minified and optimized version of the other files. It’s recommended to put it in the .gitignore file as we can always generate it using the build script.
-
-
The Test Script
-
The test script is one of those scripts that don’t require the run parameter for npm to run it. However, it will still work fine with it. When run, this script will start a test runner called Jest. The tester searches for any project file with file extensions .spec.js or test.js and runs those files.
The following
npm command will run the
test script:
|
1 |
npm test |

There are a few things to note in the output. Remember that the test runner only looks for files with specific extensions? In this case, there’s only a single test suite (only one file with .test.js extension). It only contains a single test. Jest can auto-detect tests in the code hierarchy, so you’re free to nest tests in a directory.
In addition, Jest doesn’t just run the test once and exists. It keeps running the test in the terminal. If any changes were made to the source code, it will rerun the tests again. Jest also allows limiting which tests to run. For example, by pressing 0, you can tell Jest to test only those files that were changed. As test suites grow, this option saves a lot of time. To exit the Jest test runner, press q.
-
-
The Eject Script
-
The eject script copies all the dependencies and configuration files into the project, offering you full control over the code. By doing so, however, you remove the project from the Create React App integrated toolchain. Once run, there’s no way to undo it.
The benefit of Create React App is, it takes the burden of numerous configurations. Building any modern JavaScript application requires lots of tools working in conjunction. Create React App handles all the configurations for you, so ejecting the project means you have to do all of it manually after that.
One noticeable downside to Create React App is that because it manages all the configurations by itself, it doesn’t offer full customization of the project. For most projects, that’s not an issue. However, if you want to take full control of the project, then you’ll have to eject the code. Once ejected, you won’t be able to update to new versions of Create React App. You have to manually manage all the enhancements.
Step 4: Server Start
Now, we’ll initiate the local server and run the project on a web browser. To start the server, we have another script at hand. Executing it doesn’t require the
npm run command. When run, the script starts a local server, runs the project code, launches a watcher, and listens for code changes. The changes are directly shown on the browser. The following command will start the server:
|
1 |
npm start |
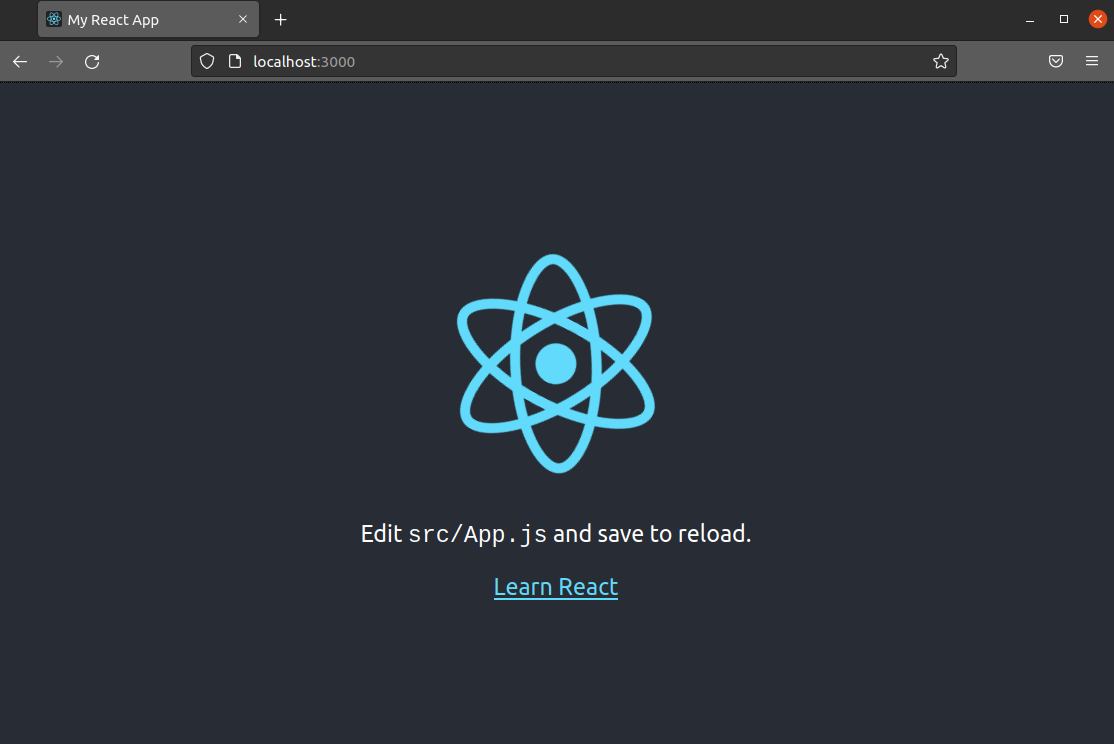
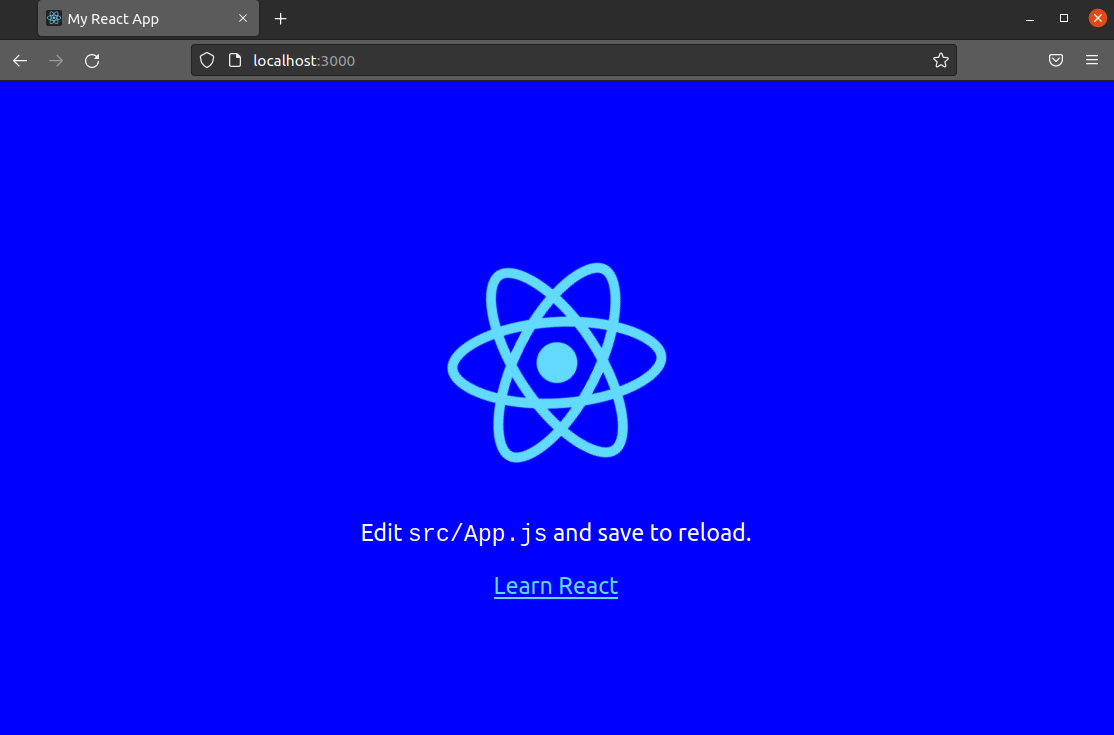
The output will show the URL to visit the project in a browser. It will also show various info about the running project. Open the URL in a browser:
|
1 |
https://localhost:3000 |
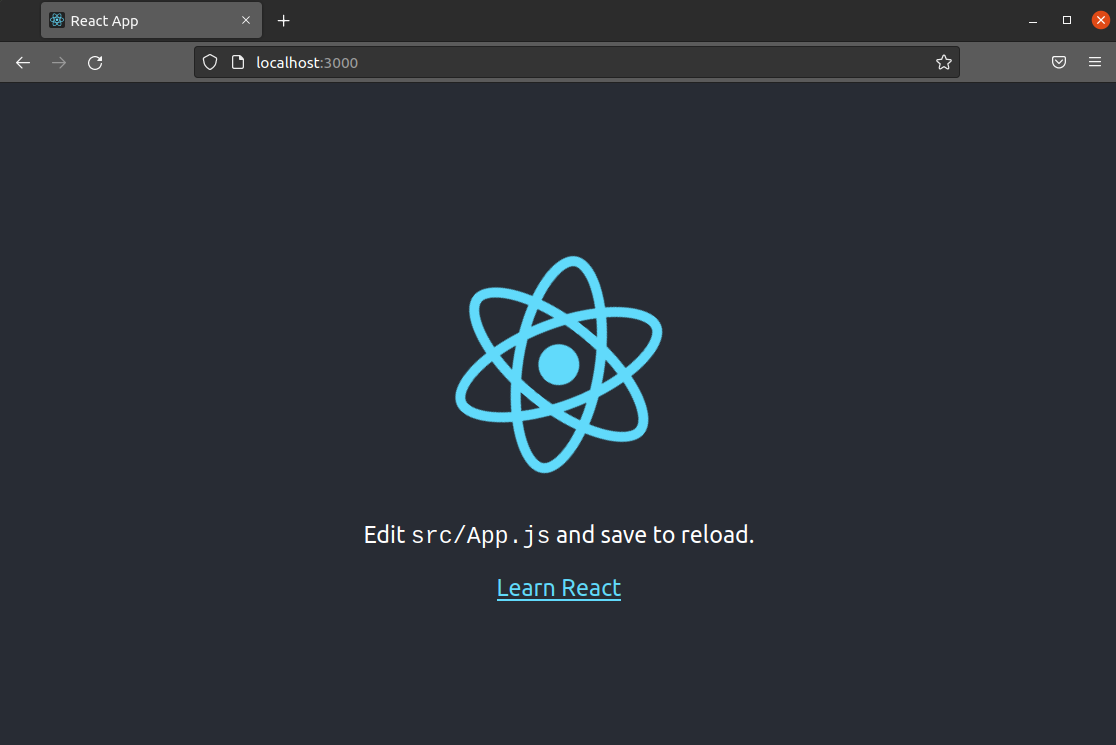
As the output shows, Create React App uses port 3000 to serve the project. If the port was already in use, then Create React App will use the next available port. If you have a firewall configured, then it must allow traffic to port 3000 (or the port Create React App reports). You can learn more about managing the UFW firewall here.
To exit the server, press Ctrl+C from the terminal window. It will terminate the running process (the server instance).
Step 5: Homepage Modification
Next, we’ll learn how to modify codes stored in the public/ directory. It contains the base HTML page and serves as the root of the project. While you may not need to edit it further in the future, it serves the base of the project.
First, launch the server with
npm, then move to the
public/ directory:
|
1 2 |
cd public/ ls -l |

The directory will contain files like favicon.ico, logo192.png, logo512.png, etc. These are icons that a user visiting the webpage would see on their tab, browser, or phone. The browser will automatically select the proper-sized one. Eventually, you’ll replace them with icons suitable for your project. For now, we’ll leave them be.
The file manifest.json hosts a structured set of metadata. It describes the project, lists available icons, and more.
The file robots.txt hosts info for web crawlers. Web crawlers “crawl” across the World Wide Web, indexing pages for search engines. There’s no need to tweak the file unless you have a specific reason to. For example, you may want to make certain URLs to specific content not easily accessible. Add the location to robots.txtand it won’t be indexed by search engines.
The file
index.html is the root of our application. Whenever accessing the app, this is the file that gets served. This is the file you see on the display. Let’s have a quick look at it. Open it up in a text editor:
|
1 |
nano public/index.html |
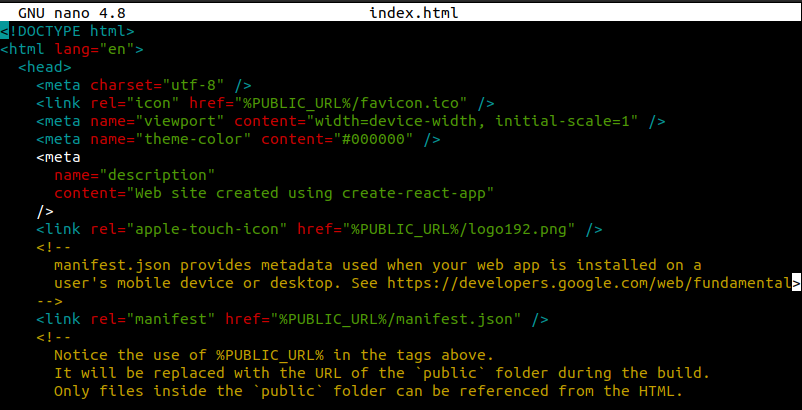
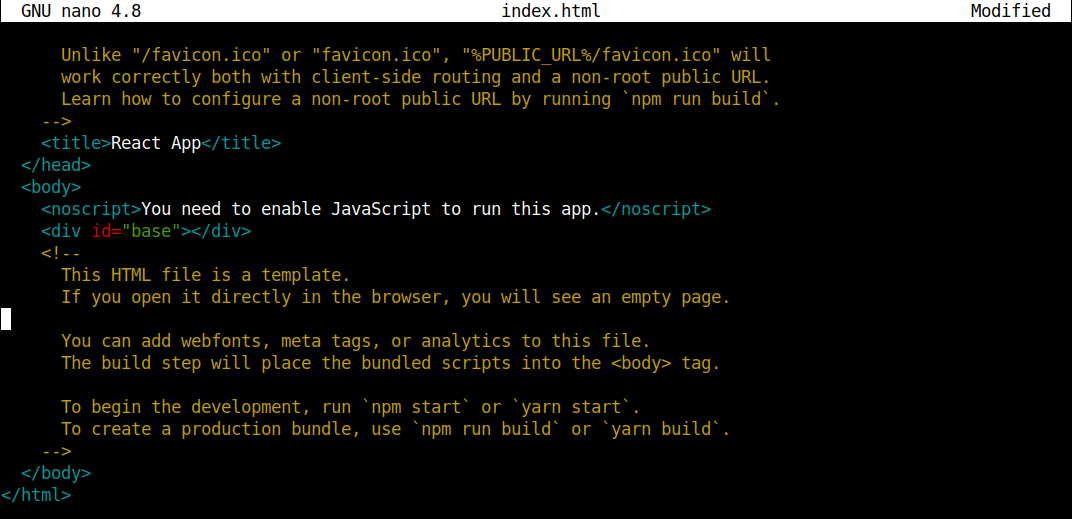
It’s a pretty short file. Note that there’s no image or words in the <body>. React builds those contents using its own engine and injects it using JavaScript. However, React needs to know where to inject the code. The file index.html serves the purpose.
Let’s change the
<title> to
My React App:
|
1 |
<title>My React App</title> |

Then, save the file and close the editor. Now, check the webpage in the browser:
As you can see, the title of the tab is changed to My React App. If it didn’t change automatically, then reload the page by pressing F5 or Ctrl+R.
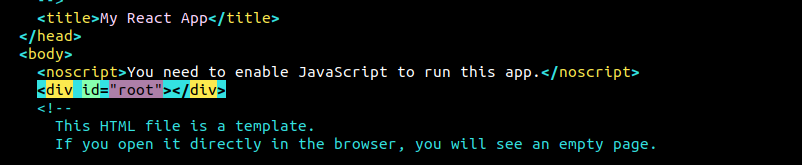
Let’s head back to the text editor. All React projects must start from a root element. There can be more than one on a single page. However, at least one is compulsory. It tells React where to put all the HTML codes generated. In our index.html, find the location of the element <div id="root">. It’s the <div> that React will use for future changes. Try to change the id value from root to base:
After that, reload the page on the browser. It will show no content. As the Web Developer Tools of Firefox shows, it throws an error:
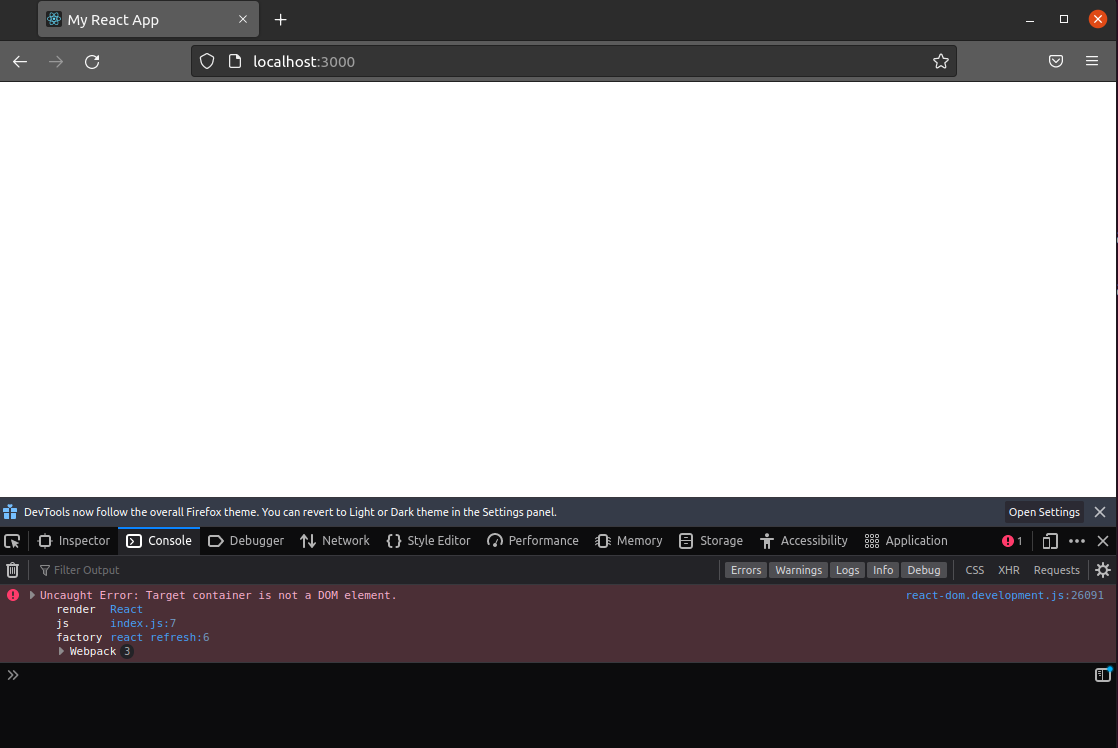
Head back to the text editor and change the value of id back to root:
Step 6: Heading Tag and Styling Changes
So far, we’ve started the local server and made small changes to the root HTML file. Now, we’re going to work with the React components located in the src/ directory. We’ll make changes to the CSS and JavaScript code. The changes will be automatically applied using hot reloading.
If the server was stopped, start it using
npm. Then, have a look at the contents of the
src/ directory:
|
1 |
ls -l src/ |
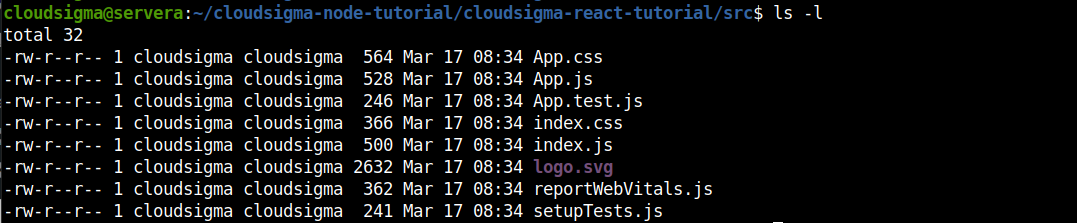
There are multiple JavaScript and CSS files here. We’ll go over them one by one.
-
ServiceWorker.js
It’s an important file if you want to make progressive web applications. This service worker offers various functionalities like push notifications, offline caching, etc. For now, we’ll leave it be.
-
SetupTests.js and App.test.js
As the naming of these files suggests, they are used for testing files. Whenever we ran the test script using npm, it ran these files. The file setupTests.js contains a few customs expect methods.
Let’s have a look at
App.test.js. Open it up in a text editor:
|
1 |
nano src/App.test.js |
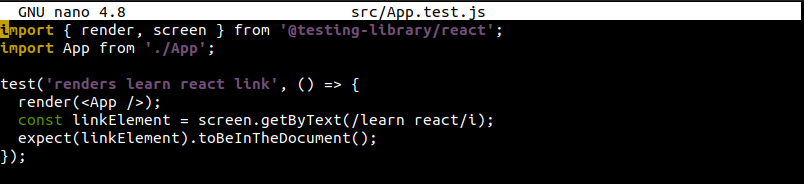
It contains a basic test that looks for the phrase learn react to be present in the document. If you have the browser tab open, you can see the phrase on the page. Unlike other unit testing, React tests are different. Because components can include visual info like markup (and logic for data manipulation), traditional unit testing doesn’t work easily. In that regard, React testing is better described as a form of functional or integration testing.
-
CSS Files
There are various styling files available: App.css, index.css, and logo.svg. You can follow multiple methods to style in React. The easiest way is to write plain CSS as there’s no additional configuration required.
You’re allowed to directly import CSS into a component. This allows for splitting the CSS files to only apply to an individual component. You’re not actually separating the CSS from the JavaScript. Rather, you’re grouping all the relevant components (CSS, JavaScript, images, and markup) together.
Open
App.css with a text editor:
|
1 |
nano App.css |
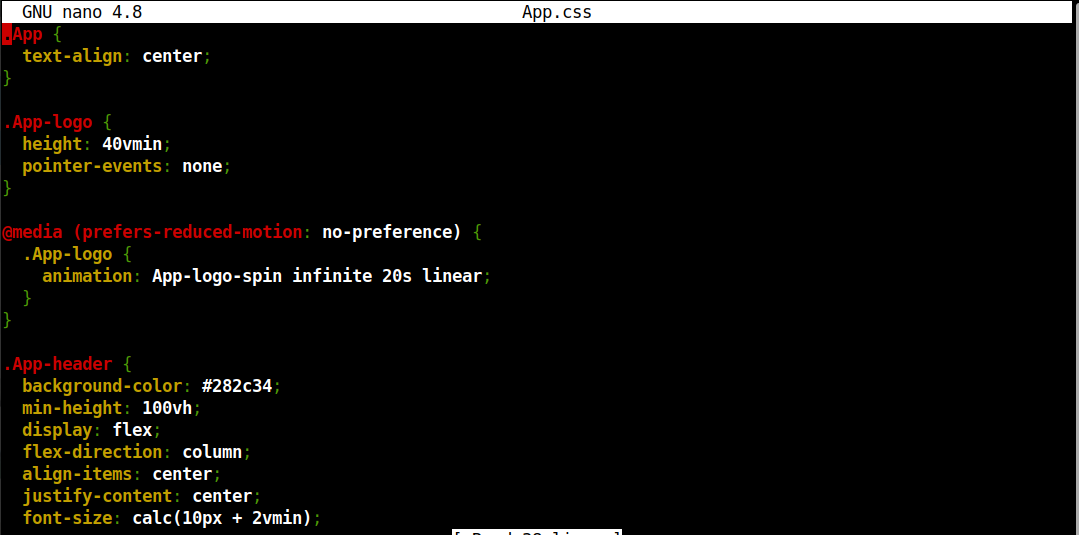
It’s a standard CSS file with no special CSS preprocessors. You can add them later if you want. Create React App strives to be neutral while offering a solid out-of-the-box experience.
Let’s make a change and see it in action. Change the value of the
background-color to
blue:
|
1 |
background-color: blue; |
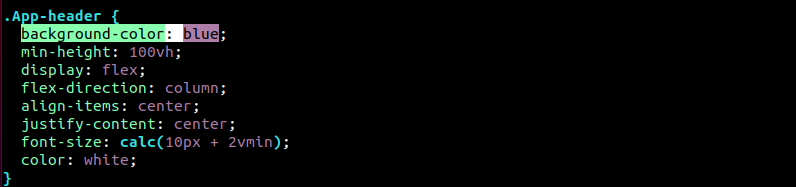
Check the change on the browser:
-
-
Index.js
-
Now, it’s time to make changes to the React JavaScript code. Open
index.js using a text editor:
|
1 |
nano src/index.js |
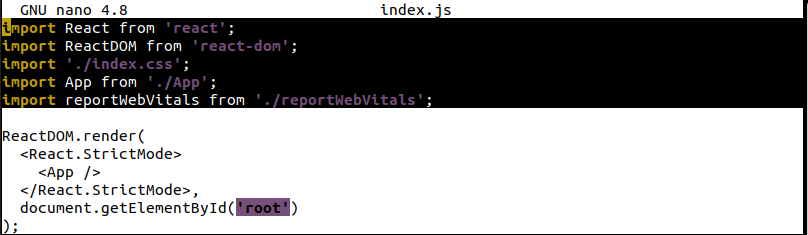
At the top, it’s importing
React,
ReactDOM,
index.css,
App, and
serviceWorker. By importing
React, we’re pulling the code needed to convert JSX to JavaScript.
ReactDOM is the code that connects our React code to the base element (
index.html, for example). Look at the following line:
|
1 |
ReactDOM.render(<App />, document.getElementById('root')); |
It’s instructing React to find an id by the label root and inject the React codes there. <App/> is the root element and everything branches out from there.
Notice that we also imported CSS files (like index.css) but didn’t actually do anything with it. By importing, we’re actually telling Webpack via the React scripts to include the CSS codes into the final compiled bundle. Otherwise, the CSS styles won’t show up.
-
App.js
Next, we’ll have a look at
App.js. Open it up in a text editor:
|
1 |
nano src/App.js |
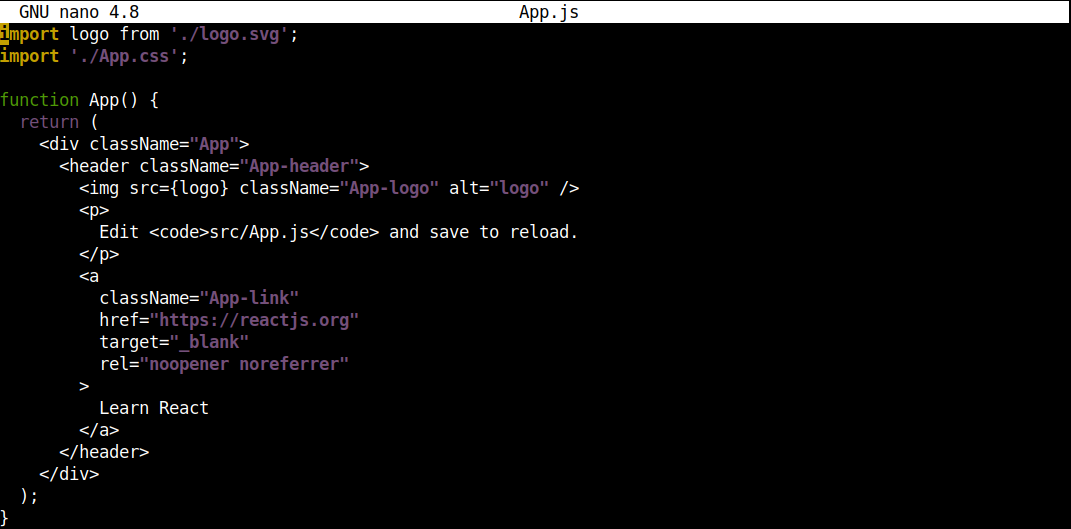
Let’s see how changing its content affects our project. Change the content of the <p>tag:
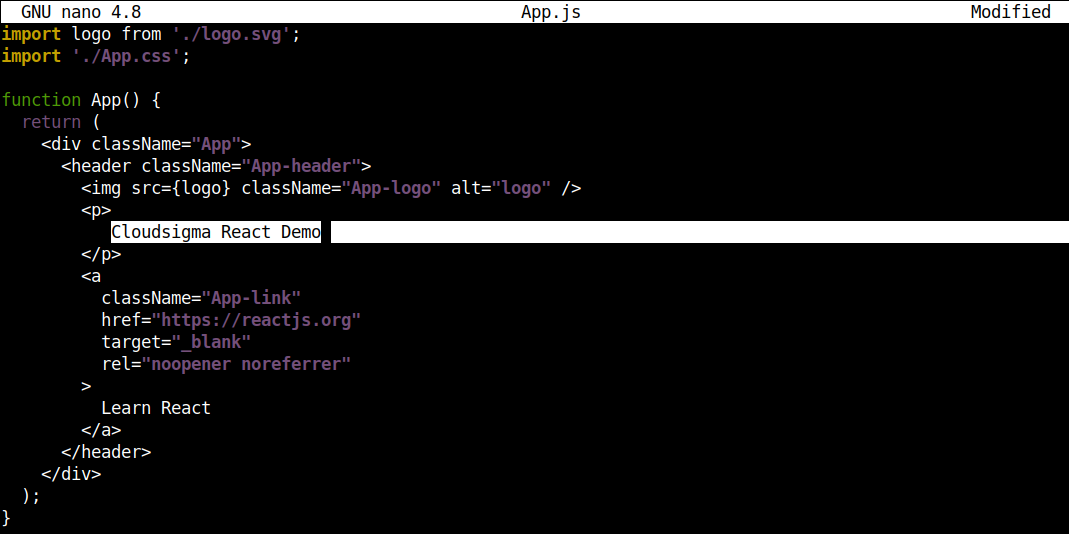
Then, save the file and check the browser for changes:
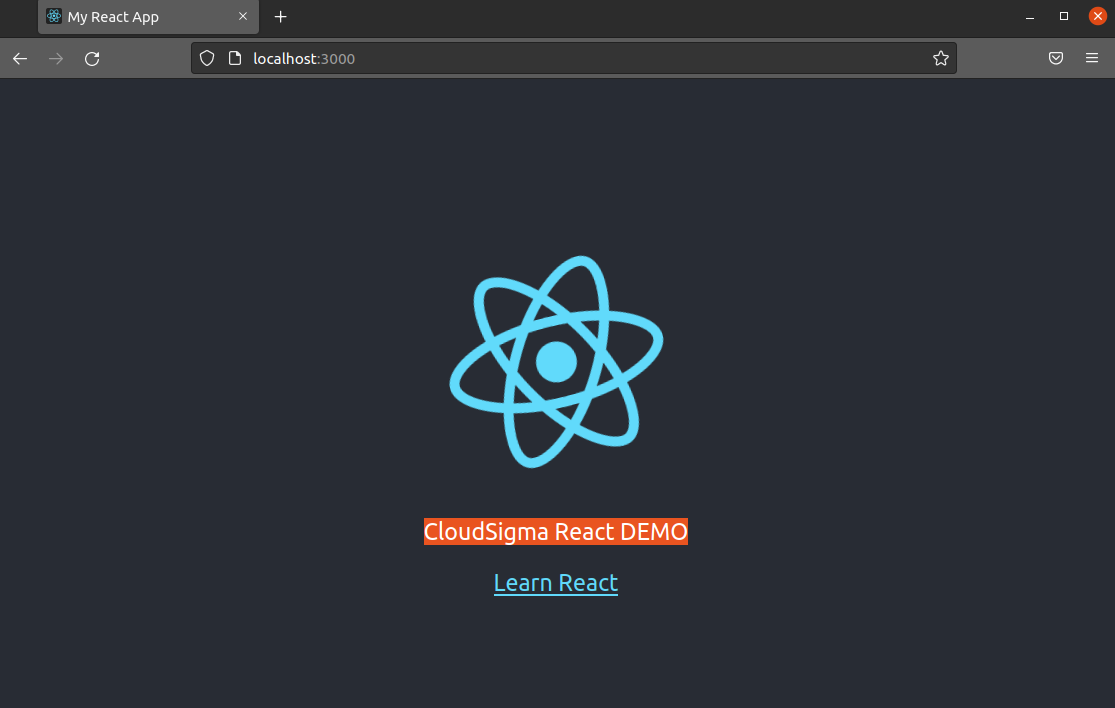
Voila! You’ve made your first React component tweaks!
There’s one more thing to notice. Look at the element
<img>:
|
1 |
<img src={logo} className="App-logo" alt="logo" /> |
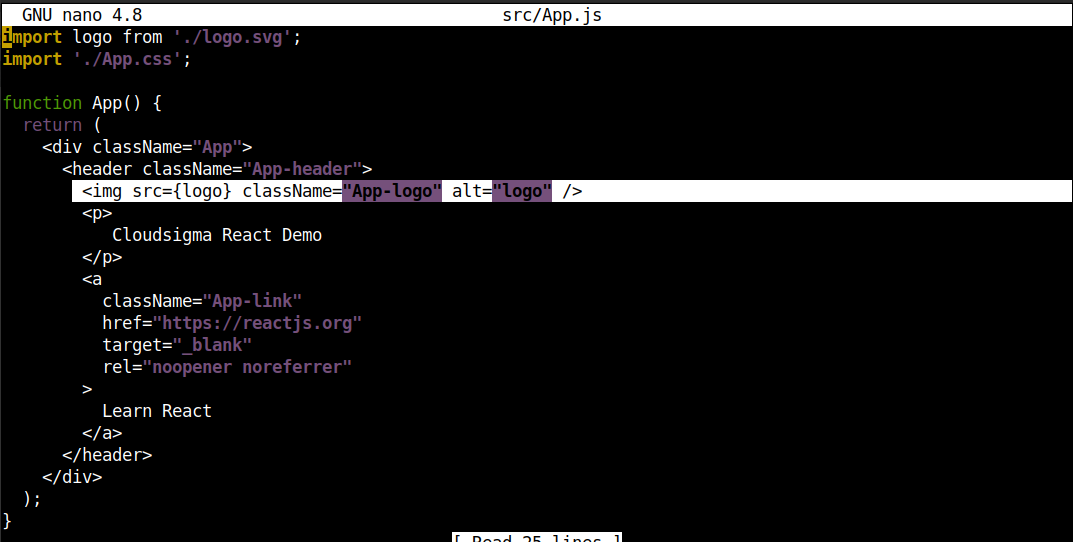
Notice that the logo is passed into curly braces. Whenever passing attributes (that are not strings or numbers), they have to be passed into curly braces. Then, React will treat them as JavaScript objects instead of strings.
In this case, the app isn’t actually importing the image. Instead, it’s a reference to the image. When Webpack builds the project, it puts the image in the appropriate position. We can verify it in the browser. Open the Web Developer Tools in Firefox:
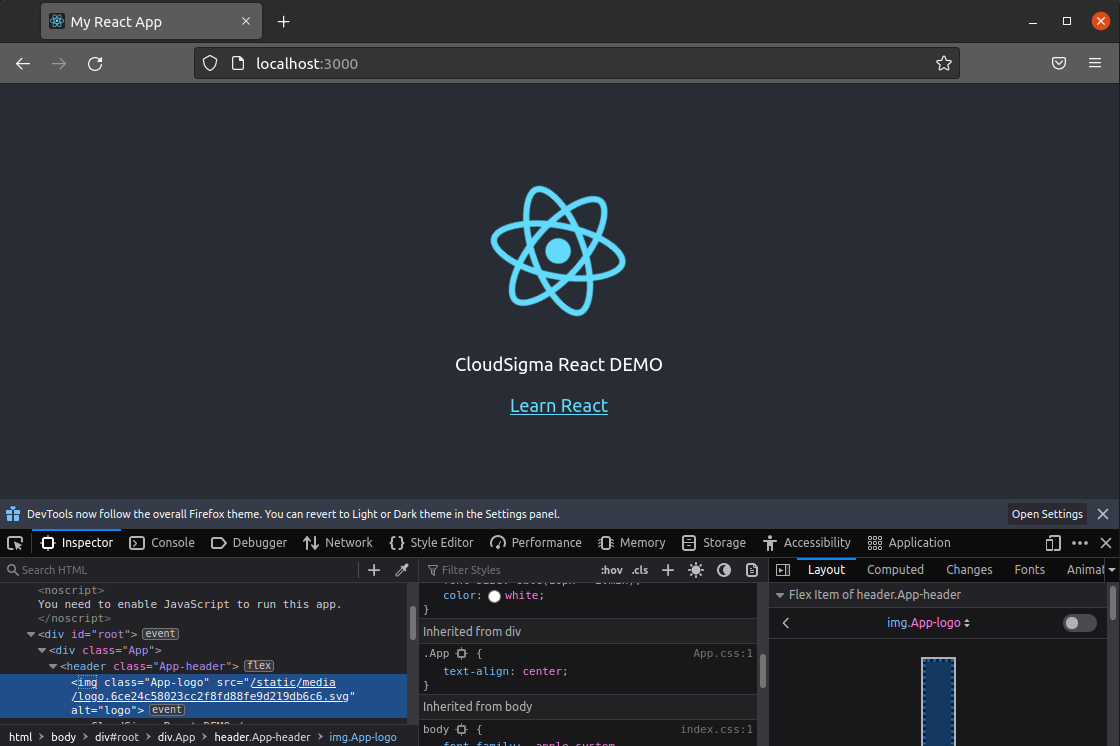
Webpack wants to assign unique file paths for all images. So, even if the images were imported with the same name, they’ll have different paths.
Step 7: Project Building
In this step, we’ll learn how to compile the project into a deployable package. Launch the terminal and run the build script of the project:
|
1 |
npm run build |
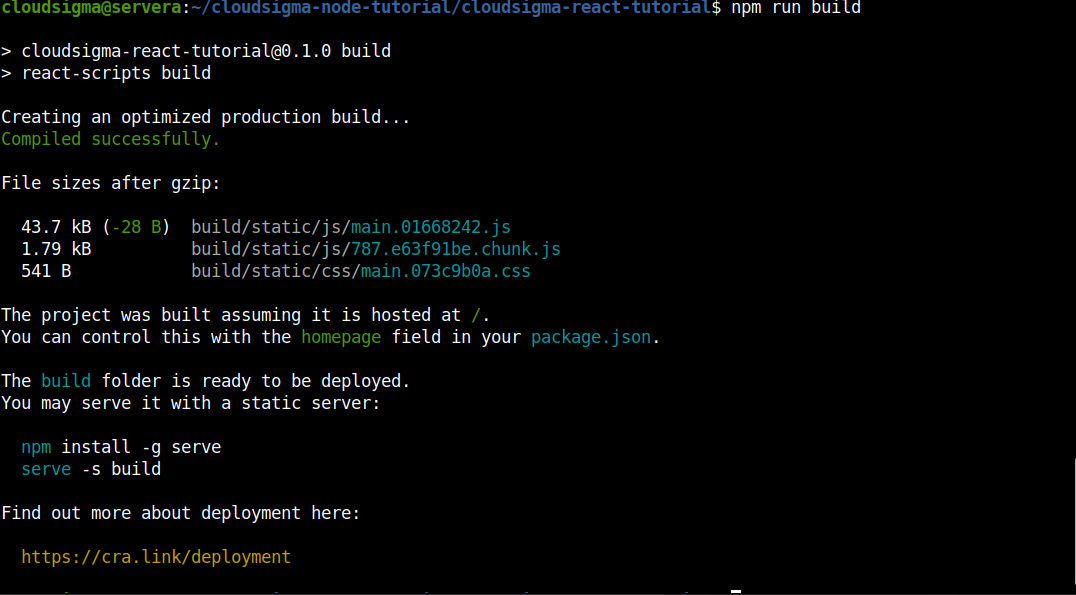
The compiler will create the dedicated directory build/where it will put the output. To see what the compilation process does, open up the index.html file from the build/directory:
|
1 |
nano build/index.html |

As you can see, all the codes are compiled and minified into the smallest usable state. Readability isn’t a concern as it’s not the public-facing piece of code. Minified codes take up less space while retaining all of their functionalities. Unlike languages where whitespace is very important (Python, for example), web languages (HTML, CSS, and JavaScript) don’t require proper spacing for the browser to interpret it.
Final Thoughts
In this guide, we’ve successfully demonstrated how to create a React application. We also showed some basic configurations using JavaScript build tools without complex technical details. This is the key value that the Create React App offers. You don’t have to know everything to get started with React. You’re allowed to not learn the complicated build steps while focusing on the React code exclusively.
Here, we’ve also demonstrated how to start, test, and build a React project. These commands are quintessential for projects of all sizes.
Happy Computing!
- How To Enable, Create and Use the .htaccess File: A Tutorial - March 8, 2023
- An Overview of Queries in MySQL - October 28, 2022
- Introduction to Cookies: Understanding and Working with JavaScript Cookies - October 25, 2022
- An Overview of Data Types in Ruby - October 24, 2022
- The Architecture of Iptables and Netfilter - October 10, 2022