

When it comes to securing your footprint on the web, you may have heard about VPNs, right? VPN acts as a middleman between your computer and the internet. All the traffic passes through the VPN server, effectively masking your IP address and location.
However, VPN isn’t the only form of a proxy server. SOCKS (Socket Secure) is a similar network protocol that allows communicating with servers through a firewall by routing the network traffic on behalf of a client. Compared to VPN, SOCKS offers more flexibility and control over the network configuration. It’s useful when you can’t install the VPN client or don’t trust a VPN provider.
This guide will demonstrate how to establish an SSH SOCKS 5 proxy tunnel and route your web traffic through the tunnel.
Prerequisites
For demonstration, we used a local machine running Ubuntu desktop and a remote machine running Ubuntu server. You need to have SSH configured prior to making it work smoothly. As we’re using SOCKS proxy, to test the connection, we need an app that can use it. Firefox is a perfect example. It’s a modern-day web browser that supports the SOCKS 5 proxy tunnel.
If you’re on Windows, then you either use WSL (Windows Subsystem for Linux) to set up a local Linux environment or use PuTTY, an open-source app that can implement various network protocols like Telnet, rlogin, etc.
Configuring the SOCKS Tunnel
-
Setting up the SOCKS tunnel (macOS/Linux)
On the local computer, we need to configure an SSH key to ensure a secure connection. The SSH key must also be registered to the remote system. This guide on configuring SSH key-based authentication demonstrates the process in detail.
The following SSH command will establish a SOCKS tunnel to the remote server:
|
1 |
ssh -i ~/.ssh/id_rsa -D 2000 -f -C -q -N <remote_username>@<remote_server> |

Let’s break down the command:
-
-i: It tells SSH which SSH key to use for the connection.
-
-D: It tells SSH that we want to establish a SOCKS tunnel. As for the port, we are using port 1024. It’s not a fixed value. You can choose any port between 1024 and 65536.
-
-f: The SSH process will be forked in the background.
-
-C: SSH will compress the data before sending it to the remote server. It can save both data consumption and increase effective bandwidth.
-
-q: Run the tool in quiet mode.
-
-N: It tells SSH that after establishing the tunnel, no command will be sent.
Once run, we can verify if the process started properly. The following command will print info about all the running SSH processes:
|
1 |
ps aux | grep ssh |

Now, you can safely close the terminal window. The SSH process will function as intended from the background.
-
Setting up SOCKS tunnel (Windows)
For Windows users, using PuTTY is an easier solution. First, you need to download PuTTY:
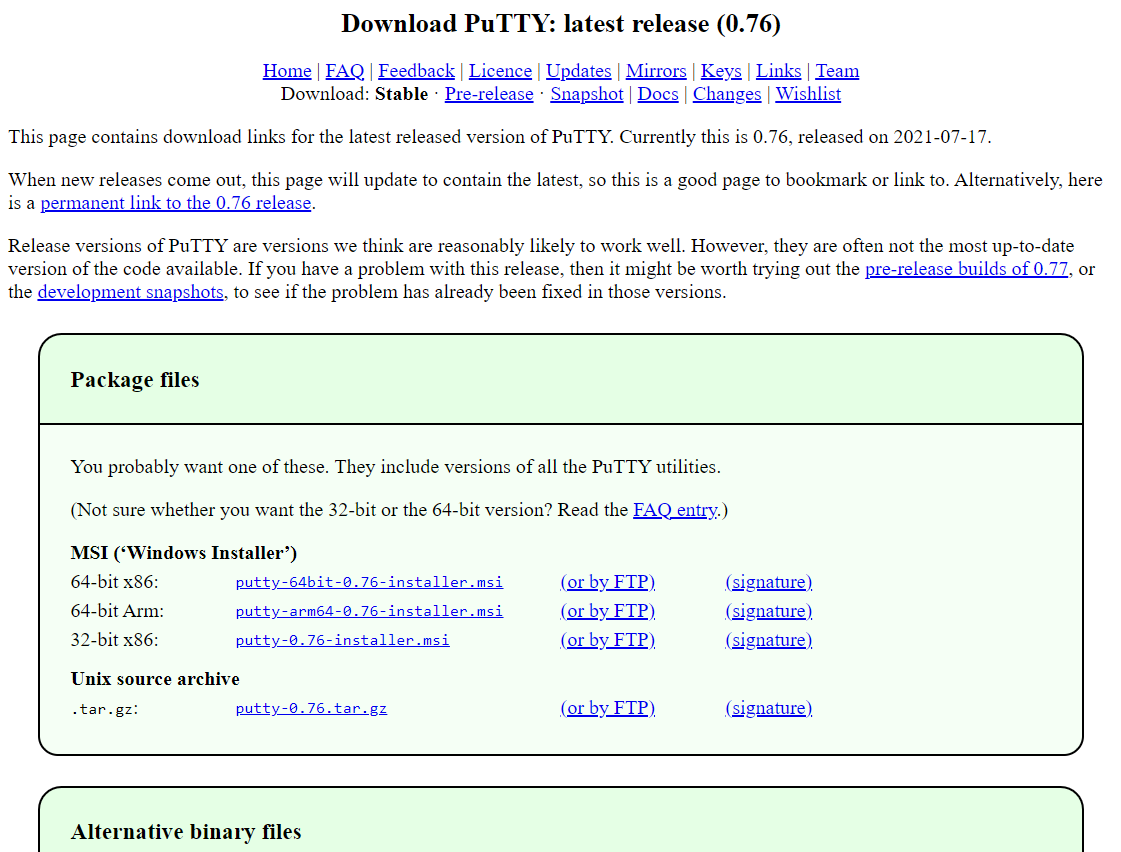
Once installed, launch PuTTY:
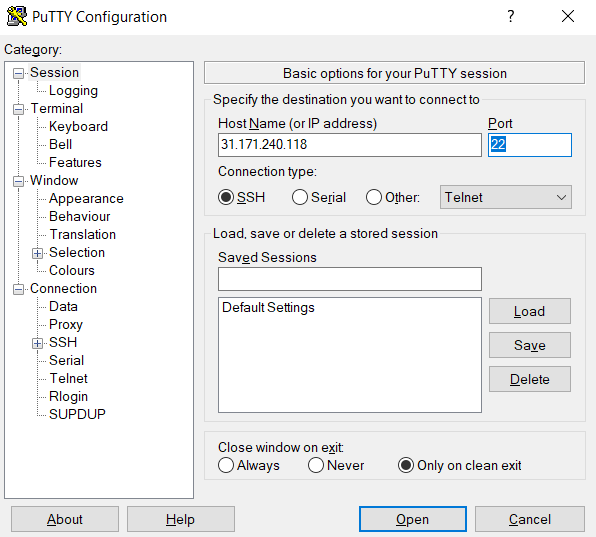
From the Session tab on the left panel, enter the Host Name (or IP address) of your server. As for the Connection type, select SSH. Next, go to Connection >> SSH >> Tunnels. Here, under the Destination field, select the options shown in the screenshot:
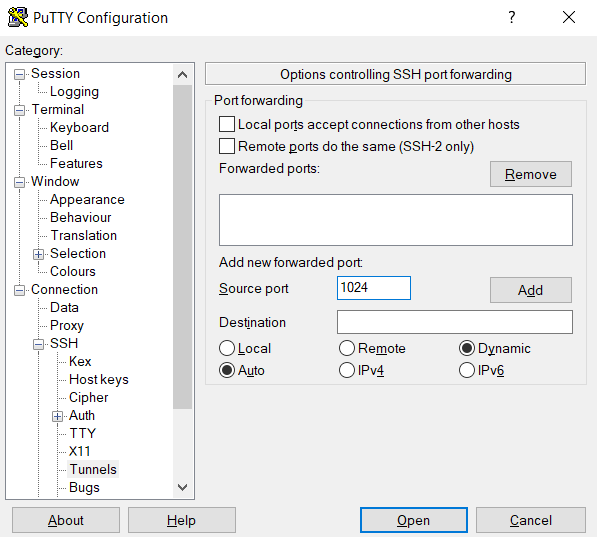
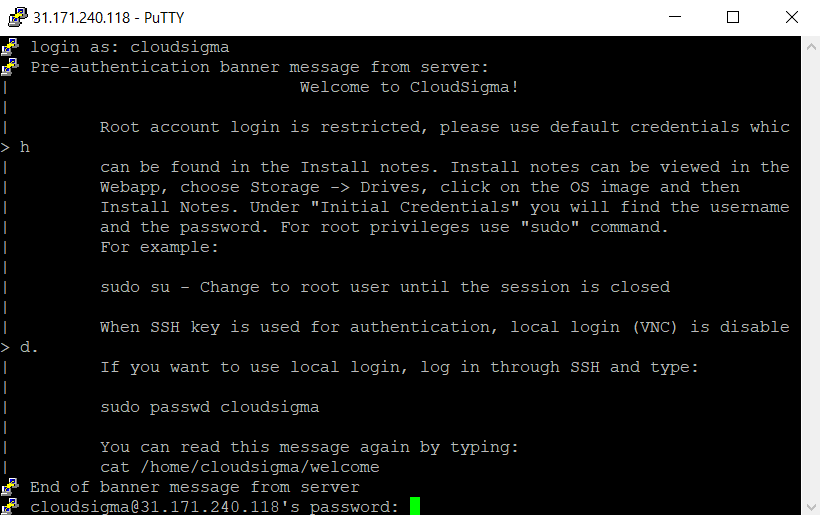
Next, click Open. A terminal window will pop up to connect to the remote server via SSH. Log in to the remote server:
Implementing the SOCKS Tunnel
The tunnel is now set. Any app supporting SOCKS can use the tunnel. For demonstration, Firefox is a great example.
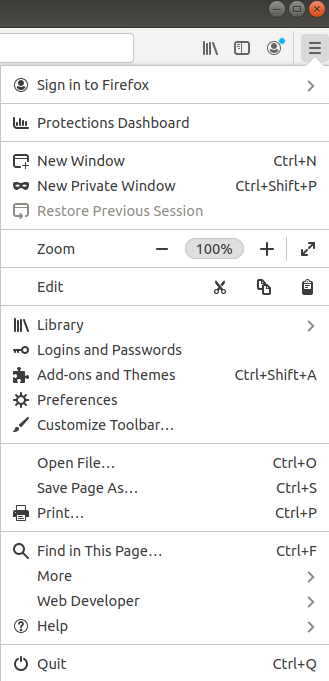
First, open Firefox. From the top-right corner, click the menu icon. Go to Settings:
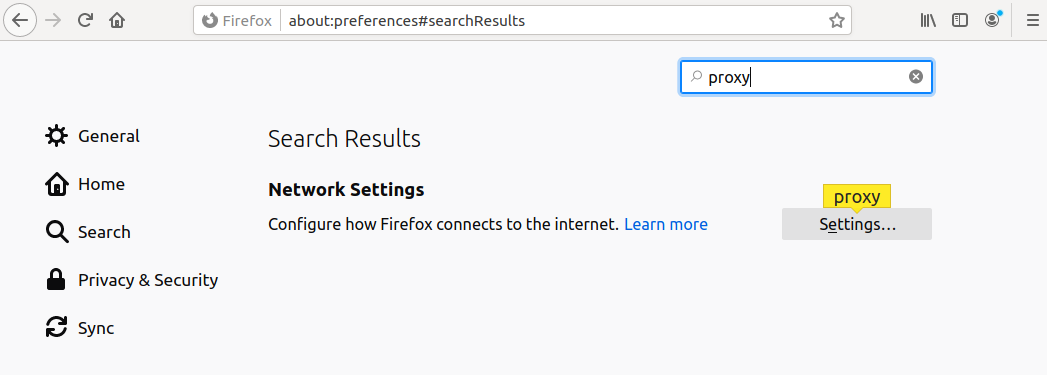
Next, search for proxy. Click Settings on Configure how Firefox connects to the internet:
After that, select Manual proxy configuration. As for the SOCKS Host, use localhost or 127.0.0.1. Then, for the port, enter the port we dedicated for the SOCKS tunnel. Don’t forget to select SOCKS_v5:
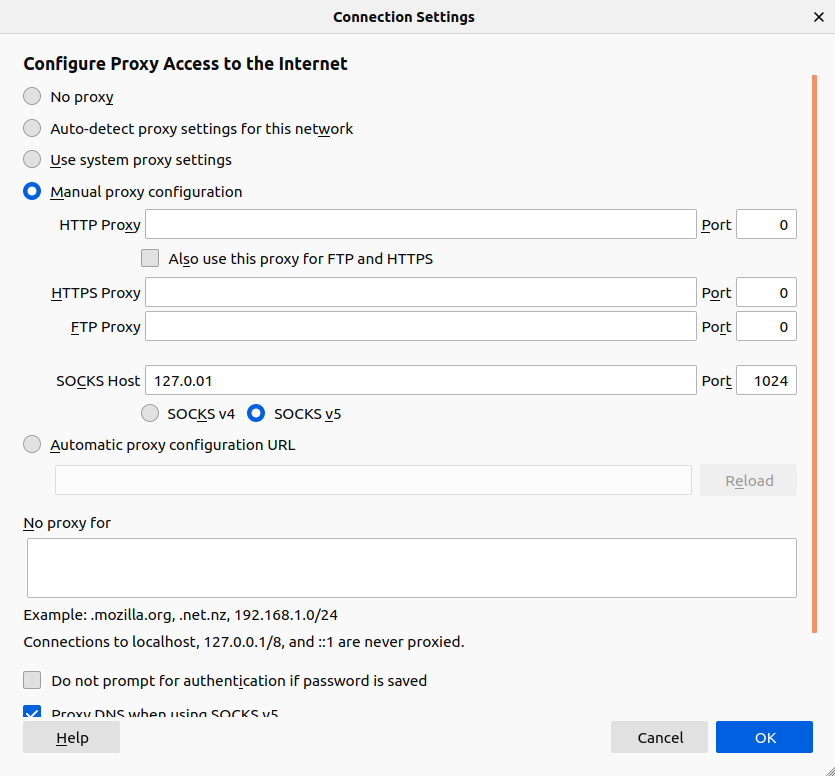
Lastly, check the option Proxy DNS when using SOCKS_v5. Click OK to continue.
Next, open a new tab and try accessing any webpage. For example, you can check your IP address from CheckMyIP.
Reverting the Proxy
When you no longer need the proxy connection to the SSH tunnel, you can safely disable it from the Firefox proxy settings:
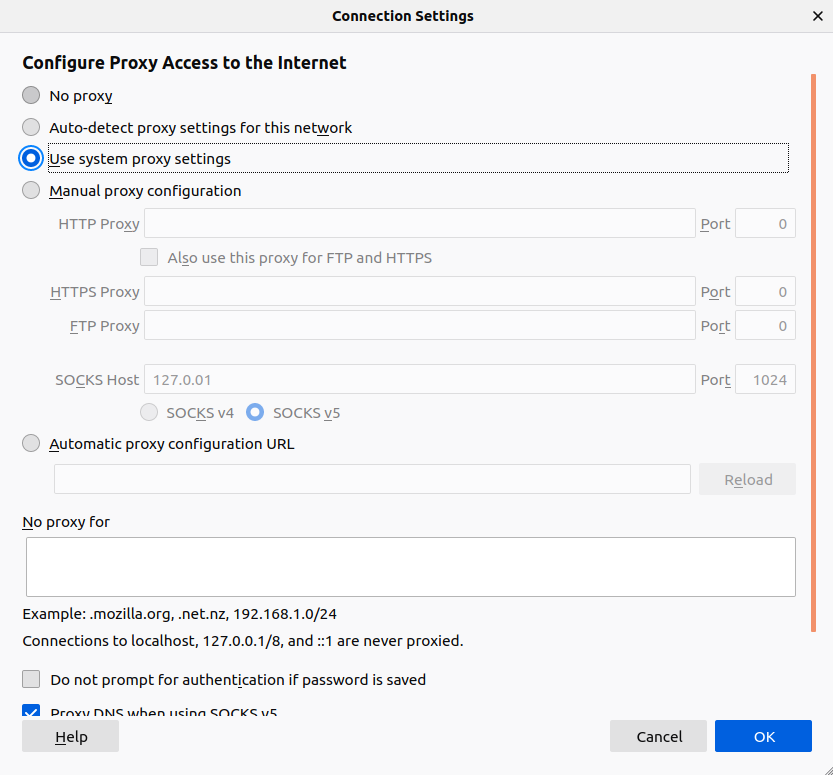
From the window, select Use system proxy settings and click OK.
Closing the SOCKS Tunnel
-
Closing the tunnel on macOS/Linux
To close the tunnel, we need to manually kill the SSH process. We need the PID (process ID) of the SSH process. The following command will reveal the PIDs of all the running SSH processes:
|
1 |
ps aux | grep ssh |
Note the SSH process that’s running with the command to create the tunnel. Kill the process:
|
1 |
kill <tunnel_ssh_pid> |
If no option is defined, the kill command will send a generic SIGTERM signal to the target process. You can learn more about Linux process management from this tutorial.
-
Closing the tunnel on Windows
Closing the PuTTY window should close the tunnel connection.
Troubleshooting
Here are some common issues that you may face when trying to use SOCKS to route traffic.
-
Firewall
If you can’t establish a connection because of a firewall restriction, then it’s likely that the firewall is configured to block connection to port 22. This is the default port that SSH uses to connect to remote systems. Some ports remain open by default, for example, port 80 (general web traffic) and port 443 (TLS, secure web traffic).
If the SSH server isn’t serving web content, then we can use one of the default ports ( 80 or 443 ) instead of port 22. It’s recommended to use port 443 as it expects encrypted traffic by default. It will also encrypt the outgoing traffic. To make the change, we need to modify the SSH configuration file. Open the file in a text editor:
|
1 |
sudo nano /etc/ssh/sshd_config |
SSH can use multiple ports for its purpose. Scroll down the configuration file and find the port section:
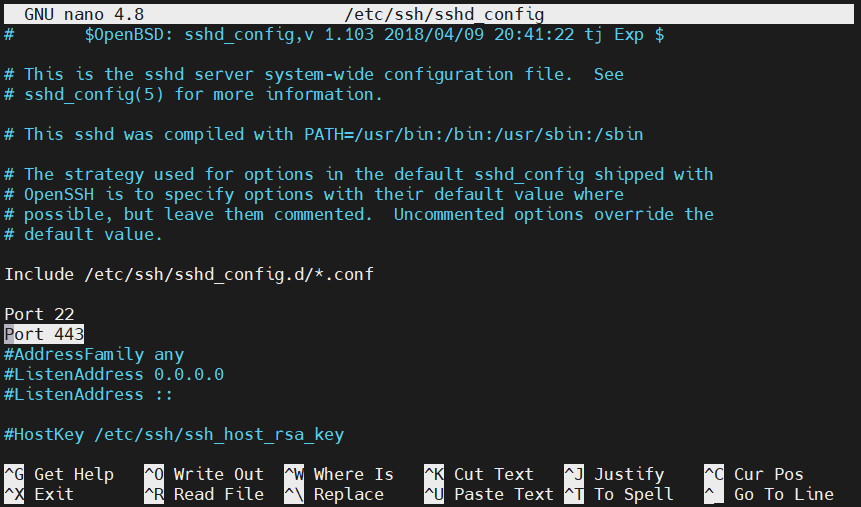
Once the changes are made, save the file and close the editor. Restart the SSH service to apply the change:
|
1 |
sudo service ssh restart |
To verify if the new port is working, try connecting to the remote server using the new port:
|
1 |
ssh <remote_username>@<remote_server> -p 443 |
If the connection was successful, we can safely use port 443 for SSH tunneling. Here’s the revised command to establish the SOCKS tunnel:
|
1 |
ssh -i ~/.ssh/id_rsa -D 2000 -f -C -q -N <remote_username>@<remote_server> -p 443 |
Here, the flag -p tells SSH to use port 443.
Final Thoughts
In this day and age, privacy and security are some of the biggest concerns. There are many ways to browse securely when you’re on a hostile network. In most cases, using a VPN will offer sufficient security to your network traffic. On the other hand, a SOCKS tunnel will offer you the necessary security if you can’t or don’t trust a VPN. Having a SOCKS tunnel also gives you full control over the setup.
Happy Computing!
- How to Deploy WordPress with Persistent Volume on Kubernetes Cluster - March 17, 2023
- Deploying Applications on Kubernetes Using Argo CD and GitOps - October 26, 2022
- Using Node.js Modules with npm and package.json: A Tutorial - October 6, 2022
- Using Ansible to Install and Configure WordPress with LAMP on Ubuntu - September 23, 2022
- Creating Views in the Django Web Application Framework - September 22, 2022