

A CSV file is a plain text file that stores data in tabular format. In most cases, CSV files use commas (,) as the delimiter, hence the name CSV (Comma Separated Values). It’s used in situations where data compatibility is a concern as CSVs can be opened with any text editor, spreadsheet apps, and other specialized tools. In fact, many programming languages offer built-in support for CSV.
In this guide, we will learn about using CSV in a sample Node.js application.
CSV in Node.js
Node.js is an open-source and cross-platform JavaScript runtime environment. It has become one of the most popular backends powering numerous web services all over the internet. Even big companies like Netflix and Uber use Node.js to power their services.
Node.js also has numerous modules available to be deployed for adding extra functionality to a project. When it comes to CSV, there are many modules available to use, for example, node-csv, fast-csv, and papaparse etc.
As the title of the guide suggests, we are going to use node-csv to read CSV files using Node.js streams. We will also demonstrate working with the data parsed, for example, transferring the data into an SQLite database.
Prerequisites
-
To perform the steps demonstrated in this guide, you will need the following components:
-
A properly-configured Linux system. Learn more about installing and configuring an Ubuntu cloud server on CloudSigma.
-
Access to a non-root user with sudo privilege. Check out managing sudo permission with sudoers.
-
A suitable text editor, for example, Brackets, VS Code, Sublime Text, Vim/NeoVim, etc.
-
Other software:
-
Node.js LTS
-
SQLite
-
Step 1 – Installing Necessary Software
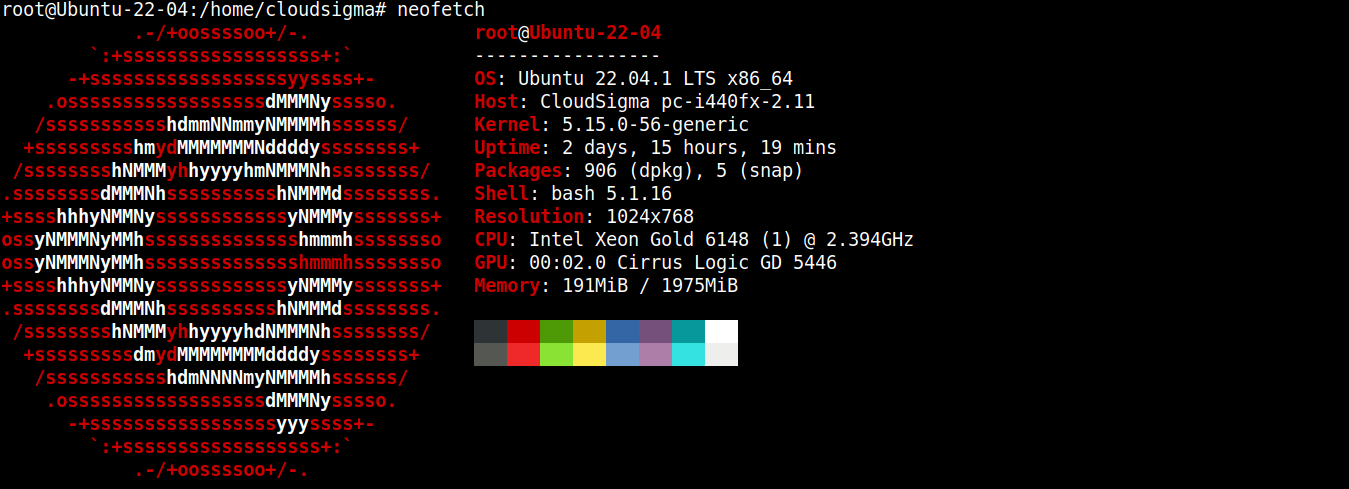
For this guide, I have created a lightweight server running Ubuntu 22.04 LTS (connected via SSH):
Now, we will install Node.js and SQLite on it.
-
Installing Node.js LTS
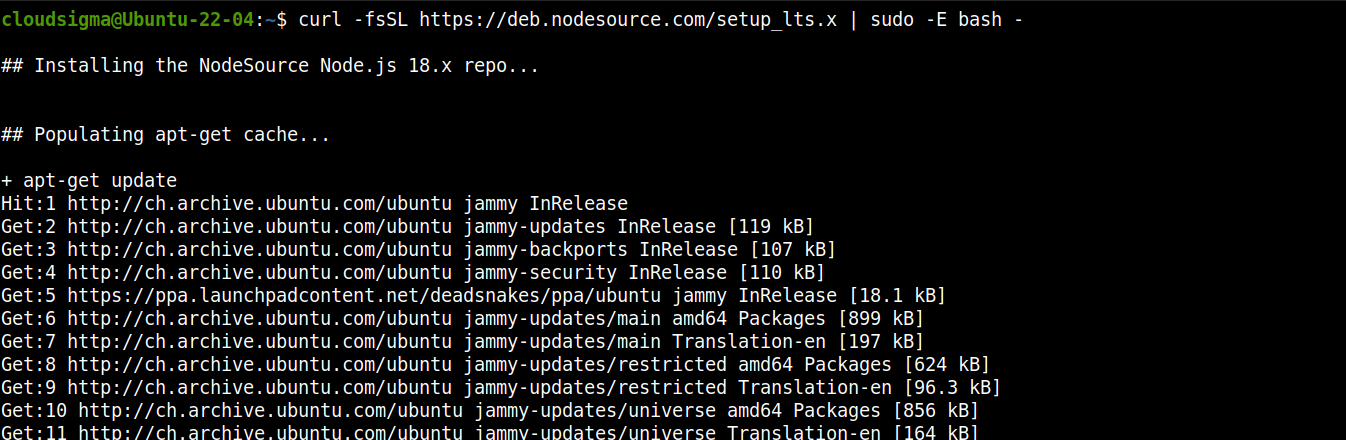
Node.js is directly available from the official Ubuntu package repos. However, it’s not the up-to-date version. That’s why we are going to rely on a third-party repo (Nodesource) to get the latest Node.js packages.
Add the repo for Node.js LTS:
|
1 |
curl -fsSL https://deb.nodesource.com/setup_lts.x | sudo -E bash - |
Now, install Node.js LTS:
|
1 |
sudo apt install nodejs -y |

-
Install SQLite
We will be installing SQLite directly from the Ubuntu package repos. Run the following commands:
|
1 |
sudo apt install sqlite3 -y |

Step 2 – Project Directory Setup
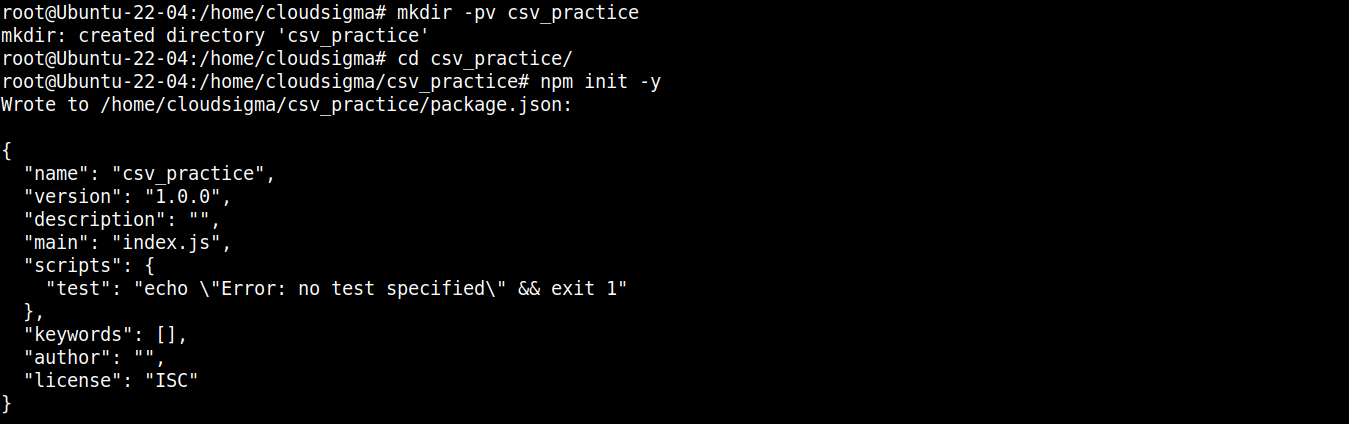
In this section, we will prepare a dedicated directory for our project. It will host all the project files along with additional modules.
Create a new directory:
|
1 |
mkdir -pv csv_practice |
Navigate into the directory:
|
1 |
cd csv_practice/ |
Next, run the following command to declare the directory as an npm project:
|
1 |
npm init -y |
Once the project folder is initialized, we can start installing the necessary packages and modules. First, we are going to install node-csv:
|
1 |
npm install csv |

The node-csv module is actually a collection of several other modules: csv-generate, csv-parse (parsing CSV files), csv-stringify (writing data to CSV), and stream-transform.
Next, we need the module for communicating with SQLite. The following command will install the node-sqlite3 module:
|
1 |
npm install sqlite3 |

The component we need for our project is a CSV file. For demonstration purposes, we are going to use the New Zealand migration CSV file:
|
1 |
wget https://www.stats.govt.nz/assets/Uploads/International-migration/International-migration-September-2021-Infoshare-tables/Download-data/international-migration-September-2021-estimated-migration-by-age-and-sex-csv.csv -O migration_data.csv |

Let’s have a quick look at the content of the file:
|
1 |
cat migration_data.csv | less |
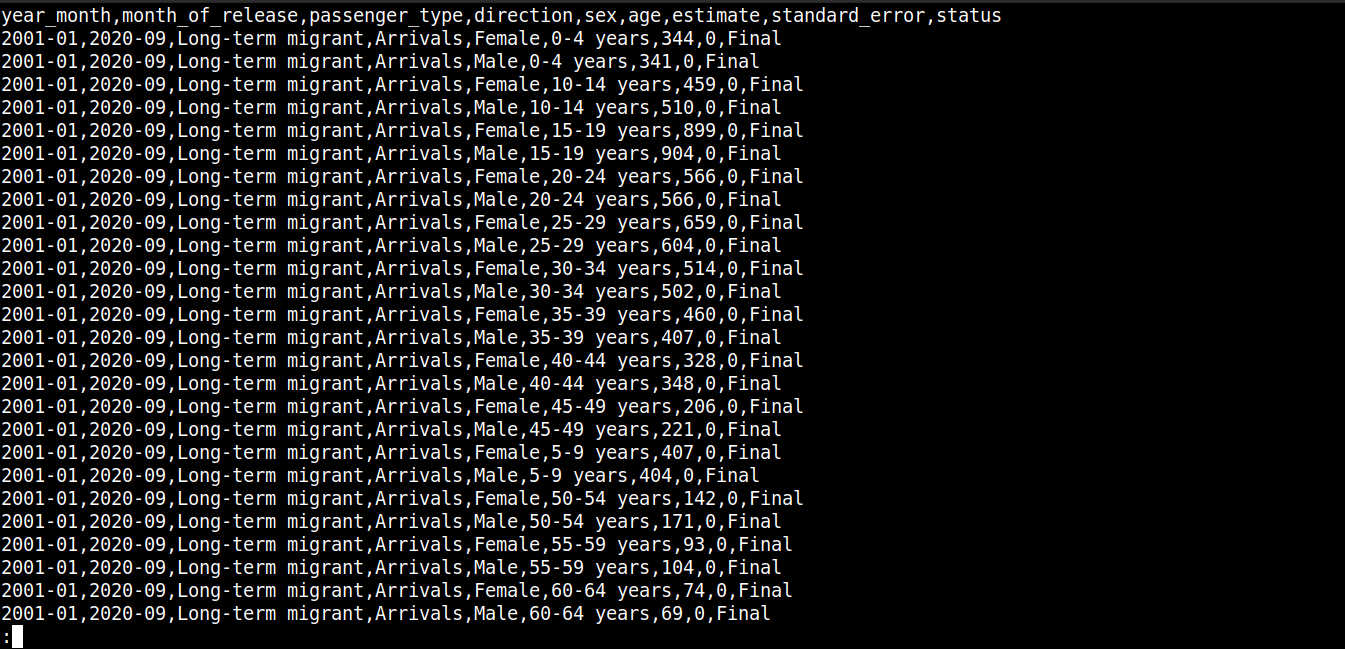
Here,
-
The first line describes the column names.
-
The subsequent lines contain the values for these fields.
-
Each row is separated by a new line (\n).
-
Each data point is separated by a comma (,).
However, CSV isn’t limited to using commas as the delimiter. Other common delimiters include colons (:), semicolons (;), and tabs (\td).
Step 3 – Reading CSV
In this section, we will demonstrate implementing a sample program that reads and parses data from the CSV file.
Create a new JavaScript file:
|
1 |
touch read_csv.js |
Open the file in your favorite text editor:
|
1 |
nano read_csv.js |
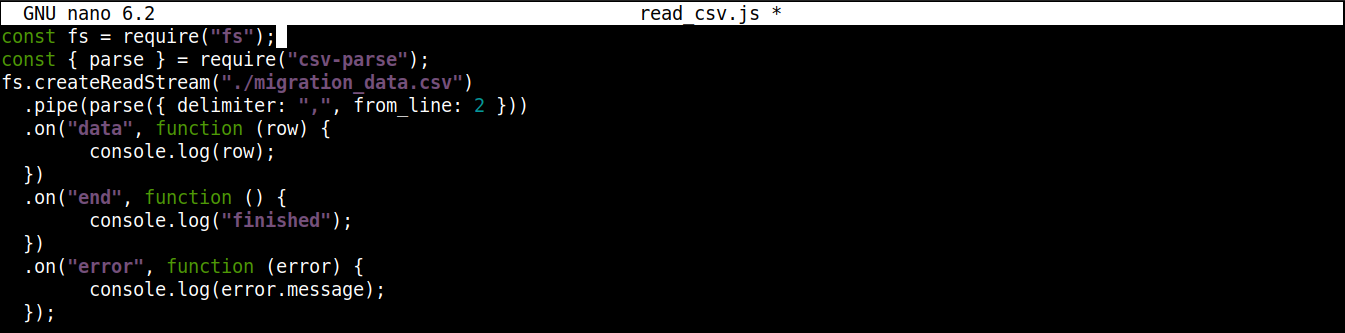
First, we are going to import the fs and csv-parse modules:
|
1 2 |
const fs = require("fs"); const { parse } = require("csv-parse"); |
Here,
-
First, the fs variable is assigned the fs object that returns the Node.js require() method upon importing the module.
-
Next, the parse method is extracted from the object returned by the require() method into the parse variable using the destructuring syntax.
Next, we are going to add codes to read the CSV file:
|
1 2 3 4 5 |
fs.createReadStream("./migration_data.csv") .pipe(parse({ delimiter: ",", from_line: 2 })) .on("data", function (row) { console.log(row); }) |
Here,
-
We’re invoking the createReadStream() from the fs module and passing the CSV file we want to read as the argument. It then creates a readable stream by breaking the larger file into smaller chunks.
-
After creating the stream, the pipe() method forwards chunks of the stream data to another stream. This new stream is created upon invoking the parse() method from csv-module.
-
The csv-module deploys a readable/writable transform stream that takes a data chunk and transforms it into another form.
-
The parse() method accepts objects with properties. The object further processes the parsed data. Here, the object is taking the following properties:
-
delimiter: The delimiter character to separate values. In the case of our target CSV, it’s comma (,).
-
from_line: The number of lines from where the parser will start parsing. With the given value 2, the parser will skip line 1 and start at line 2. With this arrangement, we are avoiding the column names from being integrated into the parsed data.
-
Next, we are going to attach a streaming event using the on() method from Node.js:
|
1 2 3 4 5 6 7 8 9 10 11 12 13 |
fs.createReadStream("./migration_data.csv") .pipe(parse({ delimiter: ",", from_line: 2 })) .on("data", function (row) { console.log(row); }) .on("end", function () { console.log("finished"); }) .on("error", function (error) { console.log(error.message); }); |
Here,
-
Upon emitting a certain event, a streaming event allows a method to consume a chunk of data.
-
When data parsed by parse() method is ready to be consumed, it triggers the data event.
-
To access the data, we are passing a callback to the on() method that takes a parameter row.
-
The row parameter is a chunk of data in the form of an array (result from parsing).
-
Finally, the data is logged in the console using console.log().
To finish the program, we are going to add additional stream events to handle errors and print a success message when all the data in the CSV file is consumed. Update the code as follows:
|
1 2 3 4 5 6 7 8 9 10 11 12 13 14 |
fs.createReadStream("./migration_data.csv") .pipe(parse({ delimiter: ",", from_line: 2 })) .on("data", function (row) { console.log(row); }) .on("end", function () { console.log("finished"); }) .on("error", function (error) { console.log(error.message); }); |
Here,
-
The end event emits when all the data in the CSV file is consumed. It results in calling the console.log() method that prints a success message.
-
The error event emits when encountering an error while parsing the CSV data. It results in calling the console.log() method that prints an error message.
The final code should look like this:
|
1 2 3 4 5 6 7 8 9 10 11 12 13 14 15 |
const fs = require("fs"); const { parse } = require("csv-parse"); fs.createReadStream("./migration_data.csv") .pipe(parse({ delimiter: ",", from_line: 2 })) .on("data", function (row) { console.log(row); }) .on("end", function () { console.log("finished"); }) .on("error", function (error) { console.log(error.message); }); |
Save the file and close the editor. We are now ready to execute the program. Run it using Node.js:
|
1 |
node read_csv.js |
The output should look something like this:
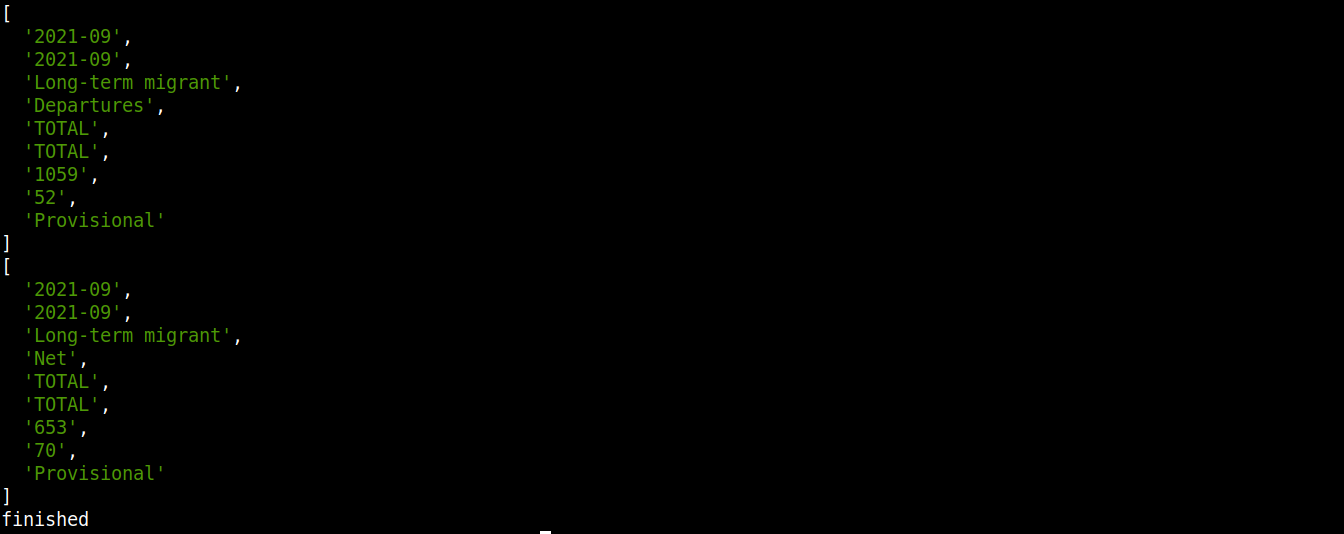
Note that the data is consumed, transformed, and printed on the console. As it’s a continuous process, it will appear as if data is being downloaded rather than printing the output all at once.
Step 4 – Transferring CSV Data to a Database
So far, we’ve learned how to parse a CSV file using node-csv. This section will demonstrate transferring the parsed data into a database (SQLite).
Create a new JavaScript file for interacting with the database:
|
1 |
touch csv-to-sqlite3.js |
Now, open the file in a text editor:
|
1 |
nano csv-to-sqlite3.js |
![]()
We will start our program with the following codes:
|
1 2 3 |
const fs = require("fs"); const sqlite3 = require("sqlite3").verbose(); const filepath = "./population.db"; |

Here,
-
In the first line, we are importing the fs module.
-
In the third line, the variable filepath contains the path of the SQLite database.
-
At this point, the database doesn’t exist yet. However, it will be necessary when working with node-sqlite3.
Next, add the following lines to establish a connection to the SQLite database:
|
1 2 3 4 5 6 7 8 9 10 11 12 13 |
function connectToDatabase() { if (fs.existsSync(filepath)) { return new sqlite3.Database(filepath); } else { const db = new sqlite3.Database(filepath, (error) => { if (error) { return console.error(error.message); } console.log("Connected to the database successfully"); }); return db; } } |
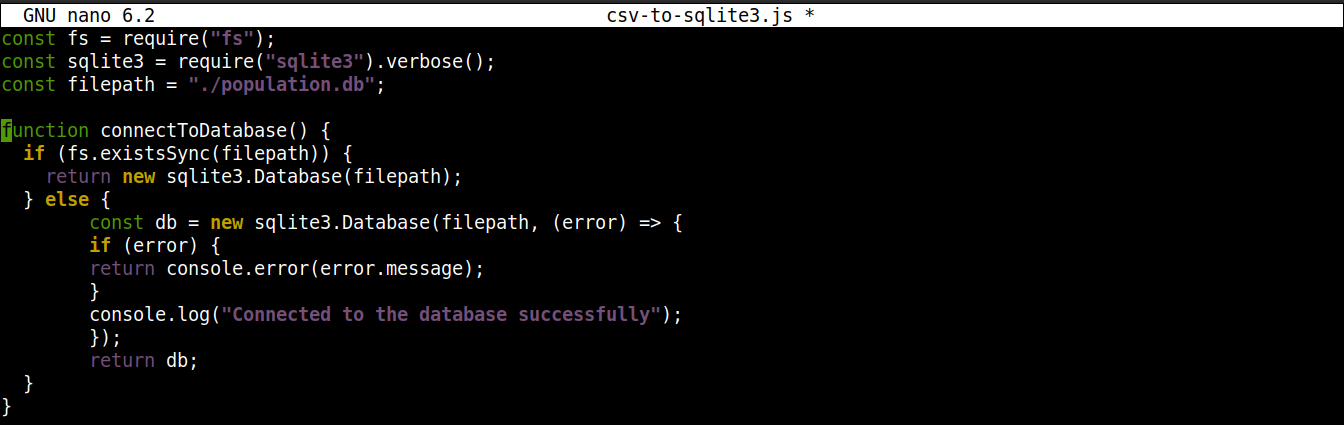
Here,
-
The method connectoToDatabase() establishes a connection to the database.
-
Within connectToDatabase(), we are invoking the existsSync() method from the fs module within an if statement. The if statement checks the existence of the database in the specified location.
-
If the condition evaluation is true, then the Database() class of the node-sqlite3 module is. Once the connection is established, the function returns an object and exists.
-
If the condition evaluation is false (the database doesn’t exist), then the execution will jump to the else block. There, the Database() class will initiate with two arguments: a path to the database file and a callback.
-
Basically, the database will be created if it does not exist. However, if any error occurs during the creation process, it will set the error object and print the error message.
Next, we are going to introduce codes to create a table if a database doesn’t exist:
|
1 2 3 4 5 6 7 8 9 10 11 12 13 14 15 16 17 18 19 20 21 22 23 24 25 26 27 28 29 30 31 32 33 34 35 36 37 |
const fs = require("fs"); const sqlite3 = require("sqlite3").verbose(); const filepath = "./population.db"; function connectToDatabase() { if (fs.existsSync(filepath)) { return new sqlite3.Database(filepath); } else { const db = new sqlite3.Database(filepath, (error) => { if (error) { return console.error(error.message); } createTable(db); console.log("Connected to the database successfully"); }); return db; } } function createTable(db) { db.exec(` CREATE TABLE migration ( year_month VARCHAR(10), month_of_release VARCHAR(10), passenger_type VARCHAR(50), direction VARCHAR(20), sex VARCHAR(10), age VARCHAR(50), estimate INT ) `); } module.exports = connectToDatabase(); |
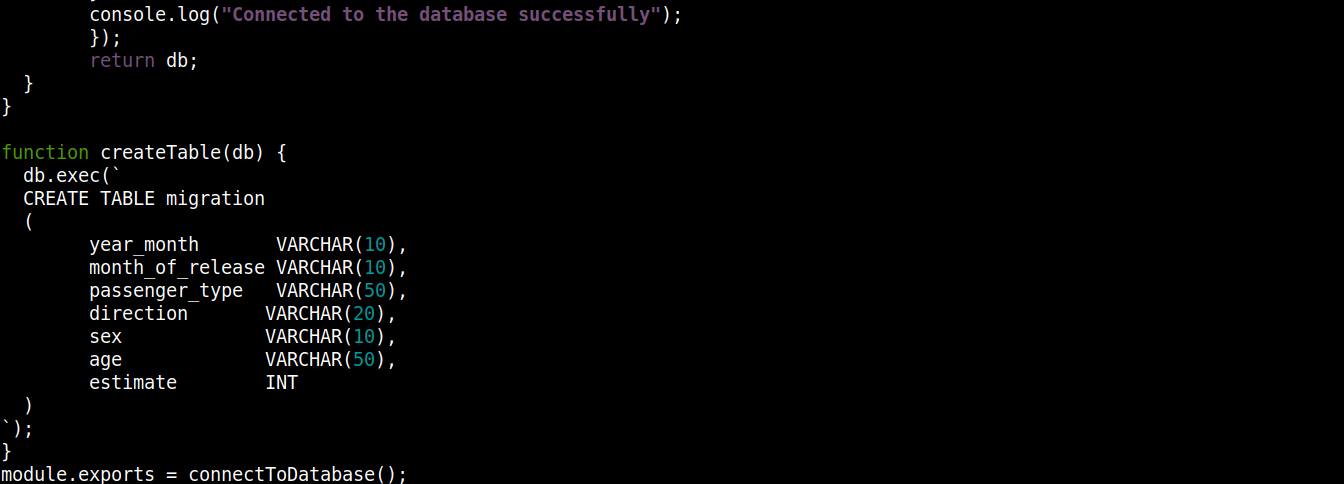
Here,
-
The connectToDatabase() invokes the createTable() function that accepts the objects stored in db as an argument.
-
Outside connectToDatabase(), we defined the createTable() method that accepts the connection object db as a parameter.
-
The exec() method on db takes a SQL statement as argument. Within this SQL statement, we defined the creation of a table migration with 7 columns, each column corresponding to the column headings in migration_data.csv file.
-
Finally, we are invoking the connectToDatabase() method and exporting the connection object it returns so that we can use it in other files.
Save the file and close the editor.
Next, we are going to create another program to insert the parsed data into the database:
|
1 |
nano insert_data.js |
Enter the following code in insert_data.js:
|
1 2 3 4 5 6 7 8 9 10 11 12 13 14 15 16 17 18 19 20 |
const fs = require("fs"); const { parse } = require("csv-parse"); const db = require("./csv-to-sqlite3"); fs.createReadStream("./migration_data.csv") .pipe(parse({ delimiter: ",", from_line: 2 })) .on("data", function (row) { db.serialize(function () { db.run( `INSERT INTO migration VALUES (?, ?, ? , ?, ?, ?, ?)`, [row[0], row[1], row[2], row[3], row[4], row[5], row[6]], function (error) { if (error) { return console.log(error.message); } console.log(`Row inserted, ID: ${this.lastID}`); } ); }); }); |
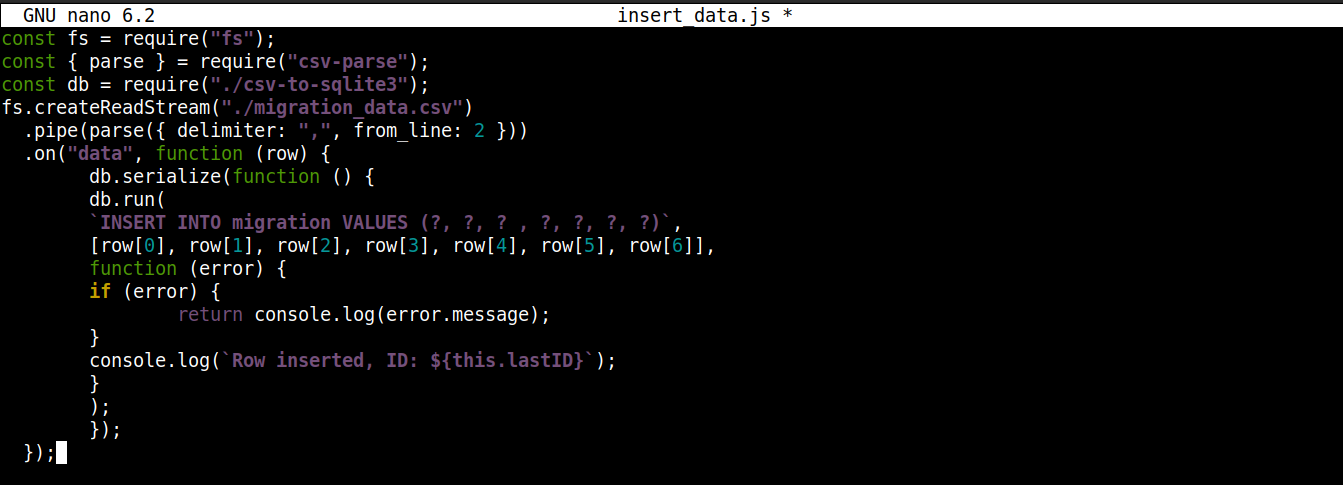
Here,
-
We are storing the connection object obtained from csv-to-sqlite3.js in the variable db.
-
Inside the data event callback (attached to the fs module stream), we are invoking the serialize() method on the connection object. It ensures that one SQL statement finishes executing before the next one starts, preventing database race conditions (system running competing operations simultaneously).
-
The serialize() accepts three arguments:
-
The first argument is the SQL statement.
-
The second argument is an array.
-
The third argument is a callback that runs when data is successfully or unsuccessfully inserted into the database.
-
We are ready to execute the program. Run insert_data.js using Node.js:
|
1 |
node insert_data.js |
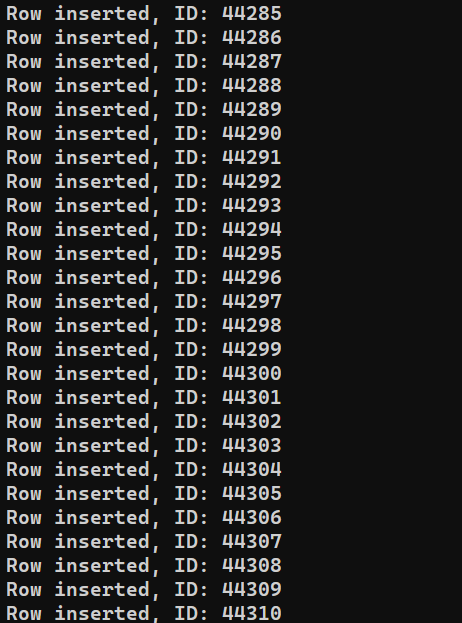
Depending on the system’s performance, the process may take some time to finish. However, upon completion, the output should look something like this:
Step 5 – Writing Data to CSV
After the last section, we have a database containing all the records we parsed from migration_data.csv. In this section, we are going to read the data from the database and write it in a separate CSV file.
Create a new JavaScript file to store the program:
|
1 |
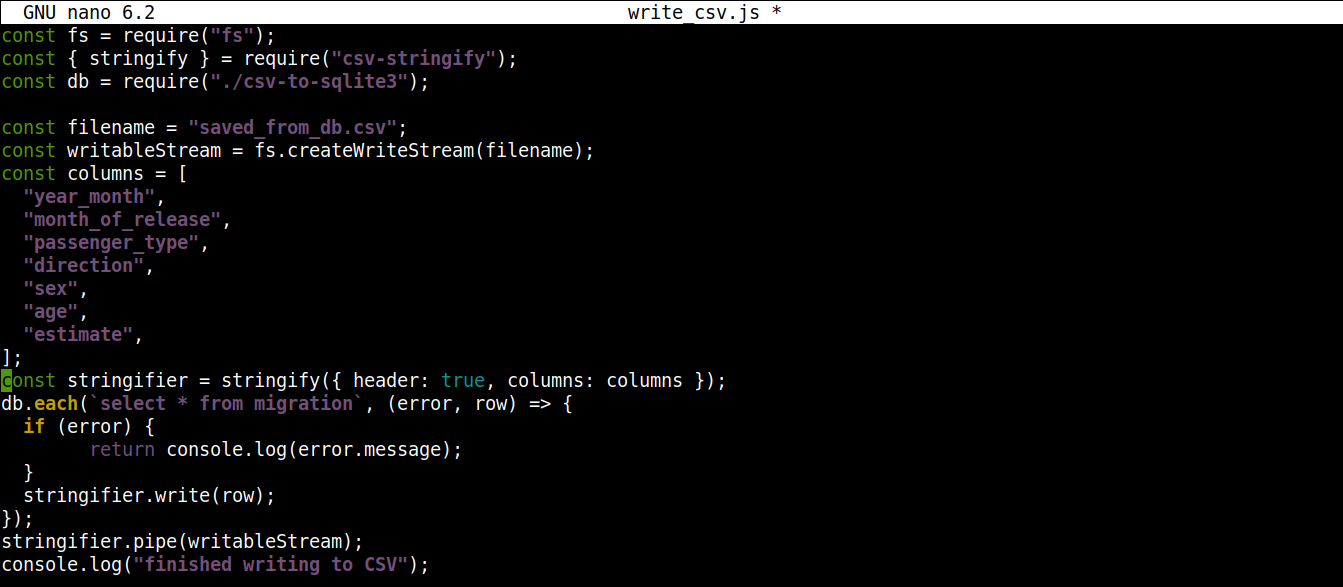
nano write_csv.js |
First, add the following lines to import fs and csv-stringify along with the database connection object from csv-to-sqlite3.js:
|
1 2 3 |
const fs = require("fs"); const { stringify } = require("csv-stringify"); const db = require("./csv-to-sqlite3"); |
Next, we are going to add a variable that contains the name of the CSV file to write to along with a writable stream:
|
1 2 3 4 5 6 7 8 9 10 11 |
const filename = "saved_from_db.csv"; const writableStream = fs.createWriteStream(filename); const columns = [ "year_month", "month_of_release", "passenger_type", "direction", "sex", "age", "estimate", ]; |
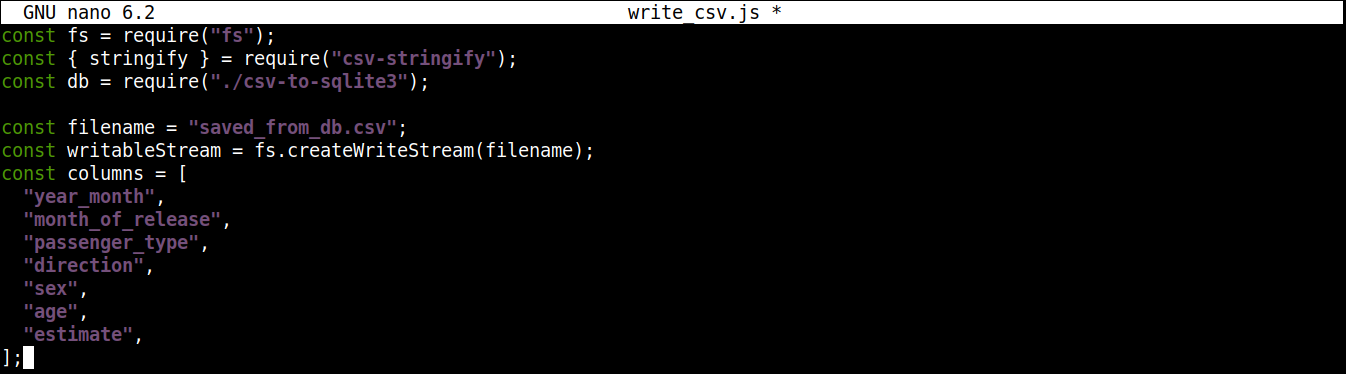
Here,
-
The createWriteStream() method takes the filename to write to as an argument. We are going to name the file saved_from_db.csv.
-
The column variable stores an array that contains all the names of the header for the CSV data.
Next, add the following lines of code to read data from the database and write it to saved_from_db.csv:
|
1 2 3 4 5 6 7 8 9 10 11 |
const stringifier = stringify({ header: true, columns: columns }); db.each(`select * from migration`, (error, row) => { if (error) { return console.log(error.message); } stringifier.write(row); }); stringifier.pipe(writableStream); console.log("finished writing to CSV"); |
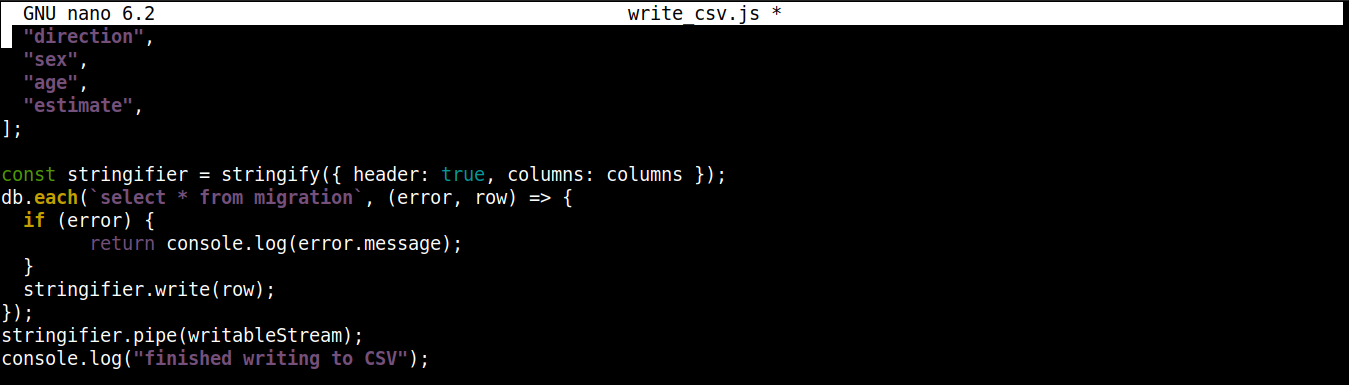
Here,
-
We are invoking the stringify() method with an object as an argument. It results in a transform stream that converts the data from an object to CSV format. The object passed to stringify() has two properties:
-
header: Accepts a Boolean value. If the value is true, then a header is generated.
-
columns: Accepts an array that contains the column names to be written in the first line of the CSV file if header is true.
-
-
The each() method from the csv-to-sqlite3 connection object is invoked with two arguments: the SQL statement (reading data from the database) and a callback (handling success/error).
-
Upon each iteration of each(), pipe() (from the stringifier stream) starts sending data in chunks to the writable stream writableStream. Each chunk of data is then written to saved_from_db.csv.
-
When all the data is written to the CSV file, a success message is printed on the console screen.
The final code should look like this:
|
1 2 3 4 5 6 7 8 9 10 11 12 13 14 15 16 17 18 19 20 21 22 23 24 25 26 27 |
const fs = require("fs"); const { stringify } = require("csv-stringify"); const db = require("./csv-to-sqlite3"); const filename = "saved_from_db.csv"; const writableStream = fs.createWriteStream(filename); const columns = [ "year_month", "month_of_release", "passenger_type", "direction", "sex", "age", "estimate", ]; const stringifier = stringify({ header: true, columns: columns }); db.each(`select * from migration`, (error, row) => { if (error) { return console.log(error.message); } stringifier.write(row); }); stringifier.pipe(writableStream); console.log("finished writing to CSV"); |
Save the file and close the editor. We can now run the program using Node.js:
|
1 |
node write_csv.js |
To confirm whether the data was successfully exported, check the content of saved_from_db.csv:
|
1 |
cat saved_from_db.csv | less |

Final Thoughts
In this guide, we demonstrated working with CSV files in Node.js using node-csv and node-sqlite3 modules. We created multiple programs to achieve various tasks, for example, parsing data from CSV, pushing the data into an SQLite database, and writing data to a new CSV file.
This guide demonstrates only a small portion of the capability of the node-csv module. Learn more about all its features at CSV Project. To learn more about node-sqlite3, check out the official documentation on GitHub. Another module worth mentioning is event-stream to simplify working with streams.
Interested in growing your Node.js project further? Here are some Node.js tutorials that you should check out:
-
How to Deploy a Node.js (Express.js) App with Docker on Ubuntu 20.04
-
Setting up Node.js Applications: How to Perform Production Tasks on Ubuntu 20.04 with Node.js
Happy Computing!
- How To Set Up GitHub Continuous Integration Pipelines With Self-Hosted Runners on Ubuntu 22.04. - March 20, 2023
- Managing CSV in Node.js using Node-CSV - March 15, 2023
- Containerize A Python App using Docker - March 7, 2023
- Using GitLab for Managing Projects - September 15, 2022
- Creating Drag and Drop Elements with Pure, Vanilla JavaScript - August 4, 2022