
Continuous Integration and Continuous Development is now a standard way of deployment. Also called CI/CD, it creates pipelines to automate testing, deployment, integrating code, and reporting. While there are many tools available in the market, both free and open-source, in this tutorial, we will be installing Jenkins on Kubernetes. Jenkins is one of the most popular CI/CD tools used for creating pipelines.
By the end of this tutorial, you will have up and running Jenkins on your Kubernetes cluster. You will also have access to the Jenkins portal for management and creating new pipelines.
Prerequisites
To begin with, you should be acquainted with Kubernetes, Containerization, and Jenkins. You should also have a working Kubernetes cluster to deploy Jenkins on. If you are new to these terminologies CloudSigma has a lot of resources to help you. We recommend learning about Kubernetes and the concepts it entails here. If you are working with Ubuntu, check out this tutorial on installing and using Kubernetes on Ubuntu.
Kubernetes and Jenkins Concepts
Before we dive into the process of installation, let’s summarize the different terms we are going to encounter:
-
Kubernetes YAML File / JSON File
Kubernetes allows us to deploy containers. You can bring up as many containers as you need. To tell Kubernetes which image you need to run and configure, you need to use a descriptive method such as a YAML file or a JSON file.
-
Kubernetes Namespace
Kubernetes can have multiple clusters running. Thus, to identify/group clusters, we use the namespace property in the YAML.
-
Jenkins Docker Image
In addition, you need a Jenkins Docker image. Docker Hub has the official image with all the information needed. You can find it here.
-
Jenkins Volume
Jenkins needs files to store the state. You have to provide it in the YAML file, so that if the cluster restarts your data persists.
Point to note, here in this installation we are keeping things simple. Kubernetes allows us to configure the specs of the services including a number of clusters, memory, and so on. We are going to keep the configurations to default.
Step 1: Making Sure Kubernetes is Up and Running
First, check if Kubernetes is running on your machine. Open the terminal/cmd and execute the below command:
|
1 |
kubectl version |
If the below output appears you are good to go:
|
1 2 |
Client Version: version.Info{Major:"1", Minor:"23", GitVersion:"v1.23.5", GitCommit:"c285e781331a3785a7f436042c65c5641ce8a9e9", GitTreeState:"clean", BuildDate:"2022-03-16T15:58:47Z", GoVersion:"go1.17.8", Compiler:"gc", Platform:"linux/amd64"} Server Version: version.Info{Major:"1", Minor:"23", GitVersion:"v1.23.5", GitCommit:"c285e781331a3785a7f436042c65c5641ce8a9e9", GitTreeState:"clean", BuildDate:"2022-03-16T15:52:18Z", GoVersion:"go1.17.8", Compiler:"gc", Platform:"linux/amd64"} |
Step 2: Installing Jenkins on Kubernetes
Now that you are acquainted with all relevant concepts and have Kubernetes up and running, let’s look at the YAML file for Jenkins installation.
First, you need to create the namespace for Jenkins. Execute the below command in the PowerShell/Bash:
|
1 |
kubectl create namespace jenkins |
You will get the output like below:

Next, create a new file called Jenkins.YAML. Open this file and add the below-mentioned contents:
|
1 2 3 4 5 6 7 8 9 10 11 12 13 14 15 16 17 18 19 20 21 22 23 24 25 26 27 28 |
apiVersion: apps/v1 kind: Deployment metadata: name: jenkins spec: replicas: 1 selector: matchLabels: app: jenkins template: metadata: labels: app: jenkins spec: containers: - name: jenkins image: jenkins/jenkins:lts ports: - name: http-port containerPort: 8080 - name: jnlp-port containerPort: 50000 volumeMounts: - name: jenkins-vol mountPath: /var/jenkins_vol volumes: - name: jenkins-vol emptyDir: {} |
After that, execute the below command to install Jenkins on Kubernetes:
|
1 |
kubectl create -f jenkins.yaml --namespace jenkins |
You will get the output below:

This will create the Jenkins cluster and expose the port 8080 and 50000 for interaction. We will see this in a while below. Once you have Jenkins installed, you have to expose this application as a service using NodePort Service.
Next, create a new file called jenkins-service.YAML. In this file enter the following:
|
1 2 3 4 5 6 7 8 9 10 11 12 13 14 15 16 17 18 19 20 21 22 23 24 25 26 |
apiVersion: v1 kind: Service metadata: name: jenkins spec: type: NodePort ports: - port: 8000 targetPort: 8080 nodePort: 30000 selector: app: jenkins --- apiVersion: v1 kind: Service metadata: name: jenkins-jnlp spec: type: ClusterIP ports: - port: 50000 targetPort: 50000 selector: app: jenkins |
Next, run the below command to create and expose the service:
|
1 |
kubectl create -f jenkins-service.yaml --namespace jenkins |
You should get the below output:

Make sure the service is running. To verify run the below command:
|
1 |
kubectl get services --namespace jenkins |
If you see the output like this below, you are good to go further:

If you are using Docker Desktop, you might come across <none> under the External-IP column. In that case, use localhost as IP and use the port as mentioned in the table above. Now you are ready to open the Jenkins UI.
Step 3: Verifying Jenkins Installation on Kubernetes
To access the Jenkins UI, open the web browser and hit localhost:8080 (use external IP if there is any). You will get the Jenkins homepage like below:
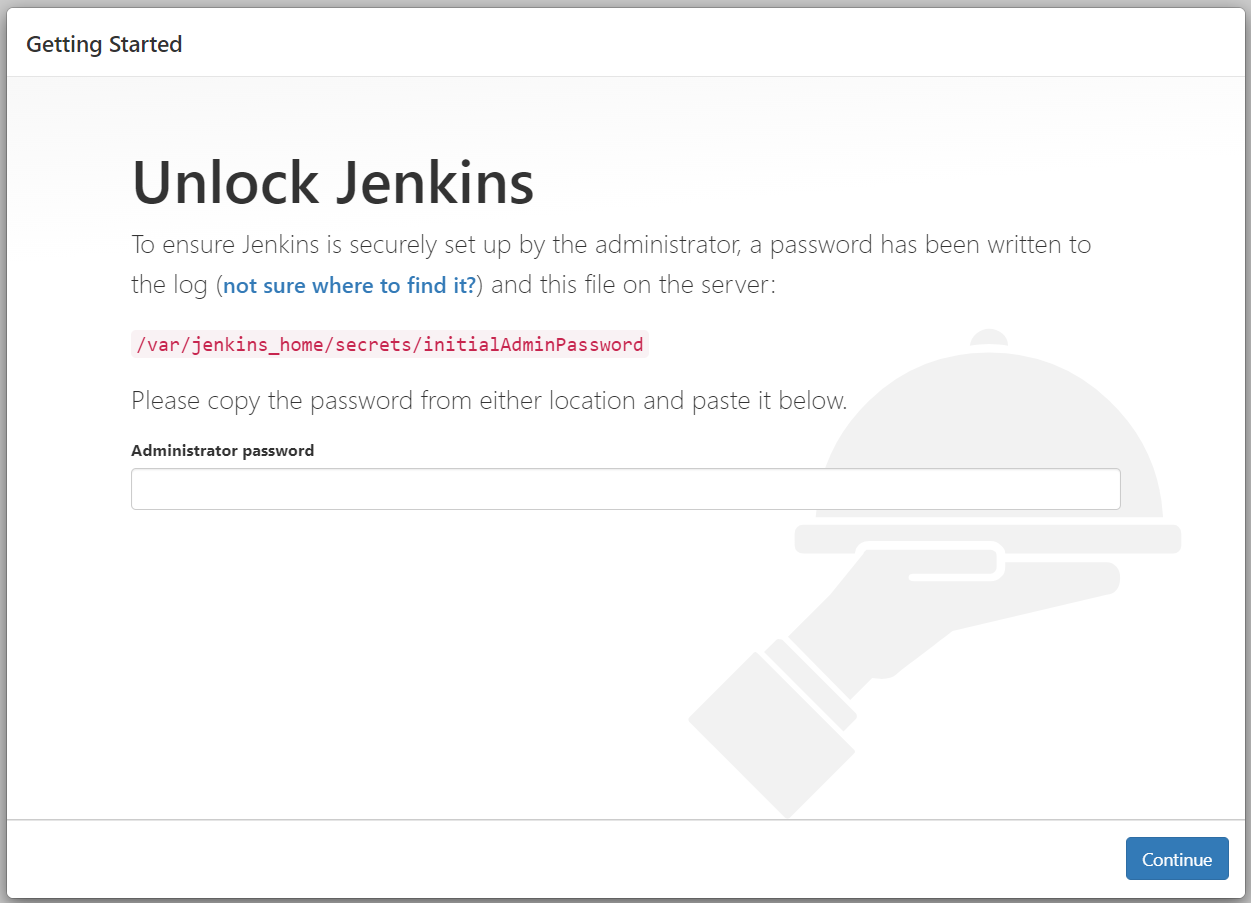
Next, Jenkins will ask you for the password. In order to get the password, you need to go to the logs of Jenkins with the help of Kubernetes.
-
Acquire Jenkins Password
Open the terminal and execute the below command:
|
1 |
kubectl get pods -n jenkins |
You will get the following output:

Next, capture the identifier that is present under the NAME column. Use this identifier to see the logs of Jenkins by running the below command:
|
1 |
kubectl logs jenkins-7d4f76684f-fdvbq -n jenkins |
You will get the logs of this pod such as below:
|
1 2 3 4 5 6 |
Jenkins initial setup is required. An admin user has been created and a password generated. Please use the following password to proceed to installation: your_jenkins_password This may also be found at: /var/jenkins_home/secrets/initialAdminPassword. |
Copy this password. Then, go back to your Jenkins password prompt and enter the password.
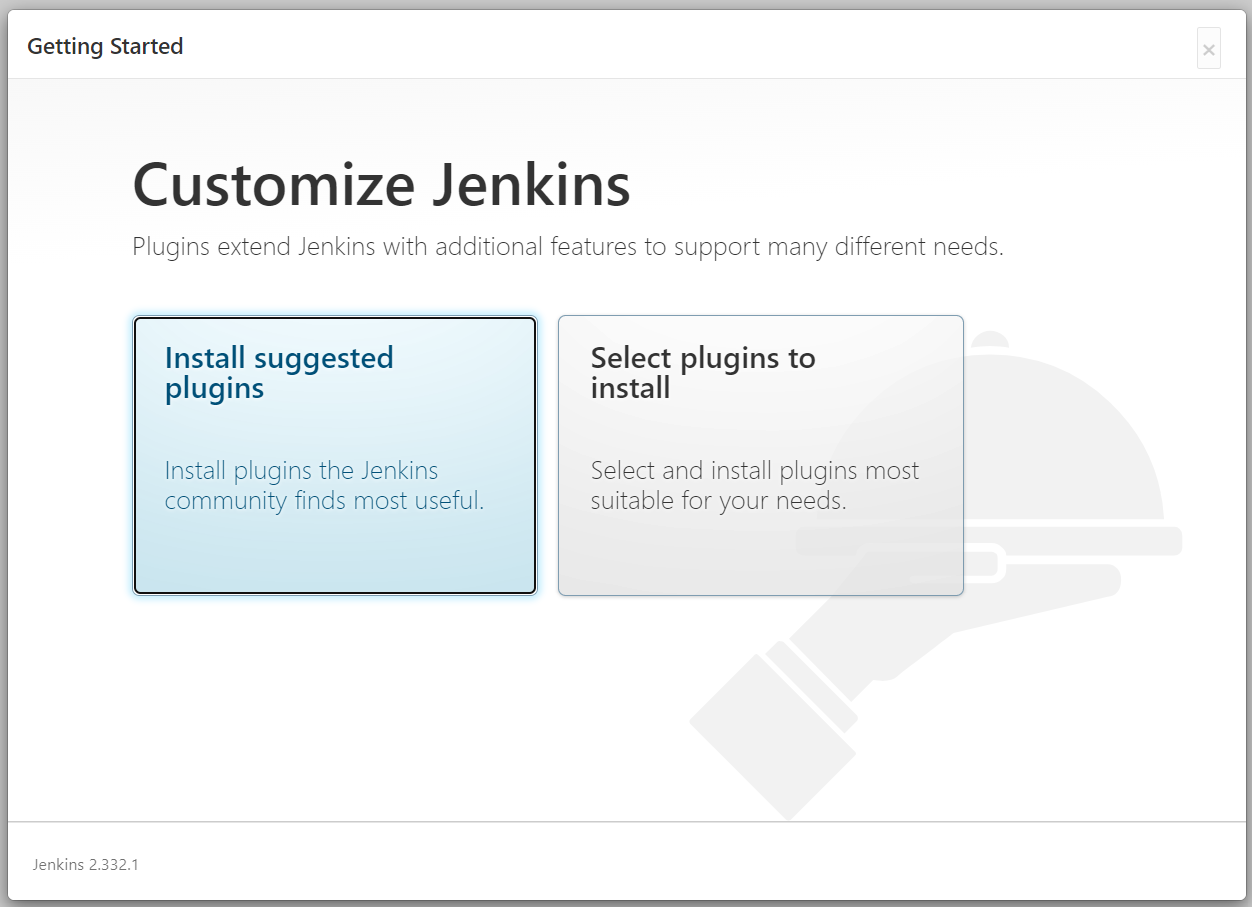
After that, Jenkins will ask you to install the plugins. Plugins support the building of deployments. Since we are not concerned with any specific technology, go ahead and select Install suggested plugins:
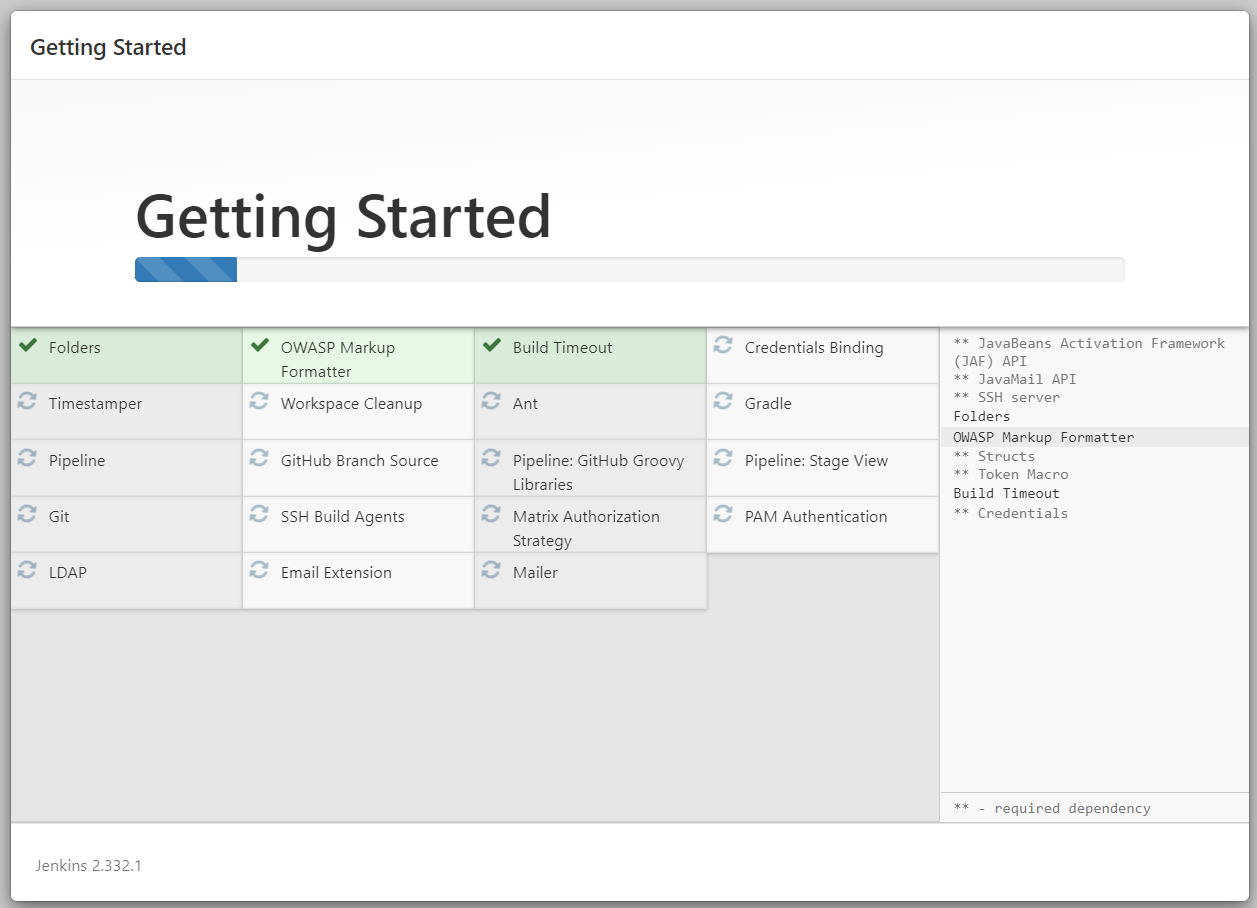
It will take some time to install all the suggested plugins:
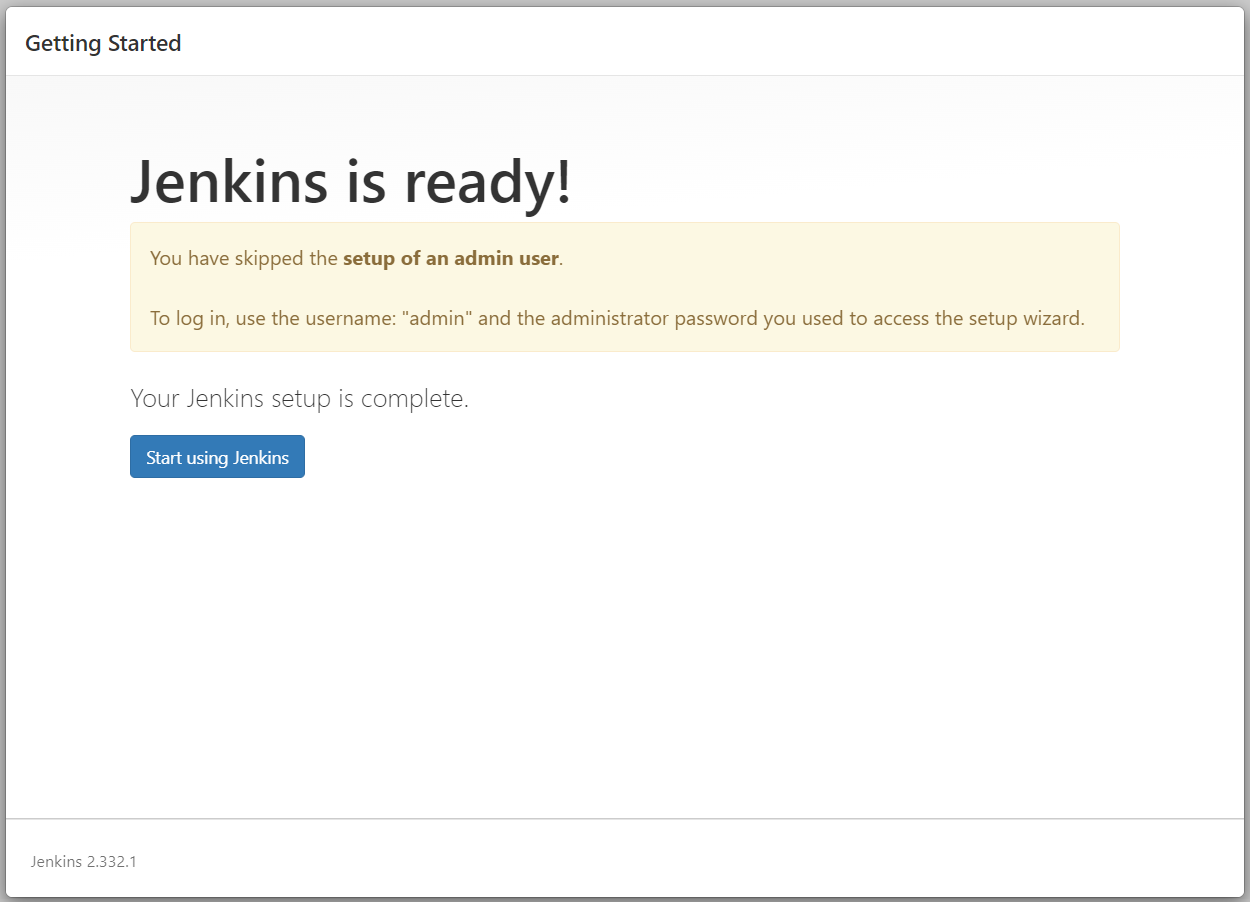
Congratulations! Now you have a successful installation of Jenkins on the Kubernetes cluster:
Step 4: Running a Sample Pipeline
Jenkins gains its strength from the Pipeline feature. Pipelines allow us to integrate code, perform tests, deploy to destination, push, and more. Next, we will show you how to configure a sample pipeline. Please note that you need to have the Pipeline plugin installed to create a pipeline. Now, follow the steps below to configure a new pipeline.
-
First, click New Item on the Jenkins Homepage:

-
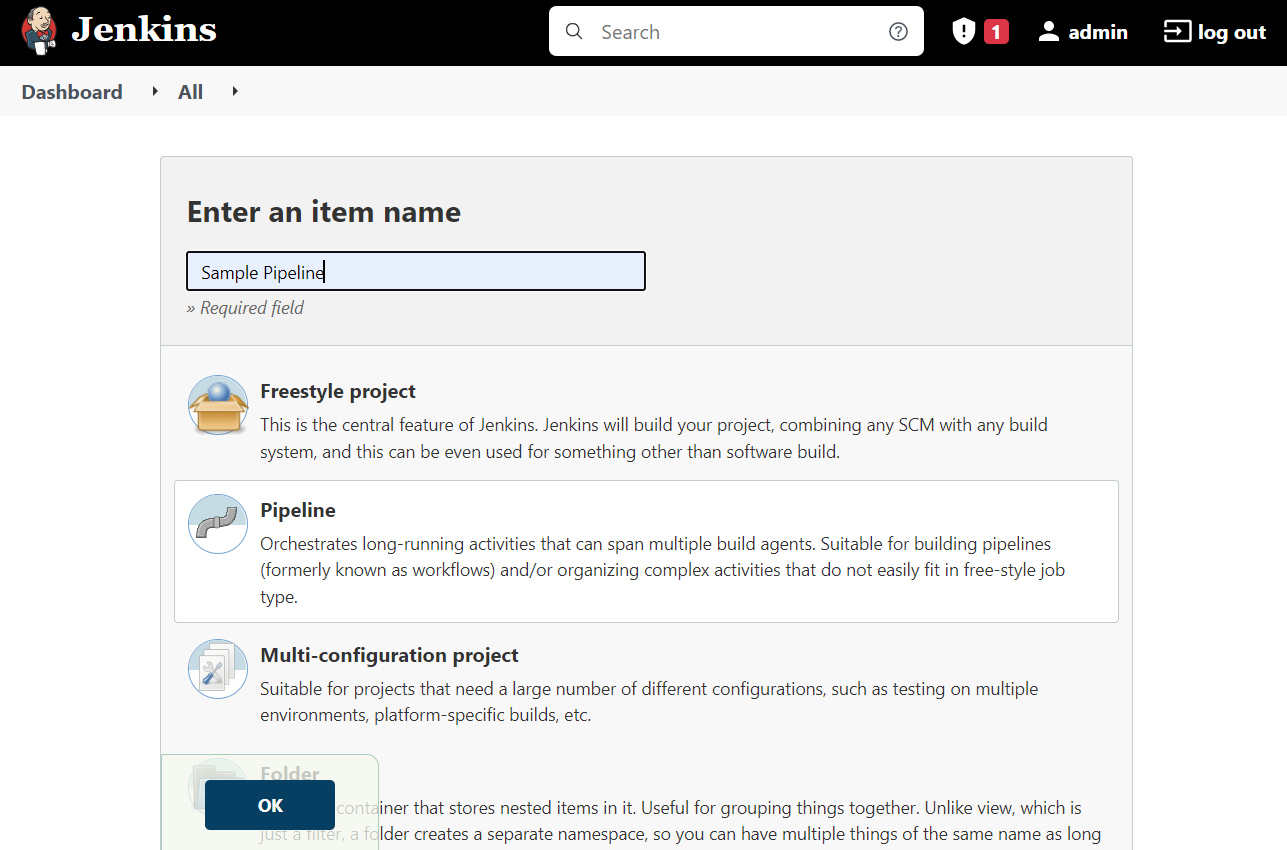
From the page that appears, enter a name for the Pipeline. We will call it Sample Pipeline. Then, select the Pipeline in the below-mentioned options:

-
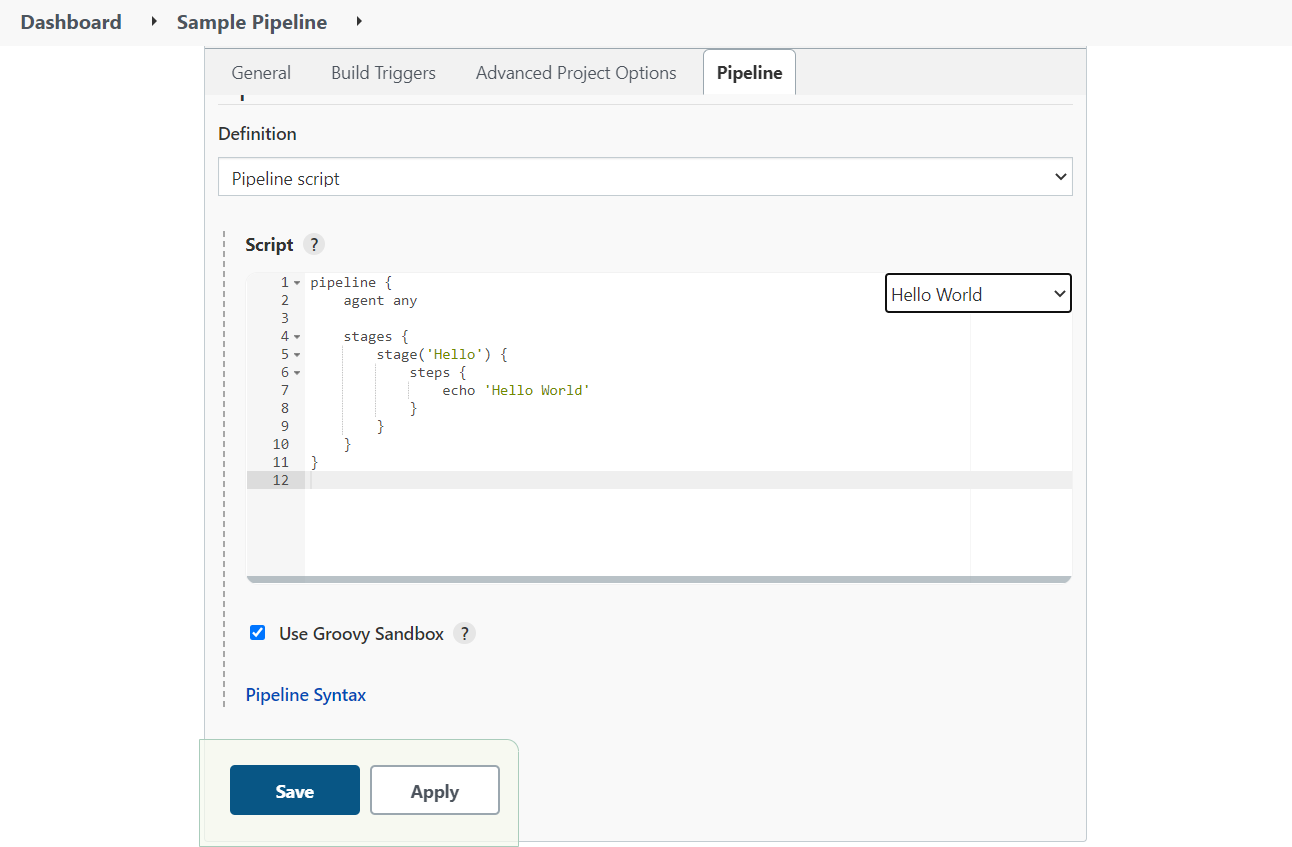
On the next page, find the Pipeline tab. Select that tab and scroll below to find the Try Sample Pipeline drop-down menu. From there, select the Hello World pipeline. Then, save your pipeline by clicking the Save button:

-
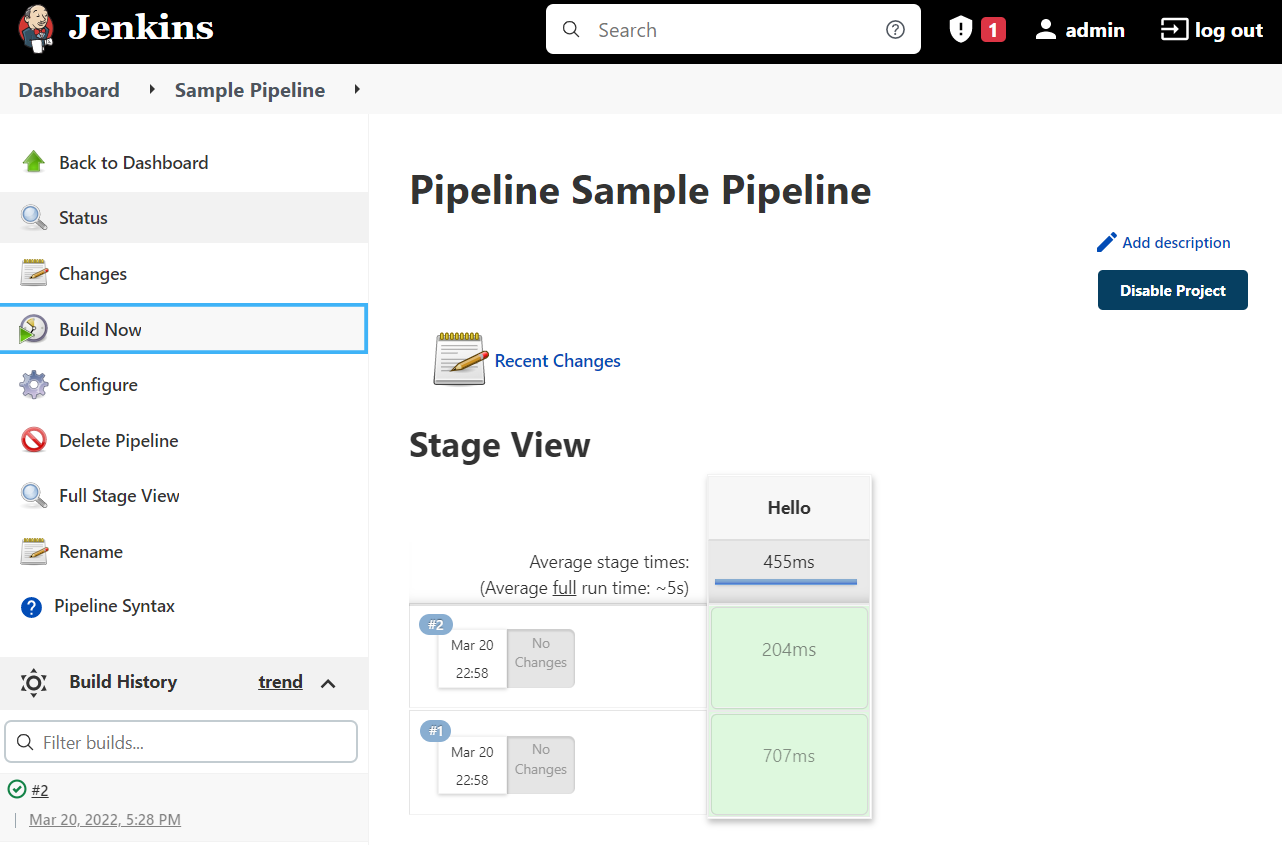
Next, Jenkins will take you to your pipeline page. From there, select the Build Now option:

-
Jenkins displays the number of times you have built the pipeline. You will be able to identify it by seeing the number on top of every build. Click the number to see what happened during that build. You can monitor the whole process, your logs, and more from here.

The Jenkins Sample Pipeline is helpful to understand what pipelines are and how you can use them. In your projects, pipelines can automate the whole Software Development Lifecycle.
Conclusion
If you have come this far, congratulations! You have a working Jenkins configured on your Kubernetes cluster and a sample pipeline. Jenkins is a world in itself and provides a lot of plugins and options to support any development team. To learn more about Kubernetes and Jenkins, feel free to explore the resources on CloudSigma and the official Jenkins documentation.
Happy Computing!
- How to Deploy WordPress with Persistent Volume on Kubernetes Cluster - March 17, 2023
- Deploying Applications on Kubernetes Using Argo CD and GitOps - October 26, 2022
- Using Node.js Modules with npm and package.json: A Tutorial - October 6, 2022
- Using Ansible to Install and Configure WordPress with LAMP on Ubuntu - September 23, 2022
- Creating Views in the Django Web Application Framework - September 22, 2022