
Server automation is a secure and reliable process of managing and monitoring servers in an effective and tech-savvy way. Unlike the traditional style of managing servers at data centers controlled by a dedicated team of experts, all servers are managed using automation. As a result, human errors are minimized.
Configuration management tools like Ansible, Puppet, Terraform, to name a few, are typically used to automate servers. These tools set up servers using automation by establishing standard procedures for new servers while eliminating potential errors when done manually.
Ansible is a robust open-source project. It is flexible, easy to use, and has the most simplified architecture. There is no coding background required to use Ansible playbooks and it doesn’t require installing software on the nodes. Above all, it is packed with excellent capabilities that allow it to write scripts and streamline automation.
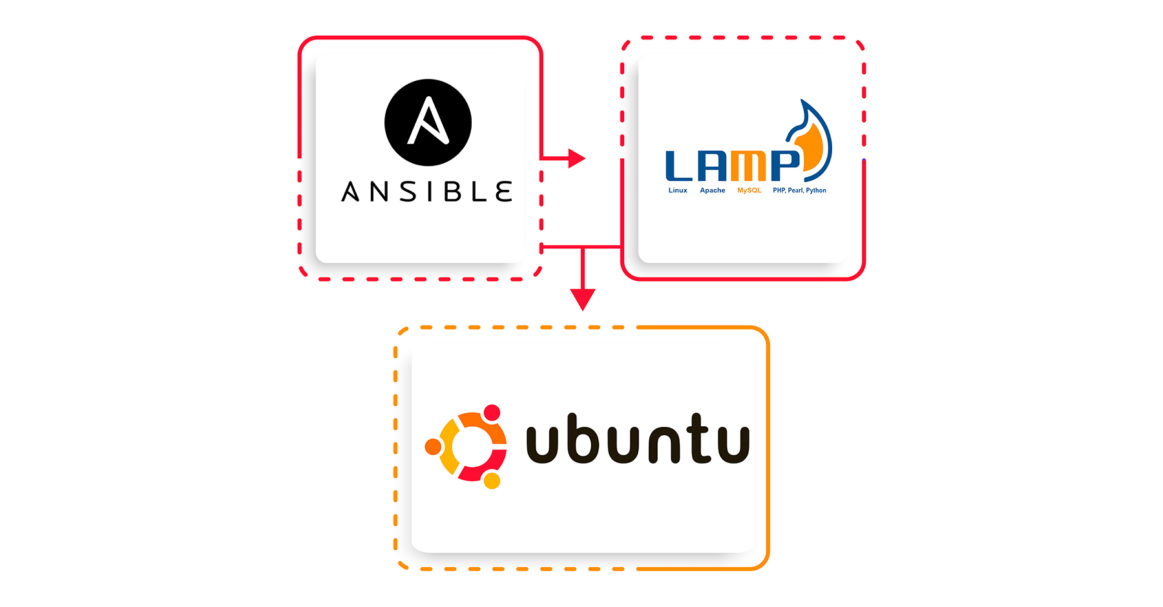
In this guide, we’ll walk you through the steps of installing and configuring LAMP on Ubuntu 20.04 with Ansible.
Prerequisites
To follow along with this tutorial, you’ll need:
- Ubuntu installed on your system.
- One or more Ansible Hosts: One or more remote Ansible hosts running the latest Ubuntu must be set up initially. Follow the tutorial Automating Server Setup using Ansible and Ubuntu 20.04 for the setup.
- One Ansible control node: An Ubuntu machine with Ansible installed, configured, and connected to your Ansible hosts using SSH keys:
-
- The control node must have a user with sudo privileges and a firewall turned ON.
- If you need help setting up Ansible, check the tutorial on installing and configuring Ansible on Ubuntu 20.04.
What is the Purpose of the Ansible Playbook?
This Ansible playbook is an alternative way to run through the procedure outlined in our guide LAMP Stack Setup – Linux Apache MySQL PHP.
Running the Ansible playbook will result in the following actions on your Ansible hosts:
-
Install aptitude, an alternative to the apt package manager as preferred by Ansible.
-
Install all the necessary LAMP packages.
-
Create a new Apache VirtualHost and configure a dedicated document root.
-
Turn ON the new VirtualHost.
-
Turn OFF the default Apache website i.e. set the disable_default variable to true.
-
Choose a password for the MySQL root user.
-
Remove anonymous MySQL accounts and the test database.
-
Set up UFW to allow HTTP traffic on the configured port, where the default is 80.
-
Set up a PHP test script.
After the Ansible playbook completes running, you will see a web PHP environment running on top of Apache as per the configurations we have set.
Utilizing the Ansible Playbook
First, get the LAMP playbook and its dependencies from the do-community/ansible-playbooks repository. Next, clone the repository with the LAMP playbook to a local folder inside the Ansible Control Node.
Run the git pull command to make sure you have access to the right content we are going to use in this tutorial:
|
1 2 |
cd ~/ansible-playbooks git pull |
If you are using the do-community/ansible-playbooks repository for the first time, consider cloning the repository to your home folder:
|
1 2 3 |
cd ~ git clone https://github.com/do-community/ansible-playbooks.git cd ansible-playbooks |
Go to the lamp_ubuntu2004 folder and you’ll see the structure:
|
1 2 3 4 5 6 7 8 |
lamp_ubuntu2004 ├── files │ ├── apache.conf.j2 │ └── info.php.j2 ├── vars │ └── default.yml ├── playbook.yml └── readme.md |
Here is an overview of what these files mean:
-
files/info.php.j2: This is a template file where you can set up a PHP test page on the root of the webserver.
-
files/apache.conf.j2: Another template file used to set up the Apache VirtualHost.
-
vars/default.yml: It’s a variable file to customize playbook settings.
-
playbook.yml: This file contains all contents of the tasks to be executed on the remote server/s.
-
readme.md: A read file containing the information about this playbook.
Let’s customize the MySQL and Apache configurations by making changes in the playbook’s variable file. Navigate to the lamp_ubuntu2004 directory and open the vars/default.yml file using nano editor:
|
1 2 |
cd lamp_ubuntu2004 nano vars/default.yml |
On opening the vars/default.yml file, there will be a list of variables that needs to be modified:
|
1 2 3 4 5 6 7 |
--- mysql_root_password: "mysql_root_password" app_user: "justin" http_host: "your_domain" http_conf: "your_domain.conf" http_port: "80" disable_default: true |
Let’s understand each of the variables in detail:
-
mysql_root_password: Stores the password for the root MySQL account.
-
app_user: It is a remote non-root user on the Ansible host that acts as the owner of the application files.
-
http_host: Displays your domain name.
-
http_conf: Displays the name of the configuration file created within Apache.
-
http_port: It’s the HTTP port for this virtual host, and 80 is the default.
-
disable_default: Used to undo default options that come with Apache.
Then, save and close the vars/default.yml file.
Once all the setup is done, we’re ready to run this playbook on the servers. By default, most of the servers on the playbooks are configured to be executed on every server in the inventories. Let’s use the -l flag to impact only a single server or a selected group subset that gets affected by the playbook. Alternatively, we can use the -u flag to get a detailed view of which remote server is getting connected and is executing on the remote hosts.
Let’s execute the playbook on one server server1 and connect it with one user as justin:
|
1 |
ansible-playbook playbook.yml -l server1 -u justin |
You will get output similar to this:
|
1 2 3 4 5 6 7 8 9 10 11 12 13 14 |
PLAY [all] ********************************************************************************************************* TASK [Gathering Facts] *********************************************************************************************************ok: [server1] TASK [Install prerequisites] *********************************************************************************************************ok: [server1] => (item=aptitude) ... TASK [UFW - Allow HTTP on port 80] ********************************************************************************************************* changed: [server1] TASK [Sets Up PHP Info Page] ********************************************************************************************************* changed: [server1] RUNNING HANDLER [Reload Apache] ********************************************************************************************************* changed: [server1] RUNNING HANDLER [Restart Apache] ********************************************************************************************************* changed: [server1] PLAY RECAP ********************************************************************************************************* server1 : ok=15 changed=11 unreachable=0 failed=0 skipped=0 rescued=0 ignored=0 |
Once you see the playbook completes running, navigate to your web browser and access the host of the server. Don’t forget to attach the /info.php at the end of the IP:
|
1 |
http://server_host_or_IP/info.php |
On clicking on this url, you will see a page like this:
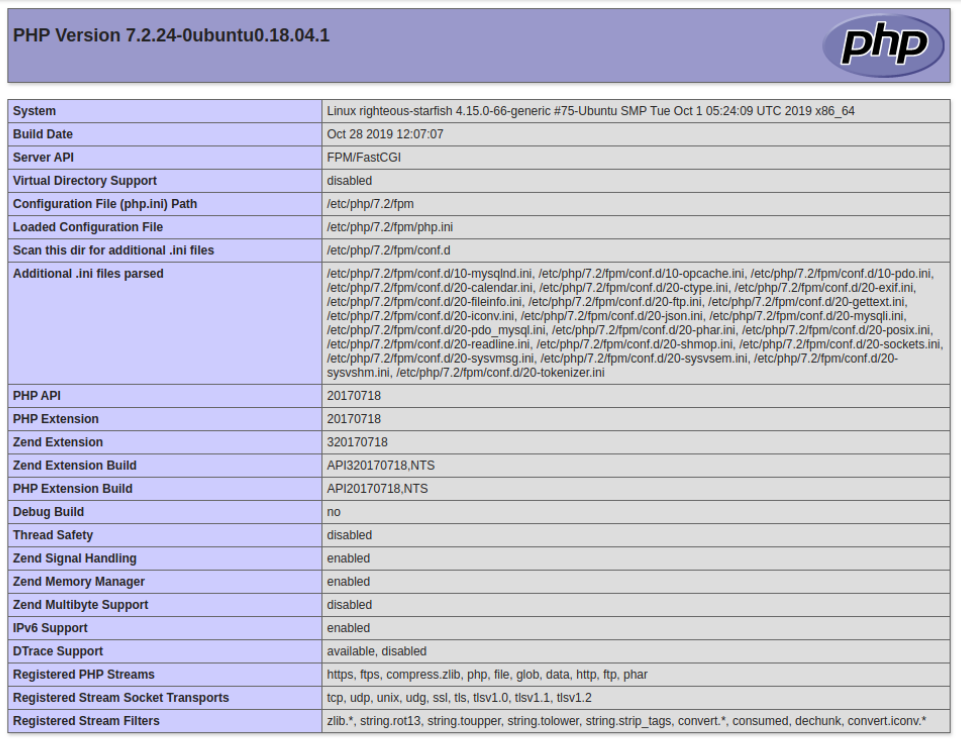
|
Warning: The page displayed contains sensitive information about your PHP environment. Therefore, it is recommended to remove your personal information from the server using the following command: rm -f /var/www/info.php |
What’s in the Playbook?
Next, let’s understand the meaning and significance of the files used in the ansible-playbook content:
-
vars/default.yml
The default.yml variable file contains the domain name and password of the MySQL root account. These are default values used in the ansible-playbook tasks:
|
1 2 3 4 5 6 7 |
--- mysql_root_password: "mysql_root_password" app_user: "justin" http_host: "your_domain" http_conf: "your_domain.conf" http_port: "80" disable_default: true |
- files/apache.conf.j2
The apache.conf.j2 file is a Jinja 2 template file used to configure a new Apache VirtualHost. The variables used within this template must be defined in the vars/default.yml variable file:
|
1 2 3 4 5 6 7 8 9 10 11 12 13 14 15 16 17 |
<VirtualHost *:{{ http_port }}> ServerAdmin webmaster@localhost ServerName {{ http_host }} ServerAlias www.{{ http_host }} DocumentRoot /var/www/{{ http_host }} ErrorLog ${APACHE_LOG_DIR}/error.log CustomLog ${APACHE_LOG_DIR}/access.log combined <Directory /var/www/{{ http_host }}> Options -Indexes </Directory> <IfModule mod_dir.c> DirectoryIndex index.php index.html index.cgi index.pl index.xhtml index.htm </IfModule> </VirtualHost> |
- files/info.php.j2
Similar to files/apache.conf.j2, the info.php.j2 file is also a Jinja template. We use this file to set up a test PHP script in the document root of a newly configured LAMP server:
|
1 2 |
<?php phpinfo(); |
-
playbook.yml
The playbook.yml file is where all tasks from this setup are defined. In this file, all the LAMP stacks are configured. It starts with defining the group of targeted servers and is set to all. Also, it takes the become value as true ( become: true), and defines all the tasks that need to be executed. Next, the yaml file has the default file, which is the vars/default.yml variable file, to load the configuration options:
|
1 2 3 4 5 6 7 8 9 10 11 12 13 14 15 16 17 18 19 20 21 22 23 24 25 26 27 28 29 30 31 32 33 34 35 36 37 38 39 40 41 42 43 44 45 46 47 48 49 50 51 52 53 54 55 56 57 58 59 60 61 62 63 64 65 66 67 68 69 70 71 72 73 74 |
--- - hosts: all become: true vars_files: - vars/default.yml tasks: - name: Install prerequisites apt: name={{ item }} update_cache=yes state=latest force_apt_get=yes loop: [ 'aptitude' ] #Apache Configuration - name: Install LAMP Packages apt: name={{ item }} update_cache=yes state=latest loop: [ 'apache2', 'mysql-server', 'python3-pymysql', 'php', 'php-mysql', 'libapache2-mod-php' ] - name: Create document root file: path: "/var/www/{{ http_host }}" state: directory owner: "{{ app_user }}" mode: '0755' - name: Set up Apache virtualhost template: src: "files/apache.conf.j2" dest: "/etc/apache2/sites-available/{{ http_conf }}" notify: Reload Apache - name: Enable new site shell: /usr/sbin/a2ensite {{ http_conf }} notify: Reload Apache - name: Disable default Apache site shell: /usr/sbin/a2dissite 000-default.conf when: disable_default notify: Reload Apache # MySQL Configuration - name: Sets the root password mysql_user: name: root password: "{{ mysql_root_password }}" login_unix_socket: /var/run/mysqld/mysqld.sock - name: Removes all anonymous user accounts mysql_user: name: '' host_all: yes state: absent login_user: root login_password: "{{ mysql_root_password }}" - name: Removes the MySQL test database mysql_db: name: test state: absent login_user: root login_password: "{{ mysql_root_password }}" # UFW Configuration - name: "UFW - Allow HTTP on port {{ http_port }}" ufw: rule: allow port: "{{ http_port }}" proto: tcp # PHP Info Page - name: Sets Up PHP Info Page template: src: "files/info.php.j2" dest: "/var/www/{{ http_host }}/info.php" handlers: - name: Reload Apache service: name: apache2 state: reloaded - name: Restart Apache service: name: apache2 state: restarted |
You can modify these files based on the needs and requirements of your project.
Conclusion
In this tutorial, we went through the steps of installing and configuring LAMP on a remote server with Ansible. There are plenty of other customization options you can experiment with. For instance, using the Ansible official documentation and using the cases of the mysql_user from the Ansible module is an excellent way to level up your game. Also, follow the steps discussed in this guide to practice automation using other configuration management tools and OS to increase the level of difficulty.
Are you new to the LAMP stack and want to dive deep into this topic? Explore the following tutorials on our blog:
- How to Install WordPress with LAMP on Ubuntu 20.04
- How to install Linux, Apache, MySQL, PHP (LAMP) Stack on Centos-7
- How to Instal the LEMP Stack Linux Nginx MySQL PHP on Ubuntu 20.04
Happy Computing!
- How To Enable, Create and Use the .htaccess File: A Tutorial - March 8, 2023
- An Overview of Queries in MySQL - October 28, 2022
- Introduction to Cookies: Understanding and Working with JavaScript Cookies - October 25, 2022
- An Overview of Data Types in Ruby - October 24, 2022
- The Architecture of Iptables and Netfilter - October 10, 2022