

Bevezetés
Docker egy konténerplatform, amely egy könnyű, virtualizált, hordozható, szoftveresen definiált szabványosított környezet. Lehetővé teszi, hogy a szoftver a fizikai gazdagépen futó többi szoftvertől elkülönítve fusson. A Docker a szoftverfejlesztés folyamatos fejlesztési és integrációs aspektusának meghatározó eleme. Egy könnyű alternatívát kínál a virtuális gépekkel szemben, és lehetővé teszi a fejlesztők számára az elosztott alkalmazásarchitektúrák előnyeinek kihasználását. Ha szeretne egy alapos áttekintést a Docker-ökoszisztémáról, olvassa el ezt a cikket.
Az alkalmazások Dockerrel történő felépítésének folyamata azzal kezdődik, hogy a fejlesztő létrehoz egy image-et az alkalmazásához. Ezután az image egy konténerben kerül telepítésre. Az image tartalmazza az alkalmazás meghatározó összetevőit, mint például az alkalmazás kódját, a könyvtárakat, a konfigurációs fájlokat, a környezeti változókat és a futtatókörnyezetet. Az image szabványosítja a konténeren belüli környezetet, megadva a konténerizációnak a hordozhatósági jellemzőket. Node.js egy nyílt forráskódú, platformfüggetlen backend JavaScript futtatókörnyezet, amely képes JavaScript-kódot futtatni a webböngészőn kívül is. Ez a Chrome V8 JavaScript Engine-re épül.. Express.js egy minimalista backend JavaScript keretrendszer, amely a Node.js-en fut.
Ebben az útmutatóban egy olyan weboldalhoz fogunk image-et készíteni, amely az Express keretrendszeren fut. A következőt fogjuk használni: Bootstrap, ami egy frontend könyvtár, hogy a frontend szebben nézzen ki. Miután létrehoztuk a képet, építünk egy konténert, és feltöltjük a Docker Hub. A Docker Hub lehetővé teszi a fejlesztők számára, hogy konténerizált alkalmazásokat hosztoljanak a bármely Docker környezetbe történő egyszerű telepítéshez. Miután a konténered a Docker Hubon van hosztolva, le fogjuk tölteni (pull), és építünk egy másik képet, amely ténylegesen kiszolgálja majd a weboldalunkat.
Előfeltételek
Ez egy gyakorlati útmutató lesz. Érdemes létrehoznod egy olyan környezetet, amely lehetővé teszi a lépések követését.
- Szükséged lesz egy telepített Ubuntu 20.04-re mint kezdeti operációs környezetre, és hozz létre egy nem-root felhasználót sudo jogosultságokkal. Jelentkezz be a nem-root felhasználóval, és folytasd a következő lépésekkel.
- Telepítened kell a Dockert. Kövesd az 1., 2., 3. és 4. lépést a következő útmutatónkban: hogyan kell telepíteni és működtetni a Dockert Ubuntu-n. Ez bármely Ubuntu disztribúció esetén működni fog.
- Hozz létre egy Docker Hub fiókot, ha még nincs. Ezen a linken elérheted a Docker Hub gyorsútmutatót.
- Telepítsd a Node.js-t és az NPM-et. Az NPM egy JavaScript csomagkezelő. Követheted ezeket az utasításokat a Node és az npm telepítéséhez.
1. lépés: Az alkalmazás függőségeinek konfigurálása
You need to create your application source code before you can create the image. The application source code includes code, static content, and dependencies that will be copied to the container. Start by creating a directory for your project in the home directory of the non-root. We will call it node_express, but you are free to use a directory name that you like:
|
1 |
mkdir node_express |
Ezután lépj be ebbe a könyvtárba:
|
1 |
cd node_express |
This will be your application root directory. A node.js application expects a package.json file in the root folder. Npm uses this file to determine what dependencies your application needs. Enter the following command to create this file:
|
1 |
nano package.json |
Ezután add hozzá a következő kódrészletet a fájlhoz. Tetszés szerint módosíthatod a nevet, a szerzőt, a leírást és a belépési pont fájlját:
|
1 2 3 4 5 6 7 8 9 10 11 12 13 14 15 16 |
{ "name": "node-express-docker-image", "version": "1.0.0", "description": "Nodejs Express Docker Image Example", "author": "hackins", "main": "index.js", "license": "ISC", "keywords": [ "nodejs", "express", "bootstrap" ], "dependencies": { "express": "^4.17.1" } } |
Amint látható, ez a fájl határozza meg a projekt nevét, verzióját, szerzőjét és azt a licencet, amely alatt az alkalmazáskód megosztásra kerül. Javasoljuk, hogy használjon rövid és leíró nevet a projekthez, hogy elkerülje a duplikációkat az npm registry-ben. Megadtuk a(z) ISC licencet a projekthez, amely lehetővé teszi az alkalmazáskód szabad másolását, módosítását vagy terjesztését.
A legfontosabb, hogy vegye figyelembe a következő irányelveket a fájlban:
- “
main”: this directive specifies the entry point of the application, which we set as index.js. We will be creating this file shortly. - “
dependencies”: this directive specifies the application dependencies that will be pulled from the npm registry when we run thenpmcommand, in our case, we want Express version 4.17.1 and above.
Most elmentheti a fájlt a Ctrl + O billentyűkombináció megnyomásával. Ezután zárja be a fájlt a Ctrl + X megnyomásával. Ezután a következő parancs futtatásával telepítjük a függőségeket:
|
1 |
npm install |
The command installs the application dependencies specified in the package.json file inside the node_modules directories. They have been auto-created when you first ran the command. With our application dependencies installed, you can now start adding the application code.
2. lépés: Az alkalmazáskód-fájlok hozzáadása
Egy egyszerű receptweboldalt fogunk készíteni, az allrecipes. The main entry point for the application is the index.js file. We will add a views directory that will hold the various pages and static assets of the project. The website will have a landing page that will contain introductory information and links to some recipes.
Our landing page code will be placed in the home.html file. First, create the index.js file by entering the following command:
|
1 |
nano index.js |
Adja hozzá a következő kódot, amely importálja és létrehozza az Express alkalmazást. Meghatározza a Router objektumot, a báziskönyvtárat és a portot is, amelyen ez az alkalmazás kiszolgálásra kerül:
|
1 2 3 4 5 6 |
const express = require('express'); const app = express(); const router = express.Router(); const path = __dirname + '/views/'; const port = 8090; |
require is a JavaScript function that loads a module. In this case, we are loading the express module. Then, we will use the imported module to create the express and router objects. The router object performs the routing functions of the app by responding to HTTP method calls that will add to this object as we go along with the tutorial.
We have also set path and port. The path constant defines the base directory for the code. In our case it’s the views subdirectory inside the project root directory. The port specifies the port on which the express app should listen on, in our example, we have set it to 8090.
Once we have the constants, we can specify some routes for the application using the router object. Add the following code to the index.js file to specify the routes:
|
1 2 3 4 5 6 7 8 9 10 11 12 13 14 15 16 17 18 19 20 |
router.use(function (req,res,next) { console.log('/' + req.method); next(); }); router.get('/', function(req,res){ res.sendFile(path + 'home.html'); }); router.get('/lasagna', function(req,res){ res.sendFile(path + 'lasagna.html'); }); router.get('/guacamole', function(req,res){ res.sendFile(path + 'guacamole.html'); }); router.get('/banana-bread', function(req,res){ res.sendFile(path + 'banana_bread.html'); }); |
Tud köztes szoftvert hozzáadni to routes using the router.use function. In this case, we add a function that logs the router’s requests before passing them to the application routes. A GET request to the application’s base will return a home.html page. Then, we have added pages for three recipes that will also be retrieved using the GET request to the specific recipe page.
Finally, add the following code to mount the router middleware and the application static assets. In addition, tell the express application to listen on port 8090:
|
1 2 3 4 5 6 |
app.use(express.static(path)); app.use('/', router); app.listen(port, function () { console.log('Nodejs Express Example App listening on port ' + port) }) |
Your complete index.js file should look like this:
|
1 2 3 4 5 6 7 8 9 10 11 12 13 14 15 16 17 18 19 20 21 22 23 24 25 26 27 28 29 30 31 32 33 34 |
const express = require('express'); const app = express(); const router = express.Router(); const path = __dirname + '/views/'; const port = 8090; router.use(function (req,res,next) { console.log('/' + req.method); next(); }); router.get('/', function(req,res){ res.sendFile(path + 'home.html'); }); router.get('/lasagna', function(req,res){ res.sendFile(path + 'lasagna.html'); }); router.get('/guacamole', function(req,res){ res.sendFile(path + 'guacamole.html'); }); router.get('/banana-bread', function(req,res){ res.sendFile(path + 'banana_bread.html'); }); app.use(express.static(path)); app.use('/', router); app.listen(port, function () { console.log('Nodejs Express Example App listening on port ' + port) }) |
You may save and close the file now. The next step is to add the static web pages to the views directory. Start by entering the following command to create the directory:
|
1 |
mkdir views |
Enter the following command to open the home.html landing page file:
|
1 |
nano views/home.html |
Adja hozzá a következő kódot a fájlhoz. A kód importálja a Bootstrapet, és információt nyújt a weboldal látogatóinak arról, hogy miről is szól a weboldal:
|
1 2 3 4 5 6 7 8 9 10 11 12 13 14 15 16 17 18 19 20 21 22 23 24 25 26 27 28 29 30 31 32 33 34 35 36 37 38 39 40 41 42 43 44 45 46 47 48 49 50 51 52 53 54 55 56 57 58 59 60 61 |
<!DOCTYPE html> <html lang="en"> <head> <meta charset="UTF-8"> <meta name="viewport" content="width=device-width, initial-scale=1"> <meta name="description" content=""> <meta name="author" content="Mark Otto, Jacob Thornton, and Bootstrap contributors"> <meta name="generator" content="Hugo 0.80.0"> <title>Awesome Recipes</title> <!-- Bootstrap core CSS --> <link href="https://cdn.jsdelivr.net/npm/bootstrap@5.0.0-beta2/dist/css/bootstrap.min.css" rel="stylesheet" crossorigin="anonymous"> <link href="css/custom.css" rel="stylesheet"> </head> <body> <nav class="navbar navbar-dark bg-dark navbar-static-top navbar-expand-md"> <div class="container"> <button type="button" class="navbar-toggler collapsed" data-toggle="collapse" data-target="#bs-example-navbar-collapse-1" aria-expanded="false"> <span class="sr-only">Navigáció váltása</span> </button> <a class="navbar-brand" href="#">Awesome Recipes</a> <div class="collapse navbar-collapse justify-content-center" id="bs-example-navbar-collapse-1"> <ul class="nav navbar-nav justify-content-center"> <li class="active nav-item"> <a href="/" class="nav-link">Home</a> </li> <li class="nav-item"> <a href="/lasagna" class="nav-link">Lasagna</a> </li> <li class="nav-item"> <a href="/guacamole" class="nav-link">Guacamole</a> </li> <li class="nav-item"> <a href="/banana-bread" class="nav-link">Banana Bread</a> </li> </ul> </div> </div> </nav> <main> <section class="py-5 text-center container"> <div class="row py-lg-5"> <div class="col-lg-6 col-md-8 mx-auto"> <h1 class="fw-light">Awesome Recipe</h1> <p class="lead text-muted"> Find and share everyday cooking inspiration from these awesome recipes. Discover recipes, cooks, videos, and how-tos based on the food you love and the friends you follow. <br /> <em>(Nothing serious, this is just for our demo node-express-docker image app)</em> </p> </div> </div> </section> </main> </body> </html> |
A Bootstrap importálásán kívül az oldal egy alapvető navigációs menüt is hozzáad, hogy segítsen a lapok közötti navigálásban és a kezdőlapra való visszatérésben. Hozzáadtunk egy sort a saját CSS-fájlunk importálásához is:
|
1 |
<link href="css/custom.css" rel="stylesheet"> |
We will use this file to add custom styling to the application later on. Now, let’s create the three pages for the recipes. We first start by creating the lasagna page. Open the file with nano editor using the following command:
|
1 |
nano views/lasagna.html |
In the opened file, add the following code. This file will import Bootstrap, the custom.css file, specify a navigation menu and offer some Lasagna recipe information:
|
1 2 3 4 5 6 7 8 9 10 11 12 13 14 15 16 17 18 19 20 21 22 23 24 25 26 27 28 29 30 31 32 33 34 35 36 37 38 39 40 41 42 43 44 45 46 47 48 49 50 51 52 53 54 55 56 57 58 59 60 61 62 63 64 65 66 67 68 69 70 71 72 73 74 75 76 77 78 79 80 81 82 83 |
<!DOCTYPE html> <html lang="en"> <head> <meta charset="UTF-8"> <meta name="viewport" content="width=device-width, initial-scale=1"> <meta name="description" content=""> <meta name="author" content="Mark Otto, Jacob Thornton, and Bootstrap contributors"> <meta name="generator" content="Hugo 0.80.0"> <title>Lasagna Recipe</title> <!-- Bootstrap core CSS --> <link href="https://cdn.jsdelivr.net/npm/bootstrap@5.0.0-beta2/dist/css/bootstrap.min.css" rel="stylesheet" crossorigin="anonymous"> <link href="css/custom.css" rel="stylesheet"> </head> <body> <nav class="navbar navbar-dark bg-dark navbar-static-top navbar-expand-md"> <div class="container"> <button type="button" class="navbar-toggler collapsed" data-toggle="collapse" data-target="#bs-example-navbar-collapse-1" aria-expanded="false"> <span class="sr-only">Navigáció váltása</span> </button> <a class="navbar-brand" href="#">Awesome Recipes</a> <div class="collapse navbar-collapse justify-content-center" id="bs-example-navbar-collapse-1"> <ul class="nav navbar-nav justify-content-center"> <li class="active nav-item"> <a href="/" class="nav-link">Home</a> </li> <li class="nav-item"> <a href="/lasagna" class="nav-link">Lasagna</a> </li> <li class="nav-item"> <a href="/guacamole" class="nav-link">Guacamole</a> </li> <li class="nav-item"> <a href="/banana-bread" class="nav-link">Banana Bread</a> </li> </ul> </div> </div> </nav> <main> <section class="py-5 text-center container bg-light"> <div class="row py-lg-5"> <div class="col-lg-6 col-md-8 mx-auto"> <h1 class="fw-light">The Best Lasagna Recipe</h1> <p class="lead text-muted"> This is the best lasagna you will ever make. <br /> <em>(Nothing serious, this is just for our demo node-express-docker image app)</em> </p> <h3>Ingredients</h3> <ul class="list-group"> <li class="list-group-item">1 pound sweet Italian sausage</li> <li class="list-group-item">¾ pound lean ground beef</li> <li class="list-group-item">½ cup minced onion</li> <li class="list-group-item">2 cloves garlic, crushed</li> <li class="list-group-item">1 (28 ounce) can crushed tomatoes</li> <li class="list-group-item">2 (6 ounce) cans tomato paste</li> <li class="list-group-item">2 (6.5 ounce) cans canned tomato sauce</li> <li class="list-group-item">½ cup water</li> <li class="list-group-item">2 tablespoons white sugar</li> <li class="list-group-item">1 ½ teaspoons dried basil leaves</li> <li class="list-group-item">½ teaspoon fennel seeds</li> <li class="list-group-item">1 teaspoon Italian seasoning</li> <li class="list-group-item">1 ½ teaspoons salt, divided, or to taste</li> <li class="list-group-item">¼ teaspoon ground black pepper</li> <li class="list-group-item">4 tablespoons chopped fresh parsley</li> <li class="list-group-item">12 lasagna noodles</li> <li class="list-group-item">16 ounces ricotta cheese</li> <li class="list-group-item">1 egg</li> <li class="list-group-item">¾ pound mozzarella cheese, sliced</li> <li class="list-group-item">¾ cup grated Parmesan cheese</li> </ul> </div> </div> </section> </main> </body> </html> |
Let’s follow the same process to create a file for the guacamole recipe page. Open the file with nano by running the following command:
|
1 |
nano views/guacamole.html |
Ezután adja hozzá ezt a kódot a fájlhoz:
|
1 2 3 4 5 6 7 8 9 10 11 12 13 14 15 16 17 18 19 20 21 22 23 24 25 26 27 28 29 30 31 32 33 34 35 36 37 38 39 40 41 42 43 44 45 46 47 48 49 50 51 52 53 54 55 56 57 58 59 60 61 62 63 64 65 66 67 68 69 70 71 |
<!DOCTYPE html> <html lang="en"> <head> <meta charset="UTF-8"> <meta name="viewport" content="width=device-width, initial-scale=1"> <meta name="description" content=""> <meta name="author" content="Mark Otto, Jacob Thornton, and Bootstrap contributors"> <meta name="generator" content="Hugo 0.80.0"> <title>Guacamole Recipe</title> <!-- Bootstrap core CSS --> <link href="https://cdn.jsdelivr.net/npm/bootstrap@5.0.0-beta2/dist/css/bootstrap.min.css" rel="stylesheet" crossorigin="anonymous"> <link href="css/custom.css" rel="stylesheet"> </head> <body> <nav class="navbar navbar-dark bg-dark navbar-static-top navbar-expand-md"> <div class="container"> <button type="button" class="navbar-toggler collapsed" data-toggle="collapse" data-target="#bs-example-navbar-collapse-1" aria-expanded="false"> <span class="sr-only">Navigáció váltása</span> </button> <a class="navbar-brand" href="#">Awesome Recipes</a> <div class="collapse navbar-collapse justify-content-center" id="bs-example-navbar-collapse-1"> <ul class="nav navbar-nav justify-content-center"> <li class="active nav-item"> <a href="/" class="nav-link">Home</a> </li> <li class="nav-item"> <a href="/lasagna" class="nav-link">Lasagna</a> </li> <li class="nav-item"> <a href="/guacamole" class="nav-link">Guacamole</a> </li> <li class="nav-item"> <a href="/banana-bread" class="nav-link">Banana Bread</a> </li> </ul> </div> </div> </nav> <main> <section class="py-5 text-center container bg-light"> <div class="row py-lg-5"> <div class="col-lg-6 col-md-8 mx-auto"> <h1 class="fw-light">The Best Guacamole Recipe</h1> <p class="lead text-muted"> You can make this avocado salad smooth or chunky depending on your tastes. <br /> <em>(Nothing serious, this is just for our demo node-express-docker image app)</em> </p> <h3>Ingredients</h3> <ul class="list-group"> <li class="list-group-item">3 avocados - peeled, pitted, and mashed</li> <li class="list-group-item">1 lime, juiced</li> <li class="list-group-item">1 teaspoon salt</li> <li class="list-group-item">½ cup diced onion</li> <li class="list-group-item">3 tablespoons chopped fresh cilantro</li> <li class="list-group-item">2 roma (plum) tomatoes, diced</li> <li class="list-group-item">1 teaspoon minced garlic</li> <li class="list-group-item">1 pinch ground cayenne pepper (Optional)</li> </ul> </div> </div> </section> </main> </body> </html> |
Finally, let’s create the banana_bread.html file by entering the command:
|
1 |
nano views/banana_bread.html |
Ezután adja hozzá a következő HTML-kódot a fájlhoz:
|
1 2 3 4 5 6 7 8 9 10 11 12 13 14 15 16 17 18 19 20 21 22 23 24 25 26 27 28 29 30 31 32 33 34 35 36 37 38 39 40 41 42 43 44 45 46 47 48 49 50 51 52 53 54 55 56 57 58 59 60 61 62 63 64 65 66 67 68 69 70 |
<!DOCTYPE html> <html lang="en"> <head> <meta charset="UTF-8"> <meta name="viewport" content="width=device-width, initial-scale=1"> <meta name="description" content=""> <meta name="author" content="Mark Otto, Jacob Thornton, and Bootstrap contributors"> <meta name="generator" content="Hugo 0.80.0"> <title>Banana Bread Recipe</title> <!-- Bootstrap core CSS --> <link href="https://cdn.jsdelivr.net/npm/bootstrap@5.0.0-beta2/dist/css/bootstrap.min.css" rel="stylesheet" crossorigin="anonymous"> <link href="css/custom.css" rel="stylesheet"> </head> <body> <nav class="navbar navbar-dark bg-dark navbar-static-top navbar-expand-md"> <div class="container"> <button type="button" class="navbar-toggler collapsed" data-toggle="collapse" data-target="#bs-example-navbar-collapse-1" aria-expanded="false"> <span class="sr-only">Navigáció váltása</span> </button> <a class="navbar-brand" href="#">Awesome Recipes</a> <div class="collapse navbar-collapse justify-content-center" id="bs-example-navbar-collapse-1"> <ul class="nav navbar-nav justify-content-center"> <li class="active nav-item"> <a href="/" class="nav-link">Home</a> </li> <li class="nav-item"> <a href="/lasagna" class="nav-link">Lasagna</a> </li> <li class="nav-item"> <a href="/guacamole" class="nav-link">Guacamole</a> </li> <li class="nav-item"> <a href="/banana-bread" class="nav-link">Banana Bread</a> </li> </ul> </div> </div> </nav> <main> <section class="py-5 text-center container bg-light"> <div class="row py-lg-5"> <div class="col-lg-6 col-md-8 mx-auto"> <h1 class="fw-light">The Best Banana Banana Bread Recipe</h1> <p class="lead text-muted"> Why compromise the banana flavor? This banana bread is moist and delicious with loads of banana flavor! Friends and family love my recipe and say it's by far the best! It's wonderful toasted!! Enjoy! <br /> <em>(Nothing serious, this is just for our demo node-express-docker image app)</em> </p> <h3>Ingredients</h3> <ul class="list-group"> <li class="list-group-item">2 cups all-purpose flour</li> <li class="list-group-item">1 teaspoon baking soda</li> <li class="list-group-item">¼ teaspoon salt</li> <li class="list-group-item">½ cup butter</li> <li class="list-group-item">¾ cup brown sugar</li> <li class="list-group-item">2 eggs, beaten</li> <li class="list-group-item">2⅓ cups mashed overripe bananas</li> </ul> </div> </div> </section> </main> </body> </html> |
Now, we have created all the pages. If you remember, we are to add the css/custom.css file. Enter the following command to create the directory:
|
1 |
mkdir views/css |
Ezután hozza létre és nyissa meg a fájlt a nano szerkesztőben a következő paranccsal:
|
1 |
nano views/css/custom.css |
További CSS kódokat is hozzáadhat a weboldal stílusának testreszabásához, ahogy szeretné. A rövidség kedvéért adjuk hozzá a következő kódrészletet a fájlhoz:
|
1 2 3 4 5 6 7 8 9 10 11 12 13 |
.bd-placeholder-img { font-size: 1.125rem; text-anchor: middle; -webkit-user-select: none; -moz-user-select: none; user-select: none; } @media (min-width: 768px) { .bd-placeholder-img-lg { font-size: 3.5rem; } } |
Ha végzett, mentse el és zárja be a fájlt.
Most már elindíthatja az alkalmazást, mivel az alkalmazás forráskódja és a projekt függőségei is telepítve vannak.
We had set the app to listen on a port 8090, run the following command to instruct the firewall to allow traffic through this port. If you had specified a different port, replace the port number in the command:
|
1 |
sudo ufw allow 8090 |
Most már elindíthatja az alkalmazást. De előtte győződjön meg róla, hogy a projekt gyökérkönyvtárában van, a következő parancs futtatásával:
|
1 |
cd ~/node_express |
Indítsa el az alkalmazást a node index.js paranccsal. Ha más belépési pontot adott meg, cserélje ki azt a saját belépési pontjára:
|
1 |
node index.js |
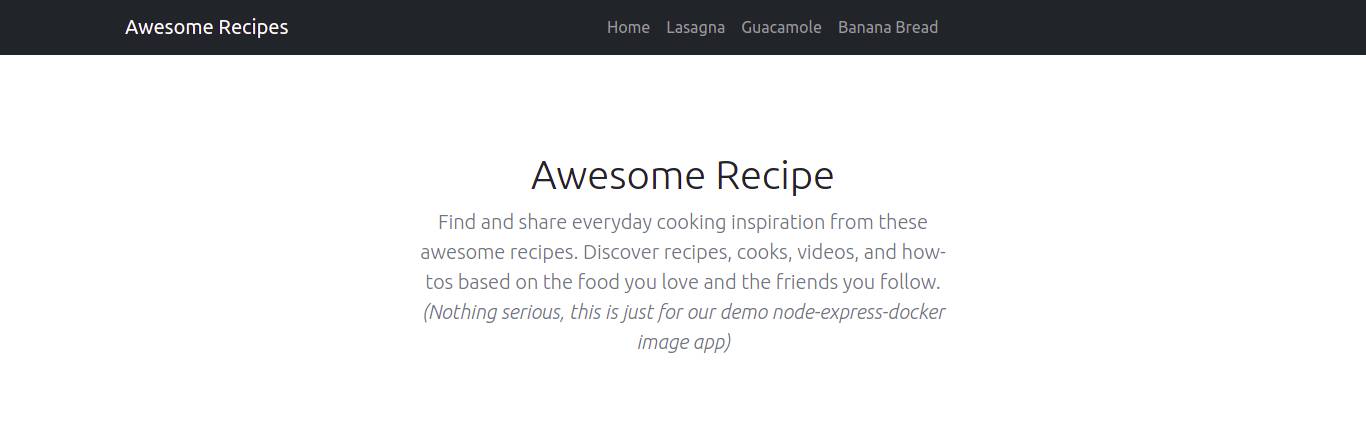
If you navigate your browser to http://your_public_server_ip:8090, you will see the Recipes landing page as defined:
You can see the links to the various recipes in the navigation. Let’s click on some. Below we have the Lasagna recipe page:

And here we have the Guacamole recipe page:

Eddig a pontig létrehozta az alkalmazást, és tesztelte, hogy az elvárásoknak megfelelően működik. A szerverből a Ctrl + C billentyűkombináció megnyomásával léphet ki, majd továbbléphet a Dockerfile létrehozására. A Dockerfile-ok segítenek a skálázhatóságban azáltal, hogy lehetővé teszik az alkalmazás egy példányának újbóli létrehozását, amikor szükséges.
3. lépés: A Dockerfile létrehozása
A Docker a Dockerfile-ban megadott utasításokat olvassa be a lemezképek készítésekor. Ez határozza meg az alkalmazás futtatókörnyezetét. Ezáltal segít a fejlesztőknek elkerülni a függőségekkel vagy a változó futtatókörnyezet-verziókkal kapcsolatos eltéréseket. Írja be a következő parancsot a Dockerfile létrehozásához:
|
1 |
nano Dockerfile |
A Docker-lemezkép több, egymásra épülő lemezképrétegből jön létre. Először egy alaplemezképet kell hozzáadnia, amely az alkalmazás kiindulópontját képezi.
Since the application expects to run in a node.js environment, we will start by adding the node:10-alpine lemezkép for node.js. Currently, as we are writing this tutorial, this is the a Node.js ajánlott LTS verziója. Azért választottuk ezt a konkrét lemezképet, mert az az Alpine Linux projektből származik. Ezért ez segít minimális szinten tartani az image méretét. Számos image-változat található a Docker Hub Node images oldalon, amelyek közül az igényeinek megfelelően választhat.
Add the following code to set the application’s base image using the FROM directive:
|
1 |
FROM node:10-alpine |
This image includes Node.js and npm. Every Dockerfile must begin with a FROM directive. The Docker node image comes with a non-root node user by default that you can use to run your application container as root. A Docker biztonsági ajánlása szerint nem javasolt a konténereket rootként futtatni, és a jogosultságokat csak az erőforrásaik futtatásához szükségesekre kell korlátozni.
In that case, we will be using the node user’s home directory as the working directory for the application as well as the user inside the container. You can check this Docker Node image best practices útmutatót további információkért.
We will create the node_modules subdirectory inside the /home/node along with the app directory to help streamline the permissions for the application code. Creating these directories ensures that they have the right permissions when we run the npm install command locally inside the containers. Once you have created the directories, you must set ownership on them to the node user. We will do this inside the Dockerfile by adding the following line:
|
1 |
mkdir -p /home/node/app/node_modules && chown -R node:node /home/node/app |
Ezután a következő sor hozzáadásával állíthatja be a munkakönyvtárat:
|
1 |
WORKDIR /home/node/app |
It’s a good idea to always set the WORKDIR so that Docker does not have to create one by default.
Add the following line to copy the package.json and package-lock.json files:
|
1 |
COPY package*.json ./ |
It’s recommended to add the COPY instruction before running npm install or copying application source code. It allows you to take advantage of Docker’s caching mechanism. During the build process, Docker checks whether it has a layer cached for every instruction. This means that if you have not changed the package.json file, then Docker will use the existing imager layer and avoid reinstalling node modules, hence faster build processes.
Before running npm install, add the following line to switch the user to node to ensure all the application files and node_modules directory are owned by the non-root node user:
|
1 |
USER node |
A konténerünk most már készen áll az npm install parancs futtatására. Adja hozzá a következő sort a Dockerfile-hoz:
|
1 |
RUN npm install |
Once node_modules have been installed, add the following line that will tell Docker to copy the application code into the application directory on the container with the right permissions and ownership, i.e. the non-root node user:
|
1 |
COPY --chown=node:node . . |
The last step is to expose the port 8090 on the container, as we had defined in our entry index.js file:
|
1 2 |
EXPOSE 8090 CMD [ "node", "index.js" ] |
EXPOSE sets which ports on the container will be open at runtime. CMD runs the command to start the application, in this case, node index.js.
Csak egy CMD parancs lehet a Dockerfile-ban, mivel csak az utolsó lép életbe. Kérjük, tekintse meg a Dockerfile referencia-dokumentációt a Dockerfile-lal végezhető műveletek listájáért.
A teljes Dockerfile-nak így kell kinéznie:
|
1 2 3 4 5 6 7 8 9 |
FROM node:10-alpine RUN mkdir -p /home/node/app/node_modules && chown -R node:node /home/node/app WORKDIR /home/node/app COPY package*.json ./ USER node RUN npm install COPY --chown=node:node . . EXPOSE 8090 CMD [ "node", "index.js" ] |
Most már elmentheti és bezárhatja a fájlt.
A következő lépés a .dockerignore fájl hozzáadása. Csakúgy, mint a .gitignore file, the .dockerignore specifies which files and directories within the project directory should not be copied over to the container.
Nyissa meg a fájlt a nano szerkesztővel:
|
1 |
nano .dockerignore |
Adja hozzá a következő sorokat a fájlhoz:
|
1 2 3 4 |
node_modules npm-debug.log Dockerfile .dockerignore |
If working with a git repo, then you should also add the .git directory and the .gitignore file. Save and close the file.
Ha minden jól ment, ideje felépíteni az alkalmazás image-ét a docker build command. You can add the –t flag to the docker build command to tag the image with a memorable name as opposed to the random string that docker sets by default. We will also be pushing the image to Docker Hub so, it’s best to include your Docker Hub username in the tag.
We will use nodejs-express-image as the tag name. You are free to choose a tag name that you like. Here is the command to build the image:
|
1 |
sudo docker build -t your_dockerhub_username/nodejs-express-image . |
Ne felejtse el kicserélni a your_dockerhub_username részt a tényleges Docker Hub felhasználónevére. A végén lévő . (pont) azt jelzi, hogy a build környezet az aktuális könyvtár.
A build folyamat egy-két percet vesz igénybe. Ha elkészült, írja be a parancsot az image-ek ellenőrzéséhez:
|
1 |
sudo docker images |
Valami hasonlót kellene látnia:

Ne feledje, a your_dockerhub_username részt egy tényleges felhasználónévre cseréltük ki.
Miután megerősítette, hogy a rendszerkép felépült, most már létrehozhat egy konténert a rendszerképből a következő használatával: docker run. A következő kapcsolók fognak szerepelni:
-p: publishes the port on the container and maps it to a port on the host system. We will use port 80 on the host system for demonstration purposes. However, if you have another process running on that port, feel free to modify this as necessary. Learn more about port-hozzárendelés a Docker dokumentációból.-d: for detached mode. Allows the container to continue running in the background.--name: you can use this to set a memorable name instead of letting Docker assign a random string.
A konténer felépítéséhez szükséges parancs a következő. Helyettesítse be megfelelően a Docker Hub felhasználónevét:
|
1 |
sudo docker run --name nodejs-express-image -p 80:8090 -d your_dockerhub_username/nodejs-express-image |
Várja meg, amíg a konténer felépül és elindul. Ezzel a paranccsal ellenőrizheti az összes futó konténert:
|
1 |
sudo docker ps |
A következőhöz hasonló kimenetet kell látnia:

Ahogy a kimeneten látható, a konténer most már fut. Megtekintheti a böngészőben, ha ellátogat a szervere nyilvános IP-címére a port megadása nélkül. A kezdőlapja be fog tölteni:
Sikeresen telepített egy statikus Node Express webhelyet a Docker segítségével. Lássuk, hogyan tölthetjük fel ezt a rendszerképet a Docker Hubra későbbi használat és skálázás céljából.
4. lépés: Docker rendszerkép-tárolók használata
Feltöltheti rendszerképeit olyan rendszerkép-nyilvántartásokba, mint a Docker Hub, és elmentheti őket későbbi használatra, megoszthatja más fejlesztőkkel, vagy lehetővé teheti a konténerek skálázását. Feltölthetjük a létrehozott rendszerképet a Docker Hubra, és használhatjuk egy konténer újbóli létrehozásához.
Használja a következő parancsot a Docker Hub fiókjába való bejelentkezéshez. Cserélje ki a tényleges Docker Hub felhasználónevére:
|
1 |
sudo docker login -u your_dockerhub_username |
Enter your password when prompted. Once logged in, a ~/.docker/config.json file is created in your user’s home directory containing your Docker Hub credentials.
Ezt követően írja be a következő parancsot a rendszerkép Docker Hubra történő feltöltéséhez, megadva a rendszerkép korábbi felépítésekor beállított taget:
|
1 |
sudo docker push your_dockerhub_username/nodejs-express-image |
Ez a parancs feltölti a Docker rendszerképet a Docker Hub fiókjába. Ha ellátogat a fiókjába, láthatja a nemrég feltöltött rendszerképet:

Letesztelhetjük a képtár hasznosságát a jelenlegi alkalmazáskonténer megsemmisítésével és a tárolóban lévő kép segítségével történő újraépítésével.
Listázza ki a jelenlegi konténereit a következő parancs beírásával:
|
1 |
sudo docker ps |
A következőhöz hasonló kimenetet kellene látnia:

Note the CONTAINER ID listed in your output, copy it, and use it to stop your container with the command, replacing the ID with yours:
|
1 |
sudo docker stop 1bb2d65279bb |
Írja be a következő parancsot a rendszerében elérhető összes docker kép listázásához:
|
1 |
sudo docker images –a |
A kimenet megmutatja az Ön képének nevét, a node.js képet és az építési folyamatból származó egyéb képeket.
Írja be a következő parancsot a képek eltávolításához, beleértve a nem használt vagy árva képeket is:
|
1 |
sudo docker system prune |
Type y to confirm. This removes the stopped containers and images. If you list them you will see an empty list in the output:

Most eltávolította mind az alkalmazást futtató konténert, mind magát a képet. Tudjon meg többet a Docker konténerek, képek és kötetek eltávolításáról az útmutatónkat követve.
Most újra létrehozhatjuk a teljes folyamatot úgy, hogy először letöltjük a képet a Docker Hubról a következő paranccsal. Helyettesítse be megfelelően a Docker Hub felhasználónevét:
|
1 |
sudo docker pull your_dockerhub_username/nodejs-express-image |
Listázza újra a Docker képeit a következő paranccsal:
|
1 |
sudo docker images |
A kimenetben látnia kell a képet:

Most újraépítheti a konténerét a 3. lépés parancsával. Természetesen helyettesítse be a Docker Hub felhasználónevét, ahol szükséges:
|
1 |
sudo docker run --name nodejs-express-image -p 80:8090 -d your_dockerhub_username/nodejs-express-image |
Listázza ki a konténereit, hogy megerősítse az újraépítést:
|
1 |
sudo docker ps |
Hasonló kimenetet kellene látnia:

A böngészőjében navigáljon a szervere nyilvános IP-címére, és látnia kell a futó alkalmazását.
Összegzés
Ha idáig követte az útmutatót, most már rendelkezik egy Express és Bootstrap segítségével készült, és Dockerrel telepített statikus weboldallal. A statikus weboldal fájljaiból egy Docker-rendszerképet épített fel, a rendszerképből pedig egy konténert hozott létre. Ezután feltöltötte a rendszerképet egy Docker-rendszerkép-regiszterbe, Docker Hub, elérhetővé téve azt a jövőbeli használatra vagy skálázásra. A rendszerkép-regiszter használatának teszteléséhez törölte a rendszerképeket és konténereket, letöltötte a rendszerképeket a regiszterből, majd újraépítette a konténereket.
Ez az útmutató bemutatta, hogyan kell telepíteni egy Node.js alkalmazást. Ha szeretné megtanulni, hogyan használhat egy másik webfejlesztési stacket, van egy útmutatónk a következő témában: Laravel alkalmazás telepítése Docker Compose segítségével Nginx-en.
A Docker használatával kapcsolatos további forrásokért tekintse meg az alábbi útmutatókat:
- A Docker Compose telepítése és konfigurálása Ubuntu 20.04-en
- Hogyan osszunk meg adatokat egy Docker-konténer és a gazdagép között
- A Docker telepítése és beállítása CentOS 7-en
Kellemes számítógépes munkát!
Hozzászólások
Még nincsenek hozzászólások. Legyen Ön az első.