

Introduction
Software Engineering is a fast-paced and competitive field. Rolling out your products to users faster will give you an edge over your competitors. On the bright side, industry best practices are in place to help companies have a level playing field.
Continuous Integration and Continuous Development(CICD) is an example of a strategy that leverages industry best practices to give companies an edge in this competitive field.
GitHub, a web-based repository with Git, a version control tool, allows software developers, engineers and architects to implement CI/CD. Continuous Development(CD) is the practice of automating builds, tests, and deployments. Continuous Integration(CI) enables many people to collaborate on the same project, and check that the code is working without worrying about merge conflicts.
GitHub Actions allow us to write steps that automate builds, tests, and deployment.
In this tutorial, you will learn how to set up Continuous Integration with GitHub Actions. We will start by setting up a Git repository to host our code. Then, we will configure a GitHub CI process to watch changes in our code, initiate a CI runner to run tests, build and deploy our application to Ubuntu 22.04 server running Nginx.
Prerequisites
To follow along with this tutorial, you will need the following:
-
A server running Ubuntu 22.04. You may follow this tutorial for the initial Ubuntu server setup, add a non-root user, and enable Ubuntu’s UFW firewall.
-
You will need Node.js installed on your server preferably version 14 and above. We have a tutorial on how to install Node.js on Ubuntu.
-
You will need Nginx server software installed. We have a guide on How to Install Nginx on a server running Ubuntu.
-
You will need Docker and Docker Compose installed on your local machine to run an isolated development environment. Please follow our tutorial to learn How to Install and Operate Docker in the cloud.
Now that we have everything we need, let’s start.
Step 1. Cloning the Project Repository.
We are going to base this tutorial on Reactjs, A declarative Javascript library for building user interfaces. If you want to set up a new project from scratch, you may use this resource on Setting up a React App. For brevity, we will be using a clone of this React.js repo we already set up on GitHub.
The application we’re cloning is a simple react application with react-router 6 and a test done with React Testing Library, which gives us methods to access the DOM.
To clone the repository, click on the green button and copy the URL.
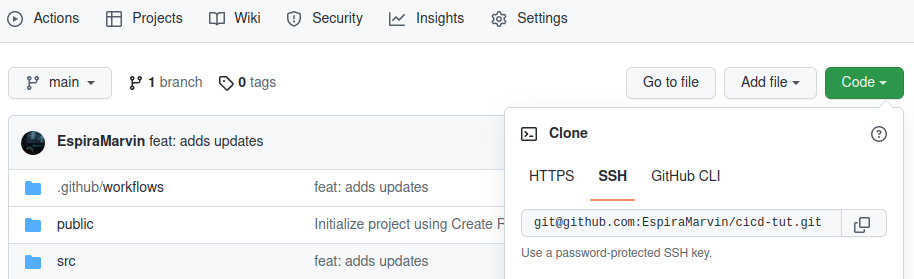
Open the terminal in your workspace, and run the command below to clone the app:
|
1 |
git clone git@github.com:EspiraMarvin/cicd-tut.git |
Once you have cloned the repository, navigate into the project directory:
|
1 |
cd cicd-tut |
Run the docker-compose up command to build and run the app:
|
1 |
docker-compose up --build --force-recreate |
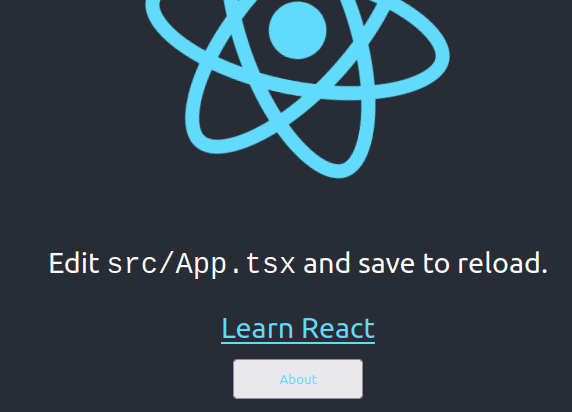
When the process completes, visit http://localhost:3000
You should see something similar to this:
Step 2. Understanding the Node.js.yml File.
In this step, we will be defining the directives in the GitHub Yaml file to help us understand what is going on. In the repository, there’s a directory .github/workflows that contains a node.js.yml file, which has workflow steps that github runners follow after you push changes to your code repository on GitHub. YAML syntax is used to write workflows for GitHub Actions. YAML files end with an extension yaml or yml.
Open the node.js.yml file, it should look like this:
|
1 2 3 4 5 6 7 8 9 10 11 12 13 14 15 16 17 18 19 20 21 22 23 24 25 26 27 28 29 |
name: cicd-tut on: push: branches: [ "main" ] pull_request: branches: [ "main" ] jobs: build: # The type of runner that the job will run on runs-on: self-hosted strategy: matrix: node-version: [16.x] # Steps represent a sequence of tasks that will be executed as part of the job steps: - name: 'checkout' uses: actions/checkout@v3 - name: 'setup node actions' uses: actions/setup-node@v3 with: node-version: "16" cache: 'npm' - run: npm i - run: npm test - run: npm run build # - run: cp -r ~/actions-runner/cicd-react/react-tut-test/react-tut-test/build /var/www/react-cicd |
At the time of writing this tutorial, we were using version 16 of Node.js 16. Now, let’s understand the GitHub Actions workflow:
-
name
name: cicd-tut
The name of your workflow, this name will be shown in your repository Actions tab.
-
on
|
1 2 3 4 5 |
on: push: branches: [ "main" ] pull_request: branches: [ "main" ] |
on is used to define events. Events can automatically trigger a workflow or be scheduled for later. Events can be single or multiple, you can also specify workflow executions to specific branches, tags, or files. This works like a filter.
In our YAML file we are defining automatic multiple events, these are:
-
A push event is triggered when code is committed to a repository
-
A pull_request event is triggered when a pull request is created on the main branch.
We are specifying a branch name main in order to restrict workflow execution to only that branch. We can also specify branches to be ignored using the ! flag followed by the branch name.
-
jobs
A workflow is essentially made up of one or several jobs. These jobs run in succession from the first to the last.
|
1 2 3 4 |
jobs: build: # The type of runner that the job will run on runs-on: self-hosted |
Each job runs in a runner environment specified by runs-on. You can choose running jobs either on GitHub runners denoted by ubuntu-latest or a self-hosted runner denoted by self-hosted. Your choice will be dependent on the number of jobs you need. With self-hosted runners, you have more flexibility and control of resources.
In our next step, we will run our jobs on GitHub runners first, then later, we will set up a GitHub self-hosted runner on our own server.
-
strategy
Strategy lets us use variables in a single job definition to automatically create multiple job runs that are based on the combinations of variables.
In our YAML file, we have one variable for our node-version, but if we add another for node version 18, like this: node-version: [16.x, 18.x], then the matrix strategy will create 2 job runs for our react application for both 16 and 18 node versions.
|
1 2 3 |
strategy: matrix: node-version: [16.x] |
-
steps
Steps are a sequence of tasks that make up a job. Steps can run commands, set up tasks, run actions in your public repository, or actions published in a docker registry.
|
1 2 3 4 5 6 7 8 9 10 11 12 13 |
steps: - name: 'checkout' uses: actions/checkout@v3 - name: 'setup node actions' uses: actions/setup-node@v3 with: node-version: "16" cache: 'npm' - run: npm i - run: npm test - run: npm run build |
A step has a name. Although it’s optional, you may use it to specify an easy way to identify the name for your step that will display on Github.
In a step, you can select an action to run in your job, actions are reusable. Versions of action are specified when defining an action, this is important as it prevents your workflow from breaking when the action owner publishes an update.
In the above code snippet, checkout@v3 is an example of an action with a specified version 3. This action checks out your repository so your workflow can access it.
Some actions such as the actions/setup-node@v3 above have inputs denoted using the with keyword, the setup node actions require node version 16 and npm to be cached.
-
run
This action runs command-line programs using the operating system’s shell.
In the above YAML file, we have three commands, both will run using the same shell in the runner environment.
-
The first command npm i installs all dependencies needed by our react application.
-
The second npm test, runs the test we have written. The test expects the text learn react to be rendered on the Home page.
-
Lastly, npm run build command creates a build directory with a production build of our application. Later, we are going to use this build directory in our Nginx server block.
Step 3. Testing Github CI with GitHub Runners.
In this step, we wil be testing Continuous Integration process with GitHub runners. Start by opening the node.js.yml file. Modify the type of runner the actions will run on to ubuntu-latest. The purpose of this is to test if the GitHub workflow is working perfectly on GitHub runners before setting up our own self-hosted runners.
|
1 2 3 |
jobs: build: runs-on: ubuntu-latest |
Create a new repository on your GitHub account. Before we continue go back to your workspace directory and delete the .git directory, if you canno’t see it check your hidden files. You can use the following command on your terminal to delete the directory:
|
1 |
rm -rf .git |
Now you can git add all your project files, commit and push them into your repository. If stuck, use this guide on connecting your project folder to the GitHub repository you created above.
When you’re done, click on the Code tab in your repo, and you will see a small orange dot beside the total commits count, when you click it, you will see a modal similar to the one below, indicating your workflow has been queued:
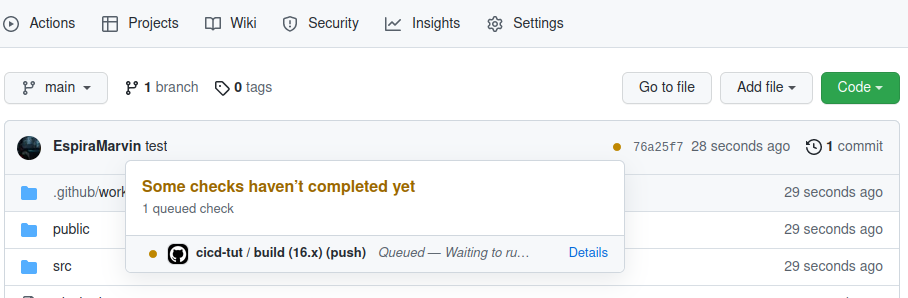
Now click the Details link on the modal or go to the Actions tab, you will see each step of the node.js.yml workflow being run by GitHub runners:
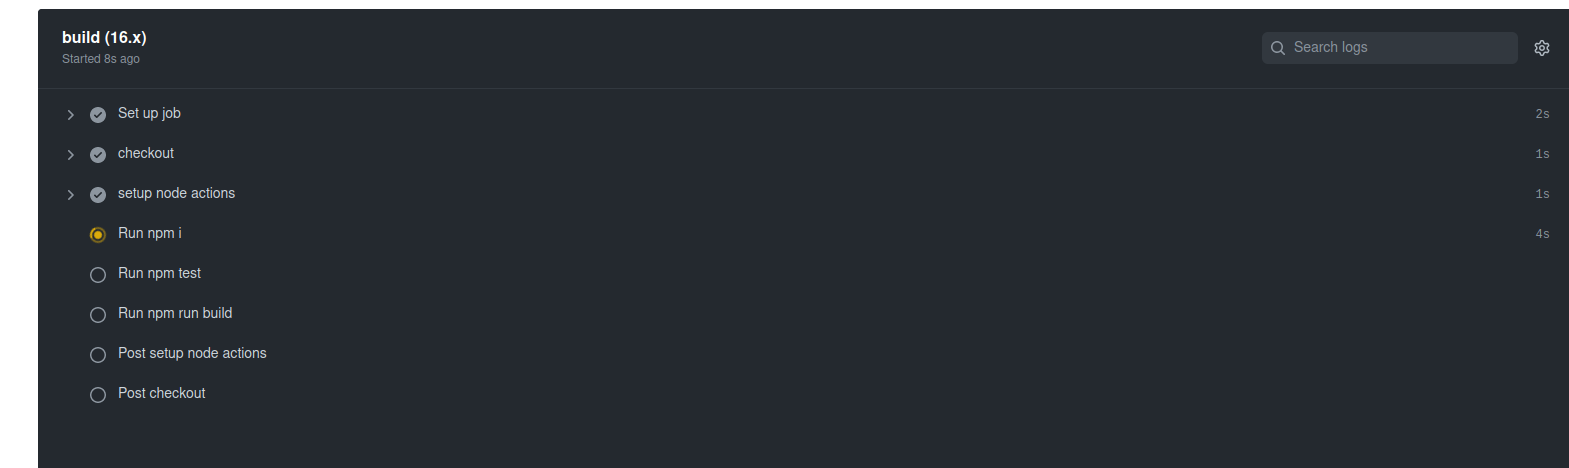
If successful, click on the Actions tab, it should look like this:
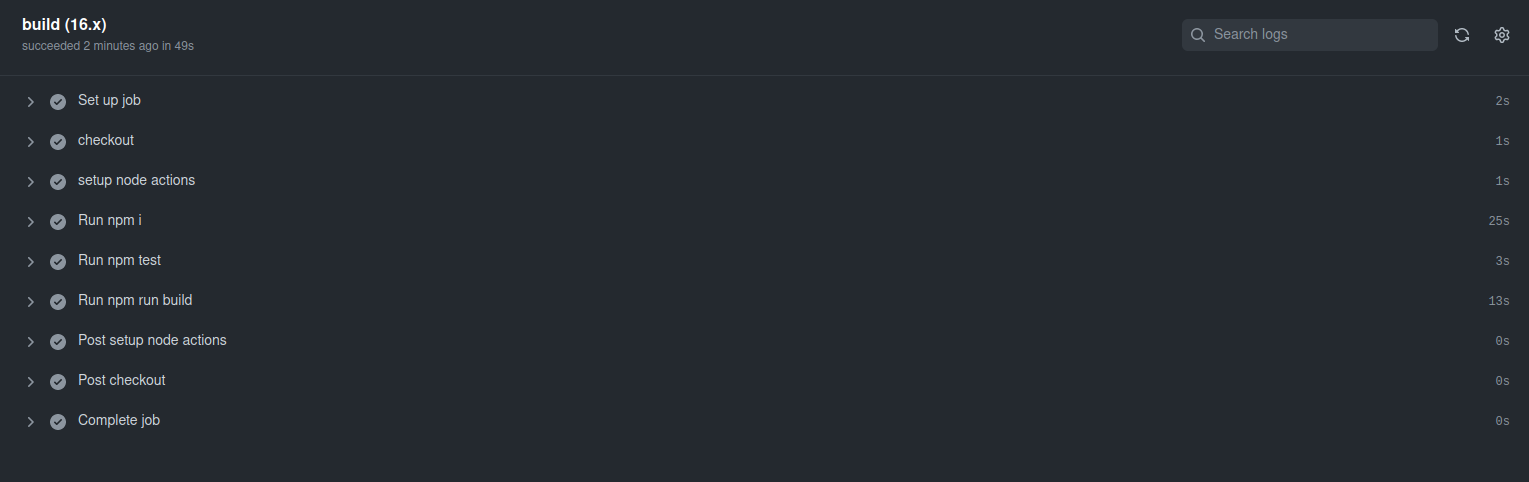
And that’s it, the small orange dot on our Code tab should now be a green tick. GitHub runner has built our application successfully.
Now, let’s go a step further and change the build environment to use GitHub self-hosted runners in our own Ubuntu Server Infrastructure.
Step 4. Setting up GitHub workflow to use a self-hosted runner.
Before we install the self-hosted runner in our server, let’s go back to our workspace, and edit the node.js.yml workflow file to run on GitHub self-hosted runners.
|
1 2 3 |
jobs: build: runs-on: self-hosted |
At this stage, when you commit the changes the job will be queued since a self-hosted runner has not been defined.
On your repository, click the
Settings tab, in the left sidebar click
Actions, then click
Runners:
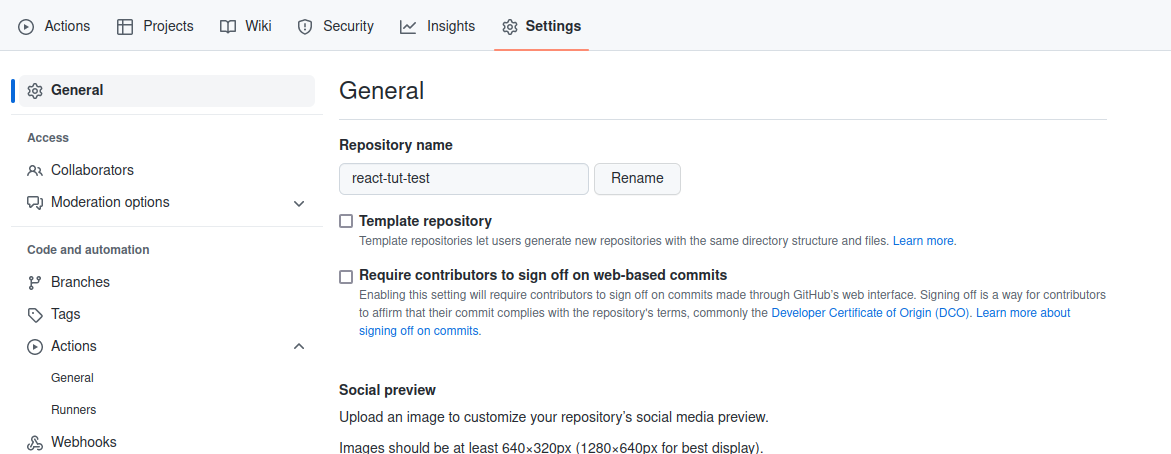
Click New self-hosted runner, and select Linux as the operating system.
You will see instructions showing you how to download the runner and install it on your server.
Step 5. Installing and configuring a Github self-hosted runner on our server.
In this step, we will be setting up a self-hosted GitHub runner. A self-hosted runner is a system that can deploy and manage the execution of jobs from Github Actions on the Github website. One advantage the self-hosted runner has over the GitHub-hosted runner is flexibility. It offers more control of the operating system, hardware, and other tools that can be customized to meet your desired application needs.
Self-hosted runners can be added at various levels such as:
-
Repository-level runners, these are dedicated to a single repository.
-
Organization-level runners, these can process jobs for multiple repositories in an organization.
-
Enterprise-level that can be assigned to multiple organizations.
To continue, login into your server via ssh:
|
1 |
ssh username@server_ip |
Change to your home directory with the command:
|
1 |
cd ~ |
Then, create a directory called action-runners and navigate into it:
|
1 |
mkdir actions-runner && cd actions-runner |
Next, download the latest version of the runner package:
|
1 |
curl -o actions-runner-linux-x64-2.298.2.tar.gz -L https://github.com/actions/runner/releases/download/v2.298.2/actions-runner-linux-x64-2.298.2.tar.gz |
Then extract the downloaded package with the command:
|
1 |
tar xzf ./actions-runner-linux-x64-2.298.2.tar.gz |
Back to your repository, on the Settings tab, on the left side panel click Actions, then Runners, just like we did in Step 4.
You’ll see a command listed that includes a token linking your self-hosted runner to your GitHub repository. While still inside the directory you extracted the GitHub runner code into, use the listed command to link your runner, for example:
|
1 |
./config.sh --url https://github.com/EspiraMarvin/react-tut-test --token XXXXXXXXXXXXXXXXXXXXXXXXXXX |
It should authenticate with a success:
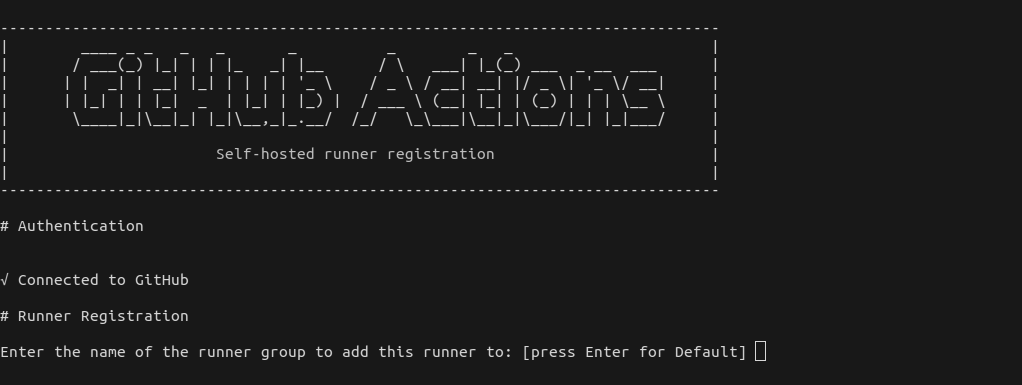
Press enter for the Default runner group.
Then enter a name for your runner, for example, my-runner, and press enter.
Press Enter to skip adding additional labels, you should see the success message in the screenshot below:
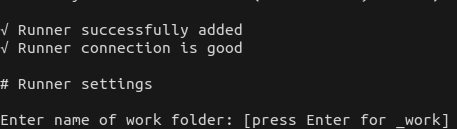
Enter the name of your working directory, for example, react-cicd, it should be successful with the text settings saved.
Finally, run ./run.sh, this should show Connected to Github:
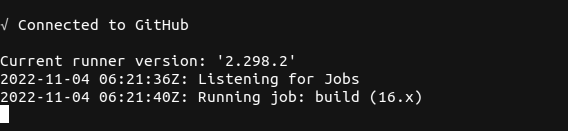
But this does not run in the background, if we type ctrl+c in our terminal, the runner will be stopped, we need to replace it with the .svc.sh service to keep the runner running as a serve so that we can continue interacting with it.
Stop the runner with ctrl+c. You can install the .svc.sh service by running the command:
|
1 |
sudo ./svc.sh install |
Once it has installed, start the service with the command:
|
1 |
sudo ./svc.sh start |
This should be successful, showing active (running).
To confirm that the svc.sh service is up and running, execute the command:
|
1 |
sudo ./svc/sh status |

At this point, any workflow that may have been queued waiting for a self-hosted runner should run successfully. You can also edit a file and try things out. For example, modify the About.tsx file, commit and push the changes, the self-hosted runner will complete the job with a success.
Step 6. Setting up Nginx server block
In this step, we will set up a server block in Nginx to view the build version of our react application. We have a tutorial on Setting up Nginx server blocks that you may find helpful.
Below is an example of a server block used in this tutorial:
|
1 2 3 4 5 6 7 8 9 10 11 12 13 14 |
server { listen 80; listen [::]:80; server_name react.test; root /var/www/react-cicd/build; index index.html index.htm index.nginx-debian.html; add_header X-Frame-Options "SAMEORIGIN"; add_header X-XSS-Protection "1; mode=block"; add_header X-Content-Type-Options "nosniff"; charset utf-8; location / { try_files $uri $uri/ =404; } } |
You will be creating an Nginx server block configuration file inside the /etc/nginx/sites-available directory.
Open a file for your site’s server block configuration with nano editor using the command:
|
1 |
sudo nano /etc/nginx/sites-available/react-cicd |
Copy the server block shared above and modify it according to your directory paths, and paste it into the opening file. When you are done editing, press ctrl+x then hit y and enter to save and exit.
Once saved, create a symlink for the react-cicd server block config from /etc/nginx/sites-available to /etc/nginx/sites-enabled by running the command:
|
1 |
sudo ln -s /etc/nginx/sites-available/react-cicd /etc/nginx/sites-enabled/ |
For the changes to take effect, you need to restart Nginx. However, before you can restart the Nginx service, test if the Nginx configurations are valid, by running the command:
|
1 |
sudo nginx -t |
If the configuration is correct, the test should be successful.
Notice the value of the server_name directive “ react.test ” in the server block? You will add this value in your hosts file on your local machine. This will enable you to open the application in your browser. This step is only necessary for virtual domains used in local development environments. If you have a registered domain name linked to a public IP of your server, then the domain name should already be accessible in your browser.
In your local machine, open the hosts file with the command:
|
1 |
sudo nano /etc/hosts |
Inside the hosts file, add the IP address of your server, e.g. 127.0.0.1, followed by your virtual domain name.
An example is shown below. Then close the file and save:
|
1 |
192.168.3.123 react.test |
Back to your server inside the /var/www directory, create a new directory, you may name it react-cicd by running:
|
1 |
mkdir react-cicd |
At this stage, we will uncomment the last command in the node.js.yml file.
This command copies the build folder of our react application from where we specified our work folder inside the actions-runner directory in the previous step 5.
And puts the public folder into the /var/www/react-cicd directory.
The server block can now access our app and display it on a browser.
Lastly, restart the Nginx service with the command:
|
1 |
sudo service nginx restart |
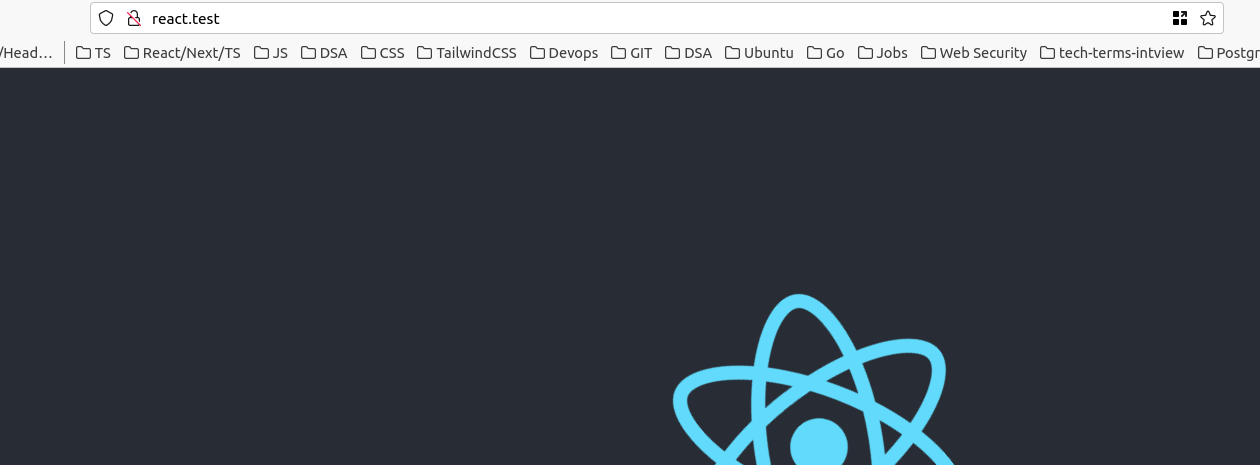
Now, you can make a change in the About.tsx file, then commit and push your changes to your repository. After a successful build, you will see the build version of your react app at http://react.test or at the domain name you specified. Avoid editing the href element at Home.tsx file as it may cause the already written test to fail. The Actions tab in your repository should also show the completed job build.
Conclusion
Continuous integration with Github Actions comes with a lot of advantages including a good developer experience, helps with continuous testing, allows easier collaborations in larger teams, shorterns development time, quick releases of new features, real-time feedback and customer satisfaction giving you an edge over your competitors. To build on this knowledge, you may also want to learn about Setting Up GitLab Continuous Integration (CI) Pipelines on Ubuntu. and using a Self Managed GitLab Instance to host your Docker Images and run private builds.
Happy Computing!
- How To Set Up GitHub Continuous Integration Pipelines With Self-Hosted Runners on Ubuntu 22.04. - March 20, 2023
- Managing CSV in Node.js using Node-CSV - March 15, 2023
- Containerize A Python App using Docker - March 7, 2023
- Using GitLab for Managing Projects - September 15, 2022
- Creating Drag and Drop Elements with Pure, Vanilla JavaScript - August 4, 2022