

Docker is one of the most popular products in organizations these days. It makes the process of managing applications in containers very easy. Docker provides portability, performance, agility, scalability and isolation to the applications, since it uses containers, which are more portable and require less resources than virtual machines.
In this tutorial, you will go through the steps required to set up and use Docker on an Ubuntu server. You will start by installing and configuring Docker on a Cloudsigma server. You will then work with Docker images and containers. Finally, you will also push an image to the Docker repository.
Step 1: Setting up the Instance on CloudSigma
I am using a machine with the following resources:
- 8 GHz CPU
- 8 GB RAM
- 50 GB SSD
Go ahead and clone Ubuntu 18.04 from the CloudSigma library and then resize it to 50 GB. Ubuntu 18.04 on the library comes pre-installed with 64bit with VirtIO drivers, superuser, Python 2.7.17, Pip 20.0.2 OpenSSL 1.1.1d, Cloud-init and latest updates until 2019-03-03. For more information on how to set up Ubuntu 18.04, please check out this tutorial.
Now that your server is ready, let’s move towards installing Docker application.
Step 2: Installing Docker on Ubuntu
There are various ways to install Docker on Ubuntu, but the most preferable one is installing Docker’s latest version from its official repository. In the current tutorial, we are going to use this method.
Before you start installing Docker, you need to set up its repository. After that, you can install Docker from the repository.
- First, you need to update the apt package index and install a few packages. These packages will allow apt to use a repository over HTTPS:
12345678sudo apt-get updatesudo apt-get install \apt-transport-https \ca-certificates \curl \gnupg-agent \software-properties-common - Then, you need to add GPG key of the official Docker repository to your system:
1sudo curl -fsSL https://download.docker.com/linux/ubuntu/gpg | sudo apt-key add - - You can verify the fingerprint by using the following command:
The output would contain “9DC8 5822 9FC7 DD38 854A E2D8 8D81 803C 0EBF CD88”1sudo apt-key fingerprint 0EBFCD88 - Next, you go ahead and add the official repository using this command:
1sudo add-apt-repository "deb [arch=amd64] https://download.docker.com/linux/ubuntu $(lsb_release -cs) stable" - Finally, you can install the Docker engine. The following commands first update the apt package index and then install the latest version of Docker engine and contained:
12sudo apt-get updatesudo apt-get install docker-ce docker-ce-cli containerd.io
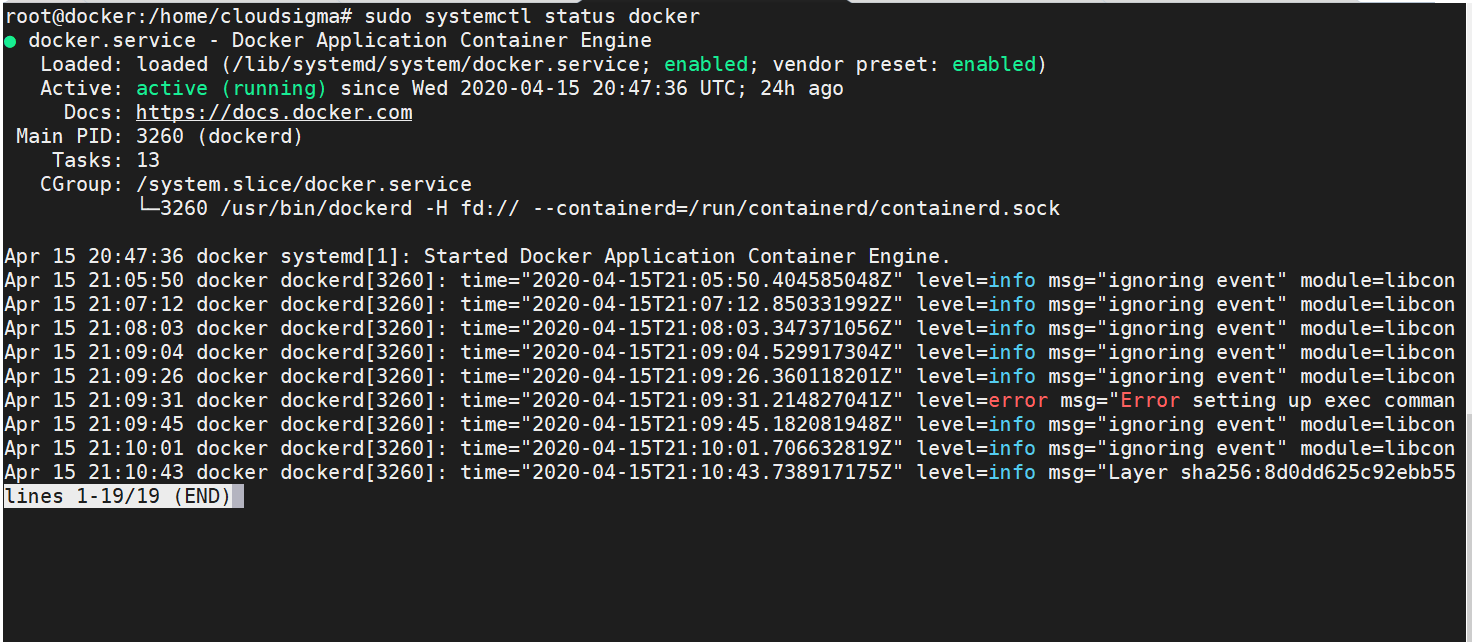
Docker is now installed and it’s daemon process has started. You can check the running status of Docker using the command:
|
1 |
sudo systemctl status docker |
The output should look like this:
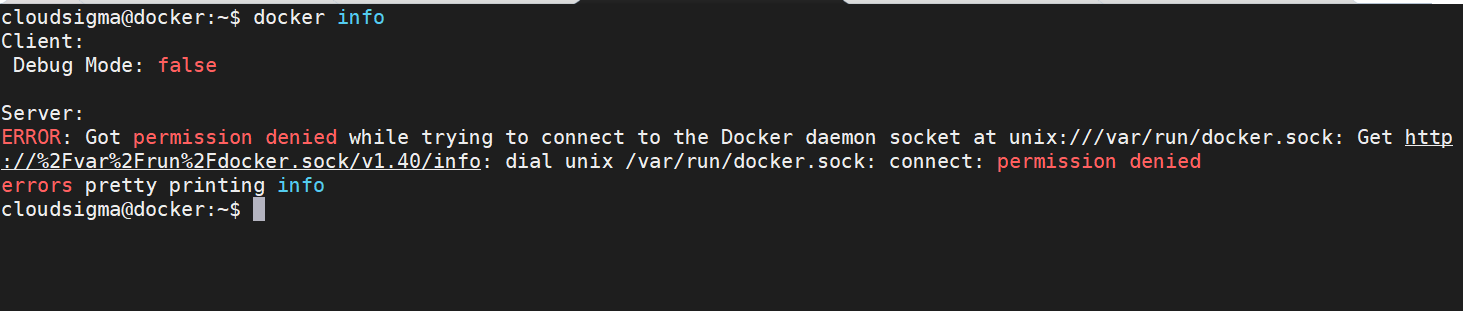
Step 3: Providing Docker Permissions to User
Currently, the Docker command can only be run by a root user or a user in the ‘docker’ group. The Docker group is automatically created during the Docker installation procedure. If you try to run the Docker command without sudo or from a user who hasn’t been added to the group, you will get an error like this:
You can add your user – “cloudsigma” to the Docker group using the following command:
|
1 |
sudo usermod -aG docker cloudsigma |
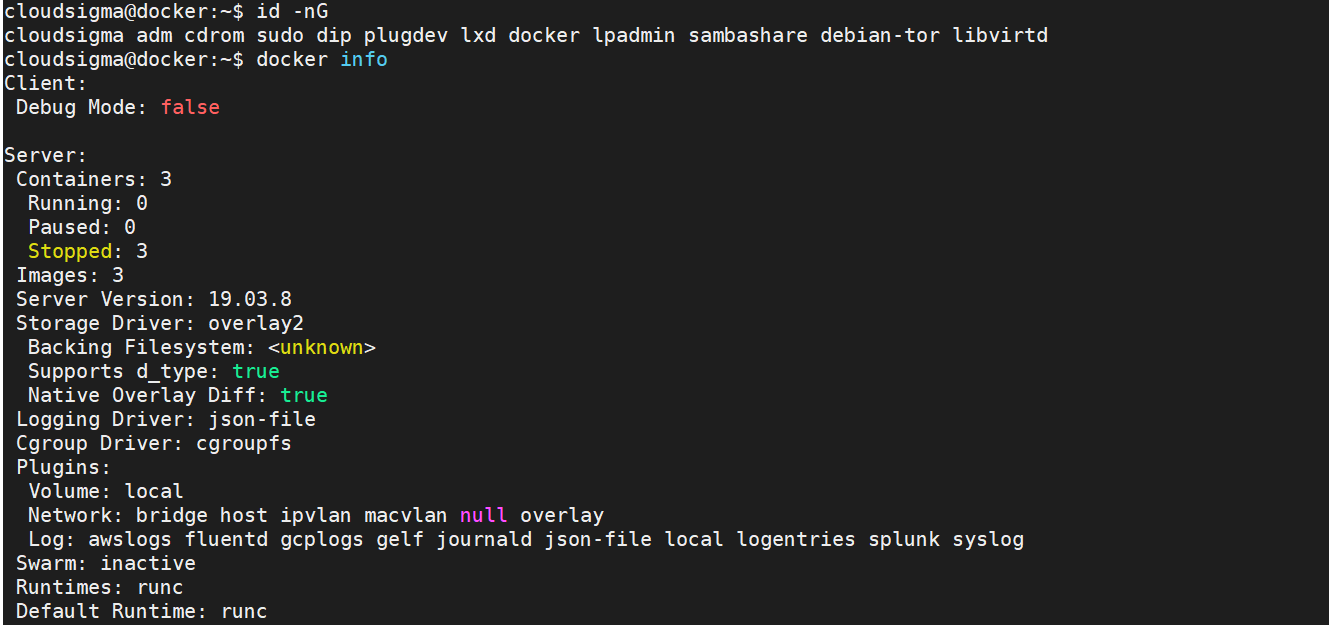
Once you run the above command, re-login to the user and try to see the user groups using the following command. Re-login is required for the command to come in effect.
|
1 |
id -nG |
You can see that Docker is now a part of the user groups and Docker command is functional for the user:
Step 4: Using the Docker Command
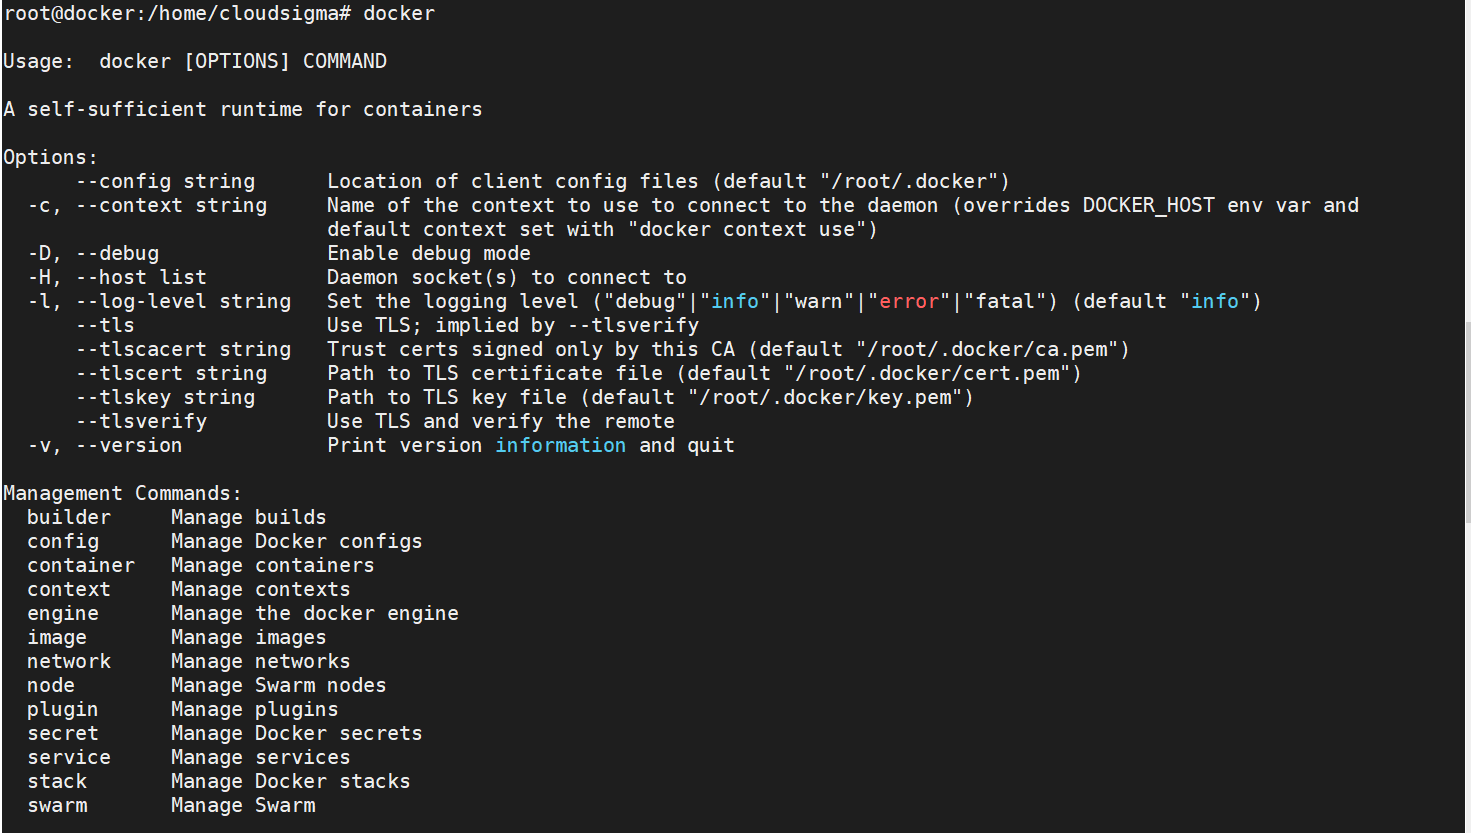
You can find the syntax of Docker command by just executing it:
|
1 |
docker |
This will show you the usage and possible options and arguments you can use. For example:
You can see the available options for a specific sub-command using:
|
1 |
docker docker-subcommand --help |
You can also see system-wide information about Docker using this command:
|
1 |
docker info |
Now let’s dive deeper into the world of Docker by working with Docker images and containers.
Step 5: Working with Docker Images in Ubuntu
Docker containers are built using Docker images. Docker Hub is an official Docker registry. Anyone can register and host their Docker images there.
To test the access to Docker hub, try this command:
|
1 |
sudo docker run hello-world |
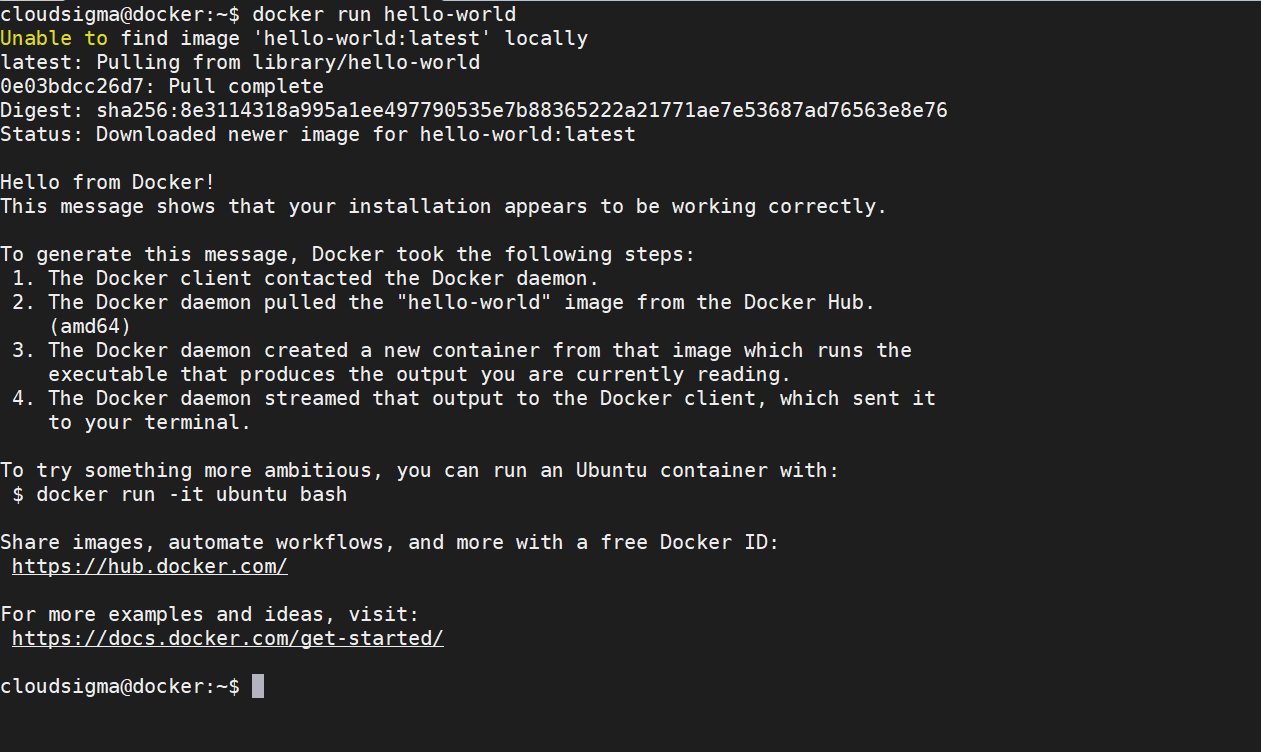
It mentions that Docker was unable to find the image locally, so it pulled the image from Docker hub. Docker daemon created a new container from that image that runs the executable and prints this output shown in the image. The daemon then streamed the output to Docker client, which sent it to our terminal.
You can search for more images using the ‘docker search’ command. For example, you can search for Ubuntu operating system image by:
|
1 |
docker search ubuntu |
It will search Docker hub for all images that contain ‘ubuntu’ and return the list to us. You can try pulling Ubuntu image using this command:
|
1 |
docker pull ubuntu |
The output should look like this:
|
1 2 3 4 5 6 7 8 9 |
Using default tag: latest latest: Pulling from library/ubuntu 5bed26d33875: Pull complete f11b29a9c730: Pull complete 930bda195c84: Pull complete 78bf9a5ad49e: Pull complete Digest: sha256:bec5a2727be7fff3d308193cfde3491f8fba1a2ba392b7546b43a051853a341d Status: Downloaded newer image for ubuntu:latest docker.io/library/ubuntu:latest |
Now that the image has been downloaded, you can run a container with this image using the ‘docker run’ command. If you haven’t downloaded the image, the ‘docker run’ command will first download it and then run it as it did in case of our ‘hello-world’ example.
You can see the Docker images stored on your server by using the command:
|
1 |
docker images |
|
1 2 3 4 5 |
Output: REPOSITORY TAG IMAGE ID CREATED SIZE ubuntu latest 4e5021d210f6 4 weeks ago 64.2MB hello-world latest bf756fb1ae65 3 months ago 13.3kB |
Currently we have two images – ‘ubuntu’ and ‘hello-world’. Now let’s see how you can run containers using these images.
Step 6: Running a Container
When we ran the hello-world container, it ran, executed some commands to display a message and exited. However, containers can also be used interactively as they are similar to virtual machines.
You can run the ubuntu container with “-it” which gives you an interactive shell access to the container.
|
1 |
docker run -it ubuntu |
The command prompt will change to look a little different based on the container you are in.
|
1 2 3 |
Output: root@743177bd9596:/# |
“743177bd9596” in the above shell is the container ID of the container which can be used to remove the container, if required.
Now that you are in the container, you can run various commands here just like you would do on a server. Let’s for example try to update your package database using this command:
|
1 |
root@743177bd9596:/# apt update |
You can also install any application that you want to run. Let’s take Nginx, for instance. You can use the following command to do that:
|
1 |
root@743177bd9596:/# apt install nginx |
You can run the Nginx service and check its status by means of these command lines:
|
1 2 3 4 |
root@743177bd9596:/# service nginx start * Starting nginx nginx [ OK ] root@743177bd9596:/# service nginx status * nginx is running |
Any changes that you make to the container are only applied inside that container. Those won’t be saved to the images. In the following steps, you will learn how to save those changes to create new images. Please type exit to exit the container.
Step 7: Managing Containers
In this part, you will learn to manage containers in Docker.
Once you start using Docker actively, you would generally have lots of containers and images on your system. You can view active ones using this command:
|
1 |
docker ps |
|
1 2 |
cloudsigma@docker:~$ docker ps CONTAINER ID IMAGE COMMAND CREATED STATUS PORTS NAMES |
But we did run two containers, “ubuntu” and “hello-world”. Where are they?
Since they are no longer running, you can’t see them here. However, you can get a list of all the containers – inactive and active – using the following command:
|
1 |
docker ps -a |
|
1 2 3 4 5 6 |
Output cloudsigma@docker:~$ docker ps -a CONTAINER ID IMAGE COMMAND CREATED STATUS PORTS NAMES 743177bd9596 ubuntu "/bin/bash" 2 hours ago Exited (0) 2 hours ago laughing_kepler 39e5c7b3414b hello-world "/hello" 2 hours ago Exited (0) 2 hours ago objective_greider |
Also, you can see the latest container created using ‘-l’
|
1 |
docker ps -l |
|
1 2 3 4 5 |
Output: cloudsigma@docker:~$ docker ps -l CONTAINER ID IMAGE COMMAND CREATED STATUS PORTS NAMES 743177bd9596 ubuntu "/bin/bash" 2 hours ago Exited (0) 2 hours ago laughing_kepler |
You can start a stopped container using the command ‘docker start’ followed by container ID or container’s name. Let’s try running the Ubuntu container:
|
1 |
docker start 743177bd9596 |
|
1 2 3 4 5 |
Output: cloudsigma@docker:~$ docker ps CONTAINER ID IMAGE COMMAND CREATED STATUS PORTS NAMES 743177bd9596 ubuntu "/bin/bash" 2 hours ago Up Less than a second laughing_kepler |
To stop a container, use the command ‘docker stop’ followed by the container ID or container’s name.
|
1 |
docker stop laughing_kepler |
You can remove a container once your work is complete using the command ‘docker remove’.
|
1 |
docker rm laughing_kepler |
There are various other features and attributes of Docker container management which you can check in the documentation. In order to access the documentation, run the ‘man docker’ command:
|
1 |
man docker |
Step 8: Committing Changes to a Docker Image
Just like a virtual machine, you can make changes to the container such as removing a file, installing an application and configuring it for a use case. But the changes are only saved in that particular container. You can stop and start the container, but once you remove the container, the changes will be lost.
However, you can save the state of the container by creating a new Docker image out of it. Earlier, we installed an Nginx application on top of the Ubuntu container. You could save that image so that you don’t have to repeat the steps again. After making the changes, you can run a command of this format:
|
1 |
docker commit -m "Change" -a "Author's Name" container_id repository/imageName |
Description:
-m : Used to mention the change we made for reference so we and others can understand the change.
-a : Used to mention the name of the author.
container_id : Container ID of the container in which we made changes
repository: Generally your Docker hub username
imageName: Name of the new image
Example:
|
1 |
docker commit -m "ubuntu with nginx" -a "cloudsigma" 743177bd9596 cloudsigma/ubuntu-nginx |
When you ‘commit’ it, the new image is saved locally. In the next step, you will learn how to save it on docker-hub.
Here is how you can list the Docker images and see the saved Docker image:
|
1 |
docker images |
|
1 2 3 4 5 6 |
Output: root@docker:/home/cloudsigma# docker images REPOSITORY TAG IMAGE ID CREATED SIZE cloudsigma/ubuntu-nginx latest 0faf1b71bd5a 3 seconds ago 153MB ubuntu latest 4e5021d210f6 4 weeks ago 64.2MB |
As you can see, the new image with the name “ubuntu-nginx” is now in your system locally. The size difference between both is significant and this is due to the Nginx installation on top of the base image.
Step 9 : Pushing Docker Images to Docker Repository in Ubuntu
Now that you have created an image, let’s push it to the Docker repository so that it’s available to others. To do that, you should first have an account on Docker hub.
To push an image, you first need to login with the username:
|
1 |
docker login -u <<userName>> |
|
1 2 3 4 5 6 7 8 |
Output: Password: WARNING! Your password will be stored unencrypted in /root/.docker/config.json. Configure a credential helper to remove this warning. See https://docs.docker.com/engine/reference/commandline/login/#credentials-store Login Succeeded |
If the Docker hub’s username is different from the local username you used to create the image, you will have to tag the image with the Docker hub username. To do this, you can use this command:
|
1 |
docker tag cloudsigma/ubuntu-nginx <<dockerHub-username>>/ubuntu-nginx |
After that, you can push the image to the Docker hub repository using the command:
|
1 |
docker push docker-registry-username/docker-image-name |
Example:
|
1 |
docker push <<dockerHub-username>>/ubuntu-nginx |
|
1 2 3 4 5 6 7 8 9 |
Output: The push refers to repository [docker.io/akshaynagpal1995/ubuntu-nginx] fa44d83e0f43: Pushed 16542a8fc3be: Mounted from library/ubuntu 6597da2e2e52: Mounted from library/ubuntu 977183d4e999: Mounted from library/ubuntu c8be1b8f4d60: Mounted from library/ubuntu latest: digest: sha256:6cba01ea786bbc52cd99cabb894915dec6893ea1cd5ed802717bbcd24e2aa98f size: 1364 |
After pushing the image to the repository, it will be listed under the account:

Now, you can pull the image from any server which has access to Docker hub.
Now that you have the basics, you can start using Docker for trying new applications, doing experiments and deploying various services on the cloud.
- Removing Spaces in Python - March 24, 2023
- Is Kubernetes Right for Me? Choosing the Best Deployment Platform for your Business - March 10, 2023
- Cloud Provider of tomorrow - March 6, 2023
- SOLID: The First 5 Principles of Object-Oriented Design? - March 3, 2023
- Setting Up CSS and HTML for Your Website: A Tutorial - October 28, 2022