

Redis is a powerful in-memory key-value store that can be used as a database server, cache, and message broker. It’s widely known for its fast performance, flexibility, and support for a wide variety of languages. It’s free and open-source software that’s written in the C programming language. In this guide, check out how to install and secure Redis on Ubuntu 18.04.
Prerequisites
In order to follow this guide, you will need to prepare a couple of things in advance. You need to have an Ubuntu 18.04 server, which you can easily install following our tutorial. In addition, you need to have a non-root user with sudo privileges and a basic firewall configured. You can set that up by following our guides on configuring the Linux sudoers file and setting up a UFW on Ubuntu and Debian cloud server.
Now, let’s start!
Installing Redis
Redis is directly available from the official Ubuntu repo. This is the simplest way of installing and configuring it. We recommend to follow this path unless there are specific reasons not to. Since the Redis source code is available for free, it’s also possible to build Redis from the source. However, we don’t recommend it because it’s more troublesome to manage and update it.
Install Redis from Ubuntu repo
First, update the local APT package cache:
|
1 |
sudo apt update |
Next, install Redis with the following command:
|
1 |
sudo apt install redis-server |
Install Redis from source
Ubuntu doesn’t come with the building tools and necessary libraries by default. The following command will install all the necessary tools for building Redis:
|
1 |
sudo apt install git build-essential |
There are two additional dependencies for building Redis. These dependencies are necessary to compile Redis with additional features, for example, TLS support, systemd integration, etc. To compile Redis with TLS support, install the “libssl-dev” package. To compile Redis for systemd support, install the “libsystemd-dev” package:
|
1 |
sudo apt install libssl-dev libsystemd-dev |
The Redis source code is available at GitHub. Check out the Redis GitHub page. Next, grab the source code:
|
1 |
git clone https://github.com/redis/redis.git |

Change the current active directory to the Redis source code directory:
|
1 |
cd redis/ |
After that, run the make tool to start compiling. It’ll compile Redis without any additional elements:
|
1 |
make -j$(nproc) |
To enable TLS support (assuming “libssl-dev” is installed), use the following command instead:
|
1 |
make -j$(nproc) BUILD_TLS=yes |
To enable support for systemd (assuming “libsystemd-dev” is installed), use the following command:
|
1 |
make -j$(nproc) USE_SYSTEMD=yes |
Next, test if the compilation was successful. Note that it may require an additional package “tcl-dev” and associated dependencies to run the test:
|
1 |
make test |
Finally, install Redis by running the following command:
|
1 |
sudo make install |
If Redis was built using TLS, then running the server will have to be done in the following manner:
|
1 2 |
./utils/gen-test-certs.sh ./runtest --tls |
Configuring Redis
Once the installation is complete, it’s time to configure Redis. Open the Redis configuration file in a text editor and scroll down to the “supervised” section:
|
1 |
sudo vim /etc/redis/redis.conf |
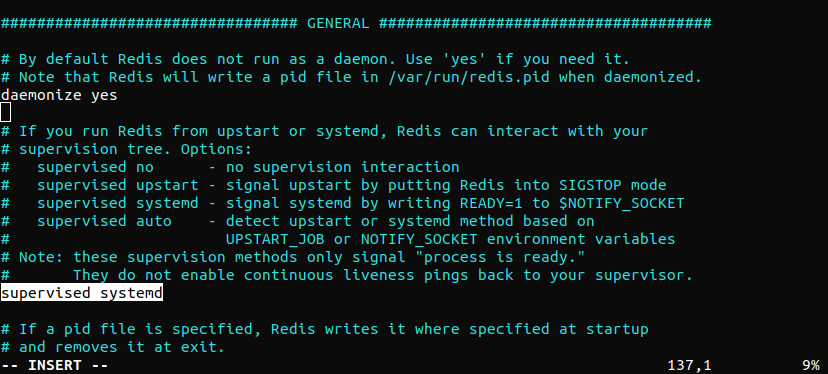
Change the value of “supervised” to “systemd.” This will ensure that the Redis service will be managed by systems. To take the changes into effect, restart the Redis service:
|
1 |
sudo systemctl restart redis.service |
Testing Redis
It’s always a good idea to test whether Redis is functioning properly before putting it to further use. Here are a handful of ways to test Redis behavior. The first step is to check whether the Redis service is up and running:
|
1 |
sudo systemctl status redis |
Here, Redis is already running. By default, the Redis service will start running at boot. If the Redis service is to be run manually, then disable it:
|
1 |
sudo systemctl disable redis |
The next test is to check using the Redis console. Launch the Redis command-line client:
|
1 |
redis-cli |
Run the “ping” command:
|
1 |
ping |
The output confirms that the connection to the server is still alive. The next test is to see whether it allows setting keys. Create a “temp” key with the value “hello world:”
|
1 |
set temp “hello world” |
Retrieve the value using the “get” command:
|
1 |
get temp |
If everything is working fine so far, Redis should return the key value without any issue. Close the Redis command-line client:
|
1 |
exit |

The final test is to check whether Redis can persist data even if it’s stopped or restarted. Restart the Redis service:
|
1 |
sudo systemctl restart redis |
If you get an error while running the above command, then use “systemctl enable redis-server” command:
|
1 |
sudo systemctl enable redis-server |
Launch the Redis command-line client and retrieve the value of the “temp” key we created before:
|
1 2 |
redis-cli get temp |
It concludes the Redis testing. Your Redis server is now ready to be utilized for the desired purpose.
Securing Redis
At this point, Redis is fully operational. However, some of its default configurations don’t offer the best security. If not updated, any malicious actor can take advantage of the opportunity to gain access to the server and its data. This section will showcase how to mitigate these vulnerabilities. While these steps are optional, it’s strongly recommended to follow them to harden system security.
Binding to localhost
By default, Redis is only accessible from localhost. However, if Redis was configured on a remote server, then the configuration has to be updated to allow connection from anywhere. However, it may not be as secure as binding to localhost. To re-bind Redis to localhost, open the Redis configuration file in a text editor:
|
1 |
sudo vim /etc/redis/redis.conf |
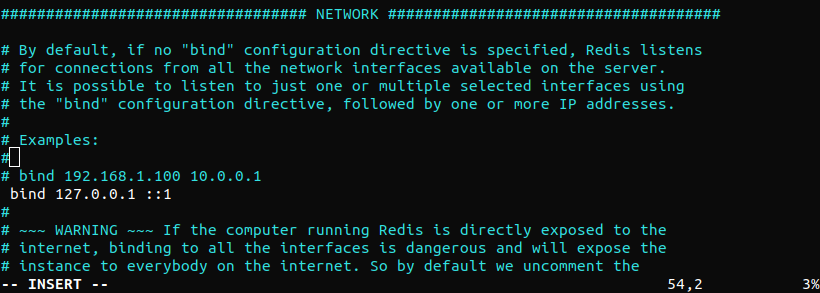
Scroll down and find the following one. Make sure that it’s not commented:
|
1 |
bind 127.0.0.1 ::1 |
Save and close the file. Then, restart the Redis service to ensure that the change is effective right away:
|
1 |
sudo systemctl restart redis |
Verify that the change was successful:
|
1 |
sudo netstat -lnp | grep redis |
If you will get error as ‘netstat: command not found’, then use command to install net-tools “sudo apt-get install net-tools”. The output verifies that “redis-server” is successfully bound to localhost (127.0.0.1), reflecting the change recently made. If there’s any other IP address (for example, 0.0.0.0), then re-check the configuration file and restart Redis server again.
Configuring Redis Password
Configuring a password allows the use of a built-in security feature of Redis – the “AUTH” command. It requires clients to authenticate to access the database. By default, Redis has no password configured. The password has to be declared in the Redis configuration file. Open up the configuration file in a text editor:
|
1 |
sudo vim /etc/redis/redis.conf |
Then, scroll down to the following line and uncomment it:
|
1 |
requirepass foobared |
After uncommenting, “foobared” will be the default password. Change it to the password of your choice. When it comes to Redis, password strength is a big factor of concern. As Redis is a fast-performance server, it’s potentially easier to exploit using brute-force attacks. This is why the configuration file directly contains the following warning. Here’s a quick example of generating a very strong random password. We’ll be using the OpenSSL command to generate a random string:
|
1 |
echo $(openssl rand 60 | openssl base64 -A) |
After configuring a new password, restart the Redis service to take the changes into effect:
|
1 |
sudo systemctl restart redis.service |
It’s time to test whether the password is successfully applied. Fire up the Redis command-line console:
|
1 |
redis-cli |
Then, try to set a new key:
|
1 |
set user “cloudsigma” |
Redis will reject the request as there’s no authentication for the action. To perform any action on the server, the user has to be authorized first. Authorize the user using the following command:
|
1 |
auth <password> |
If the password was right, Redis will acknowledge the action. Now, Redis will allow access to its server functionalities:
|
1 2 |
set user “cloudsigma” get user |
For now, our work with the Redis console is finished. You can close the console:
|
1 |
exit |
Renaming dangerous commands
Redis allows renaming or completely disabling certain commands that are considered dangerous. This is another important built-in security feature of Redis. Why are commands deemed dangerous? If run by an unauthorized user, these commands can reconfigure, destroy, or wipe data in the server. It’s a common practice to disable/rename a bunch of dangerous Redis commands. Note that the security threat of a command depends on the situation. For example, some of the following commands may be necessary on a regular basis. In such cases, disabling them isn’t recommended. In such a situation, renaming the command may prove more beneficial. Here’s a quick list of the commands that are deemed dangerous. This is a good starting point for enhancing the security of the Redis server:
- FLUSHDB
- FLUSHALL
- KEYS
- PEXPIRE
- DEL
- CONFIG
- SHUTDOWN
- BGREWRITEAOF
- BGSAVE
- SAVE
- SPOP
- SREM
- RENAME
- DEBUG
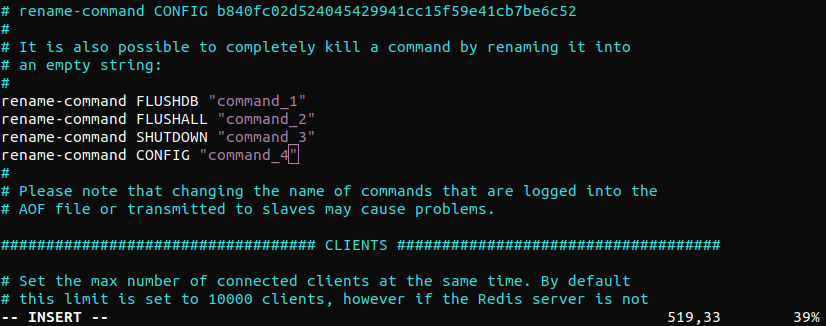
To rename or disable a command, it has to be declared in the Redis configuration file. Open the Redis configuration file, and add the following lines. Here, “rename-command” is used to rename the commands to an empty string. Add as much entry as necessary:
|
1 |
sudo vim /etc/redis/redis.conf |
|
1 2 3 4 |
$ rename-command FLUSHDB "" $ rename-command FLUSHALL "" $ rename-command SHUTDOWN "" $ rename-command CONFIG "" |
Similarly, it’s also possible to rename the commands to a different name. In certain situations, this may offer more flexibility:
|
1 2 3 4 |
$ rename-command FLUSHDB "command_1" $ rename-command FLUSHALL "command_2" $ rename-command SHUTDOWN "command_3" $ rename-command CONFIG "command_4" |
Save the file and exit the editor. To take the changes into effect, restart the Redis service:
|
1 |
sudo systemctl restart redis.service |
Verify the changes. Next, launch the Redis console and authenticate access:
|
1 2 |
redis-cli auth <password> |
Let’s assume that the “CONFIG” command was disabled or renamed. Try using the following “CONFIG” command. It’ll fail:
|
1 |
config get requirepass |
If the command was disabled, then it can’t be accessed until re-enabled. However, if it was renamed, then use the new alias:
|
1 |
command_4 get requirepass |

Conclusion
This tutorial demonstrates how to install, secure, configure, and validate a Redis installation. It also demonstrates how to use the built-in security features of Redis to make it less vulnerable to attacks. However, if someone is already logged in to the server, it’s quite easy to circumvent the Redis-specific security features. This is why having a firewall to protect access to the Redis server is crucial.
Happy computing!
- How To Enable, Create and Use the .htaccess File: A Tutorial - March 8, 2023
- An Overview of Queries in MySQL - October 28, 2022
- Introduction to Cookies: Understanding and Working with JavaScript Cookies - October 25, 2022
- An Overview of Data Types in Ruby - October 24, 2022
- The Architecture of Iptables and Netfilter - October 10, 2022