

VNC (Virtual Network Computing ) allows you to use your server just like you use your computer- with the graphical user interface (GUI), desktop, and your mouse and keyboard. It makes computing easier for users who are new to working on a server.
Cloudsigma allows you to access VNC straight after creating the server. Along with that, in this tutorial, you will set up a VNC Server on Ubuntu 18.04 and connect to it using a secure tunnel. For this tutorial, you will use TigerVNC, a lightweight and fast VNC Server package. It will enable a smooth experience, even on slow networks.
Prerequisites
First, you have to create a machine. You can do that easily on CloudSigma WebApp’s compute section:
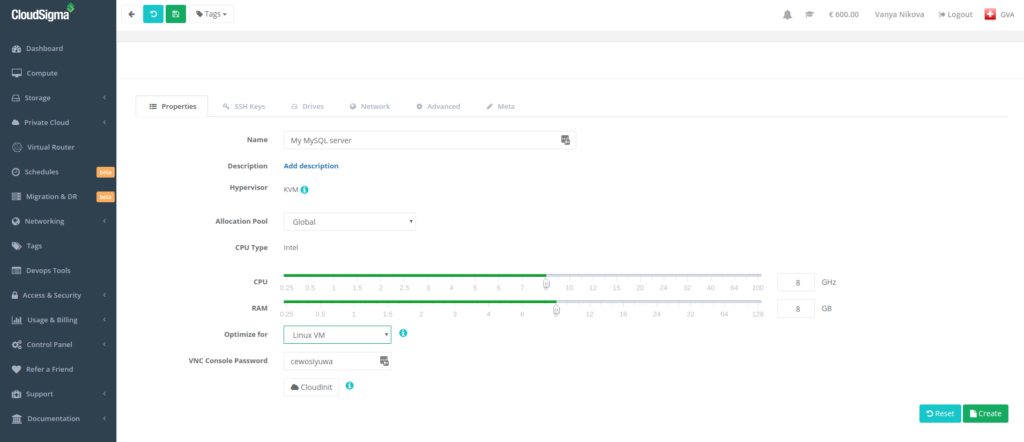
For this tutorial, you can use the following resources:
CPU: 8 GHz
RAM: 8 GB
SSD: 50 GB
You can mount the disk with Ubuntu 18.04 LTS image available in CloudSigma’s library:
Ubuntu 18.04: Pre-installed 64bit with VirtIO drivers, superuser, Python 2.7.17, Pip 20.0.2 OpenSSL 1.1.1d, Cloud-init and latest updates until 2019-03-03.
After starting the machine, you can update all the existing repos and packages on the machine by running the following commands:
|
1 2 |
sudo apt update sudo apt upgrade |
CloudSigma VNC Feature
CloudSigma provides you an easy way to access your machines through VNC.
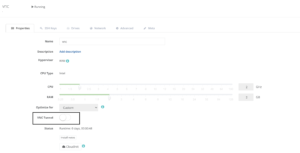
You can click on VNC Tunnel’s toggle button to enable it. Once you do that, you will see this screen.
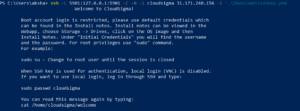
If you have attached an SSH key, you will have to access the server and change the password using the following command:
|
1 2 3 |
ssh -i key.pem cloudsigma@IP sudo passwd cloudsigma |
If you have not attached an SSH key, you can skip the above step. You will find the password in Install Notes.
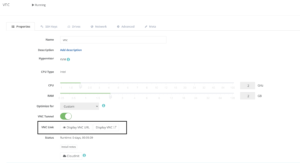
You can either click on ‘Display VNC’ to open the VNC window in the browser or ‘Display VNC URL’ to see the details required to connect it to a VNC client. When you click on ‘Display VNC’, a new tab would open and ask you for credentials. You can use it the same way you’d use the VM with a VNC client.
Now we will see the other way to install VNC on a server.
Installing the VNC Server
The Ubuntu image doesn’t come with the GUI packages by default. We will install packages for the latest XFCE desktop environment and the TigerVNC package available on Ubuntu’s repository.
You can install the XFCE package using the following command:
sudo apt install xfce4 xfce4-goodies
After the installation of XFCE packages, you can install the TigerVNC server using the following command:
|
1 |
sudo apt install tightvncserver |
To complete the configuration, run the following command and set up a password for the VNC connection:
|
1 |
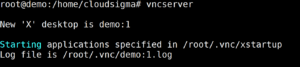
vncserver |
While running the above command, it would prompt you to check if you want to login with a view-only password. With a view-only password, you can only see the screen but not use the system. This option would be relevant if you want someone else to be able to see the screen but not use it.
Next, the command would create all the required configurations. You can use the VNC server from a remote system or your computer at this stage. As part of this tutorial, we will further configure our server before using it.
Configuring the VNC Server
In this section, we will show you how to configure the preferred desktop to use.
You need to configure these commands in a file called ‘xstartup’ in the .vnc folder of your home directory. When you had run the vncserver command the first time, the startup script got created. You will create another one to launch the XFCE desktop.
Moreover, when you had run the vncserver command for the first time, it launched a default server instance with port 5901. This port is called display port and is referred by VNC as “:1”. If you rerun the command, VNC will create another instance “:2” on other ports, and so on.
Since you are going to configure the VNC server, stop the instances already running:
|
1 |
vncserver -kill :1 |
Before modifying the startup file, take a backup of the original file:
|
1 |
mv ~/.vnc/xstartup ~/.vnc/xstartup.bak |
Now, you can edit the original file using vim editor and replace its content with the following:
|
1 2 3 4 5 6 7 |
vim ~/.vnc/xstartup Content: #!/bin/bash xrdb $HOME/.Xresources startxfce4 & |
Whenever you start or restart the vncserver, the process runs the commands of this file. These commands start the desktop environment if it isn’t already started.
The first command, “xrdb $HOME/.Xresources” tells the GUI framework to read the configurations from this location. You can configure various settings of the desktop like terminal colors, cursor themes, etc. The second command starts the XFCE.
To ensure that the VNC server can execute the file, you need to change its permission:
|
1 |
sudo chmod +x ~/.vnc/xstartup |
Post the change in permission. Now you can run the VNC server:
|
1 |
vncserver |
Now that the server is ready, we can connect to it from our computer.
Creating a Secure Tunnel for VNC Connection
Since VNC doesn’t use secure protocols when connecting, we will use SSH to create a secure connection. We can use an SSH secure tunnel to connect to our virtual desktop.
To create an SSH tunnel which securely forwards the connection to the localhost, you can use the following command on the terminal or PowerShell ( for Windows) :
|
1 |
ssh -L 5901:127.0.0.1:5901 -C -N -l <UserName> <ServerIP> -i <pemKey> |
In the above command,
-L: Used to specify the port bindings. In this case, we are forwarding the 5901 port of the server to 5901 port of our system
-C: Used to enable compression
-N: Used to specify that no remote execution of the command is required
-l: Specifies the remote login name
-i: Specifies the location of the key
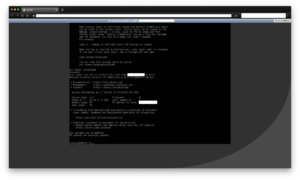
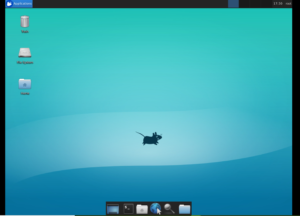
Once the tunnel is running, use a VNC Client to connect to localhost:5901. It’ll ask you to fill in the password you set up earlier.
Once you’re connected, you’ll see a screen similar to this.
You can stop the SSH tunnel by pressing Ctrl + C.
Running VNC as a System Service
You can now set up VNC as a system service to start, restart, or check it’s status using systemd commands. It’ll also ensure that the VNC server starts up when the server reboots.
To do so, create a new unit file – /etc/systemd/system/vncserver@.service.
|
1 |
touch /etc/systemd/system/vncserver@.service |
You will notice that in the filename above, there’s a ‘@’ symbol. It lets you pass an argument which you can use in the server configuration.
Add the following content in the file:
|
1 2 3 4 5 6 7 8 9 10 11 12 13 14 15 16 |
[Unit] Description=Start TightVNC server at startup After=syslog.target network.target [Service] Type=forking User=<User> Group=<UserGroup> WorkingDirectory=/home/<User> PIDFile=/home/<User>/.vnc/%H:%i.pid ExecStartPre=-/usr/bin/vncserver -kill :%i > /dev/null 2>&1 ExecStart=/usr/bin/vncserver -depth 24 -geometry 1280x800 :%i ExecStop=/usr/bin/vncserver -kill :%i [Install] WantedBy=multi-user.target |
The ‘ExecStartPre’ command stops the VNC if it’s already running, whereas ExecStart command starts the VNC with color depth as 24-bit color and a resolution of 1280×800. You can modify this file to suit your needs.
Now, you can reload the units for systemd using the following command:
|
1 |
sudo systemctl daemon-reload |
Now that systemctl is aware of the new unit, you can enable it using the command:
|
1 |
sudo systemctl enable vncserver@1.service |
Number 1 after @ signifies which display number the service should appear over. Example:1, :2, etc.
To stop the current instance, run the command:
|
1 |
vncserver -kill :1 |

Now you can start the VNC Server as you’d start any other service.
|
1 |
sudo systemctl start vncserver@1 |
To check if the service is up, run the command:
|
1 |
sudo systemctl status vncserver@1 |
VNC server will now be available when you reboot your server.
Now that you know how to set up a VNC server, you can easily manage your server, just like managing your computer.
- Removing Spaces in Python - March 24, 2023
- Is Kubernetes Right for Me? Choosing the Best Deployment Platform for your Business - March 10, 2023
- Cloud Provider of tomorrow - March 6, 2023
- SOLID: The First 5 Principles of Object-Oriented Design? - March 3, 2023
- Setting Up CSS and HTML for Your Website: A Tutorial - October 28, 2022