
Introduction
Docker is a container platform that is a lightweight, virtualized, portable, software-defined standardized environment. It allows the software to run in isolation from other software running on the physical host machine. Docker is a defining component of the Continuous Development and Integration aspect of Software Development. It offers a lightweight alternative to virtual machines and allows developers to enjoy distributed application architectures. For a thorough overview of the Docker ecosystem, check out this article.
The process of building an application with Docker starts with a developer creating an image for their application. Then, the image will be deployed inside a container. The image holds defining components of an application such as the application code, libraries, configuration files, environment variables, and the runtime environment. The image standardizes the environment inside a container giving containerization the portability characteristics. Node.js is an open-source, cross-platform backend JavaScript runtime environment that can execute JavaScript code outside of a web browser. It’s built on top of Chrome’s V8 JavaScript Engine. Express.js is a minimalist backend JavaScript framework that runs on top of Node.js.
In this tutorial, we will be creating an image for a website that runs on the Express framework. We will use Bootstrap, which is a frontend library, to make the frontend look better. Once we have created the image, we will build a container and push it to Docker Hub. Docker Hub allows developers to host containerized applications for easy deployment to any Docker environment. Once your container is hosted on Docker Hub, we will pull it and build another image that will actually serve our website.
Prerequisites
This is going to be a hands-on tutorial. You should create an environment that will enable you to follow along.
- You should have an installation of Ubuntu 20.04 as your initial operating environment and create a non-root user with sudo privileges. Log in with the non-root user and proceed with the following steps.
- You need to install Docker. Follow steps 1, 2, 3, and 4 of our tutorial on how to install and operate Docker on Ubuntu. This should work for any Ubuntu distribution.
- Create a Docker Hub account if you do not have one already. You can follow this link for Docker Hub Quick start guide.
- Install Node.js and NPM. NPM is a JavaScript package manager. You may follow these instructions on installing Node and npm.
Step 1: Configure Application Dependencies
You need to create your application source code before you can create the image. The application source code includes code, static content, and dependencies that will be copied to the container. Start by creating a directory for your project in the home directory of the non-root. We will call it node_express, but you are free to use a directory name that you like:
|
1 |
mkdir node_express |
Next, move into this directory:
|
1 |
cd node_express |
This will be your application root directory. A node.js application expects a package.json file in the root folder. Npm uses this file to determine what dependencies your application needs. Enter the following command to create this file:
|
1 |
nano package.json |
After that, add the following code snippet to the file. You can update the name, author, description, and entry point file as you wish:
|
1 2 3 4 5 6 7 8 9 10 11 12 13 14 15 16 |
{ "name": "node-express-docker-image", "version": "1.0.0", "description": "Nodejs Express Docker Image Example", "author": "hackins", "main": "index.js", "license": "ISC", "keywords": [ "nodejs", "express", "bootstrap" ], "dependencies": { "express": "^4.17.1" } } |
As you can see, this file specifies the project name, version, author, and license under which the application code will be shared. It’s recommended to use a short and descriptive name for your project to avoid duplicates in the npm registry. We have specified the ISC license for the project which permits free copying, modifying, or distributing the application code.
Most importantly, you should note the following directives in the file:
- “
main”: this directive specifies the entry point of the application, which we set as index.js. We will be creating this file shortly. - “
dependencies”: this directive specifies the application dependencies that will be pulled from the npm registry when we run thenpmcommand, in our case, we want Express version 4.17.1 and above.
You can now save the file by pressing Ctrl + O. Then, close the file by pressing Ctrl + X. Next, we will install the dependencies by running the following command:
|
1 |
npm install |
The command installs the application dependencies specified in the package.json file inside the node_modules directories. They have been auto-created when you first ran the command. With our application dependencies installed, you can now start adding the application code.
Step 2: Adding Your Application Code Files
We will be creating a basic recipe website, courtesy of allrecipes. The main entry point for the application is the index.js file. We will add a views directory that will hold the various pages and static assets of the project. The website will have a landing page that will contain introductory information and links to some recipes.
Our landing page code will be placed in the home.html file. First, create the index.js file by entering the following command:
|
1 |
nano index.js |
Add the following code, which imports and creates an Express application. It also specifies the Router object, the base directory, and the port on which this app will be served:
|
1 2 3 4 5 6 |
const express = require('express'); const app = express(); const router = express.Router(); const path = __dirname + '/views/'; const port = 8090; |
require is a JavaScript function that loads a module. In this case, we are loading the express module. Then, we will use the imported module to create the express and router objects. The router object performs the routing functions of the app by responding to HTTP method calls that will add to this object as we go along with the tutorial.
We have also set path and port. The path constant defines the base directory for the code. In our case it’s the views subdirectory inside the project root directory. The port specifies the port on which the express app should listen on, in our example, we have set it to 8090.
Once we have the constants, we can specify some routes for the application using the router object. Add the following code to the index.js file to specify the routes:
|
1 2 3 4 5 6 7 8 9 10 11 12 13 14 15 16 17 18 19 20 |
router.use(function (req,res,next) { console.log('/' + req.method); next(); }); router.get('/', function(req,res){ res.sendFile(path + 'home.html'); }); router.get('/lasagna', function(req,res){ res.sendFile(path + 'lasagna.html'); }); router.get('/guacamole', function(req,res){ res.sendFile(path + 'guacamole.html'); }); router.get('/banana-bread', function(req,res){ res.sendFile(path + 'banana_bread.html'); }); |
You can add middleware to routes using the router.use function. In this case, we add a function that logs the router’s requests before passing them to the application routes. A GET request to the application’s base will return a home.html page. Then, we have added pages for three recipes that will also be retrieved using the GET request to the specific recipe page.
Finally, add the following code to mount the router middleware and the application static assets. In addition, tell the express application to listen on port 8090:
|
1 2 3 4 5 6 |
app.use(express.static(path)); app.use('/', router); app.listen(port, function () { console.log('Nodejs Express Example App listening on port ' + port) }) |
Your complete index.js file should look like this:
|
1 2 3 4 5 6 7 8 9 10 11 12 13 14 15 16 17 18 19 20 21 22 23 24 25 26 27 28 29 30 31 32 33 34 |
const express = require('express'); const app = express(); const router = express.Router(); const path = __dirname + '/views/'; const port = 8090; router.use(function (req,res,next) { console.log('/' + req.method); next(); }); router.get('/', function(req,res){ res.sendFile(path + 'home.html'); }); router.get('/lasagna', function(req,res){ res.sendFile(path + 'lasagna.html'); }); router.get('/guacamole', function(req,res){ res.sendFile(path + 'guacamole.html'); }); router.get('/banana-bread', function(req,res){ res.sendFile(path + 'banana_bread.html'); }); app.use(express.static(path)); app.use('/', router); app.listen(port, function () { console.log('Nodejs Express Example App listening on port ' + port) }) |
You may save and close the file now. The next step is to add the static web pages to the views directory. Start by entering the following command to create the directory:
|
1 |
mkdir views |
Enter the following command to open the home.html landing page file:
|
1 |
nano views/home.html |
Add the following code to the file. The code imports Bootstrap and offers website visitors some information on what the website is all about:
|
1 2 3 4 5 6 7 8 9 10 11 12 13 14 15 16 17 18 19 20 21 22 23 24 25 26 27 28 29 30 31 32 33 34 35 36 37 38 39 40 41 42 43 44 45 46 47 48 49 50 51 52 53 54 55 56 57 58 59 60 61 |
<!DOCTYPE html> <html lang="en"> <head> <meta charset="UTF-8"> <meta name="viewport" content="width=device-width, initial-scale=1"> <meta name="description" content=""> <meta name="author" content="Mark Otto, Jacob Thornton, and Bootstrap contributors"> <meta name="generator" content="Hugo 0.80.0"> <title>Awesome Recipes</title> <!-- Bootstrap core CSS --> <link href="https://cdn.jsdelivr.net/npm/bootstrap@5.0.0-beta2/dist/css/bootstrap.min.css" rel="stylesheet" crossorigin="anonymous"> <link href="css/custom.css" rel="stylesheet"> </head> <body> <nav class="navbar navbar-dark bg-dark navbar-static-top navbar-expand-md"> <div class="container"> <button type="button" class="navbar-toggler collapsed" data-toggle="collapse" data-target="#bs-example-navbar-collapse-1" aria-expanded="false"> <span class="sr-only">Toggle navigation</span> </button> <a class="navbar-brand" href="#">Awesome Recipes</a> <div class="collapse navbar-collapse justify-content-center" id="bs-example-navbar-collapse-1"> <ul class="nav navbar-nav justify-content-center"> <li class="active nav-item"> <a href="/" class="nav-link">Home</a> </li> <li class="nav-item"> <a href="/lasagna" class="nav-link">Lasagna</a> </li> <li class="nav-item"> <a href="/guacamole" class="nav-link">Guacamole</a> </li> <li class="nav-item"> <a href="/banana-bread" class="nav-link">Banana Bread</a> </li> </ul> </div> </div> </nav> <main> <section class="py-5 text-center container"> <div class="row py-lg-5"> <div class="col-lg-6 col-md-8 mx-auto"> <h1 class="fw-light">Awesome Recipe</h1> <p class="lead text-muted"> Find and share everyday cooking inspiration from these awesome recipes. Discover recipes, cooks, videos, and how-tos based on the food you love and the friends you follow. <br /> <em>(Nothing serious, this is just for our demo node-express-docker image app)</em> </p> </div> </div> </section> </main> </body> </html> |
Apart from importing Bootstrap, the page also adds a basic navigation menu to help us move through the pages and back to the landing page. We also added a line to import our custom CSS file:
|
1 |
<link href="css/custom.css" rel="stylesheet"> |
We will use this file to add custom styling to the application later on. Now, let’s create the three pages for the recipes. We first start by creating the lasagna page. Open the file with nano editor using the following command:
|
1 |
nano views/lasagna.html |
In the opened file, add the following code. This file will import Bootstrap, the custom.css file, specify a navigation menu and offer some Lasagna recipe information:
|
1 2 3 4 5 6 7 8 9 10 11 12 13 14 15 16 17 18 19 20 21 22 23 24 25 26 27 28 29 30 31 32 33 34 35 36 37 38 39 40 41 42 43 44 45 46 47 48 49 50 51 52 53 54 55 56 57 58 59 60 61 62 63 64 65 66 67 68 69 70 71 72 73 74 75 76 77 78 79 80 81 82 83 |
<!DOCTYPE html> <html lang="en"> <head> <meta charset="UTF-8"> <meta name="viewport" content="width=device-width, initial-scale=1"> <meta name="description" content=""> <meta name="author" content="Mark Otto, Jacob Thornton, and Bootstrap contributors"> <meta name="generator" content="Hugo 0.80.0"> <title>Lasagna Recipe</title> <!-- Bootstrap core CSS --> <link href="https://cdn.jsdelivr.net/npm/bootstrap@5.0.0-beta2/dist/css/bootstrap.min.css" rel="stylesheet" crossorigin="anonymous"> <link href="css/custom.css" rel="stylesheet"> </head> <body> <nav class="navbar navbar-dark bg-dark navbar-static-top navbar-expand-md"> <div class="container"> <button type="button" class="navbar-toggler collapsed" data-toggle="collapse" data-target="#bs-example-navbar-collapse-1" aria-expanded="false"> <span class="sr-only">Toggle navigation</span> </button> <a class="navbar-brand" href="#">Awesome Recipes</a> <div class="collapse navbar-collapse justify-content-center" id="bs-example-navbar-collapse-1"> <ul class="nav navbar-nav justify-content-center"> <li class="active nav-item"> <a href="/" class="nav-link">Home</a> </li> <li class="nav-item"> <a href="/lasagna" class="nav-link">Lasagna</a> </li> <li class="nav-item"> <a href="/guacamole" class="nav-link">Guacamole</a> </li> <li class="nav-item"> <a href="/banana-bread" class="nav-link">Banana Bread</a> </li> </ul> </div> </div> </nav> <main> <section class="py-5 text-center container bg-light"> <div class="row py-lg-5"> <div class="col-lg-6 col-md-8 mx-auto"> <h1 class="fw-light">The Best Lasagna Recipe</h1> <p class="lead text-muted"> This is the best lasagna you will ever make. <br /> <em>(Nothing serious, this is just for our demo node-express-docker image app)</em> </p> <h3>Ingredients</h3> <ul class="list-group"> <li class="list-group-item">1 pound sweet Italian sausage</li> <li class="list-group-item">¾ pound lean ground beef</li> <li class="list-group-item">½ cup minced onion</li> <li class="list-group-item">2 cloves garlic, crushed</li> <li class="list-group-item">1 (28 ounce) can crushed tomatoes</li> <li class="list-group-item">2 (6 ounce) cans tomato paste</li> <li class="list-group-item">2 (6.5 ounce) cans canned tomato sauce</li> <li class="list-group-item">½ cup water</li> <li class="list-group-item">2 tablespoons white sugar</li> <li class="list-group-item">1 ½ teaspoons dried basil leaves</li> <li class="list-group-item">½ teaspoon fennel seeds</li> <li class="list-group-item">1 teaspoon Italian seasoning</li> <li class="list-group-item">1 ½ teaspoons salt, divided, or to taste</li> <li class="list-group-item">¼ teaspoon ground black pepper</li> <li class="list-group-item">4 tablespoons chopped fresh parsley</li> <li class="list-group-item">12 lasagna noodles</li> <li class="list-group-item">16 ounces ricotta cheese</li> <li class="list-group-item">1 egg</li> <li class="list-group-item">¾ pound mozzarella cheese, sliced</li> <li class="list-group-item">¾ cup grated Parmesan cheese</li> </ul> </div> </div> </section> </main> </body> </html> |
Let’s follow the same process to create a file for the guacamole recipe page. Open the file with nano by running the following command:
|
1 |
nano views/guacamole.html |
Then add this code to the file:
|
1 2 3 4 5 6 7 8 9 10 11 12 13 14 15 16 17 18 19 20 21 22 23 24 25 26 27 28 29 30 31 32 33 34 35 36 37 38 39 40 41 42 43 44 45 46 47 48 49 50 51 52 53 54 55 56 57 58 59 60 61 62 63 64 65 66 67 68 69 70 71 |
<!DOCTYPE html> <html lang="en"> <head> <meta charset="UTF-8"> <meta name="viewport" content="width=device-width, initial-scale=1"> <meta name="description" content=""> <meta name="author" content="Mark Otto, Jacob Thornton, and Bootstrap contributors"> <meta name="generator" content="Hugo 0.80.0"> <title>Guacamole Recipe</title> <!-- Bootstrap core CSS --> <link href="https://cdn.jsdelivr.net/npm/bootstrap@5.0.0-beta2/dist/css/bootstrap.min.css" rel="stylesheet" crossorigin="anonymous"> <link href="css/custom.css" rel="stylesheet"> </head> <body> <nav class="navbar navbar-dark bg-dark navbar-static-top navbar-expand-md"> <div class="container"> <button type="button" class="navbar-toggler collapsed" data-toggle="collapse" data-target="#bs-example-navbar-collapse-1" aria-expanded="false"> <span class="sr-only">Toggle navigation</span> </button> <a class="navbar-brand" href="#">Awesome Recipes</a> <div class="collapse navbar-collapse justify-content-center" id="bs-example-navbar-collapse-1"> <ul class="nav navbar-nav justify-content-center"> <li class="active nav-item"> <a href="/" class="nav-link">Home</a> </li> <li class="nav-item"> <a href="/lasagna" class="nav-link">Lasagna</a> </li> <li class="nav-item"> <a href="/guacamole" class="nav-link">Guacamole</a> </li> <li class="nav-item"> <a href="/banana-bread" class="nav-link">Banana Bread</a> </li> </ul> </div> </div> </nav> <main> <section class="py-5 text-center container bg-light"> <div class="row py-lg-5"> <div class="col-lg-6 col-md-8 mx-auto"> <h1 class="fw-light">The Best Guacamole Recipe</h1> <p class="lead text-muted"> You can make this avocado salad smooth or chunky depending on your tastes. <br /> <em>(Nothing serious, this is just for our demo node-express-docker image app)</em> </p> <h3>Ingredients</h3> <ul class="list-group"> <li class="list-group-item">3 avocados - peeled, pitted, and mashed</li> <li class="list-group-item">1 lime, juiced</li> <li class="list-group-item">1 teaspoon salt</li> <li class="list-group-item">½ cup diced onion</li> <li class="list-group-item">3 tablespoons chopped fresh cilantro</li> <li class="list-group-item">2 roma (plum) tomatoes, diced</li> <li class="list-group-item">1 teaspoon minced garlic</li> <li class="list-group-item">1 pinch ground cayenne pepper (Optional)</li> </ul> </div> </div> </section> </main> </body> </html> |
Finally, let’s create the banana_bread.html file by entering the command:
|
1 |
nano views/banana_bread.html |
Then, add the following HTML code to the file:
|
1 2 3 4 5 6 7 8 9 10 11 12 13 14 15 16 17 18 19 20 21 22 23 24 25 26 27 28 29 30 31 32 33 34 35 36 37 38 39 40 41 42 43 44 45 46 47 48 49 50 51 52 53 54 55 56 57 58 59 60 61 62 63 64 65 66 67 68 69 70 |
<!DOCTYPE html> <html lang="en"> <head> <meta charset="UTF-8"> <meta name="viewport" content="width=device-width, initial-scale=1"> <meta name="description" content=""> <meta name="author" content="Mark Otto, Jacob Thornton, and Bootstrap contributors"> <meta name="generator" content="Hugo 0.80.0"> <title>Banana Bread Recipe</title> <!-- Bootstrap core CSS --> <link href="https://cdn.jsdelivr.net/npm/bootstrap@5.0.0-beta2/dist/css/bootstrap.min.css" rel="stylesheet" crossorigin="anonymous"> <link href="css/custom.css" rel="stylesheet"> </head> <body> <nav class="navbar navbar-dark bg-dark navbar-static-top navbar-expand-md"> <div class="container"> <button type="button" class="navbar-toggler collapsed" data-toggle="collapse" data-target="#bs-example-navbar-collapse-1" aria-expanded="false"> <span class="sr-only">Toggle navigation</span> </button> <a class="navbar-brand" href="#">Awesome Recipes</a> <div class="collapse navbar-collapse justify-content-center" id="bs-example-navbar-collapse-1"> <ul class="nav navbar-nav justify-content-center"> <li class="active nav-item"> <a href="/" class="nav-link">Home</a> </li> <li class="nav-item"> <a href="/lasagna" class="nav-link">Lasagna</a> </li> <li class="nav-item"> <a href="/guacamole" class="nav-link">Guacamole</a> </li> <li class="nav-item"> <a href="/banana-bread" class="nav-link">Banana Bread</a> </li> </ul> </div> </div> </nav> <main> <section class="py-5 text-center container bg-light"> <div class="row py-lg-5"> <div class="col-lg-6 col-md-8 mx-auto"> <h1 class="fw-light">The Best Banana Banana Bread Recipe</h1> <p class="lead text-muted"> Why compromise the banana flavor? This banana bread is moist and delicious with loads of banana flavor! Friends and family love my recipe and say it's by far the best! It's wonderful toasted!! Enjoy! <br /> <em>(Nothing serious, this is just for our demo node-express-docker image app)</em> </p> <h3>Ingredients</h3> <ul class="list-group"> <li class="list-group-item">2 cups all-purpose flour</li> <li class="list-group-item">1 teaspoon baking soda</li> <li class="list-group-item">¼ teaspoon salt</li> <li class="list-group-item">½ cup butter</li> <li class="list-group-item">¾ cup brown sugar</li> <li class="list-group-item">2 eggs, beaten</li> <li class="list-group-item">2⅓ cups mashed overripe bananas</li> </ul> </div> </div> </section> </main> </body> </html> |
Now, we have created all the pages. If you remember, we are to add the css/custom.css file. Enter the following command to create the directory:
|
1 |
mkdir views/css |
Then create and open the file in nano editor with the command:
|
1 |
nano views/css/custom.css |
You can add more CSS codes to style your website as you wish. For brevity, let’s add the following code snippet to the file:
|
1 2 3 4 5 6 7 8 9 10 11 12 13 |
.bd-placeholder-img { font-size: 1.125rem; text-anchor: middle; -webkit-user-select: none; -moz-user-select: none; user-select: none; } @media (min-width: 768px) { .bd-placeholder-img-lg { font-size: 3.5rem; } } |
Save and close the file when done.
You can start the application since we now have the application source code and project dependencies installed.
We had set the app to listen on a port 8090, run the following command to instruct the firewall to allow traffic through this port. If you had specified a different port, replace the port number in the command:
|
1 |
sudo ufw allow 8090 |
Now, you can start the application. But first, just ensure you are in the project root directory by running the following command:
|
1 |
cd ~/node_express |
Start the application with node index.js. If you specified a different entry point, replace it with your entry point:
|
1 |
node index.js |
If you navigate your browser to http://your_public_server_ip:8090, you will see the Recipes landing page as defined:
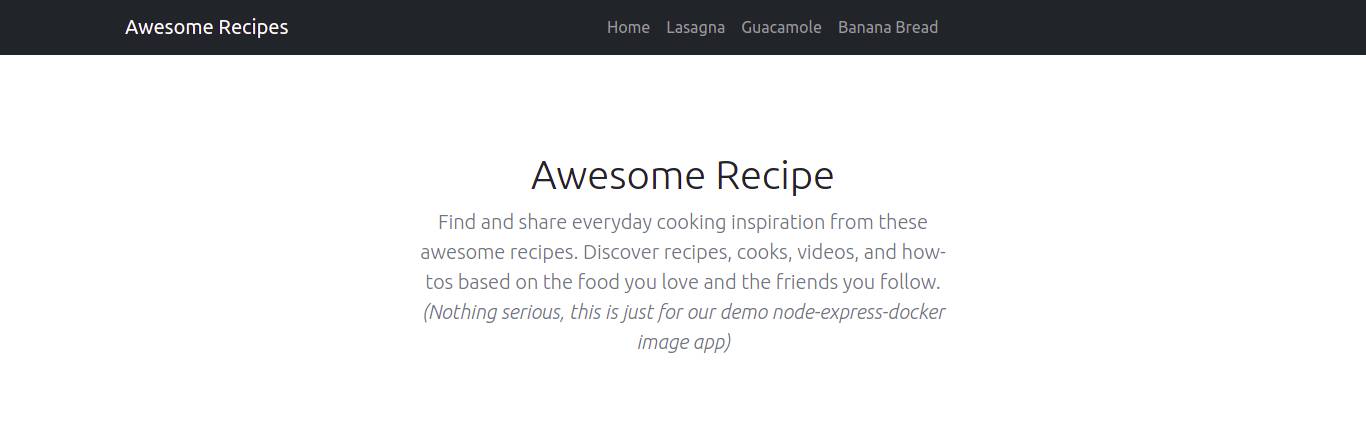
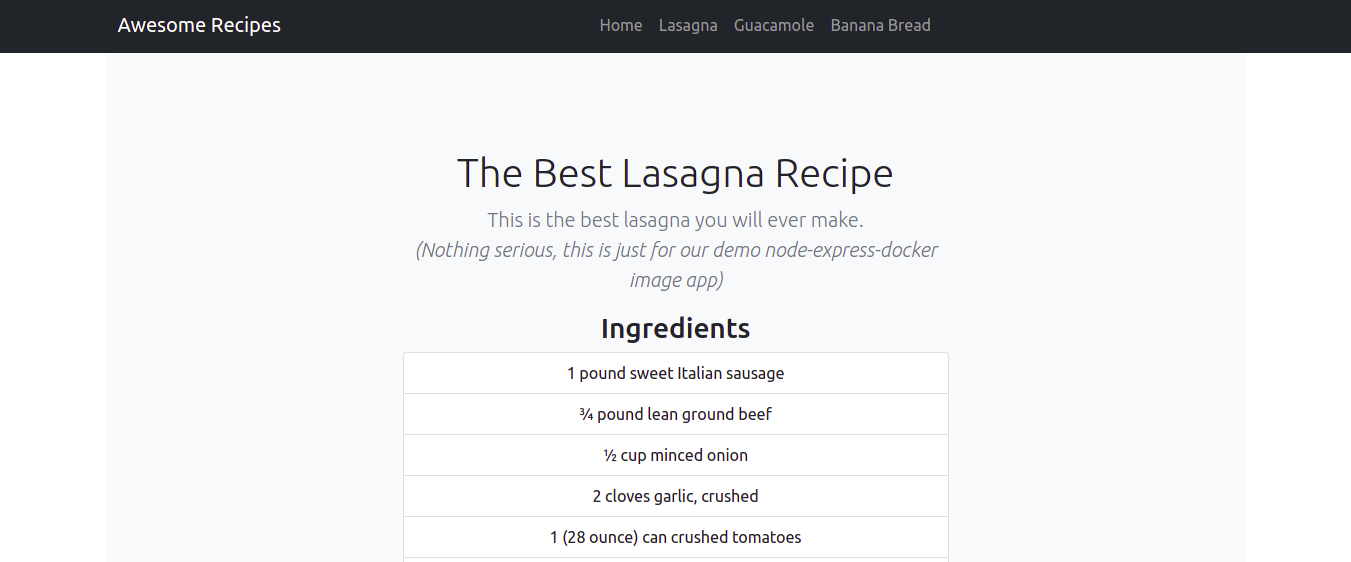
You can see the links to the various recipes in the navigation. Let’s click on some. Below we have the Lasagna recipe page:
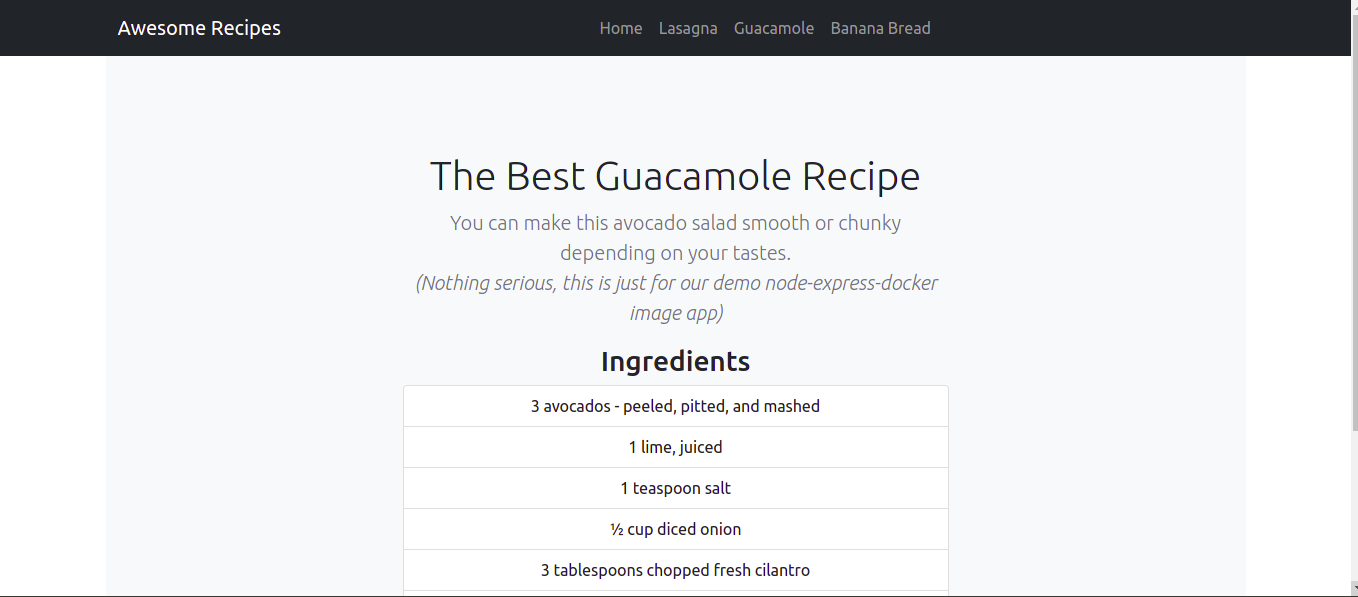
And here we have the Guacamole recipe page:
Up to this point, you have created your application and tested that it’s working as expected. You may quit the server by pressing Ctrl + C and move on to creating the Dockerfile. Dockerfiles help in scalability by making it possible to recreate an application’s instance when needed.
Step 3: Creating the Dockerfile
Docker reads the instructions specified in a Dockerfile when building images. It specifies the runtime environment of an application. Hence, it helps developers avoid discrepancies with dependencies or changing runtime versions. Enter the following command to create the Dockerfile:
|
1 |
nano Dockerfile |
A Docker image is created using several layers of images that build on one another. You start by adding a base image to form the starting point for the app.
Since the application expects to run in a node.js environment, we will start by adding the node:10-alpine image for node.js. Currently, as we are writing this tutorial, this is the recommended LTS version of Node.js. We chose this specific image because it’s derived from the Alpine Linux project. Hence, it will help keep our image size at the minimum. There are several image variants under the Docker Hub Node images page that you can choose from depending on your needs.
Add the following code to set the application’s base image using the FROM directive:
|
1 |
FROM node:10-alpine |
This image includes Node.js and npm. Every Dockerfile must begin with a FROM directive. The Docker node image comes with a non-root node user by default that you can use to run your application container as root. Docker security recommends not running the containers as root and to restrict privileges to only those required to run its resources.
In that case, we will be using the node user’s home directory as the working directory for the application as well as the user inside the container. You can check this Docker Node image best practices guide for more information.
We will create the node_modules subdirectory inside the /home/node along with the app directory to help streamline the permissions for the application code. Creating these directories ensures that they have the right permissions when we run the npm install command locally inside the containers. Once you have created the directories, you must set ownership on them to the node user. We will do this inside the Dockerfile by adding the following line:
|
1 |
mkdir -p /home/node/app/node_modules && chown -R node:node /home/node/app |
Then you will set the working directory by adding the following line:
|
1 |
WORKDIR /home/node/app |
It’s a good idea to always set the WORKDIR so that Docker does not have to create one by default.
Add the following line to copy the package.json and package-lock.json files:
|
1 |
COPY package*.json ./ |
It’s recommended to add the COPY instruction before running npm install or copying application source code. It allows you to take advantage of Docker’s caching mechanism. During the build process, Docker checks whether it has a layer cached for every instruction. This means that if you have not changed the package.json file, then Docker will use the existing imager layer and avoid reinstalling node modules, hence faster build processes.
Before running npm install, add the following line to switch the user to node to ensure all the application files and node_modules directory are owned by the non-root node user:
|
1 |
USER node |
Our container is now ready to run the npm install command. Add the following line to the Dockerfile:
|
1 |
RUN npm install |
Once node_modules have been installed, add the following line that will tell Docker to copy the application code into the application directory on the container with the right permissions and ownership, i.e. the non-root node user:
|
1 |
COPY --chown=node:node . . |
The last step is to expose the port 8090 on the container, as we had defined in our entry index.js file:
|
1 2 |
EXPOSE 8090 CMD [ "node", "index.js" ] |
EXPOSE sets which ports on the container will be open at runtime. CMD runs the command to start the application, in this case, node index.js.
You should only have one CMD command in the Dockerfile since only the last one takes effect. Please check out the Dockerfile reference documentation for a list of things you can do with Dockerfile.
Your complete Dockerfile should look like this:
|
1 2 3 4 5 6 7 8 9 |
FROM node:10-alpine RUN mkdir -p /home/node/app/node_modules && chown -R node:node /home/node/app WORKDIR /home/node/app COPY package*.json ./ USER node RUN npm install COPY --chown=node:node . . EXPOSE 8090 CMD [ "node", "index.js" ] |
You may now save and close the file.
The next thing you do is adding the .dockerignore file. Just like the .gitignore file, the .dockerignore specifies which files and directories within the project directory should not be copied over to the container.
Open the file with nano editor:
|
1 |
nano .dockerignore |
Add the following lines inside the file:
|
1 2 3 4 |
node_modules npm-debug.log Dockerfile .dockerignore |
If working with a git repo, then you should also add the .git directory and the .gitignore file. Save and close the file.
If everything has gone well, it’s time to build the application image using the docker build command. You can add the –t flag to the docker build command to tag the image with a memorable name as opposed to the random string that docker sets by default. We will also be pushing the image to Docker Hub so, it’s best to include your Docker Hub username in the tag.
We will use nodejs-express-image as the tag name. You are free to choose a tag name that you like. Here is the command to build the image:
|
1 |
sudo docker build -t your_dockerhub_username/nodejs-express-image . |
Remember to replace your_dockerhub_username with your actual Docker Hub username. The . (dot) at the end specifies that the build context is the current directory.
The build process takes a minute or two. Once it’s done, enter the command to check your images:
|
1 |
sudo docker images |
You should see something like this:

Remember, we replaced your_dockerhub_username with an actual username.
After confirming that your image has been built, you may now create a container with the image using docker run. The following flags will be included:
-p: publishes the port on the container and maps it to a port on the host system. We will use port 80 on the host system for demonstration purposes. However, if you have another process running on that port, feel free to modify this as necessary. Learn more about port binding from the Docker docs.-d: for detached mode. Allows the container to continue running in the background.--name: you can use this to set a memorable name instead of letting Docker assign a random string.
The command to build the container is as follows. Replace your Docker Hub username appropriately:
|
1 |
sudo docker run --name nodejs-express-image -p 80:8090 -d your_dockerhub_username/nodejs-express-image |
Wait for the container to build and start running. You may use this command to inspect all the running containers:
|
1 |
sudo docker ps |
You should see an output similar to the following:

As seen in the output, the container is now running. You can view it in the browser if you visit your server’s public IP address without the port in the browser. Your home page will load:
You have successfully deployed a Node Express static website with Docker. Let’s see how we can push this image to Docker Hub for future use and scaling purposes.
Step 4: Working with Docker Image Repositories
You can push your images to image registries like Docker Hub and save them for future use, share them with other developers or allow for scaling your containers. We can push the image we created to Docker Hub and use it to recreate a container.
Use the following command to log in to your Docker Hub account. Replace it with your actual Docker Hub username:
|
1 |
sudo docker login -u your_dockerhub_username |
Enter your password when prompted. Once logged in, a ~/.docker/config.json file is created in your user’s home directory containing your Docker Hub credentials.
With that set, enter the following command to push the image to Docker Hub, specifying the tag you set when building the image earlier:
|
1 |
sudo docker push your_dockerhub_username/nodejs-express-image |
This command pushes the docker image to your Docker Hub account. If you visit your account, you can see your recently pushed image:

We can test the usefulness of the image repository by destroying the current application container and rebuilding it using the image in the repository.
List your current containers by entering the command:
|
1 |
sudo docker ps |
You should see an output similar to this:

Note the CONTAINER ID listed in your output, copy it, and use it to stop your container with the command, replacing the ID with yours:
|
1 |
sudo docker stop 1bb2d65279bb |
Enter the following command to list all the docker images available in your system:
|
1 |
sudo docker images –a |
The output will show the name of your image, the node.js image, and other images from the build process.
Enter the following command to remove the images, including unused or dangling images:
|
1 |
sudo docker system prune |
Type y to confirm. This removes the stopped containers and images. If you list them you will see an empty list in the output:

Now, you have removed both the container running the application, and the image itself. Learn more about removing Docker containers, images, and volumes by following our tutorial.
We can now recreate the whole process by first pulling the image from Docker Hub with the following command. Replace your Docker Hub username appropriately:
|
1 |
sudo docker pull your_dockerhub_username/nodejs-express-image |
List your Docker images again with the command:
|
1 |
sudo docker images |
You should see the image in the output:

You can now rebuild your container using the command from Step 3. Of course, replace your Docker Hub username where appropriate:
|
1 |
sudo docker run --name nodejs-express-image -p 80:8090 -d your_dockerhub_username/nodejs-express-image |
List your containers to confirm that it has been rebuilt:
|
1 |
sudo docker ps |
You should see a similar output:

In your browser, navigate to your server’s public IP address and you should see your app running.
Conclusion
If you have followed through the tutorial up to this point, you now have a static website made with Express and Bootstrap, and deployed with Docker. You used the static website files to build a Docker image and used the image to create a container. You then pushed the image to a Docker image registry, Docker Hub, making it available for future use or scaling. To test the use of the image registry, you destroyed the images and containers, pulled the images from the registry, and rebuilt the containers.
This tutorial explained how to deploy a Node.js app. If you would like to learn how to use a different web development stack, we have a tutorial on Deploying a Laravel app with Docker Compose on Nginx.
For more resources on utilizing Docker, check out the following tutorials:
- How to Install and Configure Docker Compose on Ubuntu 20.04
- How To Share Data Between a Docker Container and a Host
- Installing and Setting up Docker on CentOS 7
Happy Computing!
- How To Enable, Create and Use the .htaccess File: A Tutorial - March 8, 2023
- An Overview of Queries in MySQL - October 28, 2022
- Introduction to Cookies: Understanding and Working with JavaScript Cookies - October 25, 2022
- An Overview of Data Types in Ruby - October 24, 2022
- The Architecture of Iptables and Netfilter - October 10, 2022