
Security is a prime consideration for server admins, especially when there is a need to access servers remotely at regular intervals. Protection from cyber-attacks is of crucial importance to streamline workflows and to ensure business continuity. The standard practice of using a username and password is highly insecure, unsafe, and ineffective. You need a robust and advanced method like SSH key-pair authorization to access, manage and control servers. The cryptographic algorithms used in SSH keys give an advanced level of security to protect servers, where deciphering becomes impossible, even through brute force.
Today, SSH key-based authentication is the most reliable mode of authentication and a favorite among Linux users. With SSH, you get an option to choose either “RSA” (Rivest-Shamir-Adleman) or “DSA” (“Digital Signature Algorithm”) keys. If you’re generating keys for the first time, RSA is the preferred option. In this tutorial, we will use the “RSA key” method with the default port size 2048 to generate private and public keys and connect with the VPS.
How does SSH Key Authentication Work?
SSH Key authentication uses a client-server model to exchange data from the server and the client. The server accepts connections, while the client is responsible for the Transmission Control Protocol (TCP) to connect with the server. You generate a pair of keys (private and public keys) and match the server to the client. The private key is kept on your local machine, whereas, the public key gets uploaded to the server. The private key gets validated with the public key to make connections. Only if both keys pass the validation and there is a match, the connection is made, else the connection is denied.
Undeniably, SSH key-pair authentication is a highly secure and reliable way of connecting with servers. In fact, Linux users can configure the Linux server and use key-based authentication too. Irrespective of the OS you’re using, you can leverage key-pair authentication to protect your resources and enjoy a hassle-free experience. In this tutorial, we will walk you through the steps of generating SSH keys with PuTTY and connecting them with a VPS. Let’s begin!
Prerequisites
To follow this tutorial, you’ll need:
-
Access to a Linux server.
-
PuTTY and PuTTYgen installed on your system.
Step 1 — Download PuTTYgen
Download PuTTYgen from the official website.
Step 2 — Generate the SSH Pair
- First, double-click on the puttygen.exe file to open the PuTTYgen we’ve downloaded in Step 1.
-
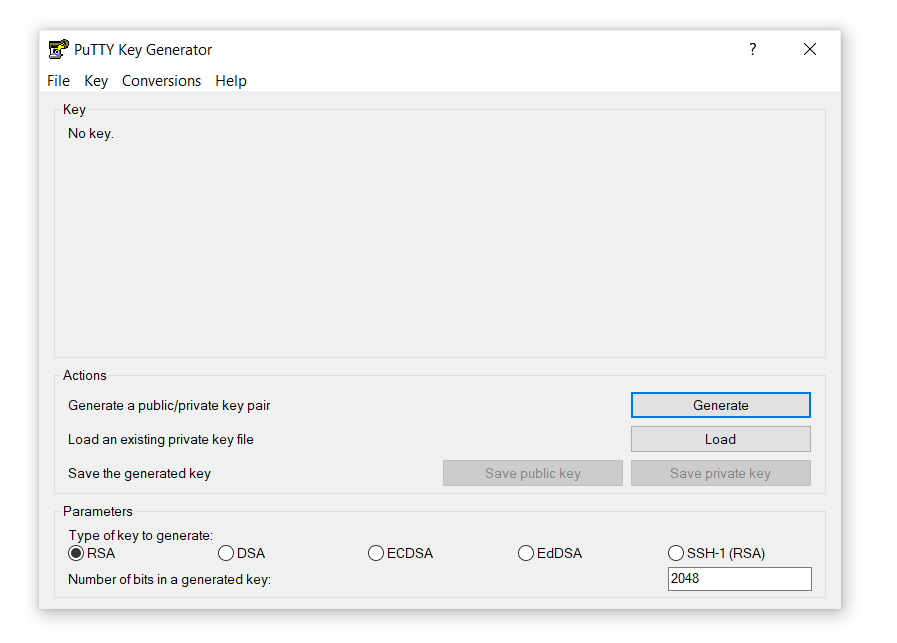
You’ll see a window:

-
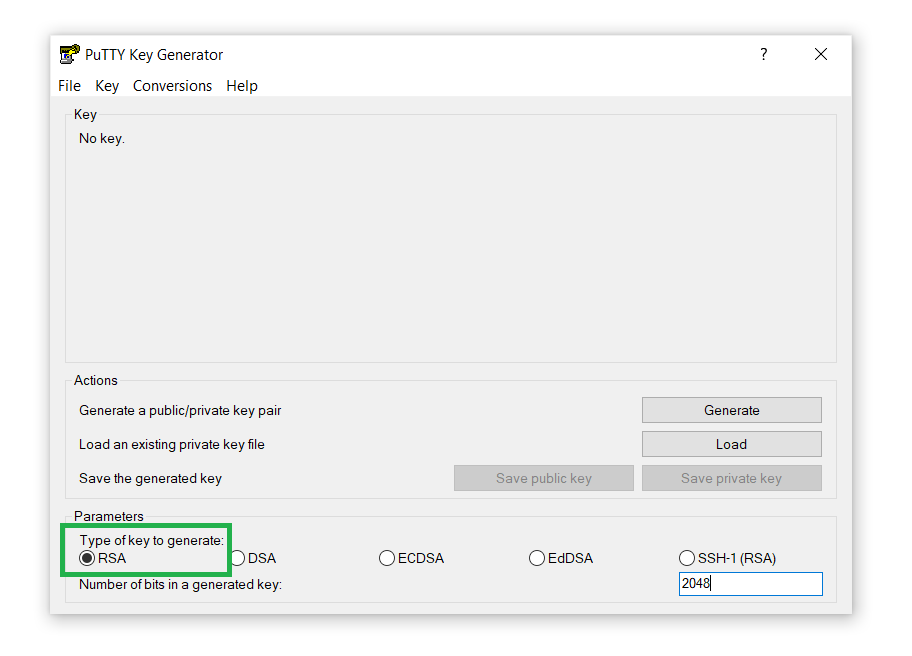
Next, under the Parameters section, select RSA from the Type of key to generate option:

- Keep the default RSA key size
2048. You can also increase it to
4096 to add an extra layer of security and protection from brute-force attacks:

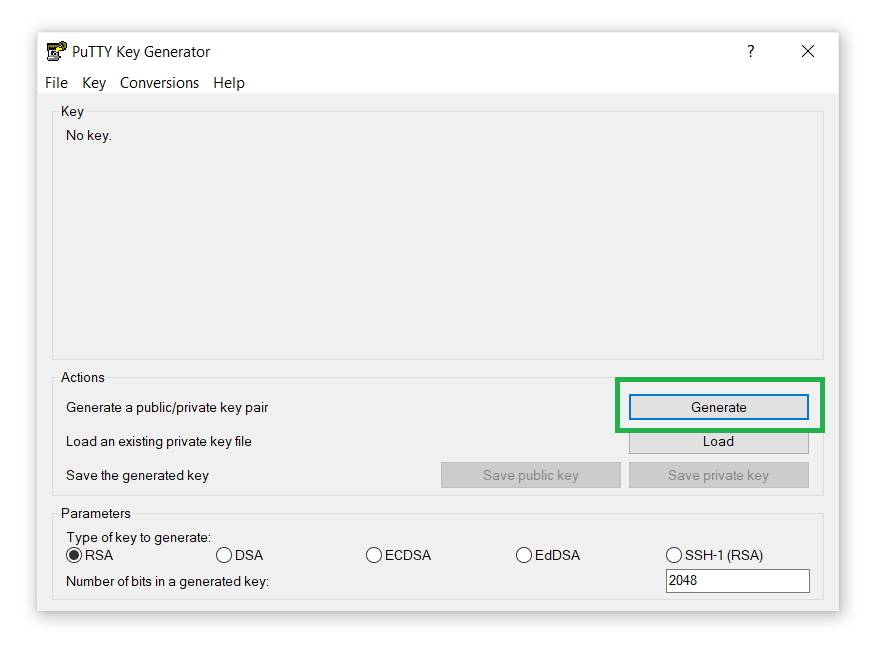
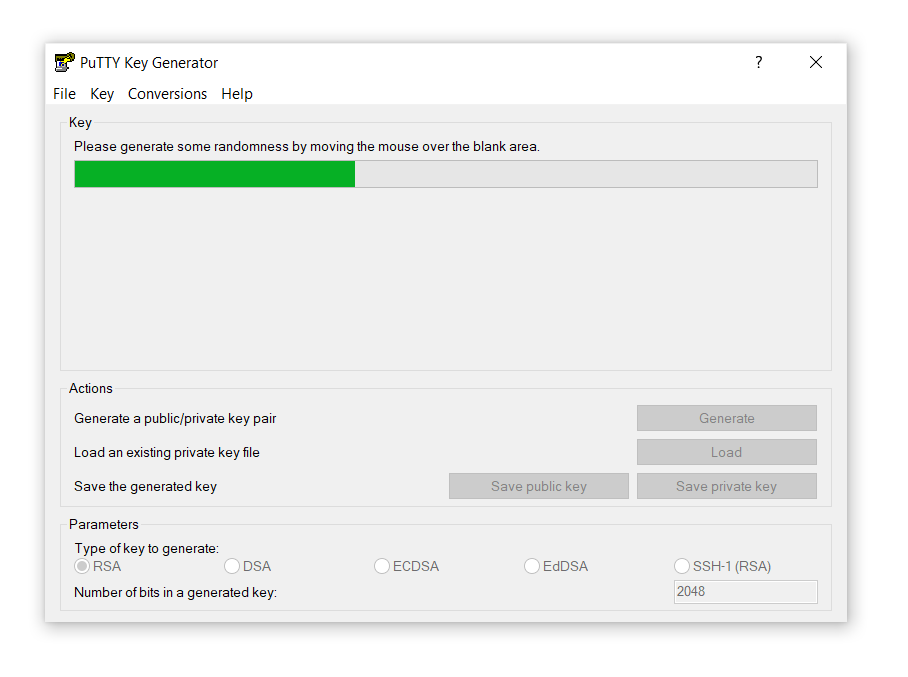
- Next, click on the Generate button to generate the SSH Key pair:

- After that, hover the mouse pointer around the black area of the Key section until the progress bar is loaded:

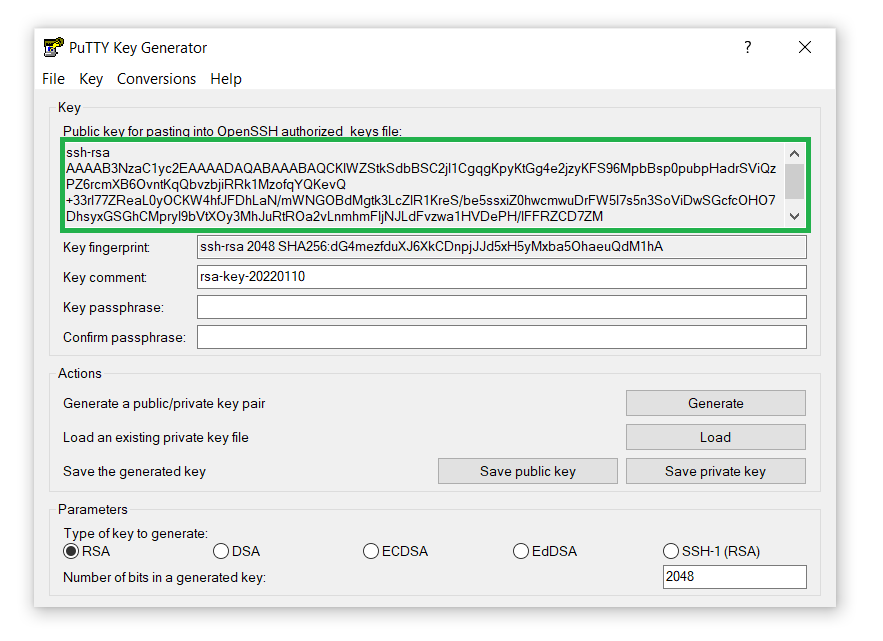
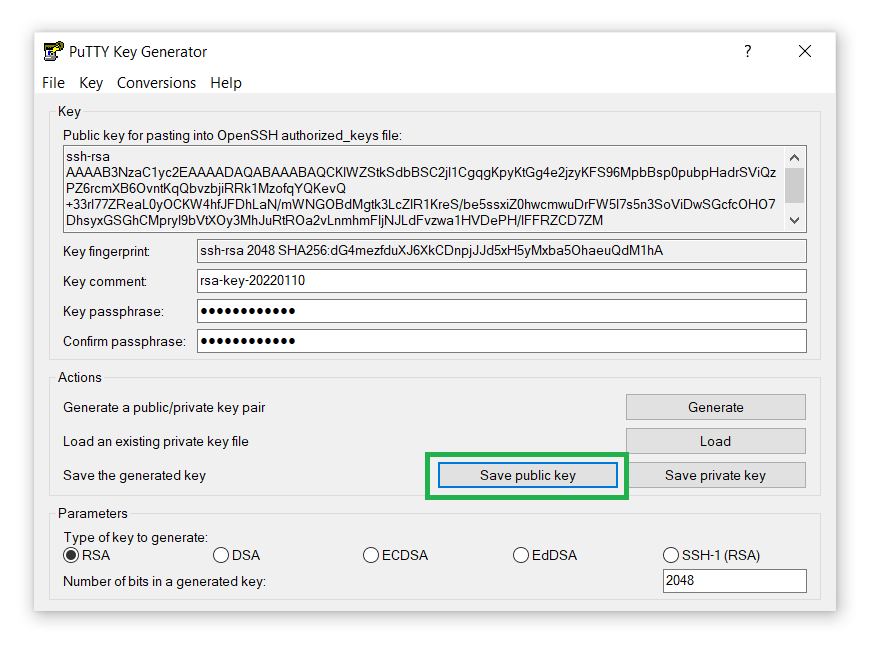
- You’ll see the public SSH key on the screen:

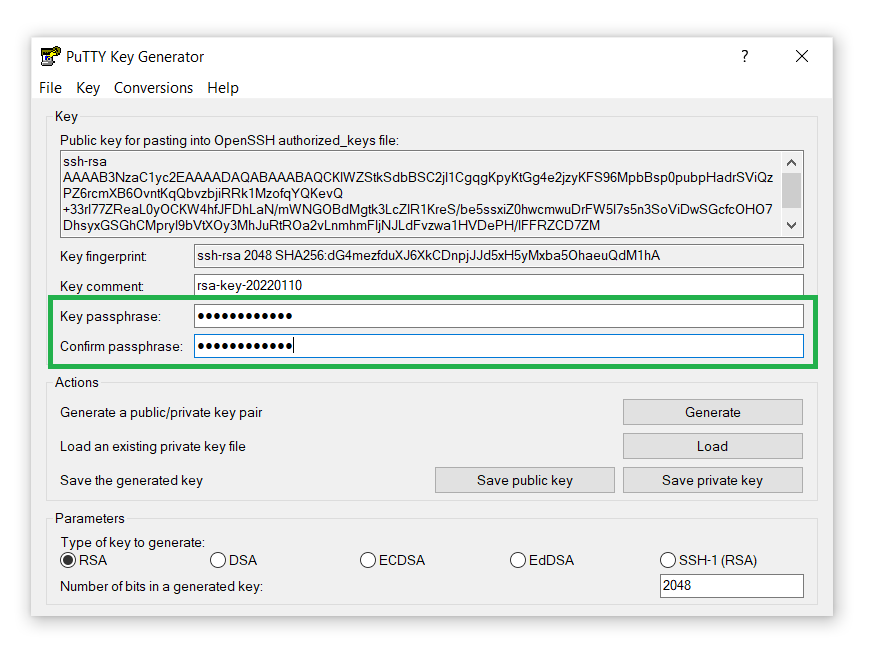
- Additionally, add a Key passphrase for security purposes. Confirm and proceed:

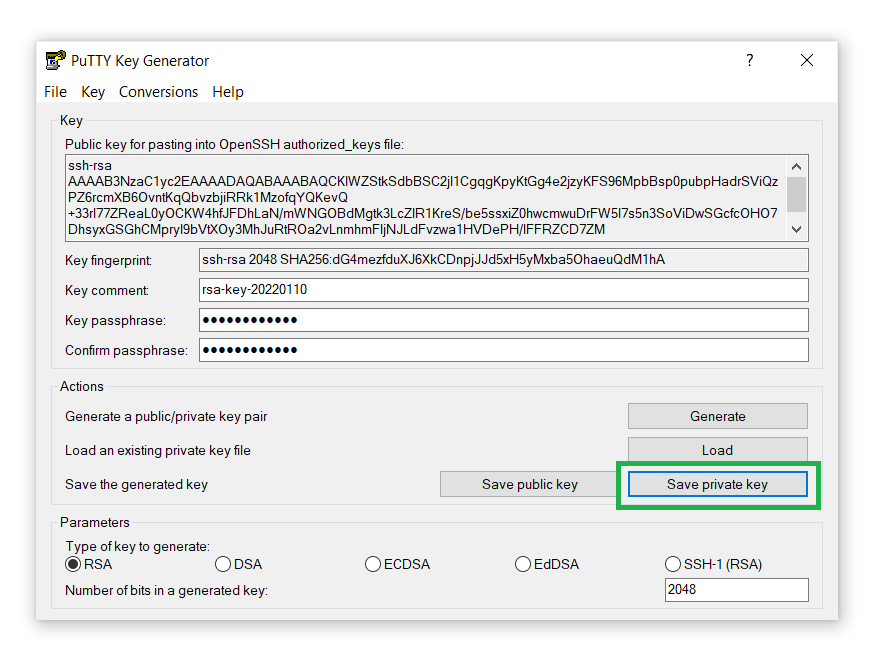
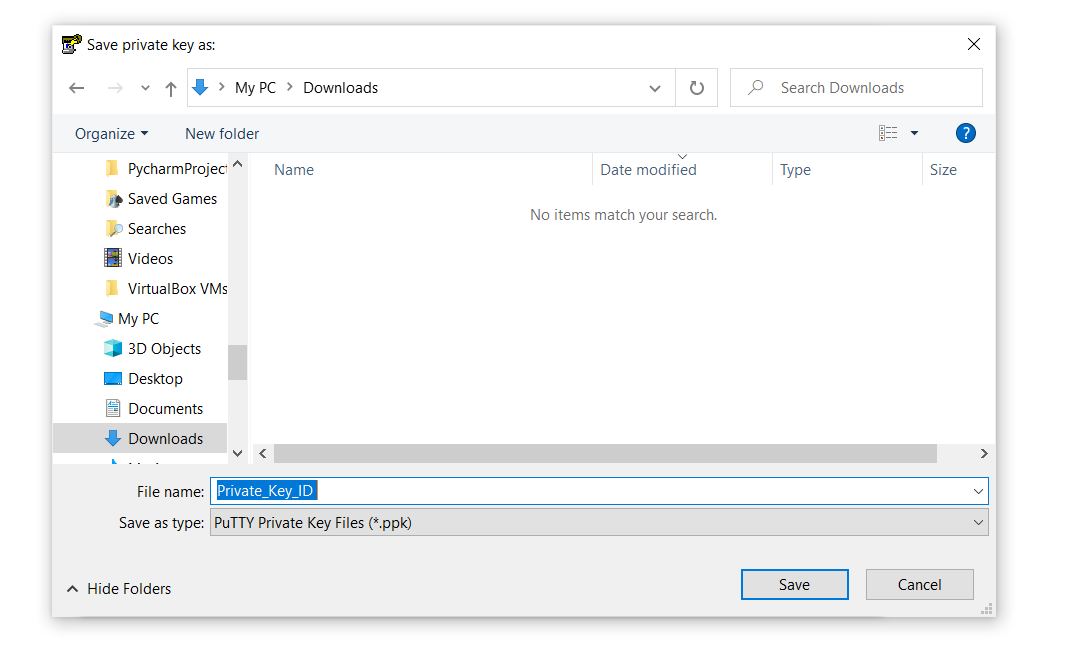
- Save the private key on your computer by clicking on the Save private key button:

- Add a name to the private key and locate it anywhere on your computer. Remember, we’ll need this key in the upcoming step, so make sure you know the destination:

- Similarly, save the private key on your computer by clicking on the Save public key button:

- You can also Copy the public key file and save it on your computer. We’ll need the public key to upload to the server for establishing a secure connection:


Now you have successfully generated your SSH Key pair! Let’s move forward with setting up the private key with PuTTY. Alternatively, you can skip Step 3 and check how to generate a set of RSA keys with PuTTYgen to securely access CloudSigma’s cloud.
Step 3 — Save Your Server’s Settings
So far, the server still cannot recognize your system. Let us attach the private key to PuTTY to introduce the server to our system. Follow the steps below:
-
Start PuTTY by double-clicking its executable file.
-
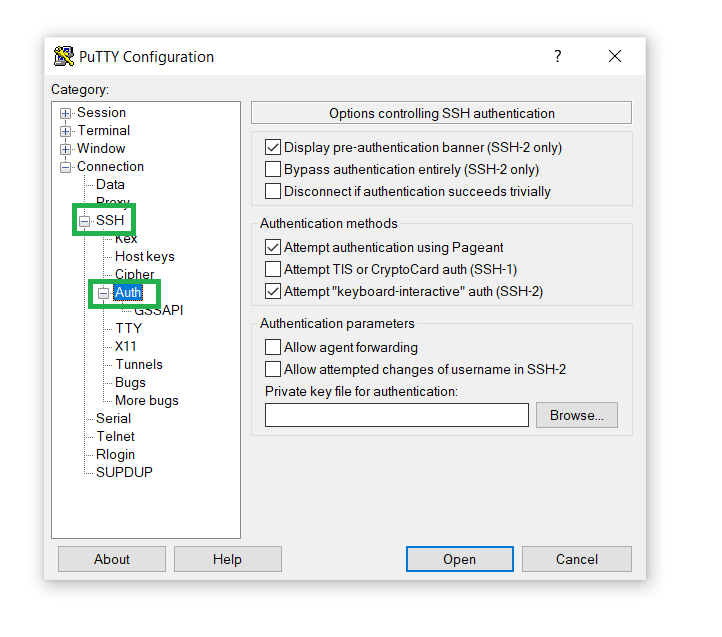
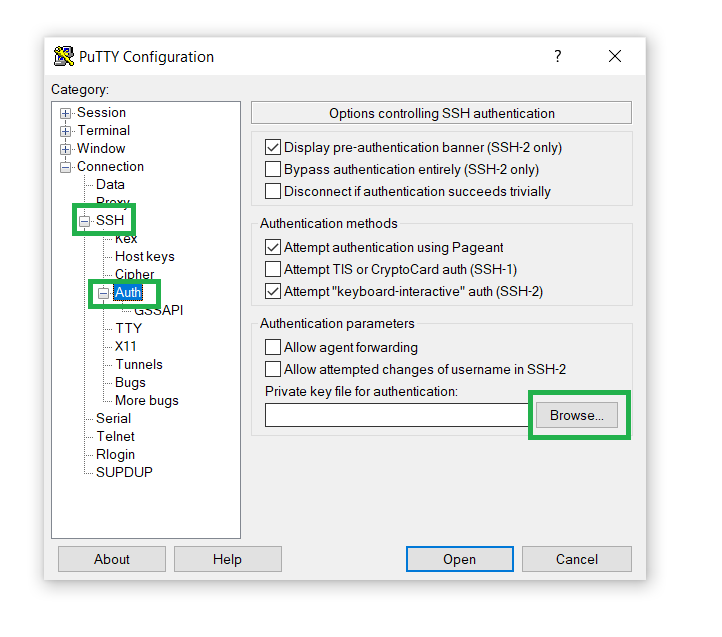
In the left sidebar, open the Connection section, go to SSH, and click on Auth:

-
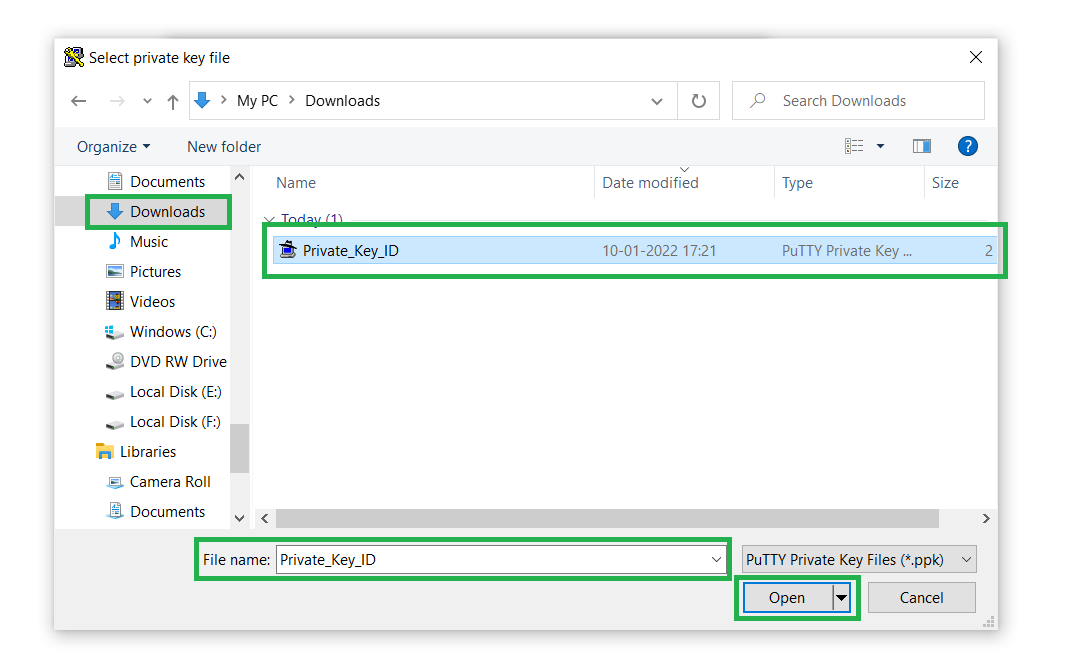
In the Private key for authentication field, click on Browse, and open the Private key file we’ve saved in Step 2 (11.):
-
Next, open the Private key file from the source-destination:

Step 4 — Add a Private Key to the Server
Let’s paste the copied public key in the file ~/.ssh/authorized_keys on your server.
-
Log in to your destination server.
-
If your SSH folder does not yet exist, create it manually using the authorized_keys:
|
1 |
mkdir ~/.ssh | touch ~/.ssh/authorized_keys |
-
Next, change the permission by securing the SSH Keys:
|
1 |
chmod 0700 ~/.ssh; chmod 0644 ~/.ssh/authorized_keys |
-
Then, open the ~/.ssh/authorized_keys file using the vim text editor:
|
1 |
vim ~/.ssh/authorized_keys |
-
Tap the i key on your keyboard and right-click to paste.
-
To save, tap the following keys on your keyboard (in this order): Esc, :, w, q, Enter.
Step 5 — Disable Username/Password Logins
After verifying key-based logins, you may disable username or password logins to advance additional security.
-
Edit the SSH server’s configuration file located at /etc/ssh/sshd_config.
-
Next, press the i key on your keyboard and edit the lines:
|
1 2 3 4 |
[...] PasswordAuthentication no [...] UsePAM no [...] |
-
To save, tap the following keys on your keyboard (in this order): Esc, :, w, q, Enter.
-
Next, reload the SSH server’s configuration:
|
1 |
$ sudo reload ssh |
Conclusion
Using SSH key authentication is an excellent choice to secure servers and protect your system from cyber threats. However, the key-based security method demands alertness while saving private keys. Make sure to keep the private key confidential and never disclose it to anyone. If you fail to keep your private key safe, hackers may gain access and eventually monitor your servers without your permission.
Are you interested in learning more about SSH and Linux servers? Dive into the following tutorials from our blog:
- How to use SSH to connect to a remote server in Ubuntu
- SSH Overview – SSH Servers, Clients, and Keys
- Configuring your Linux server to use SSH key-based authentication
Happy Computing!
- How To Enable, Create and Use the .htaccess File: A Tutorial - March 8, 2023
- An Overview of Queries in MySQL - October 28, 2022
- Introduction to Cookies: Understanding and Working with JavaScript Cookies - October 25, 2022
- An Overview of Data Types in Ruby - October 24, 2022
- The Architecture of Iptables and Netfilter - October 10, 2022