
The importance of data security in the modern business industry cannot be over-emphasized. It is extremely important for individuals to ensure their privacy and online safety, let alone businesses and corporations. There are well-disguised scams and viruses hiding at almost every turn and corner on the internet. Even remaining as vigilant as you possibly can, you can still be at significant risk of data breaches. As such, we highly recommend using tools such as VPNs to maximize your online safety.
What are VPNs?
VPN stands for Virtual Private Network. As suggested by the name, a VPN allows the user to conduct online activities in a secure space where their personal data is protected from potential hackers and other cybersecurity threats. A VPN operates based on strong encryption algorithms that are designed to protect connections and sensitive communications from third parties.
The use of VPNs is becoming extremely commonplace with time. Therefore, you might already be familiar with some of the commercial or free VPNs available on the internet. While you may decide to opt for one of these open-source VPN solutions, we recommend investing a bit more thought into this decision.
The reason is that most of these commercial VPNs use shared infrastructure for cost savings. This means they all use the same servers and IP addresses. As such, even a single fraud user can cause the IP address to get blocked from most common websites. Not to mention, these third-party VPN providers often have access to all of your data streams which is a privacy breach in and of itself.
Private VPN Connections
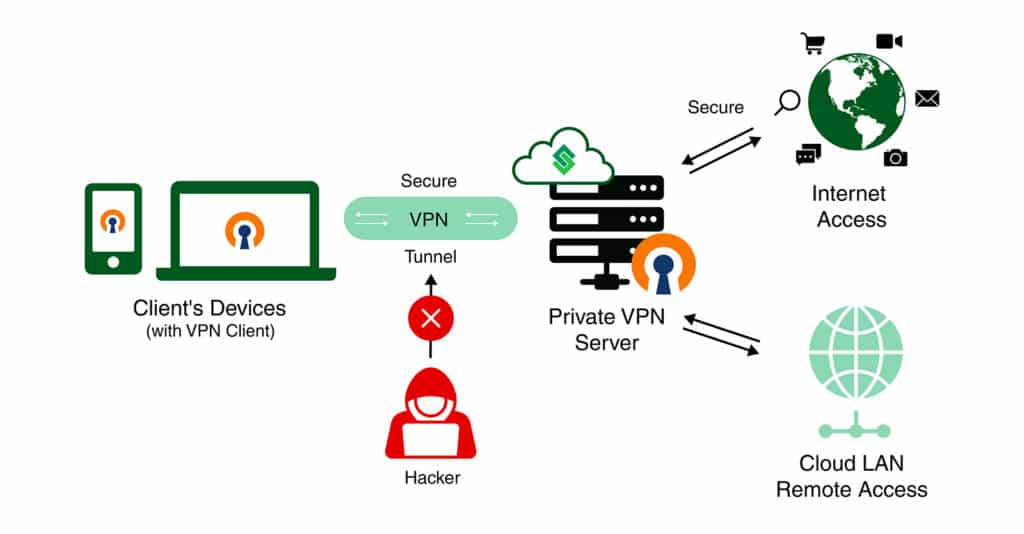
The ideal solution to this issue is to establish a private VPN connection with a dedicated server inside your very own cloud environment. This will ensure that you can fully trust the connection to maintain the privacy and integrity of your data and operations as opposed to shared VPNs.
How OpenVPN Can Help You
Here are just a few ways establishing a VPN connection in CloudSigma PaaS with OpenVPN can help you in your daily operations:
- Tunnel traffic to limit exposure to potentially compromised networks.
- Limit access to only trusted online sources to prevent malware and phishing attacks.
- Allow safe connections between private networks across sites and public clouds.
- Specify authorized domains for the safe transmission of sensitive business data.
- Extend data security to remote desktop sharing services.
In this tutorial, we will guide you on how to establish your own private VPN connection on OpenVPN server software within CloudSigma PaaS. Ahead, you will find step by step instructions on how to perform the following:
- Installing OpenVPN Server Software
- Setting Up the OpenVPN Client Software and Profiles
- Establishing the VPN Connection
- Verifying the VPN Tunnel
- Changing the VPN Access Mode
- Issuing an OpenVPN Custom Domain SSL Certificate
Installing OpenVPN Server Software
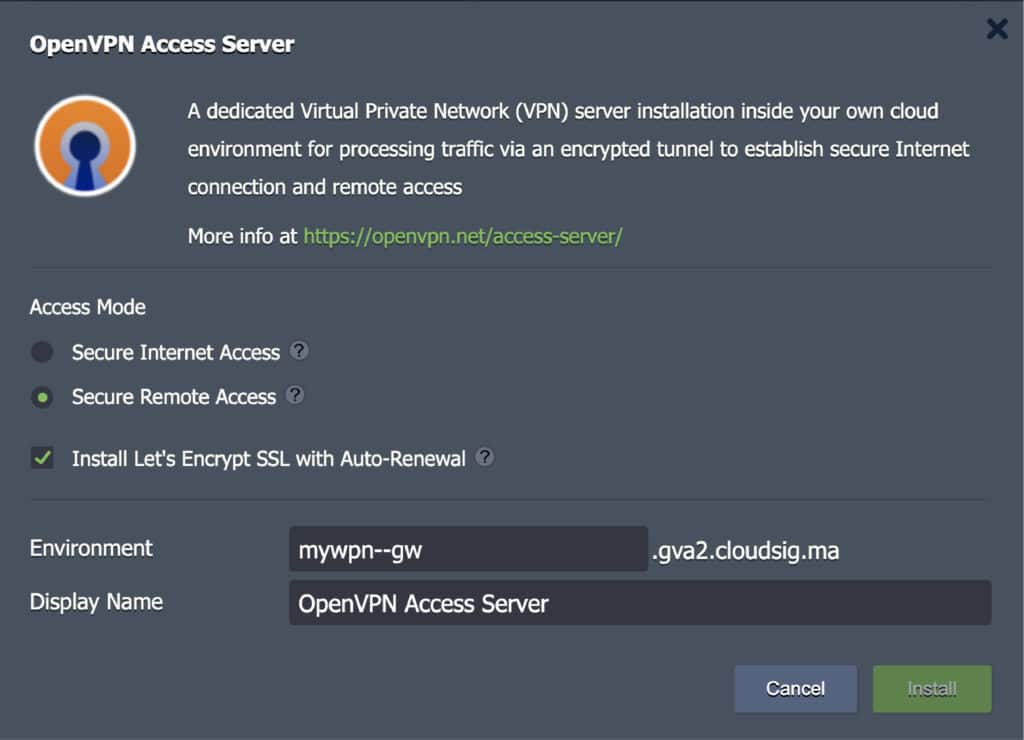
Step 1. Log into your CloudSigma account and head over to the Marketplace. Within the Dev & Admin Tools section, locate the OpenVPN Access Server:

Step 2. Click on Install to open the installation window. Here, you can customize the following settings:
- Secure Internet Access
This feature does the following:
-
- Provides a secure channel to access the internet.
- Blocks threats from untrusted or unknown networks and Wi-Fi hotspots.
- Tunnels traffic securely to enforce corporate Internet usage policy.
This mode is applicable to only internet browsing as the DNS queries are resolved by Google Public DNS.
- Secure Remote Access
This feature does the following:
-
- Allows employees to connect remotely to corporate resources and public cloud networks.
- Make the remote desktop protocol more secure for users.
- Extends data security to other desktop screen-sharing services.
Here, the DNS queries are resolved by internal platform DNS servers. Therefore, when connected to the Cloud LAN, each environment and container hostname will be associated with its own private IP address. Additionally, if the VPN server runs in an isolated environment group, the VPN client will only have access to the environments of this specific group.
- Install Let’s Encrypt free SSL with Auto-Renewal for OpenVPN Admin Web Server
Selecting this option will install the Let’s Encrypt Free SSL add-on onto the VPN server. It will also, simultaneously, issue a valid SSL certificate for the environment domain generated by the platform. The goal of this add-on is to maintain the security of the web admin interface of the OpenVPN Access Server. If you prefer using a custom domain, you have the ability to change it after installation.
Within this window, you can also change the environment name, if required. Once you finish modifying the settings, click on Install:
Step 3. You will see the successful installation window once it finishes installing. Click on the Client UI URL in this window to access the Admin Web Server. Here, you will find the connection profiles as well as the settings to modify different OpenVPN Access Server parameters:
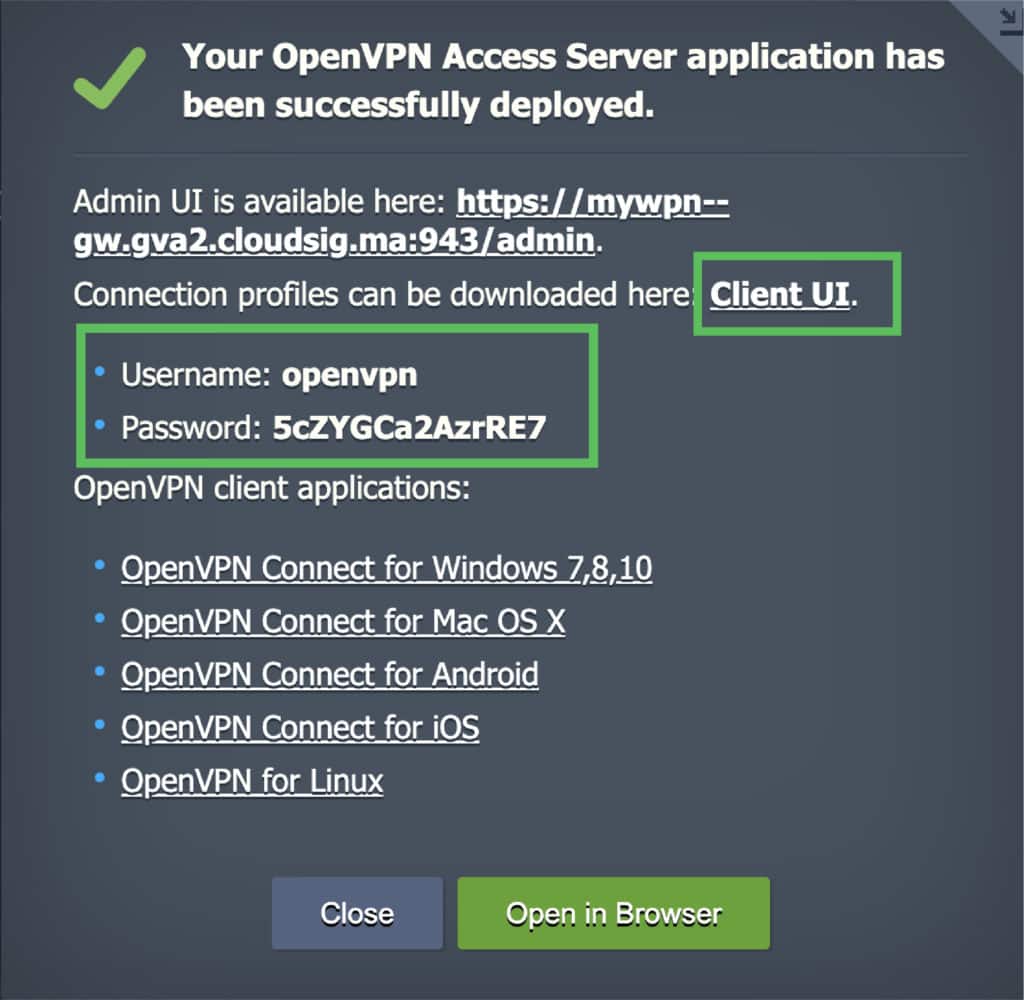
If you do not have any OpenVPN client software installed on your system, you can select one as appropriate for your OS from the same window.
Setting Up the OpenVPN Client Software and Profiles
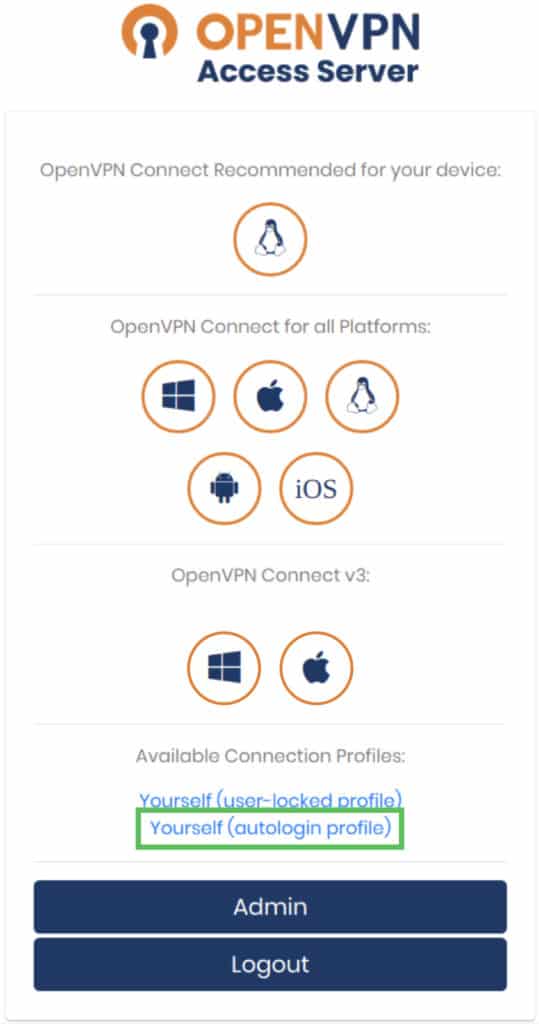
Next, we will explore the user panel. Here is what you can achieve from the user panel of the OpenVPN Access Server:
- Follow URLs to get the best-suited software for your devices.
- Obtain a user-locked profile to connect to the VPN server. Remember, you must use the login credentials in this profile provided to you in the successful installation window when you established the VPN connection.
- Obtain an autologin profile (this means you can connect to the VPN server without entering credentials).
- Obtain access to the OpenVPN Access Server Admin UI panel by clicking on the Admin button. This panel can be used to tune and modify the server:
Establishing the VPN Connection
Here is how to establish a VPN connection:
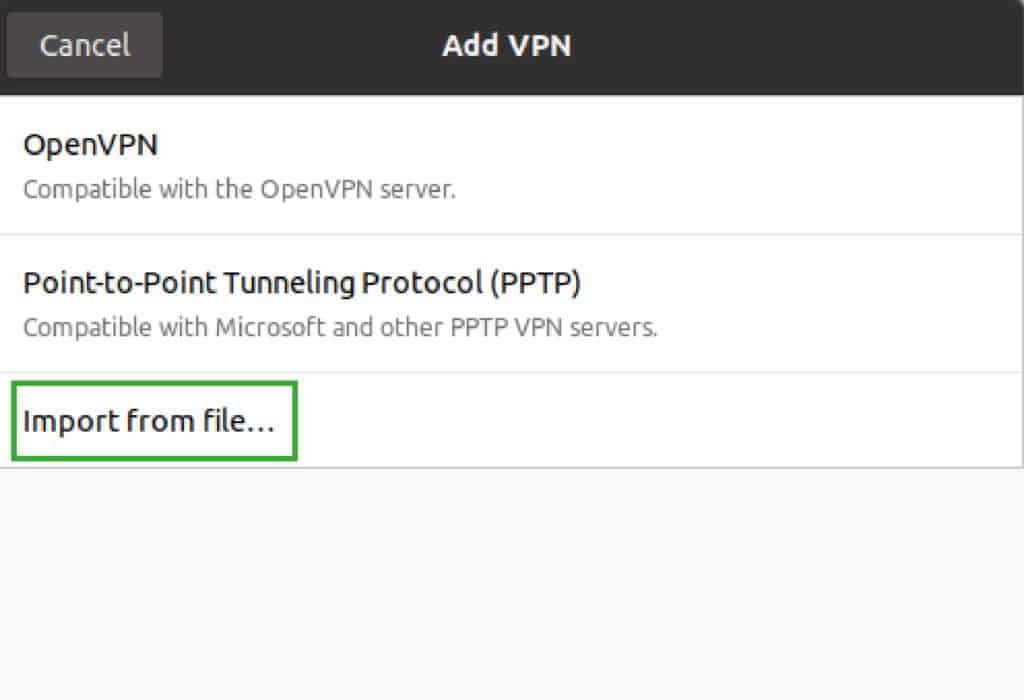
Step 1. Once you have downloaded the client software, download the OpenVPN autologin profile to your device as file client.ovpn.
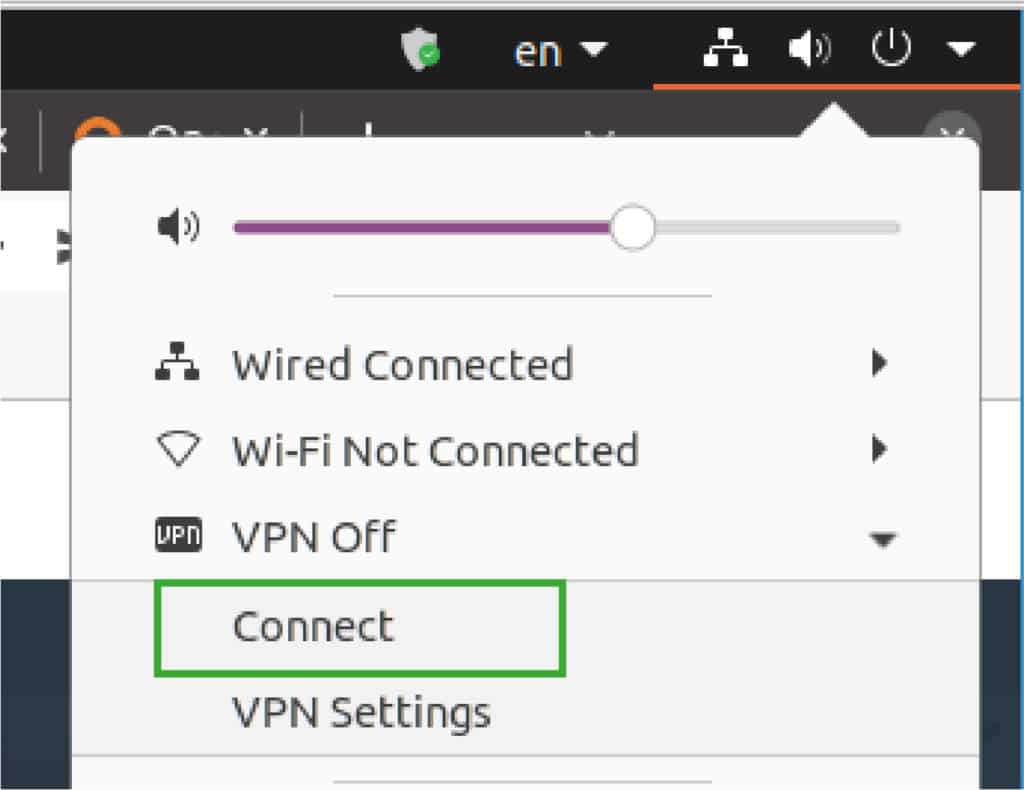
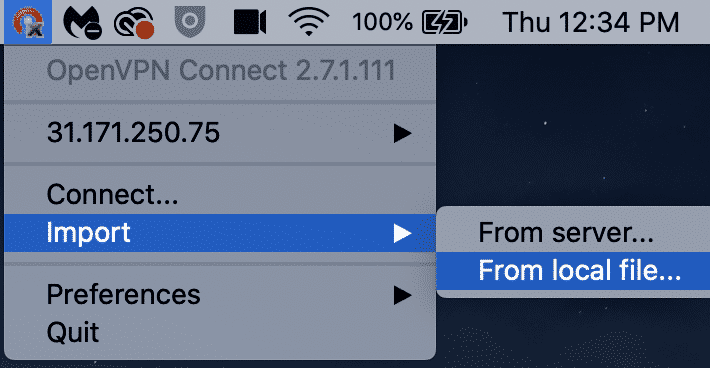
Step 2. Next, import the file client.ovpn and start a connection:
- For Ubuntu Linux:
- For Windows 10:
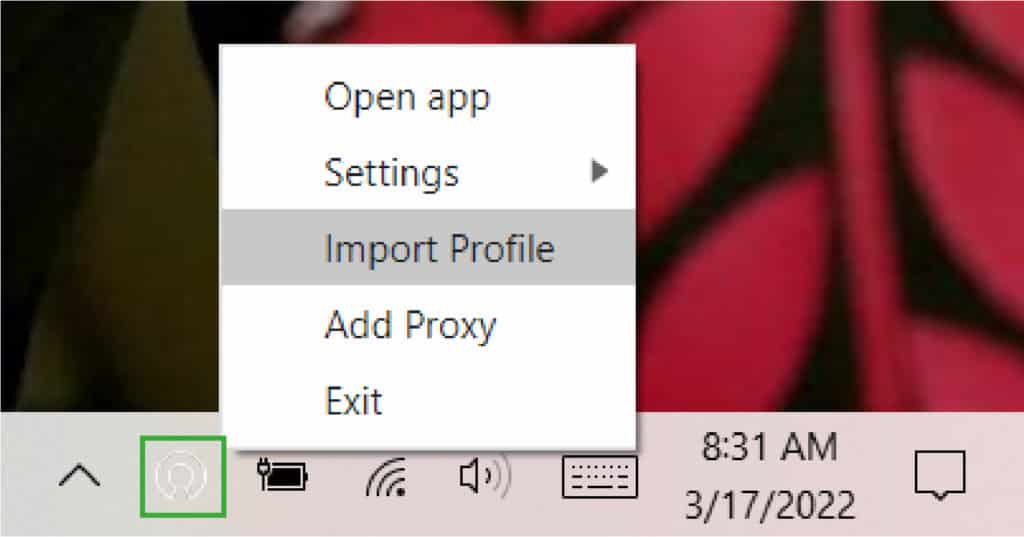
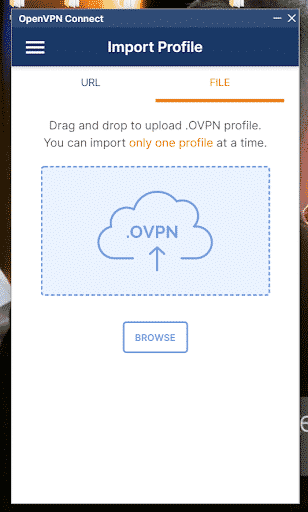
Once you have imported the file, connect as follows:

- For MacOS:
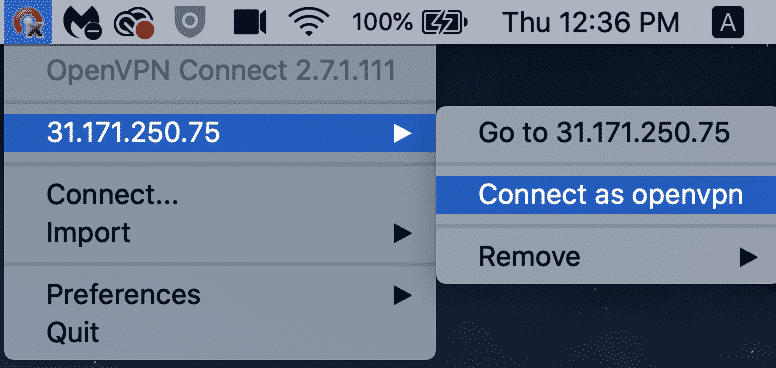
Step 3. Once you click on the connect option on your respective device as shown above, an encrypted tunnel will be established to your cloud infrastructure. This means you can access the cloud resources as well as the internet safely.
Verifying the VPN Tunnel
Now that you have established the tunnel, you can actually verify it. If you chose the Secure Internet Access option, then you can proceed to browse the internet. If you chose the Secure Remote Access option, you can use the environment hostnames to reach the hosts in the cloud LAN using their private IP addresses.
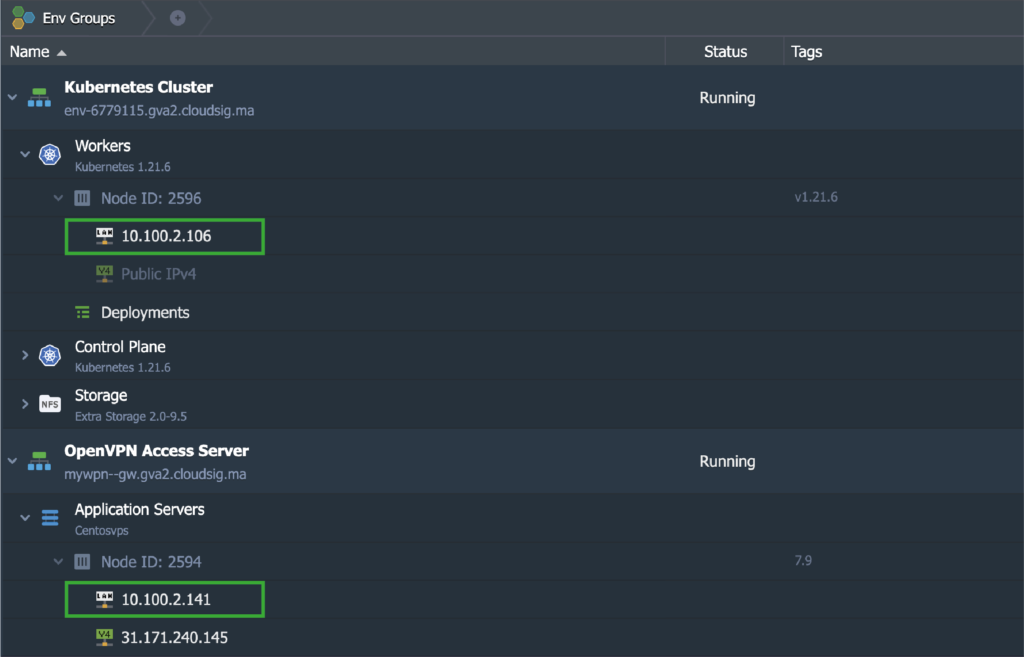
In order to do this, we will use our local computer (which is a Mac in our case) to ping two nodes from the required environments. In this scenario, these nodes are the OpenVPN Access Server and the Kubernetes Cluster v1.21.6:
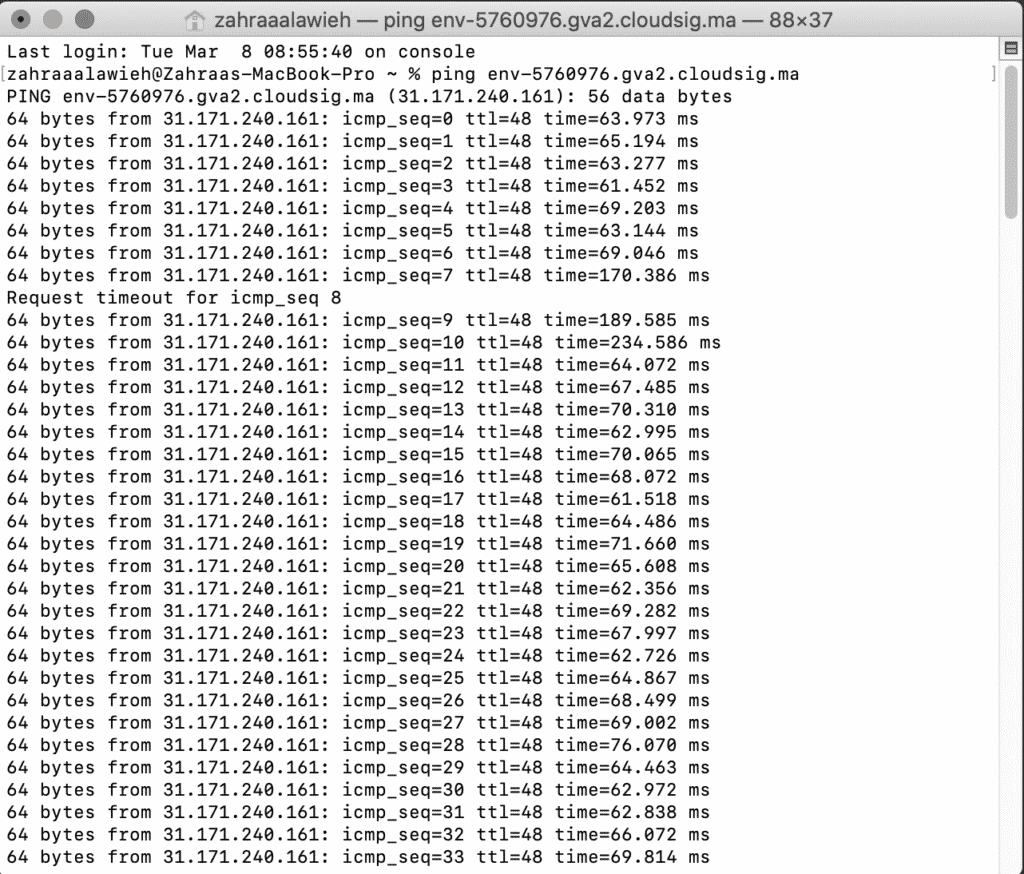
The hostnames of each of the nodes were resolved into their respective private IP addresses. The responses to the ping commands came through the VPN tunnel from the local computer:
Changing the VPN Access Mode
The Access Mode is initially selected at the time of the VPN server installation. However, it is possible for you to change it later down the line at any given time as needed. To do so, all you need to do is go to the Add-Ons tab:
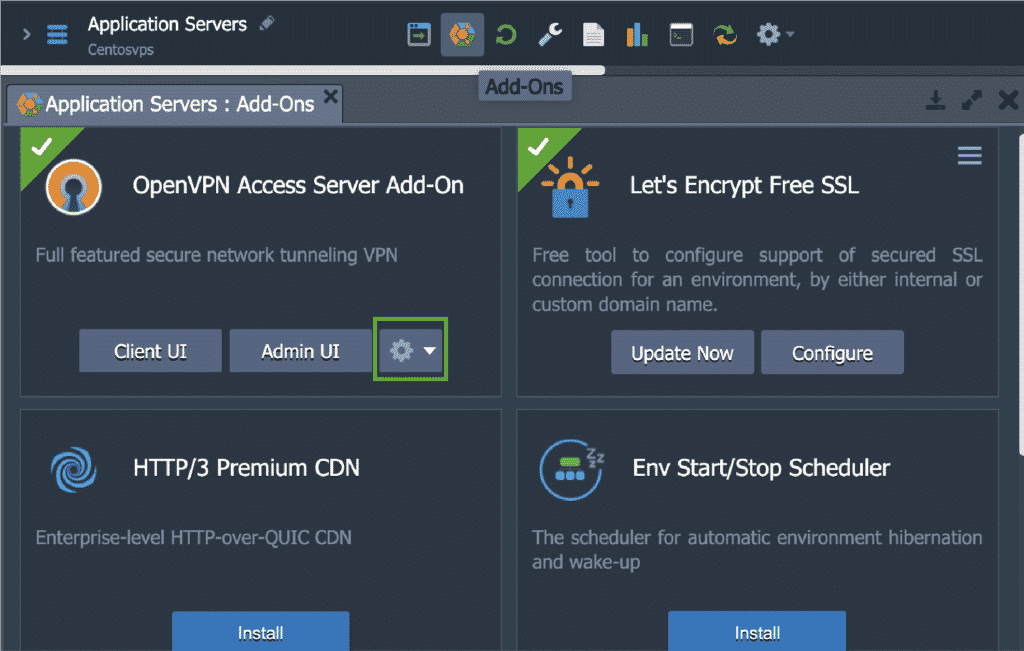
Here, click on the Configuration icon to Change Mode:

Then pick from either one of the given options:
- Secure Internet Access
- Secure Remote Access
You can also use this window to Reset Password for the openvpn user account that was created by default.
Issuing an OpenVPN Custom Domain SSL Certificate
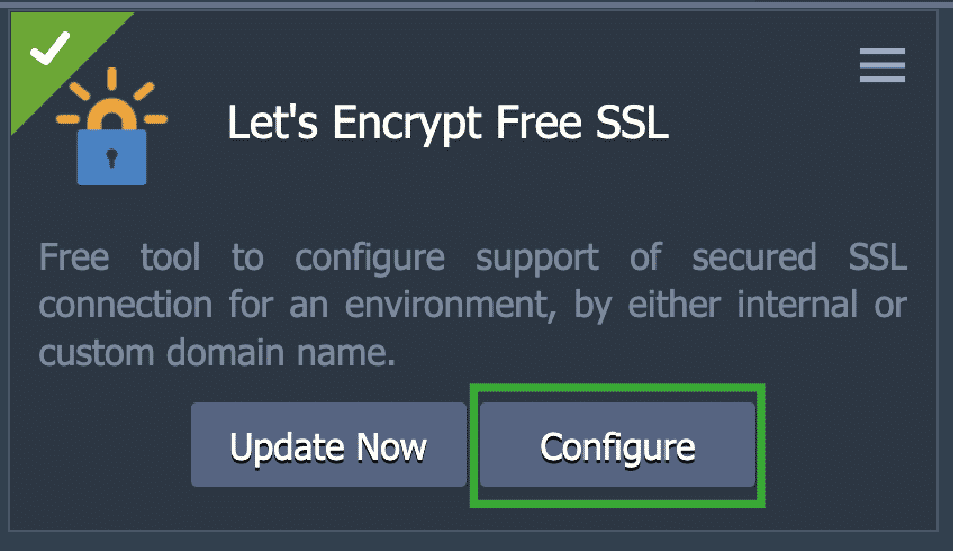
Lastly, we will see how you can bind a custom domain to the Admin Web Server and also issue a valid SSL certificate for it. For this purpose, you will have to create an A record at your registered domain with a public IP address that has been provisioned for a VPN server node.
Next, click on the Configure option within the Let’s Encrypt Free SSL add-on:
In the following window, remove the existing domain, such as this one…
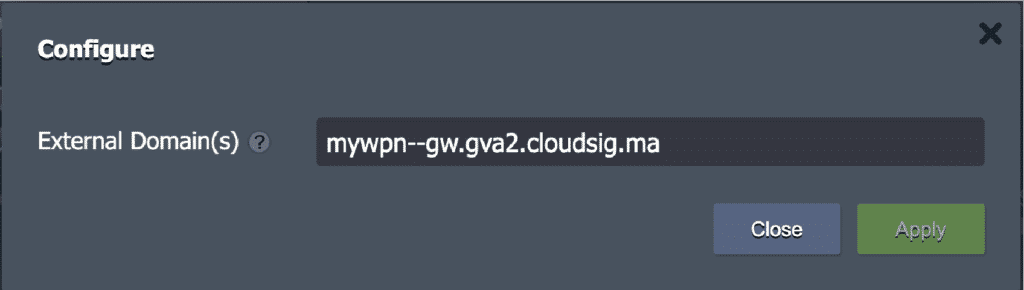
…with a custom one of your choice, such as:
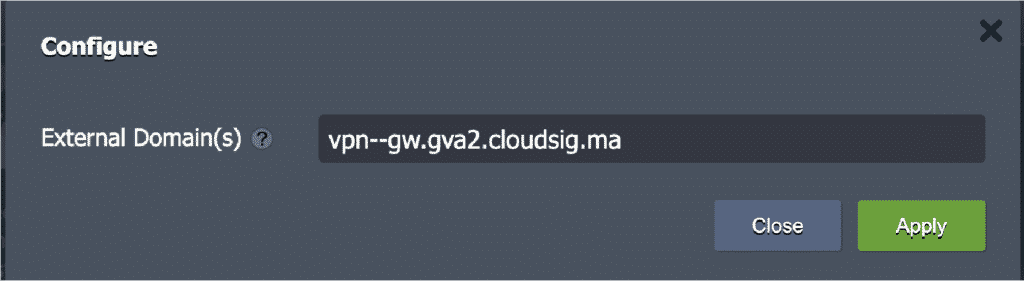
Finally, click on Apply. Once the certificate has been issued, you can open the admin Web Server UI using your new custom domain name, which is vpn–gw.gva2.cloudsig.ma in our case.
Now you know how to install, set up, and perform some basic configuration of OpenVPN Access Server on your CloudSigma PaaS environment. Considering how straightforward the process is, we highly recommend doing it to ensure you and your employees are operating and communicating in a secure manner over the dangerous bounds of the internet. You can also learn how to set up OpenVPN Access Server for Ubuntu 18.04 or under Docker.
This is only one of the numerous features CloudSigma PaaS has to offer. Give CloudSigma PaaS a try with our 7-day free trial or contact us if you want us to provide you with more details and a platform demo.
- 5 Tips to Achieve Optimal Cloud Computing Cost Efficiency - October 31, 2022
- CloudSigma Empowers Blockchain Infrastructure Provider with a Green, Reliable, and Cost-Efficient Cloud Platform - October 27, 2022
- Whitech Launches New Egypt Cloud Computing Offering, Powered by HPE and CloudSigma - October 17, 2022
- Key Aspects of Protecting your Data in the Cloud - September 20, 2022
- How to Configure MongoDB Replication and Automated Failover - September 19, 2022