
Django is a popular, free, and open-source web application framework built on Python. It strives to streamline web app development. Django comes with a solid set of components to develop websites faster and easier.
In our series of articles on Django, we have been exploring how to use Django with a demo app. In this guide, we will build on what we learned in the Creating Django Models: A Tutorial guide and connect our Django model with the admin interface.
Let’s start!
Prerequisites
This guide goes deeper into configuring and building the Django app. It requires the following prerequisites:
- A properly configured local Python programming environment.
- A Django app configured to connect to a database (preferably MySQL). Check out this guide on configuring Django with PostgreSQL, Nginx, and Gunicorn.
- The app will contain the Django environment demonstrated in this guide. All the steps are performed on an Ubuntu 20.04 server. Learn more about setting up an Ubuntu server.
If you’ve followed the series so far, we’ve created a sample Django app, established a connection with MySQL, and created database models for Posts and Comments. The models feature the simple functionalities of a basic blog site. This guide will continue from here on. Note that Django official documentation discourages building web apps around an automatically-generated Django admin interface.
Step 1. Enabling the Admin
As demonstrated in the Prerequisites tutorials, it’s always recommended to build your Django app in a dedicated virtual Python environment. Whenever we’re intending to work on the app, you have to activate the virtual environment.
First, run the activation script of the Python virtual environment:
|
1 |
cd sample_app/ |
|
1 |
. sample_app_env/bin/activate |
![]()
We need to tweak the Django app configuration first. Open up the configuration file
settings.py in a text editor:
|
1 |
nano settings.py |
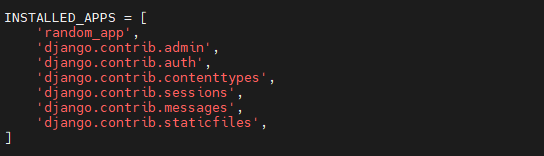
Scroll down to the section INSTALLED_APPS. It lists all the apps connected to our Django project. Alongside the default apps, it should contain the Django model app random_app and django.contrib.admin:
Next, we need to tweak the URL configuration file
urls.py. Open the file in a text editor:
|
1 |
nano urls.py |
The file should contain the following codes:
|
1 2 3 4 5 6 |
from django.contrib import admin from django.urls import path urlpatterns = [ path('admin/', admin.site.urls), ] |

Save the file and close the editor. These tweaks ensure that our Django app will have access to the admin models and the admin user interface.
Step 2. Verifying the Admin Installation
After making tweaks to the configuration, it’s recommended to migrate the models so that the database can update with the Admin models.
Run the database migration on our Django app:
|
1 |
python manage.py migrate |

We’re now ready to launch the Django server. Because it’s a local project, we are going to launch the server locally. The server should run on port 8000. If you have a firewall configured, it must allow traffic exchange for port 8000. This in-depth guide on UFW showcases how to allow traffic to a certain port.
Launch the server:
|
1 |
python manage.py runserver localhost:8000 |

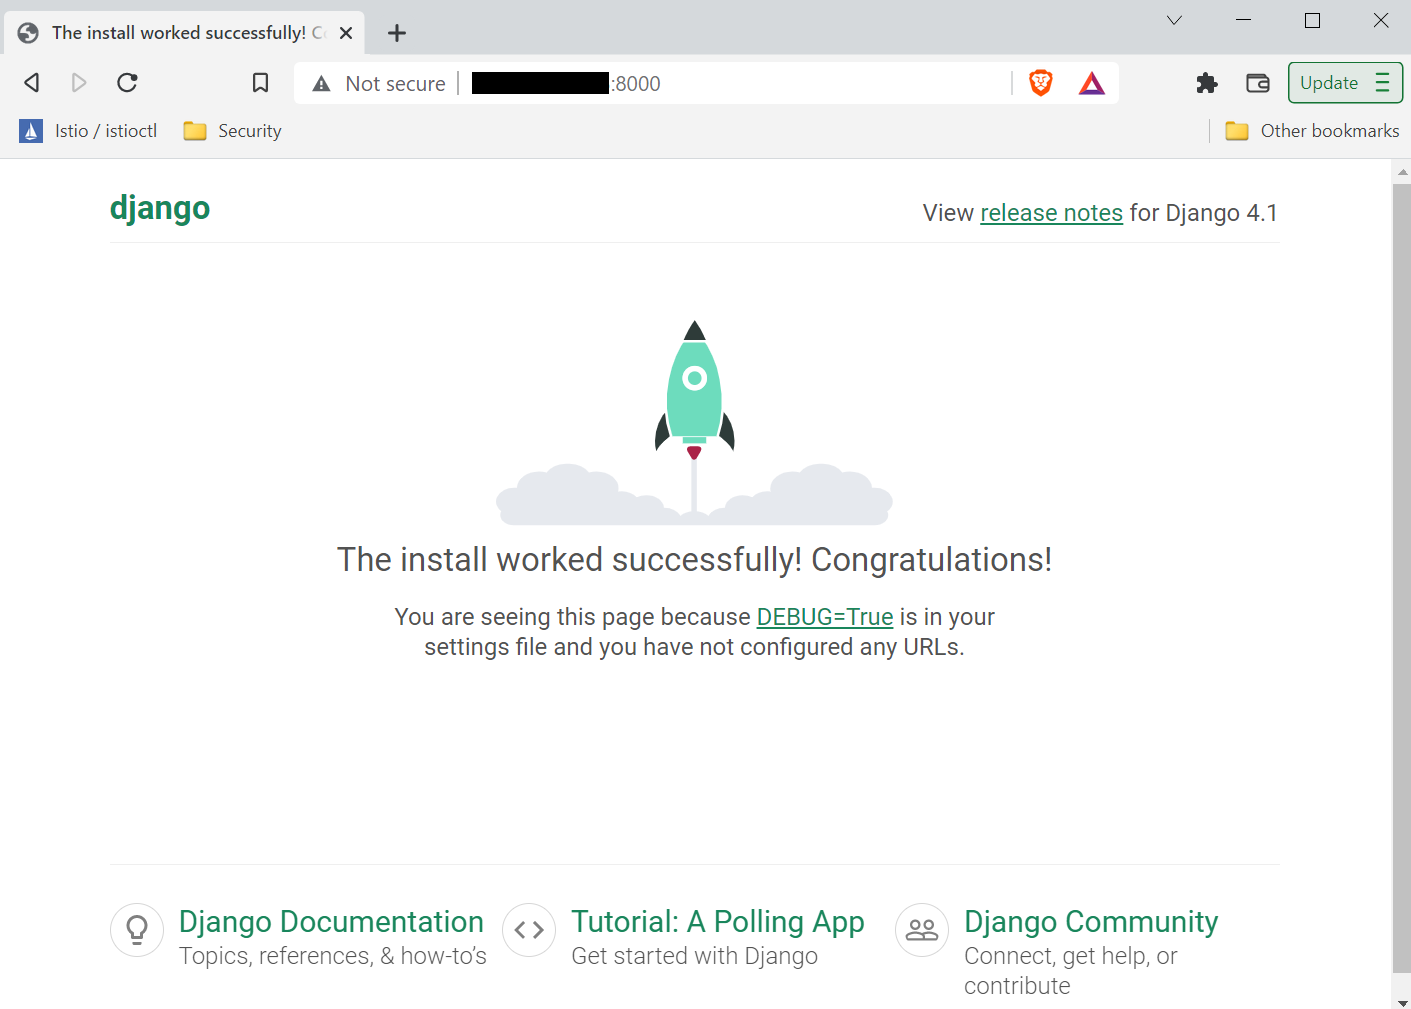
After that, access the server URL on a web browser:
|
1 |
http://localhost:8000 |
To access the admin access page, go to the following URL:
|
1 |
http:/localhost:8000/admin |
We need an admin account ready for our Django app. This admin account will have the highest priority on our app.
Step 3. Creating the Superuser Account
So far, we’ve verified that our Django app is successfully using the Adminsmodel and the admin page is accessible. Turn off the Django server by pressing Ctrl + C.
Once shut down, we can make changes to the Django app. Run the following command to create a superuser/admin account:
|
1 |
python manage.py createsuperuser |

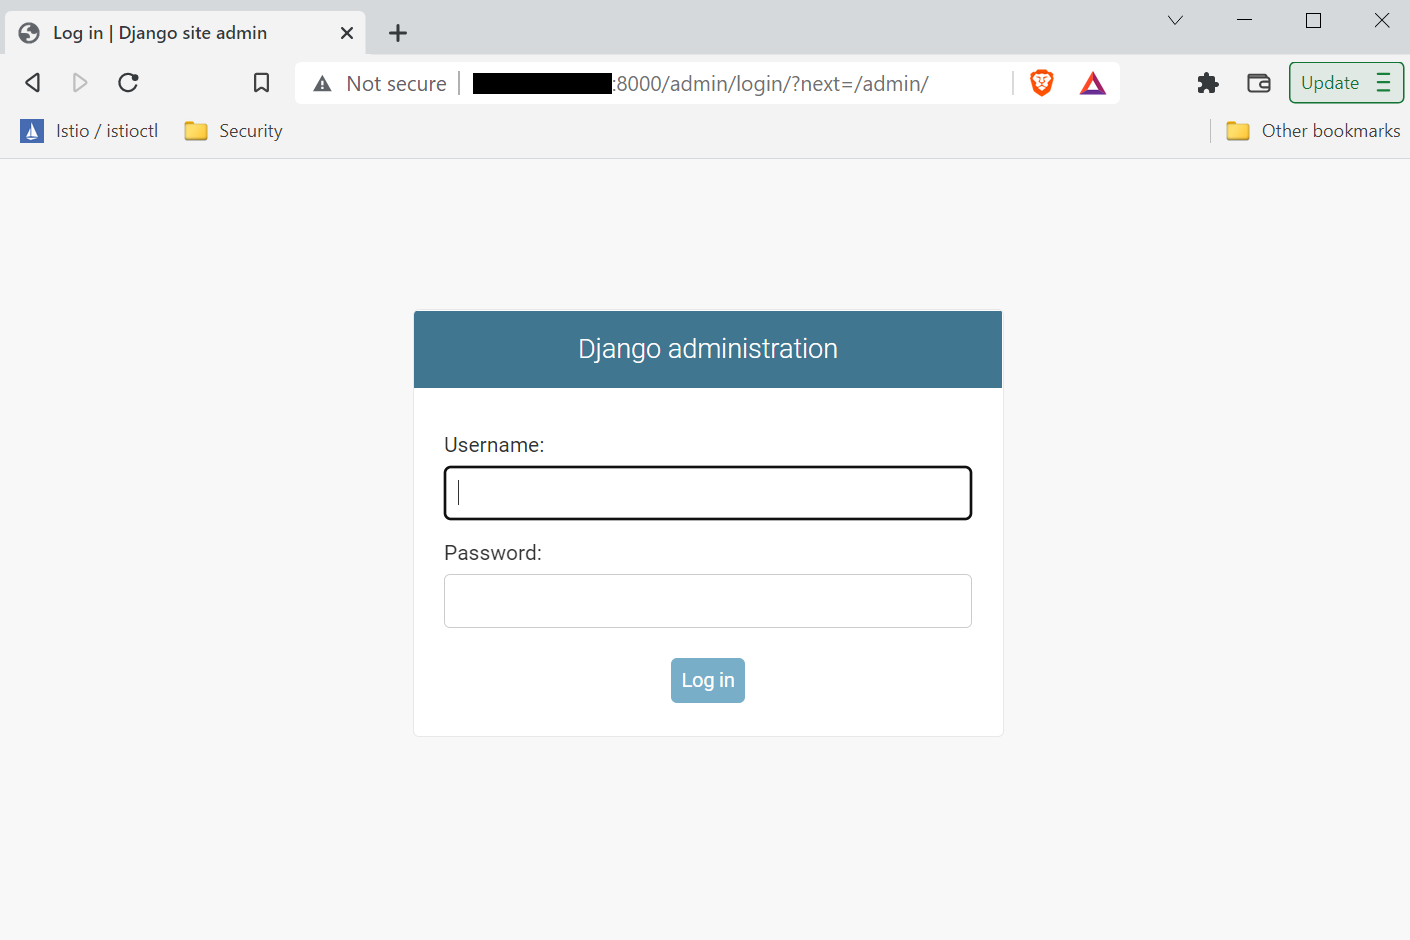
It will ask for the username, email, and password for verification. We can now try to access the Django admin panel. Start the Django server, and go to the admin page:
|
1 |
python manage.py runserver localhost:8000 |
Use the username and password of the superuser to log in:
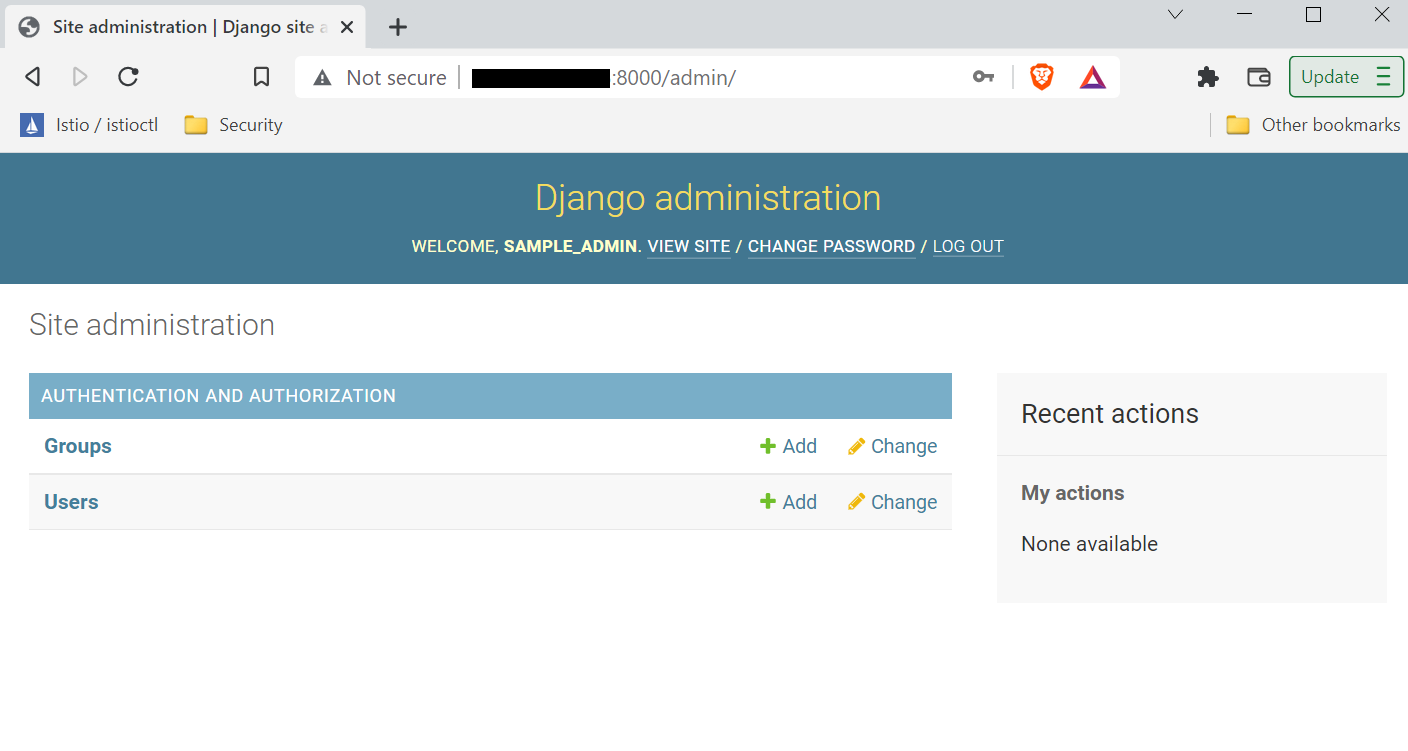
Voila! We’ve successfully landed on the admin panel. All that’s left is connecting the Post and Comment parts to the admin panel.
Step 4. Creating URL Patterns
To populate our admin interface with Post and Comment, we need Django to generate the associated URLs. In this section, we’ll have a look at configuring dedicated URLs for them.
Create a file
urls.py under the
random_app directory:
|
1 |
touch urls.py |
![]()
Open the file in a text editor:
|
1 |
nano urls.py |
Next, add the following codes in the file:
|
1 2 3 4 5 6 7 |
from django.urls import path from . import views urlpatterns = [ path('$/', views.posts, name='posts'), path('$/', views.comments, name='comments'), ] |
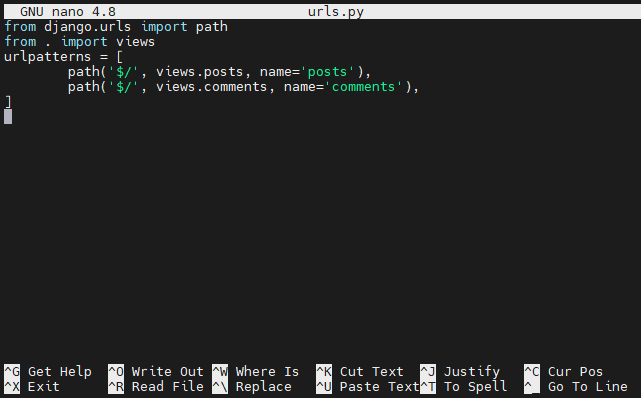
The code describes the URL pattern for our app to access the views for Posts and Comments.
Step 5. Connecting the App to Admin
Our goal is to successfully connect the Posts and Comments to the admin panel. If the process is successful, we can see links for them on the admin dashboard.
To connect, navigate to the location of the models and open
admin.py in a text editor:
|
1 |
nano admin.py |
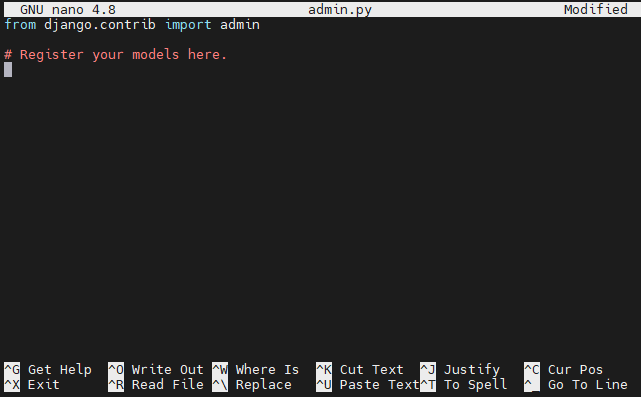
Enter the following codes in the file:
|
1 2 3 4 5 6 |
from django.contrib import admin from random_app.models import Post from random_app.models import Comment admin.site.register(Post) admin.site.register(Comment) |
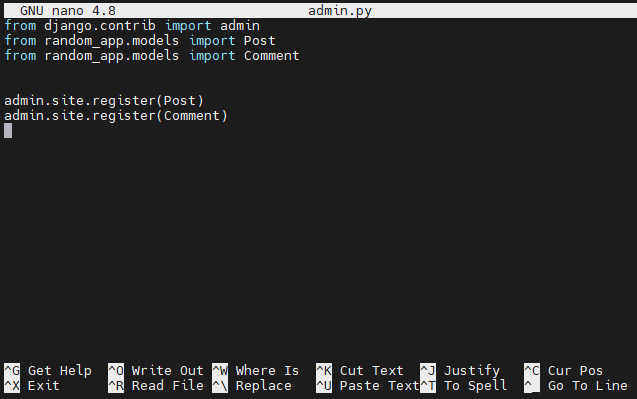
Save the file and close the editor. Now, the admin panel should recognize and show links to the models.
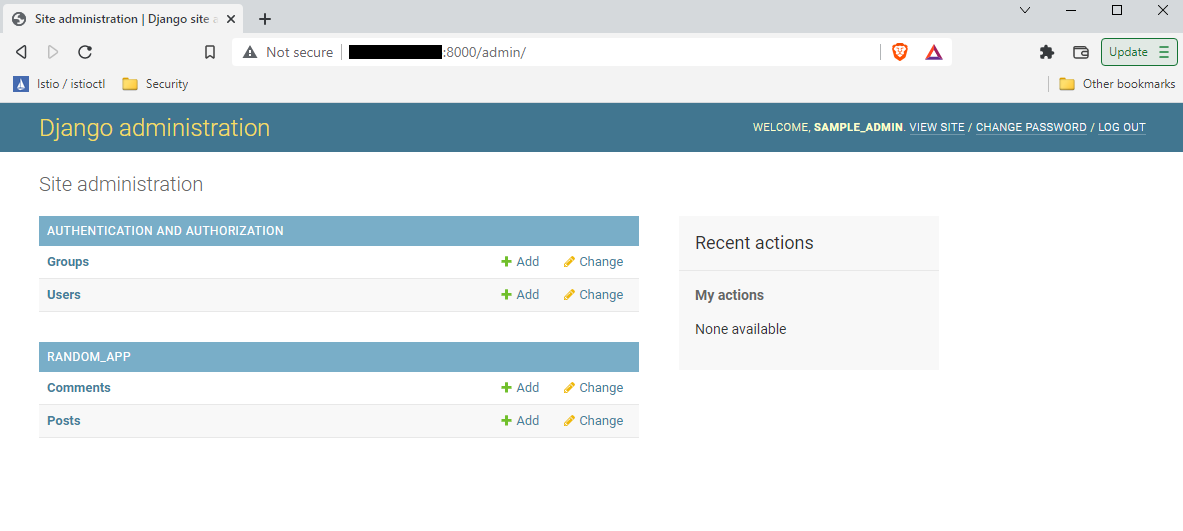
Step 6. Verifying the Changes
Our Django app is now successfully configured to manage Posts and Comments directly from the admin panel. Start the server on localhost, log in to the admin panel, and verify the change:
Once done with testing, we can safely stop the Django server and exit the virtual environment. From the console window, press Ctrl + C to stop the Django server. To exit the virtual window, run the following command:
|
1 |
deactivate |
![]()
It should return you to the normal terminal session.
Final Thoughts
In this guide, we showcased how to enable the admin interface, create an admin account, and register our custom models ( Posts and Comments) with the admin. The Django admin interface will now have improved managing posts and comments in your blog.
Here are more resources from our Django series, that will help you utilize Django with containers:
- Building a Django and Gunicorn Application with Docker on Ubuntu
- How To Secure and Scale a Django Application with Docker, Nginx, and Let’s Encrypt
Happy Computing!
- How to Deploy WordPress with Persistent Volume on Kubernetes Cluster - March 17, 2023
- Deploying Applications on Kubernetes Using Argo CD and GitOps - October 26, 2022
- Using Node.js Modules with npm and package.json: A Tutorial - October 6, 2022
- Using Ansible to Install and Configure WordPress with LAMP on Ubuntu - September 23, 2022
- Creating Views in the Django Web Application Framework - September 22, 2022