

Django is a powerful, open-source, Python-based web framework that streamlines the process of creating and managing websites and web apps. Django applications are scalable, high-performance, and secure. It also comes with really good documentation on every single part of the framework.
In our series on Django, we’ve been exploring Django by implementing a sample website with basic blogging features. In this guide, we’ll go over the steps of creating a sample view for our Django app.
Prerequisites
To follow this guide, you’ll need the following components.
- An Ubuntu server with proper configurations. Learn more about setting up an Ubuntu server.
- Properly-configured Python development environment.
- A database server, for example, MySQL. This guide elaborates on installing and configuring MySQL on an Ubuntu server.
This guide is a continuation of our series on Django. First, it will be useful to check out the previous guides on setting up Django, establishing Django database connection, creating models, and enabling the Django Admin Interface.
In this guide, we’ll showcase how to create Django views that will enable the web app to properly handle web requests and return the proper response. As described by the Django official documentation, a web response can be HTML content of a webpage, a redirect, or an HTTP error. There’s no fixed place to store the view functions as long as they’re within the Python paths. However, there are popular conventions for naming and placing the files. This guide will follow those conventions.
Step 1. Activating the Virtual Environment
Django is best operated within a Python virtual environment. Our Django app
sample_app is established within a dedicated virtual environment. First, activate the virtual environment:
|
1 2 3 |
cd sample_app/ . sample_app_env/bin/activate |
Step 2. Creating View Functions
Navigate to our
random_app directory that hosts the models for our blog website:
|
1 |
cd random_app/ |
Here, the file
views.py will hold the codes necessary for creating our views. Open it up in a text editor:
|
1 |
nano views.py |
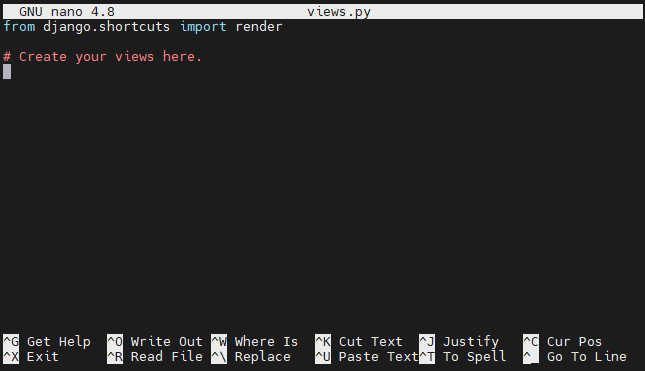
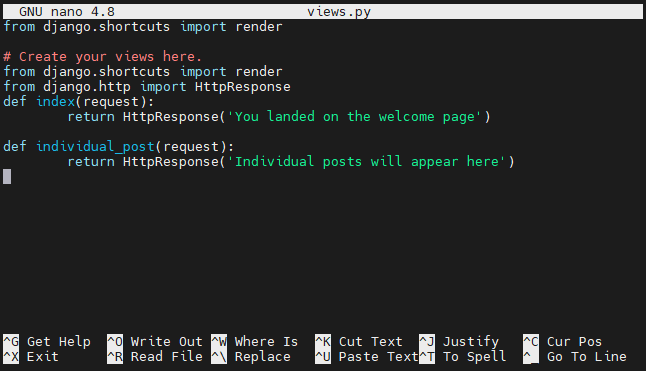
We need the render() function from the django.shortcuts library, so the first line remains the same. The render() function helps combine both a template and a context to be returned as the proper HttpResponse object.
The first view will welcome users landing on the index page. We’ll have to import the function
HttpResponse() from the Django library
http:
|
1 2 3 4 5 6 7 8 |
from django.shortcuts import render from django.http import HttpResponse def index(request): return HttpResponse(You landed on the welcome page') def individual_post(request): return HttpResponse('Individual posts will appear here') |
Save the file and close the editor.
Step 3. Mapping URLs to Views
Right now, there’s no URL designated to these functions, so they’re inaccessible. We need to add another block urlpatterns within the URL configuration file. In Python, it’s referred to as the URLconf (URL configuration) file.
Django needs to determine the root URLconf module to use. Then, it will look into urlpatterns that contain all the URL patterns in a list structure. Django then traverses the file until it finds the first match. Once it finds a match, Django will look for its associated view. This view function will receive data related to the URL pattern and an HttpRequest object. Error in any point of this process will redirect it to an error-handling view.
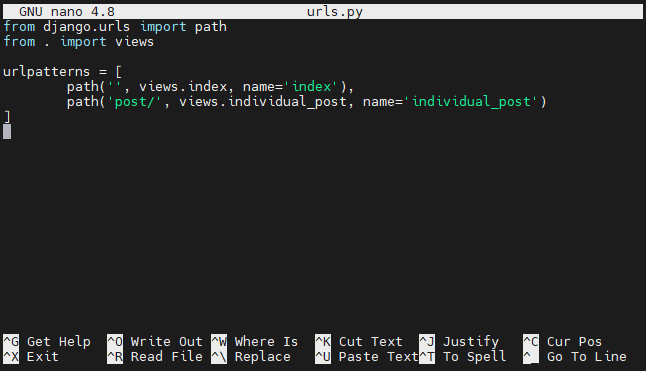
Open the file
urls.py of
random_app in a text editor:
|
1 |
nano urls.py |
Enter the following code:
|
1 2 3 4 5 6 7 |
from django.urls import path from . import views urlpatterns = [ path('', views.index, name='index'), path('post/', views.individual_post, name='individual_post') ] |
Save the file and close the editor.
Once done, we’ll also have to include the path of the URL file under sample_app directory’s URLconf. Otherwise, our Django app won’t recognize it. It’s because the URLconf of sample_app is set as the ROOT_URLCONF in the settings file.
Navigate to the directory of our app
sample_app:
|
1 |
cd sample_app/sample_app/sample_app/ |
![]()
Open the file
urls.py in a text editor:
|
1 |
nano urls.py |
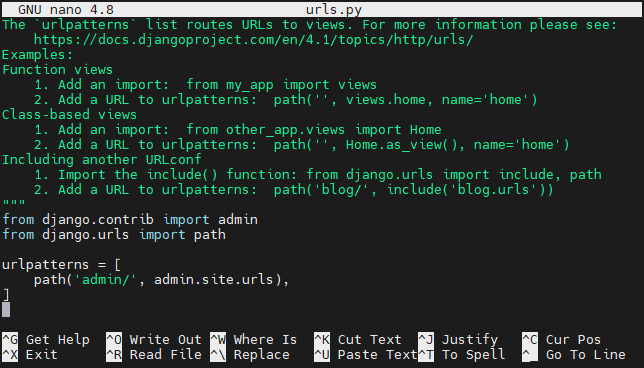
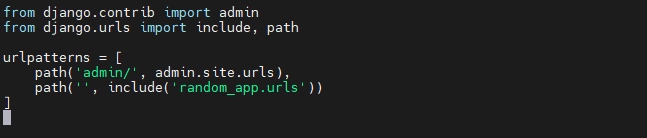
Enter the following code in the file:
|
1 2 3 4 5 6 7 |
from django.contrib import admin from django.urls import include, path urlpatterns = [ path('admin/', admin.site.urls), path('', include('random_app.urls')) ] |
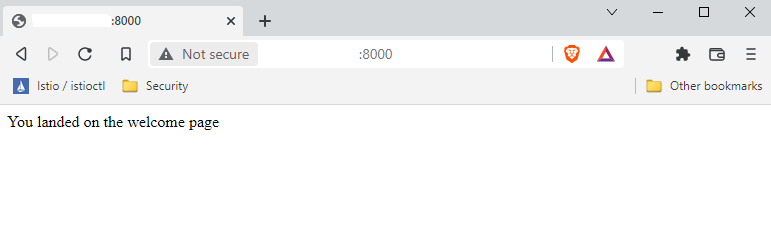
Let’s test out our changes. Launch the Django app server on
localhost:8000:
|
1 |
python manage.py runserver localhost:8000 |

Navigate to the URL:
|
1 |
localhost:8000 |
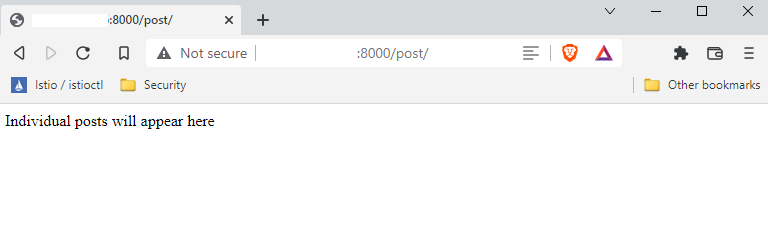
Check the URL for the post:
|
1 |
localhost:8000/posts |
Step 4. Creating a Blog Post
We’ve established our URL patterns and investigated their workflows. It’s time to add a sample blog and see the result.
From the admin panel, navigate to the
random_app page:
|
1 |
localhost:8000/admin/random_app/ |
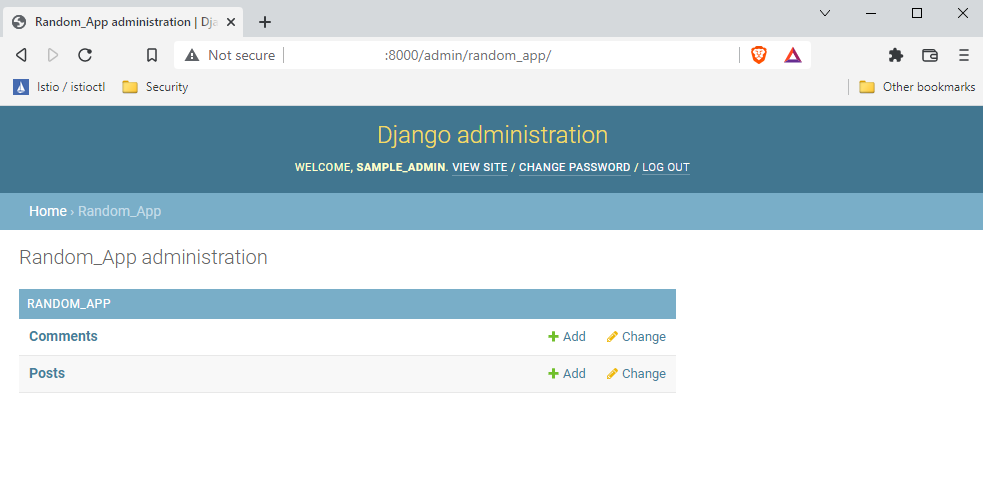
Click the +Add link from the Posts row:
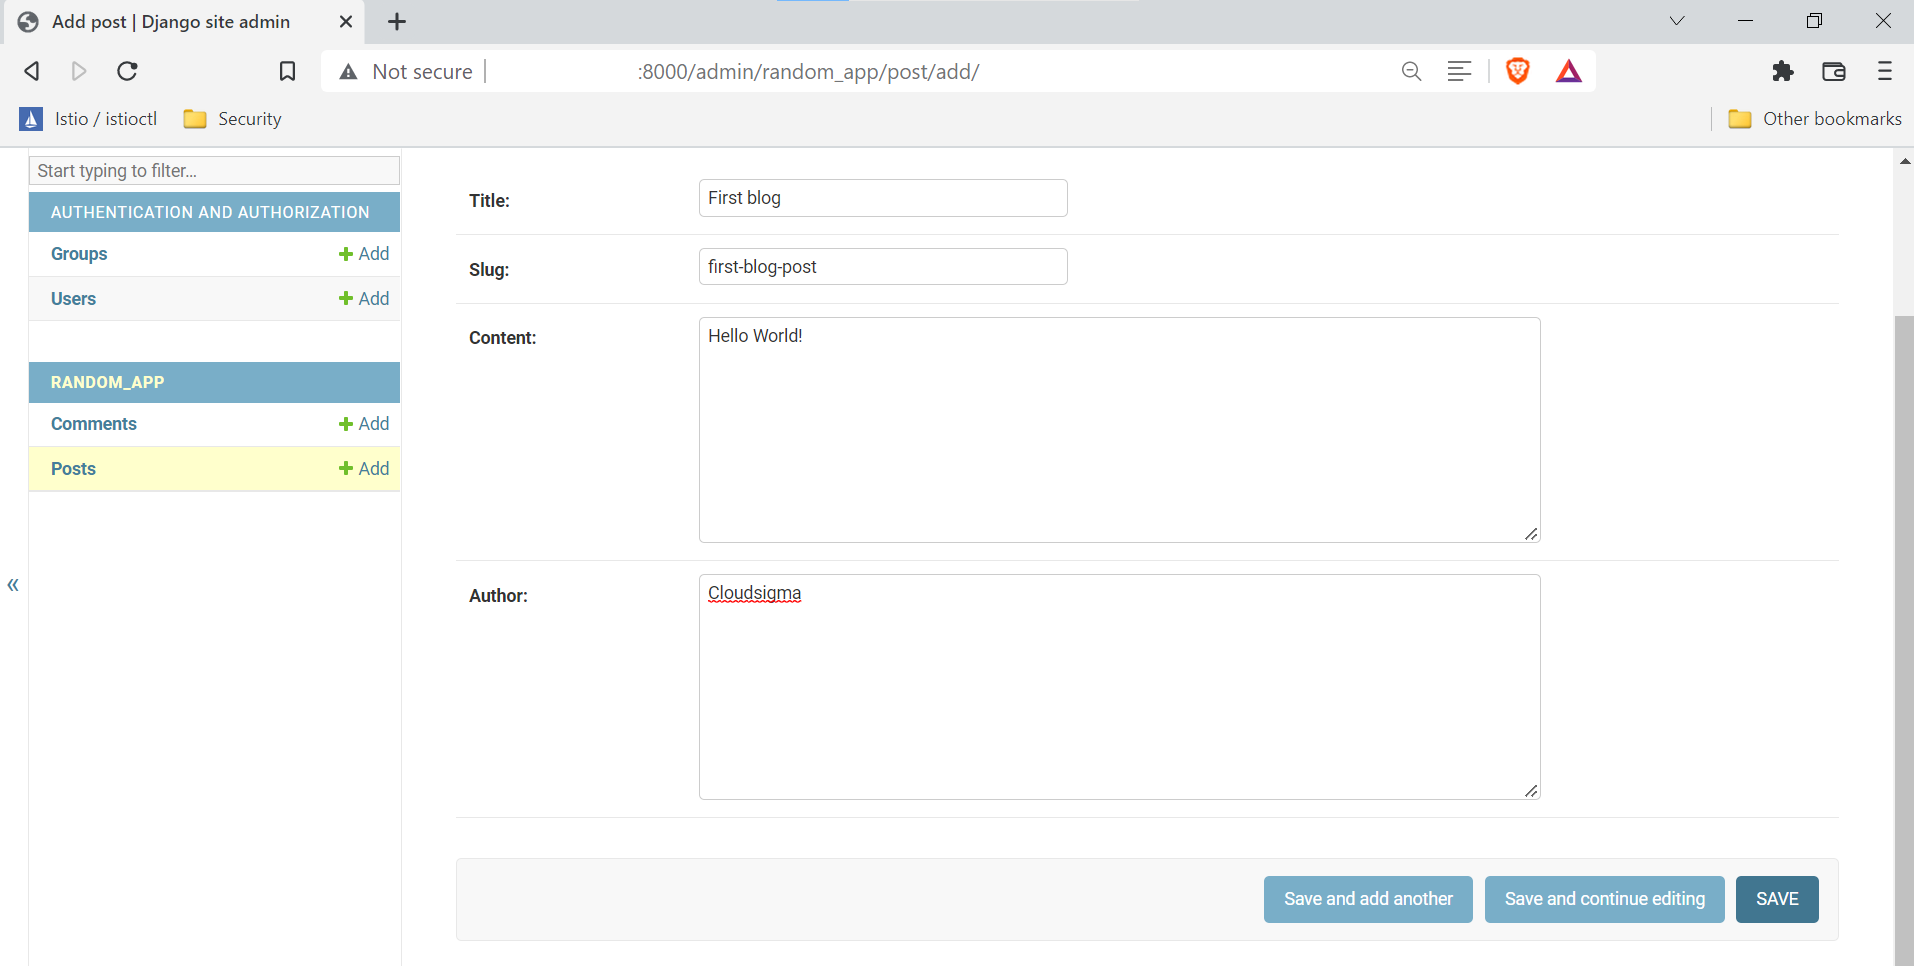
On the new web page, it will present a form consisting of the following fields.
- Title: The title of the blog post.
- Slug: It refers to the part of the valid web address with human-readable keywords. Generally, slugs are created after the title of the post.
- Content: Body of the blog post.
- Author: The relevant username.
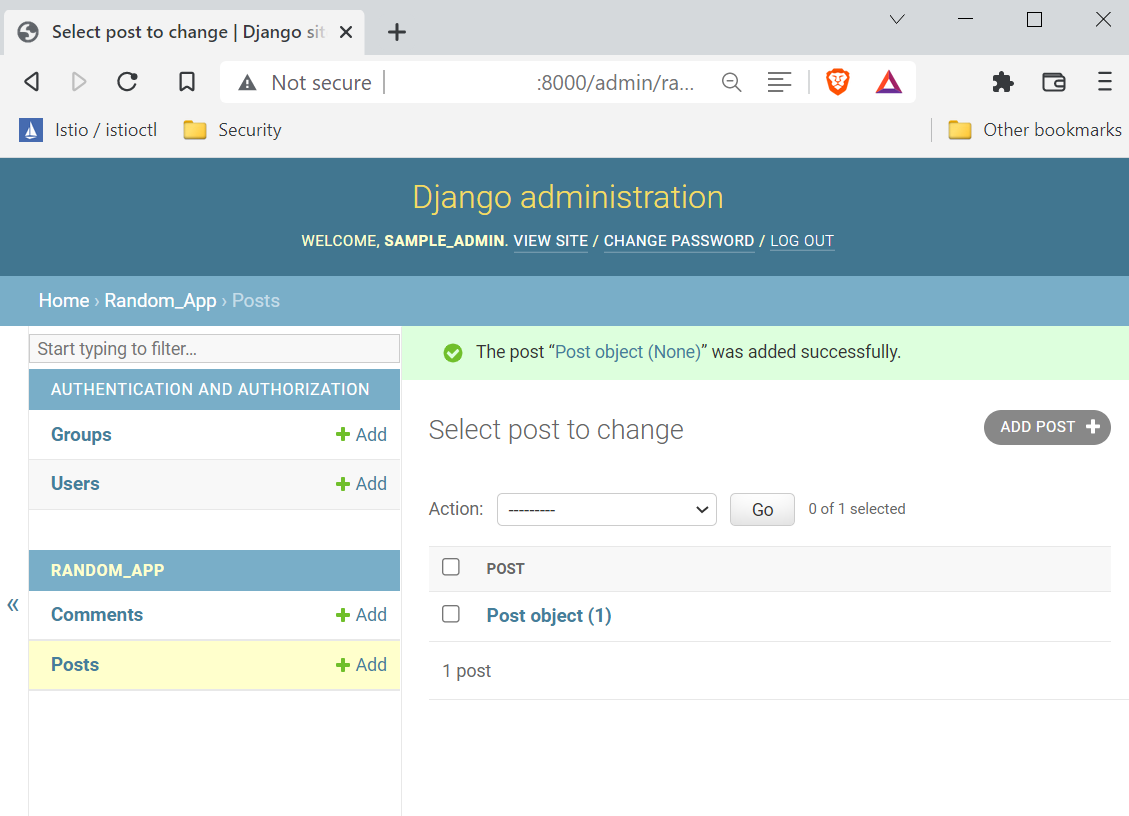
Click SAVE to submit the post:
Step 5. Displaying the Data in the Database
In this next section, we’ll work with our database. Login to MySQL as the Django-dedicated user:
|
1 |
mysql -u sample_app_user -p |
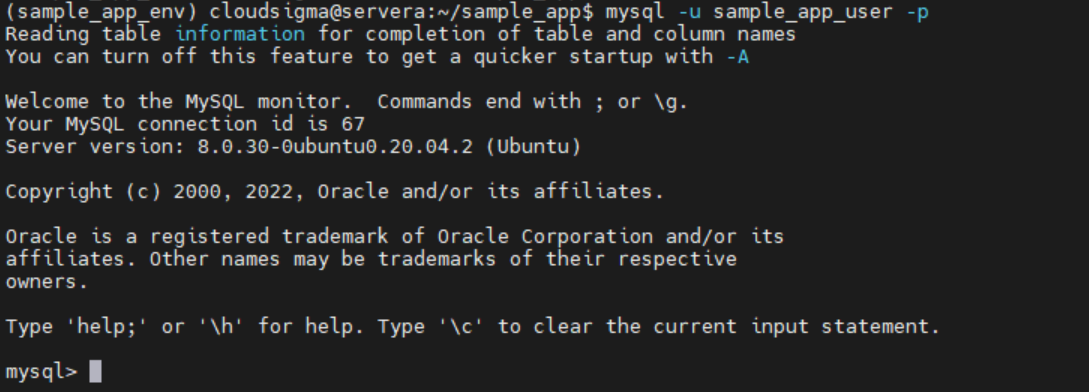
Let’s verify if our post was successfully registered in the database:
|
1 |
USE sample_app_data; |

|
1 |
SELECT * FROM random_app_post; |

Voila! The post was successfully registered! You can now exit the MySQL shell.
Step 6. Additional View Tweaks
There are few more things we can do with our views. Open the file in a text editor:
|
1 |
nano views.py |
The code should look like this:
|
1 2 3 4 5 6 7 8 9 10 |
from django.shortcuts import render from django.http import HttpResponse from .models import Post def index(request): return HttpResponse('Hello, welcome to the index page.') def individual_post(request): recent_post = Post.objects.get(id__exact=1) return HttpResponse(recent_post.title + ': ' + recent_post.content) |
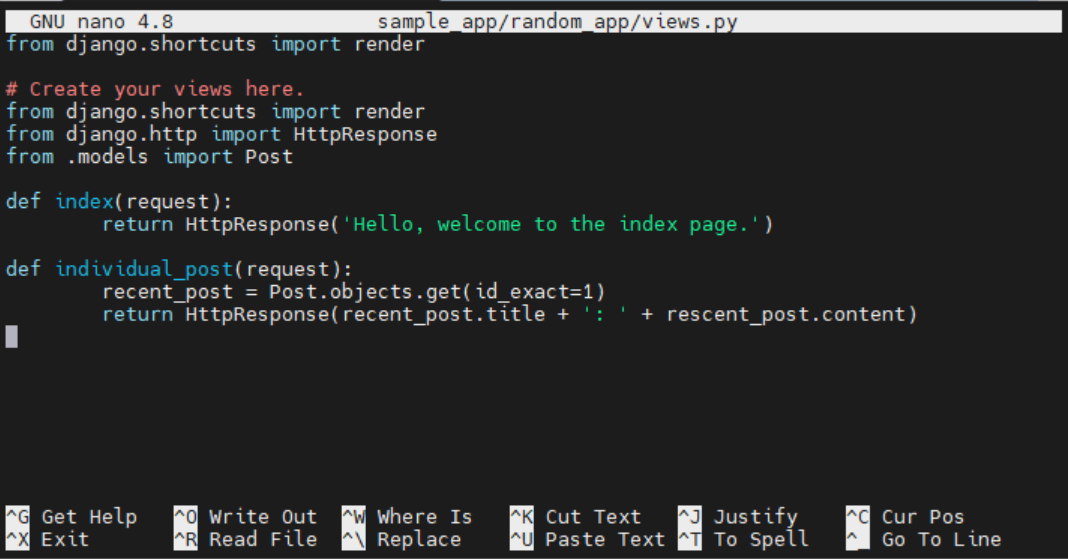
Here, we’ve added an additional import statement for Post. The quoted string from HttpResponse is also replaced with data from our blog post. To reference the data, we’re using the blog post ID with the associated object. The ID is being stored in a variable recent_post. Now, we can extract specific fields of the object by appending the field with a period separator.
Once changed, let’s verify the changes. Launch the Django server:
|
1 |
python manage.py runserver localhost:8000 |

Now, access the
Posts page:
|
1 |
localhost:8000/posts |
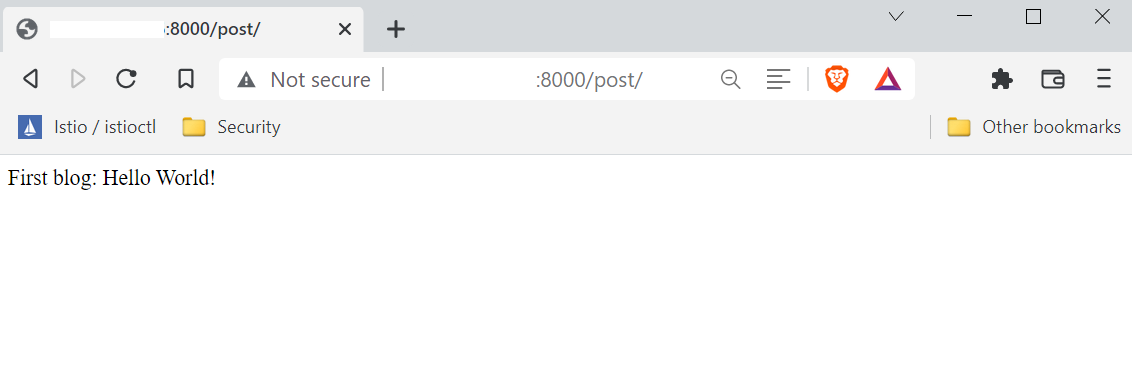
It should show the blog post we created.
Step 7. Exiting the Project
To exit the Django server, press Ctrl + C from the terminal. To deactivate the Python virtual environment, run the following command:
|
1 |
deactivate |
Final Thoughts
In this guide, we’ve successfully demonstrated creating views, mapping URL patterns, and displaying texts on a webpage from the database of random_app in Django.These are fundamental concepts of Django that are necessary to understand and master.
Here are further resources to help you create and manage Django apps:
- Creating a Django App with Database Connection: A Tutorial
- Building a Django and Gunicorn Application with Docker on Ubuntu
- How To Secure and Scale a Django Application with Docker, Nginx, and Let’s Encrypt
Happy Computing!
- How to Deploy WordPress with Persistent Volume on Kubernetes Cluster - March 17, 2023
- Deploying Applications on Kubernetes Using Argo CD and GitOps - October 26, 2022
- Using Node.js Modules with npm and package.json: A Tutorial - October 6, 2022
- Using Ansible to Install and Configure WordPress with LAMP on Ubuntu - September 23, 2022
- Creating Views in the Django Web Application Framework - September 22, 2022