
Docker is a free and open-source solution for developing, deploying, and managing apps in lightweight, OS-level virtualization. In this guide, we will demonstrate creating a Python app within a Docker container.
Prerequisites
To perform the steps demonstrated in this guide, you will need the following components:
-
A Linux system. Check out configuring your own Ubuntu VPS on CloudSigma.
-
The latest version of Docker is installed and configured. Learn more about installing Docker on Ubuntu.
Docker Containers
When running various programs within the same environment, things can (and will) break. The more programs you add, the more unstable it becomes. It may not be a big deal for average folks. However, when it comes to mission-critical applications, there can be serious consequences.
The more apps are introduced in the system, the bigger the attack surface. A single compromised app can easily lead to the downfall of the entire system.
To solve these issues, we can use Docker containers for software-level sandboxing:
-
Apps within the container will have limited access to files.
-
Containerized apps can’t see other processes running in the system.
-
The container can be allocated a specific amount of hardware resources.
-
Network ports of a container aren’t exposed outside.
-
Consistent packaging of almost anything across local/production environments.
To demonstrate, we are going to build a simple Python server within a Docker container, transform the container into an image, and deploy the image within a dummy production environment.
Step 1 – Filesystem Configuration
To host the project, first, we are going to create a dedicated directory:
|
1 |
mkdir -pv python-server-container/ |
|
1 |
cd !$ |
Within the directory, create a sub-directory src to store our code:
|
1 |
mkdir -pv src/ |

Step 2 – Building the Python Server
In this step, we are going to create a simple HTTP server in Python. Create the file server.py:
|
1 |
touch server.py |
Open it up in a text editor:
|
1 |
nano server.py |

Enter the following Python code:
|
1 2 3 4 5 6 7 8 9 10 11 |
from http.server import HTTPServer, SimpleHTTPRequestHandler def run(server_class=HTTPServer, handler_class=SimpleHTTPRequestHandler): """server entrypoint""" server_address = ("0.0.0.0", 8080) httpd = server_class(server_address, handler_class) print("starting server...") httpd.serve_forever() if __name__ == "__main__": run() |
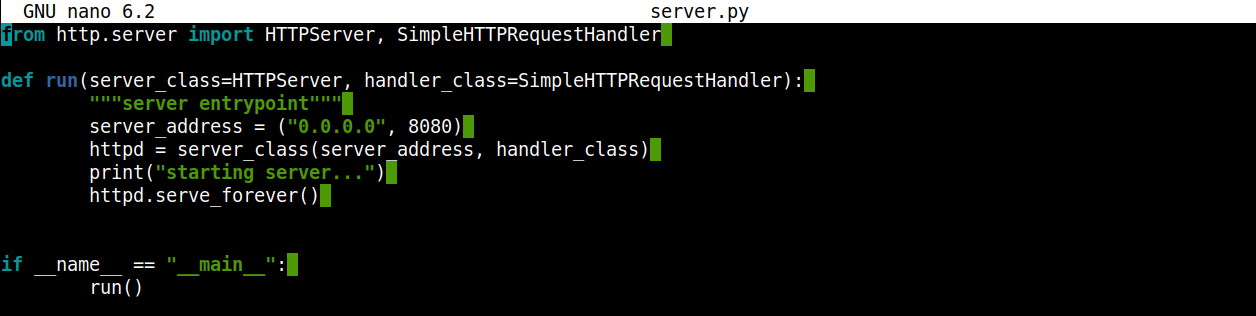
Here,
-
We are using the HTTPServer class and requesting a handler from the standard Python library, keeping the program simple.
-
The function run initiates an instance of the HTTPserver.
-
As the arguments of server_address suggest, the server will listen to any incoming connection on port 8080.
Now, we will verify if the server is working as expected. Launch the server:
|
1 |
python3 server.py |
![]()
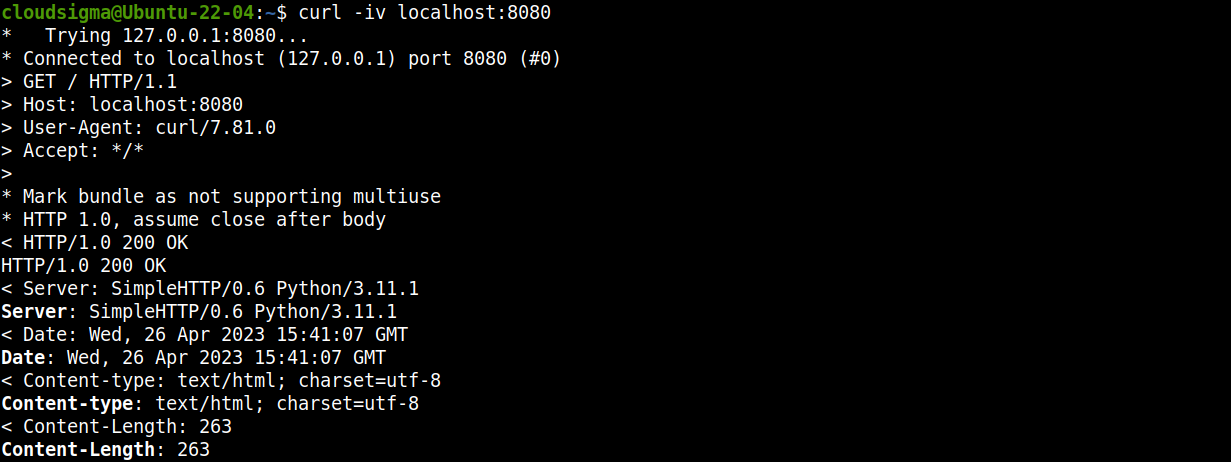
From a new terminal, we can use curl to send a request to the server:
|
1 |
curl -iv localhost:8080 |

Alternatively, you can access the link in a web browser:
|
1 |
http://localhost:8080 |
Step 3 – Creating a Dockerfile
A Dockerfile contains the necessary instructions to generate a Docker image. The instructions in the file are followed sequentially. Learn more about Dockerfile.
Create a new Dockerfile for our project:
|
1 |
touch Dockerfile |
Now, we will introduce the necessary codes in it. Open it in a text editor:
|
1 |
nano Dockerfile |
Enter the following code:
|
1 2 3 4 5 6 7 8 9 |
FROM python:latest ENV SRC_DIR /usr/bin/src/test_server/src COPY src/* ${SRC_DIR}/ WORKDIR ${SRC_DIR} ENV PYTHONUNBUFFERED=1 CMD ["python", "server.py"] |
Here,
-
Any Dockerfile must begin with the FROM directive. In our case, we are declaring Python as the base of the Docker image.
-
The ENV SRC_DIR directive specifies the location of the container directory.
-
The COPY directive copies the files from the src directory that currently hosts the Python server.
-
The variable PYTHONBUFFERED=1 specifies that Python will print and log output directly to STDOUT. Otherwise, the logs wouldn’t be sent to any buffer.
-
The CMD directive specifies a default command to run when executing the container. In this case, we are using the directive to launch our Python server.
Step 4 – Docker Image Generation
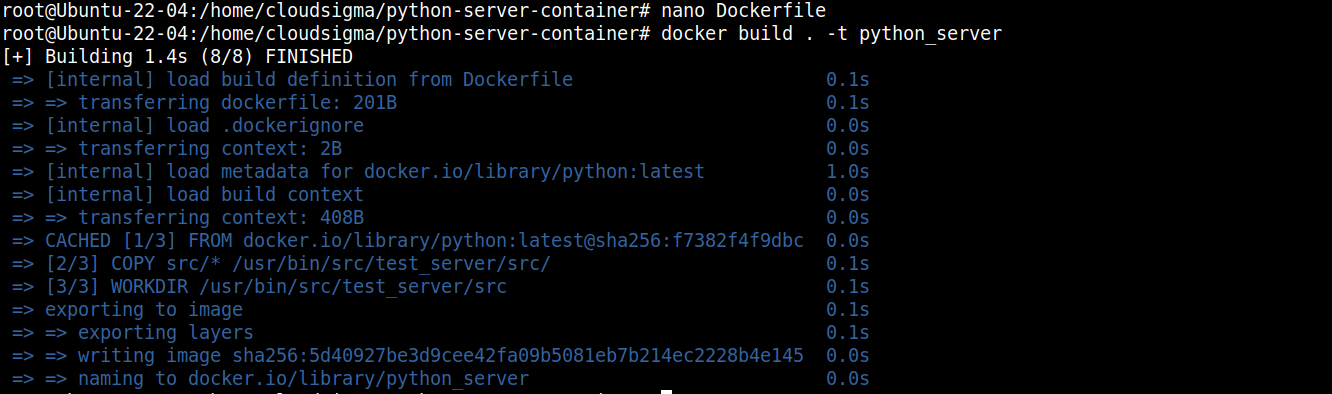
With the Dockerfile ready, we can now bake an image. Run the following Docker command to start the process:
|
1 |
docker build . -t python_server |
Here,
-
The -t flag is used to tag our Docker image as python_server.
-
Docker will download all the necessary components and combine them into an image.
Step 5 – Executing the Image
The image is ready for deployment. We can execute it using the following command:
|
1 |
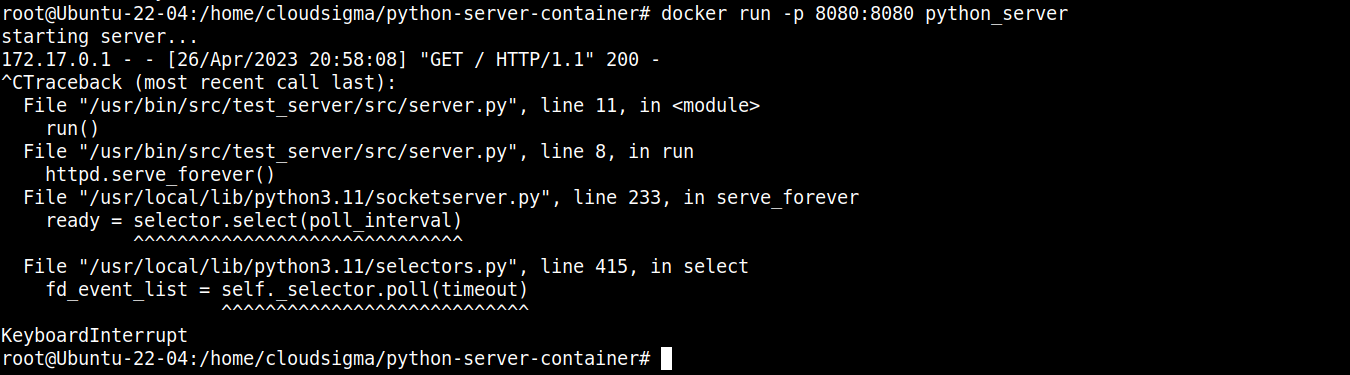
docker run -p 8080:8080 python_server |

Here, we are forwarding port 8080 from the local machine to the Docker image using the -p flag.
We can easily validate if the server is up and running using curl:
|
1 |
curl -iv localhost:8080 |


Step 6 – Terminating the Server
From the terminal, press “Ctrl + C” to terminate the Docker process:
Step 7 – Exporting and Importing the Docker Image
We now have a functional Docker image hosting our Python server. With the help of Docker’s export and import features, we can migrate it to any other system.
First, check the list of Docker images in the current system:
|
1 |
docker images |

Our target is the python_server Docker image we just created. The following command will export it as a TAR archive:
|
1 |
docker save python_server:latest > python_server.tar |

After transferring the python_server.tar file to the target machine, use the following command to import the Docker image:
|
1 |
docker load < python_server.tar |

Final Thoughts
In this guide, we demonstrated building a Docker image out of a Python application. We created a simple Python webserver and built a Docker image out of it. The Docker image can now be deployed in any environment and expect consistent behavior.
Interested in learning more about Docker? Check out the following guides:
-
Build and Deploy a Flask Application with Docker on Ubuntu 20.04
-
How To Secure and Scale a Django Application with Docker, Nginx, and Let’s Encrypt
-
How to Deploy WordPress with Docker Containers on Ubuntu 20.04
Happy Computing!
- How To Set Up GitHub Continuous Integration Pipelines With Self-Hosted Runners on Ubuntu 22.04. - March 20, 2023
- Managing CSV in Node.js using Node-CSV - March 15, 2023
- Containerize A Python App using Docker - March 7, 2023
- Using GitLab for Managing Projects - September 15, 2022
- Creating Drag and Drop Elements with Pure, Vanilla JavaScript - August 4, 2022