

Introduction
Iptables is a command-line firewall utility. This means that it is software that allows you to configure a firewall on your system. It is typically available by default on Linux systems. In this guide, we will discuss some of the common rules and commands that go with the iptables firewall. Whenever a connection tries to establish itself with your system, the firewall will refer to these rules to determine what the next step in action should be.
Iptables Commands
This guide will introduce some of the most essential iptables commands. To follow the guide you will need to have a basic understanding of what iptables is and how it works. It will help you get a better grasp of the rules you are implementing with the following commands. Remember, any of the commands given below can be used in isolation. On the other hand, you can also mix and match them to suit your specific needs.
Things to Keep in Mind
Before you read ahead, here are some things you should keep in mind:
- The order of the rules in iptables is important.
- To append a new rule to the end of a chain, your
iptablescommand will have to use the-A. - If you want to append the rule in another position, you have to use the
-Ioption. This option enables you to specify the exact location of the rule. If you want to place the rule at the beginning of the chain, simply do not supply a rule number. - To ensure you have consistent access to your server, block SSH traffic on port 22 by default.
- In case you fail to do so and lose access to your server, you can reconnect using the console. Allow SSH traffic to change the firewall settings.
- If you ever want to review the ruleset currently in place, use the commands
sudo iptables -S and sudo iptables -L.
Furthermore, we have a detailed guide on how to list and delete iptables firewall rules, which will further help you get the best use of your iptables firewall.
Now that we have the prerequisites out of the way, let’s dive into some of the common iptables commands:
How to Save Your Rules
We will begin by determining how you can save your rules. It is important to note that iptables rules are ephemeral. This means that they will be lost after you reboot your system- unless you save them. Here is how you can manually save your new rules on Ubuntu and CentOS server respectively:
-
Ubuntu
The easiest way to save your new rules on an Ubuntu server is to use the iptables-persistent package. You can easily create an Ubuntu server by following this tutorial.
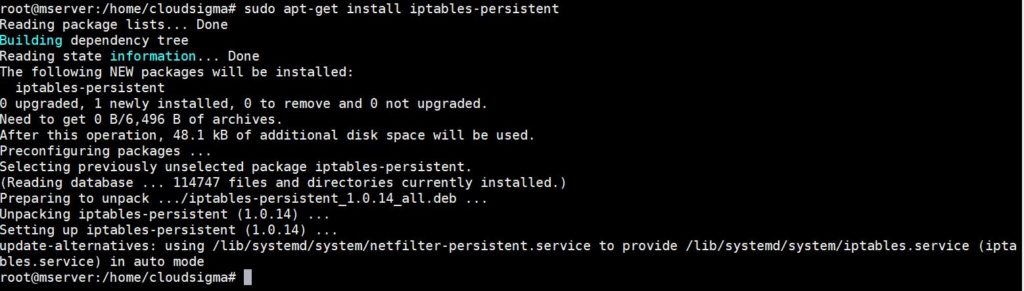
Now, the first step to save your new iptables rules is installing the iptables-persistent package using apt-get. Here is how you can get it:
|
1 |
sudo apt-get install iptables-persistent |
During the installation process, you need to decide whether you want to save the firewall rules currently in place. To update the rules instead and save the changes, use this command:
|
1 |
sudo netfilter-persistent save |

The above command typically works for Ubuntu versions after 16.04. If you are using an earlier version, use this command instead:
|
1 |
sudo invoke-rc.d iptables-persistent save |
-
CentOS
You can configure your firewall with iptables on CentOS 6 or versions older than that. CentOS 7 uses FirewallD instead. Follow this tutorial to learn how to set up FirewallD on CentOS 7.
You can save your new rules on CentOS using the iptables init script. See the following command:
|
1 |
sudo service iptables save |
This command will save your new rules for the iptables firewall. The currently active iptables rules can be found in the /etc/sysconfig/iptables file.
Useful Iptable Commands
Now, let’s move on to some very useful iptables firewall commands that you may need to use on your server.
-
Loopback Connections
First, we will explore how you can allow loopback connections. Your system uses a loopback interface to send itself connections. For instance, imagine that you ran this command: ping localhost or ping 127.0.0.1. Your server will use a loopback interface, or a lo, to essentially ping itself. Other times, the server may use it if your application server is configured to connect to the ‘localhost’ address.
Regardless of what the situation is, you need to make sure that your iptables firewall does not block these connections. Therefore, you will have to allow loopback connections to allow these functions to take place.
Here are the commands you will run to allow all traffic coming onto the loopback interface:
|
1 2 |
sudo iptables -A INPUT -i lo -j ACCEPT sudo iptables -A OUTPUT -o lo -j ACCEPT |

-
Established and Related Incoming Connections
Another type of connection that you may need to allow is the outgoing connection. To make sure your server is receiving and sending both incoming and outgoing traffic respectively, you need to allow established and related incoming connections. This allows the server to send return traffic to outgoing connections. Use this command to allow established as well as related incoming connections:
|
1 |
sudo iptables -A INPUT -m conntrack --ctstate ESTABLISHED,RELATED -j ACCEPT |
![]()
-
Established Outgoing Connections
The server will typically send responses to incoming connections in the form of outgoing traffic of established connections. To allow these, use the following command:
|
1 |
sudo iptables -A OUTPUT -m conntrack --ctstate ESTABLISHED -j ACCEPT |
![]()
-
Internal to External
Sometimes, you may even need to configure your firewall to give the internal access to the external. By default, your external network should be eth0 and eth1 should be your internal network. If this is the case, use this command to enable access:
|
1 |
sudo iptables -A FORWARD -i eth1 -o eth0 -j ACCEPT |

-
Dropping Invalid Packets
At times, some of the network traffic packets will be labeled as invalid. Most of the time, you can simply drop these invalid packets. To do so, use the following command:
|
1 |
sudo iptables -A INPUT -m conntrack --ctstate INVALID -j DROP |

Rules for Blocking IP Addresses
Next, we will look at some commands you can use to block connections coming from certain IP addresses. To make things easier, we will use the 15.15.15.51 IP address as an example in our commands. You can substitute this value with your specific IP address.
|
1 |
sudo iptables -A INPUT -s 15.15.15.51 -j DROP |
In -s 15.15.15.51, the -s stands for source. Thus, the command is specifying the source IP address ‘15.15.15.51.’ Similarly, you can specify the source IP address in any firewall rule. This includes the allow and the reject rule.
If you want to reject the connection, you will use REJECT in place of DROP in the command like this:
|
1 |
sudo iptables -A INPUT -s 15.15.15.51 -j REJECT |
As a result, your server will give a ‘connection refused’ error whenever that particular IP address sends a connection request.
-
Blocking Connections to a Specific Interface
It is possible for you to block all the connection requests coming from a particular IP address to a particular network interface. In our example, the IP address is 15.15.15.51 and the network interface is eth0. Use this command to block the connections:
|
1 |
iptables -A INPUT -i eth0 -s 15.15.15.51 -j DROP |
The great thing is that you can specify the network interface in any rule. This means that any rule can be applied and limited to a specific network only.
Rules for Service: SSH
SSH becomes relevant if you are using a cloud server. In this case, you need to allow incoming SSH connections at port 22. Enabling these connections allows you to connect to and manage your server. Here, we will discuss a number of common rules pertaining to SSH.
-
Allowing All Incoming SSH
The following commands enable all incoming SSH connections:
|
1 2 |
sudo iptables -A INPUT -p tcp --dport 22 -m conntrack --ctstate NEW,ESTABLISHED -j ACCEPT sudo iptables -A OUTPUT -p tcp --sport 22 -m conntrack --ctstate ESTABLISHED -j ACCEPT |
In the above set, you only need to use the second command if the OUTPUT policy is not set to ACCEPT. It allows the outgoing traffic of established SSH connections.
-
Allowing Incoming SSH from a Subnet
The previous command allows all incoming connections. You can use the following commands to only allow incoming connections from a specific IP address or subnet. Let’s say you only want to allow incoming connections from the 15.15.15.0/24 subnet:
|
1 2 |
sudo iptables -A INPUT -p tcp -s 15.15.0/24 --dport 22 -m conntrack --ctstate NEW,ESTABLISHED -j ACCEPT sudo iptables -A OUTPUT -p tcp --sport 22 -m conntrack --ctstate ESTABLISHED -j ACCEPT |
Same as before, you only need to use the second command if the OUTPUT policy is not set to ACCEPT. It allows the outgoing traffic of established SSH connections.
-
Allowing Outgoing SSH
Use these commands if the firewall OUTPUT policy is not set to ACCEPT and you want to enable SSH connections. This will allow your server to initiate SSH connections to other servers:
|
1 2 |
sudo iptables -A OUTPUT -p tcp --dport 22 -m conntrack --ctstate NEW,ESTABLISHED -j ACCEPT sudo iptables -A INPUT -p tcp --sport 22 -m conntrack --ctstate ESTABLISHED -j ACCEPT |
To further utilize SSH on your cloud servers take a look at our tutorials on how to use SSH to connect to a remote server in Ubuntu and how to configure your Linux server to use SSH key-based authentication.
-
Allowing Incoming Rsync from a Subnet
Rsync is a feature that you can use to transfer files from one system to the other. It runs on port 873. So if you want to allow incoming Rsync connections on port 873 from a specific IP address or subnet, use the following commands:
|
1 2 |
sudo iptables -A INPUT -p tcp -s 15.15.0/24 --dport 873 -m conntrack --ctstate NEW,ESTABLISHED -j ACCEPT sudo iptables -A OUTPUT -p tcp --sport 873 -m conntrack --ctstate ESTABLISHED -j ACCEPT |
As you can see, we specified the source IP address along with the destination port. You will use the second command only if the firewall OUTPUT policy is not set to ACCEPT. It allows the outgoing traffic of established Rsync connections. Furthermore, you can take a look at our tutorial on how to utilize Rsync to sync local and remote directories on a VPS.
Rules for Service: Web Server
HTTP connections are typically received on port 80. Similarly, HTTPS usually comes on port 443. Web servers like Apache and Nginx listen to these ports to catch connection requests. Sometimes, the default settings may make your server deny or drop these incoming requests. That is why you will need to set new rules to allow the traffic though.
-
Allowing All Incoming HTTP Connections
You can allow all incoming HTTP connections on port 80 with these commands:
|
1 2 |
sudo iptables -A INPUT -p tcp --dport 80 -m conntrack --ctstate NEW,ESTABLISHED -j ACCEPT sudo iptables -A OUTPUT -p tcp --sport 80 -m conntrack --ctstate ESTABLISHED -j ACCEPT |
You will use the second command only if the firewall OUTPUT policy is not set to ACCEPT. It allows the outgoing traffic of established HTTP connections.
-
Allowing All Incoming HTTPS Connections
Use these commands to allow all incoming HTTPS connection requests on port 443:
|
1 2 |
sudo iptables -A INPUT -p tcp --dport 443 -m conntrack --ctstate NEW,ESTABLISHED -j ACCEPT sudo iptables -A OUTPUT -p tcp --sport 443 -m conntrack --ctstate ESTABLISHED -j ACCEPT |
You will use the second command only if the iptables firewall OUTPUT policy is not set to ACCEPT. It allows the outgoing traffic of established HTTP connections.
-
Allowing All Incoming Connections from HTTP and HTTPS
You can use the multiport module if you want to allow traffic from both HTTP and HTTPS ports. Use these commands if such is the case:
|
1 2 |
sudo iptables -A INPUT -p tcp -m multiport --dports 80,443 -m conntrack --ctstate NEW,ESTABLISHED -j ACCEPT sudo iptables -A OUTPUT -p tcp -m multiport --dports 80,443 -m conntrack --ctstate ESTABLISHED -j ACCEPT |
You will use the second command only if the firewall OUTPUT policy is not set to ACCEPT. It allows the outgoing traffic of established HTTP and HTTPS connections.
Rules for Service: MySQL
Sometimes a client may use a remote server to access your MySQL database server. In that case, you need to manually allow incoming traffic from the relevant port. MySQL listens for connection requests from port 3306.
-
Allowing Incoming MySQL Connections from a Subnet
You will have to specify the source if you want to allow MySQL connections from a particular subnet. In our example, we will allow incoming traffic from the 15.15.15.0/24 subnet using these commands:
|
1 2 |
sudo iptables -A INPUT -p tcp -s 15.15.0/24 --dport 3306 -m conntrack --ctstate NEW,ESTABLISHED -j ACCEPT sudo iptables -A OUTPUT -p tcp --sport 3306 -m conntrack --ctstate ESTABLISHED -j ACCEPT |
You will use the second command only if the firewall OUTPUT policy is not set to ACCEPT. It allows the outgoing traffic of established MySQL connections.
-
Enabling MySQL Connections to an Interface
If you also want to specify which network interface should be receiving the MySQL connections, you can use these commands:
|
1 2 |
sudo iptables -A INPUT -i eth1 -p tcp --dport 3306 -m conntrack --ctstate NEW,ESTABLISHED -j ACCEPT sudo iptables -A OUTPUT -o eth1 -p tcp --sport 3306 -m conntrack --ctstate ESTABLISHED -j ACCEPT |
In this case, we are allowing the connections to a private network interface called eth1.
You will use the second command only if the firewall OUTPUT policy is not set to ACCEPT. It allows the outgoing traffic of established MySQL connections.
You can follow our tutorial for an easy setup of MySQL on your server.
Rules for Service: PostgreSQL
Your client may use a remote server to access your PostgreSQL database server. In that case, you need to allow these incoming connections. These connections will come through port 5432.
-
Allowing Incoming PostgreSQL Connections from a Subnet
You can use the following commands to allow incoming PostgreSQL connections from a particular subnet or IP address. As you can see, we specified the source which is the 15.15.15.0/24 subnet.
|
1 2 |
sudo iptables -A INPUT -p tcp -s 15.15.0/24 --dport 5432 -m conntrack --ctstate NEW,ESTABLISHED -j ACCEPT sudo iptables -A OUTPUT -p tcp --sport 5432 -m conntrack --ctstate ESTABLISHED -j ACCEPT |
You will use the second command only if the firewall OUTPUT policy is not set to ACCEPT. It allows the outgoing traffic of established PostgreSQL connections.
-
Enabling PostgreSQL Connections to a Specific Interface
If you want to only allow PostgreSQL connections to a particular network interface, use these commands:
|
1 2 |
sudo iptables -A INPUT -i eth1 -p tcp --dport 5432 -m conntrack --ctstate NEW,ESTABLISHED -j ACCEPT sudo iptables -A OUTPUT -o eth1 -p tcp --sport 5432 -m conntrack --ctstate ESTABLISHED -j ACCEPT |
In this case, we are allowing the connections to a private network interface called eth1. You will use the second command only if the firewall OUTPUT policy is not set to ACCEPT. It allows the outgoing traffic of established PostgreSQL connections.
Follow this tutorial to install PostgreSQL on your Ubuntu server.
Rules for Service: Mail
You may also need to configure your firewall in accordance with any mail server you are using. For example, Sendmail and Postfix can receive connections on a number of different ports. It depends on the protocol that you use for mail delivery. To block and allow certain mail connections, you need to know what protocol you are using.
-
Allowing Incoming SMTP Connections
SMTP connections typically come in on port 25. Although SMTP also commonly uses port 587 for outbound mail. To allow your server to respond to these connections, use the following commands:
|
1 2 |
sudo iptables -A INPUT -p tcp --dport 25 -m conntrack --ctstate NEW,ESTABLISHED -j ACCEPT sudo iptables -A OUTPUT -p tcp --sport 25 -m conntrack --ctstate ESTABLISHED -j ACCEPT |
You will use the second command only if the firewall OUTPUT policy is not set to ACCEPT. It allows the outgoing traffic of established SMTP connections.
-
Allowing All Incoming IMAP
To allow your server to respond to all incoming IMAP connections on port 143, simply type and run this:
|
1 2 |
sudo iptables -A INPUT -p tcp --dport 143 -m conntrack --ctstate NEW,ESTABLISHED -j ACCEPT sudo iptables -A OUTPUT -p tcp --sport 143 -m conntrack --ctstate ESTABLISHED -j ACCEPT |
You will use the second command only if the firewall OUTPUT policy is not set to ACCEPT. It allows the outgoing traffic of established IMAP connections.
-
Allowing All Incoming IMAPS
Use these commands to let your server give responses to IMAPS connections on port 993:
|
1 2 |
sudo iptables -A INPUT -p tcp --dport 993 -m conntrack --ctstate NEW,ESTABLISHED -j ACCEPT sudo iptables -A OUTPUT -p tcp --sport 993 -m conntrack --ctstate ESTABLISHED -j ACCEPT |
You will use the second command only if the firewall OUTPUT policy is not set to ACCEPT. It allows the outgoing traffic of established IMAPS connections.
-
Allowing All Incoming POP3
These connections will come in on port 993. If you want your server to respond to IMAPS connection requests, use the following commands:
|
1 2 |
sudo iptables -A INPUT -p tcp --dport 110 -m conntrack --ctstate NEW,ESTABLISHED -j ACCEPT sudo iptables -A OUTPUT -p tcp --sport 110 -m conntrack --ctstate ESTABLISHED -j ACCEPT |
You will use the second command only if the firewall OUTPUT policy is not set to ACCEPT. It allows the outgoing traffic of established POP3 connections.
-
Allowing All Incoming POP3S
Use these commands to allow your server to form connections with POP3S requests coming in on port 995:
|
1 2 |
sudo iptables -A INPUT -p tcp --dport 995 -m conntrack --ctstate NEW,ESTABLISHED -j ACCEPT sudo iptables -A OUTPUT -p tcp --sport 995 -m conntrack --ctstate ESTABLISHED -j ACCEPT |
You will use the second command only if the firewall OUTPUT policy is not set to ACCEPT. It allows the outgoing traffic of established POP3S connections.
-
How to Block Outgoing SMTP Mail
Instead of allowing incoming connections and enabling server response, you may want to block outgoing mail altogether. You can block all outgoing SMTP mail on port 25 using this command:
|
1 |
sudo iptables -A OUTPUT -p tcp --dport 25 -j REJECT |
As a result, all outgoing traffic on port 25 will be rejected by the iptables firewall. You can use the same command structure if you want to reject any other service. All you need to do is replace port 25 with the relevant port number.
Conclusion
This guide covers the essential iptables firewall commands. It provides you with the essential tools you need to configure your iptables firewall effectively. Keep in mind that there is no one-fixes-all solution. These commands are extremely flexible. This means that you can use them in whatever way suits you and your requirements best.
Happy Computing!
- How To Create a Kubernetes Cluster Using Kubeadm on Ubuntu 18.04 - June 24, 2021
- Nginx Server and Location Block Selection Algorithms: Overview - May 14, 2021
- Configuring an Iptables Firewall: Basic Rules and Commands - April 5, 2021
- How to Configure a Linux Service to Auto-Start After a Reboot or System Crash: Part 2 (Theoretical Explanations) - March 25, 2021
- How to Configure a Linux Service to Auto-Start After a Reboot or System Crash: Part 1 (Practical Examples) - March 24, 2021