
Axios is a popular JavaScript library used to make HTTP requests. It is a promise-based HTTP client used in JavaScript or with other Javascript libraries like Vue.js or React.js. Due to its isomorphic nature, Axios can run on the client and server-side simultaneously using the same codebase. Also, it is a powerful tool used collectively with async to formulate a user-friendly API. Above all, Axios has the ability to abort a request automatically, which is otherwise an uphill battle.
How Does Axios Work?
Axios uses the default promise settings to run parallel in the browser and Node.js with the same code. Using the promise-based HTTP feature, Axios performs CRUD operations and sends HTTP requests to REST endpoints. In this tutorial, we’ll walk you through the steps of configuring a REST API with Axios in Vue.js.
Let’s start!
Prerequisites
To be able to complete this tutorial, you must have the following:
- Node.js installed and set up on your Ubuntu system.
- If you are using Centos OS, you can follow this guide to install Node.js on Centos 8.
- Basics of JavaScript.
Step 1: Axios Installation
Before we install Axios, it is important to update your system repositories to avoid errors or installation failure:
|
1 |
sudo apt-get update |
Next, install Axios using the
npm software package:
|
1 |
npm install axios --save |
Alternatively, you can install Axios using the
yarn package manager:
|
1 |
yarn add axios |
After that, create a Vue.js project and import Axios on it:
|
1 |
import axios from ‘axios’; |
In the next step, we will use the axios.get() method to pull requests.
Step 2: Pull Data Using GET Request
Here, we are going to pull data using a
GET request. Take a look at how we use the
axios.get() method to fetch data directly from a method:
|
1 2 3 4 5 6 7 8 9 10 11 12 13 14 15 16 17 18 19 20 21 22 23 24 25 26 27 28 29 30 31 32 33 34 35 36 37 38 39 40 41 42 |
<template> <div> <ul v-if="posts && posts.length"> <li v-for="post of posts"> <p><strong>{{post.title}}</strong></p> <p>{{post.body}}</p> </li> </ul> <ul v-if="errors && errors.length"> <li v-for="error of errors"> {{error.message}} </li> </ul> </div> </template> <script> import axios from "axios"; export default { data() { return { posts: [], errors: [], }; }, // Pulls posts when the component is created. created() { axios .get(`http://jsonplaceholder.typicode.com/posts`) .then((response) => { // JSON responses are automatically parsed. this.posts = response.data; }) .catch((e) => { this.errors.push(e); }); } }; </script> |
You’ll see the async or await version:
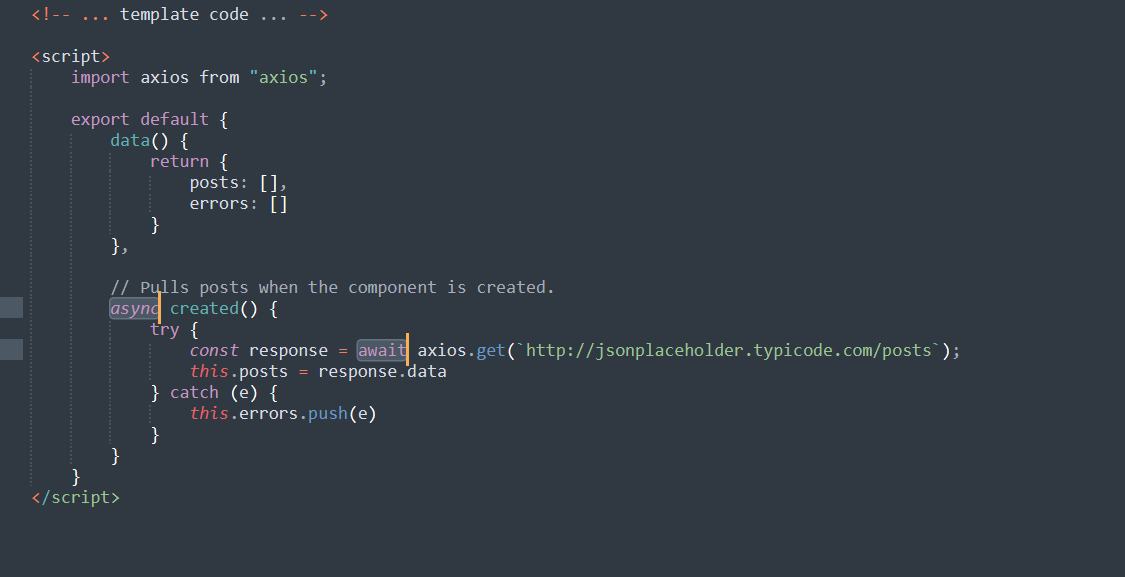
The above code will retrieve posts from JSONPlaceholder and distribute data in an unordered fashion. Any type of error/s encountered would appear in a different unordered list.
Step 3: Push Data Using POST Request
Opposite to the
axios.get() method, we will now use the
axios.post() method to make a
POST request. Take a look at how to apply the
axios.post() method to pull data:
|
1 2 3 4 5 6 7 8 9 10 11 12 13 14 15 16 17 18 19 20 21 22 23 24 25 26 27 28 29 30 31 32 33 34 35 36 37 |
<template> <div> <input type="text" v-model="postBody" @change="postPost()" /> <ul v-if="errors && errors.length"> <li v-for="error of errors"> {{error.message}} </li> </ul> </div> </template> <script> import axios from "axios"; export default { data() { return { postBody: "", errors: [] } }, methods: { // Pushes Posts to the Server When Called. postPost() { axios .post(`http://jsonplaceholder.typicode.com/posts`, { body: this.postBody }) .then((response) => {}) .catch((e) => { this.errors.push(e) }) } } } </script> |
You’ll see the async or await version:

The above code will create an input field that submits content to JSONPlaceholder. Any type of error/s encountered appears in a different unordered list.
Step 4: Set Up a Common Base Instance
In this step, we are going to create a common base instance using the axios.create() method. The objective behind setting up a common base instance is to share a base URL across all the instances.
The common base instance comes in handy if all your calls are using a common server or header like
Authorization header:
|
1 2 3 4 5 6 7 8 |
import axios from "axios"; export const HTTP = axios.create({ baseURL: `http://jsonplaceholder.typicode.com/`, headers: { Authorization: "Bearer {token}" } }) |
Finally, you are all set to use HTTP in your component:
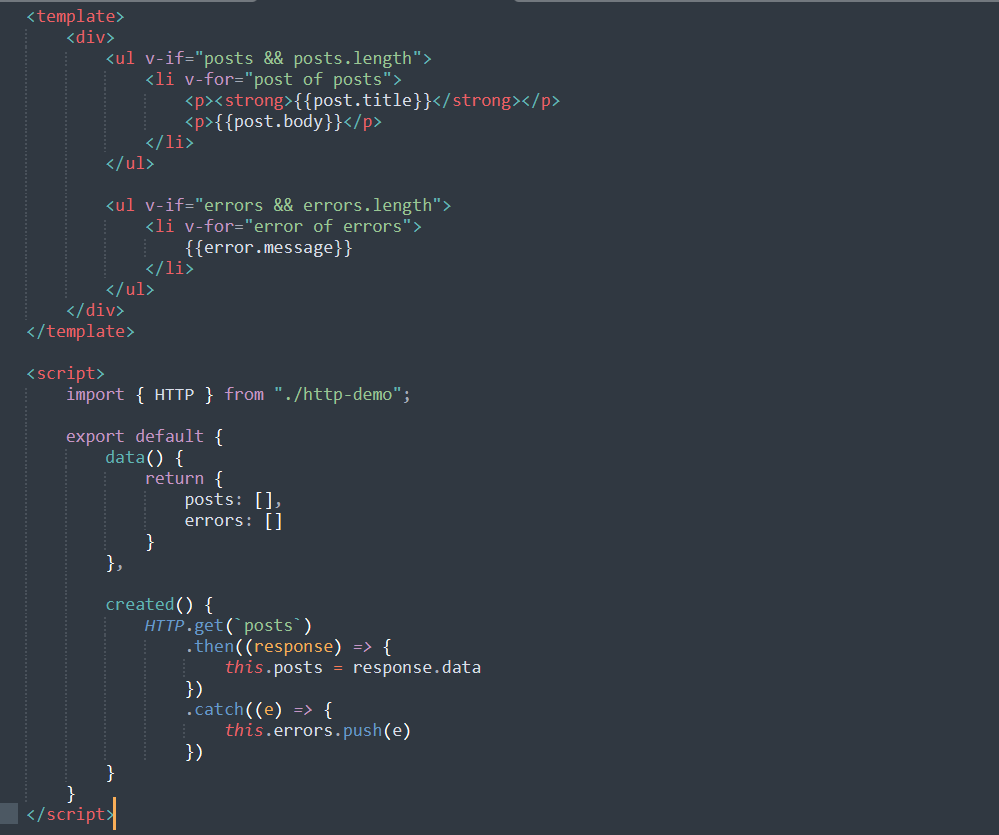
With all the configuration set up, our http-demo.js is established. Now, Axios connects with the JSONPlaceholder and Authorization header at the same time using the same codebase. The best part is that Axios retrieves the posts, identifies the errors, and displays them in an unordered list.
Conclusion
In this tutorial, we have learned the basics of pushing and pulling data using Axios. Besides, we created a common base instance to share a common URL. However, this must not be the end of your Axios learning. We encourage you to practice other Axios methods to send POST, PUT, PATCH and DELETE requests. Dive in the Axios documentation to explore the topic and try building projects yourself.
To further learn more on Axios and Vue.js topics, check these resources from our blog:
- Using HTTP client Axios in a React Application: A Tutorial
- Using Vue and Axios to Display Data from an API
Happy Computing!
- 5 Tips to Achieve Optimal Cloud Computing Cost Efficiency - October 31, 2022
- CloudSigma Empowers Blockchain Infrastructure Provider with a Green, Reliable, and Cost-Efficient Cloud Platform - October 27, 2022
- Whitech Launches New Egypt Cloud Computing Offering, Powered by HPE and CloudSigma - October 17, 2022
- Key Aspects of Protecting your Data in the Cloud - September 20, 2022
- How to Configure MongoDB Replication and Automated Failover - September 19, 2022