
In this tutorial of CloudSigma’s How To Series we tell you more about our storage system and how you can upload your own drive image in the cloud. Our cloud platform solution allows you to create and (re)size multiple persistent virtual drives including mounting multiple drives to a single cloud server and where available multiple storage tiers on the same cloud server. We offer a fast SSD-based storage system. It is perfectly suited to the high-performance requirements associated with big data, fast database transactions and more.
CloudSigma Storage System
Drives can be mounted or unmounted and exist separately from your cloud servers. Therefore, you can consider your virtual drive images to be your own private cloud drive library. The system supports the creation of regular drives as well as CDs / DVDs which are typically used for install CDs and recovery tools etc. You can directly upload RAW images, complementing the extensive selection of install CDs and pre-installed systems available from our cloud marketplace.
There is no fixed drive sizing. Instead, you can create drives subject to a minimum and maximum size in a very granular way. All storage is persistent. The provisioning time for creating a new drive is 10-20 seconds with an average provisioning time of 15 seconds, similar to starting or creating a new cloud server. Once created, a drive can be resized subject to the maximum drive size. Drive resizing is executed instantly with a provisioning time of 10-20 seconds but please bear in mind you will likely need to expand the file system afterwards from within the operating system of the cloud server.
In the following short tutorial we’ll show you how to upload your own image on our platform. Please note that CloudSigma allows you to upload any x86 based operating system images and of course data drives, this, therefore, including all variants of Windows, Linux, and even BSD/Unix-based systems (keep in mind that Desktop versions of Windows are not permitted on the cloud).
So let’s get started:
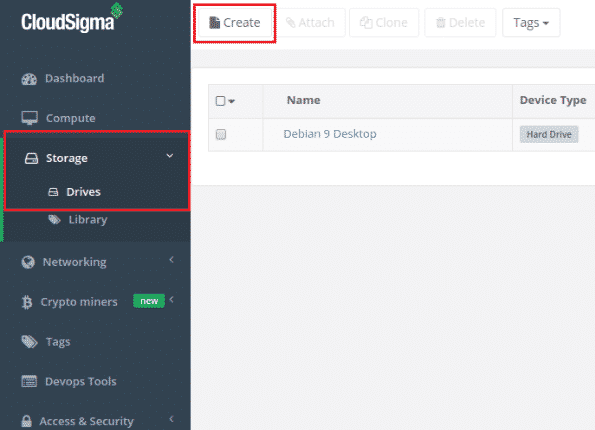
Step 1: Go to the drives listing page on the WebApp and click the “Create” button
Step 2: Choose a name for your drive, select the size, storage and device type
In the “Device Type” section you can choose between Hard Drive or CD-ROM. For the “Storage Type” you can choose between SSD and HDD (Scale-out Magnetic).
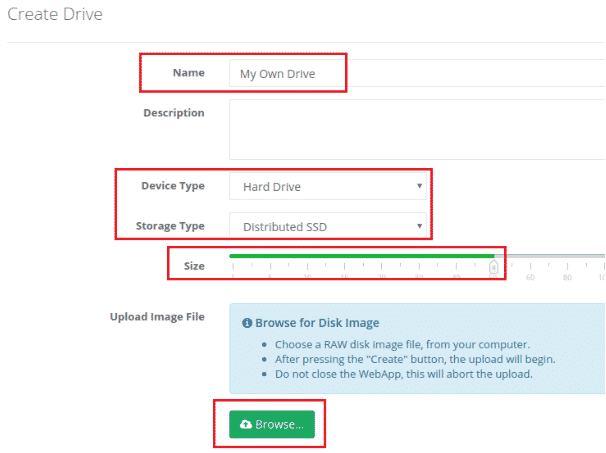
Step 3: The final step is to choose a disk image. For that purpose you should click on the green “Browse” button.
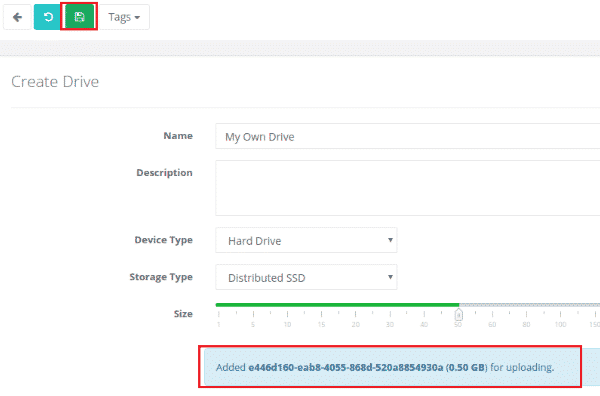
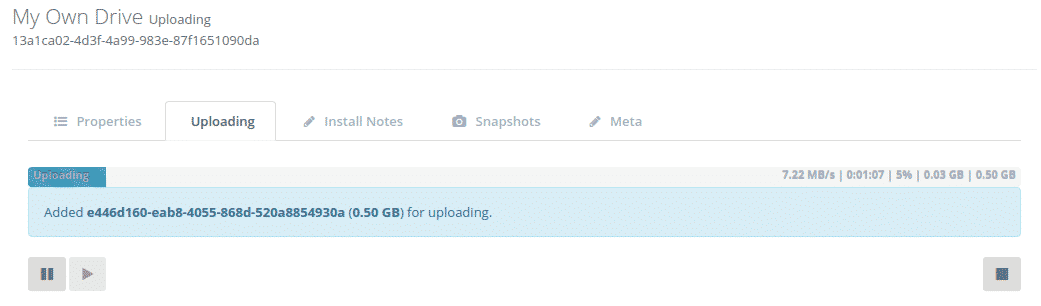
Find your ISO image on your local system and simply select it. Once you select it, you will see that this image is added for uploading. Click the green “Save” button on the top to start.
Once the uploading starts you will be able to monitor the progress of your upload via the progress upload bar, and data transfer statistics. You can start, stop or pause your upload at any time. Please, be patient. It can take some time to upload your drive image. This depends on its size and your networking connection to our cloud.
The drive size will be automatically set at the size of the uploaded drive image. If the drive specified is larger than the upload drive, the larger size will be assigned to the drive. To take advantage of this extra space you will likely need to expand the file system within the drive after you attach it to a cloud server and boot it up.
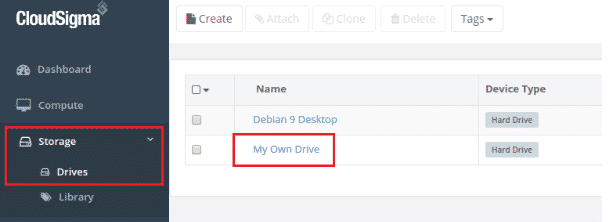
Once the uploading is completed you will see the drive appear in your list of drives associated with your account.
Now you can mount the drive to an existing or new server and boot it up.
Happy computing!
- 5 Tips to Achieve Optimal Cloud Computing Cost Efficiency - October 31, 2022
- CloudSigma Empowers Blockchain Infrastructure Provider with a Green, Reliable, and Cost-Efficient Cloud Platform - October 27, 2022
- Whitech Launches New Egypt Cloud Computing Offering, Powered by HPE and CloudSigma - October 17, 2022
- Key Aspects of Protecting your Data in the Cloud - September 20, 2022
- How to Configure MongoDB Replication and Automated Failover - September 19, 2022