

In these times of uncertainties, the global trend is to make the working environment more agile and the work tools more portable. Never has been more important than during the COVID19 crisis with the requirement to work remotely from the main corporate office locations. Cloudflare Access replaces traditional corporate VPN clients by putting Cloudflare’s global edge network in front of your internal applications. Cloudflare Access helps in providing a gateway to let employees have secure access to private network applications remotely. Most important of all, due to the current COVID-19 global pandemic, until September 1st Cloudflare is providing this service for free.
In this tutorial, I am going to show you how to deploy an application on a CloudSigma machine and then secure the access to it using Cloudflare Access.
First, I am creating a machine with the following resources:
8 GHz CPU
8 GB RAM
50 GB SSD
I am mounting the disk with the x Ubuntu 18.04 image that is available in CloudSigma’s library – Ubuntu 18.04: Pre-installed 64bit with VirtIO drivers, superuser, Python 2.7.17, Pip 20.0.2 OpenSSL 1.1.1d, Cloud-init and latest updates until 2019-03-03.
Next, I am updating all existing repos and packages on the machine.
|
1 2 |
sudo apt update sudo apt upgrade |
Now that our system is up-to-date, I will move towards deploying a sample application.
For this tutorial, I will deploy a Nginx server on my machine.
|
1 |
sudo apt install nginx-light -y |
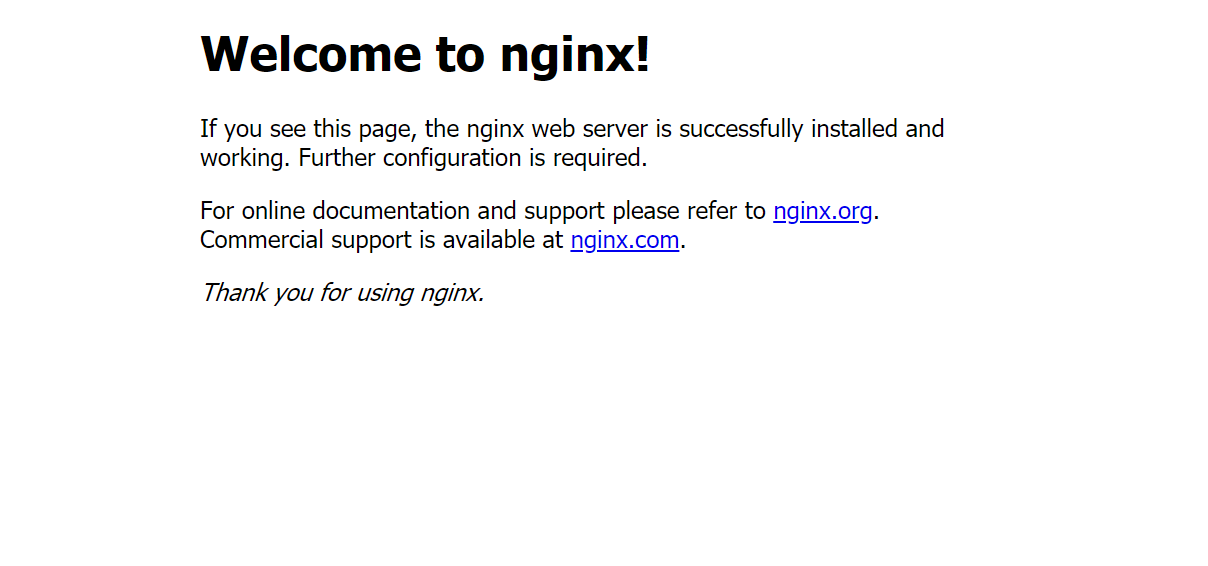
When I open the IP on my browser, I get the following message:
Currently, anyone can access it provided they have the IP address. I want to secure access with a zero-trust approach and policies.
According to Cloudflare,
Zero trust security is an IT security model that requires strict identity verification for every person and device trying to access resources on a private network, regardless of whether they are sitting within or outside of the network perimeter.
To get started I will create a Cloudflare account. Once I sign up for it, I will set up my domain with Cloudflare’s name servers.
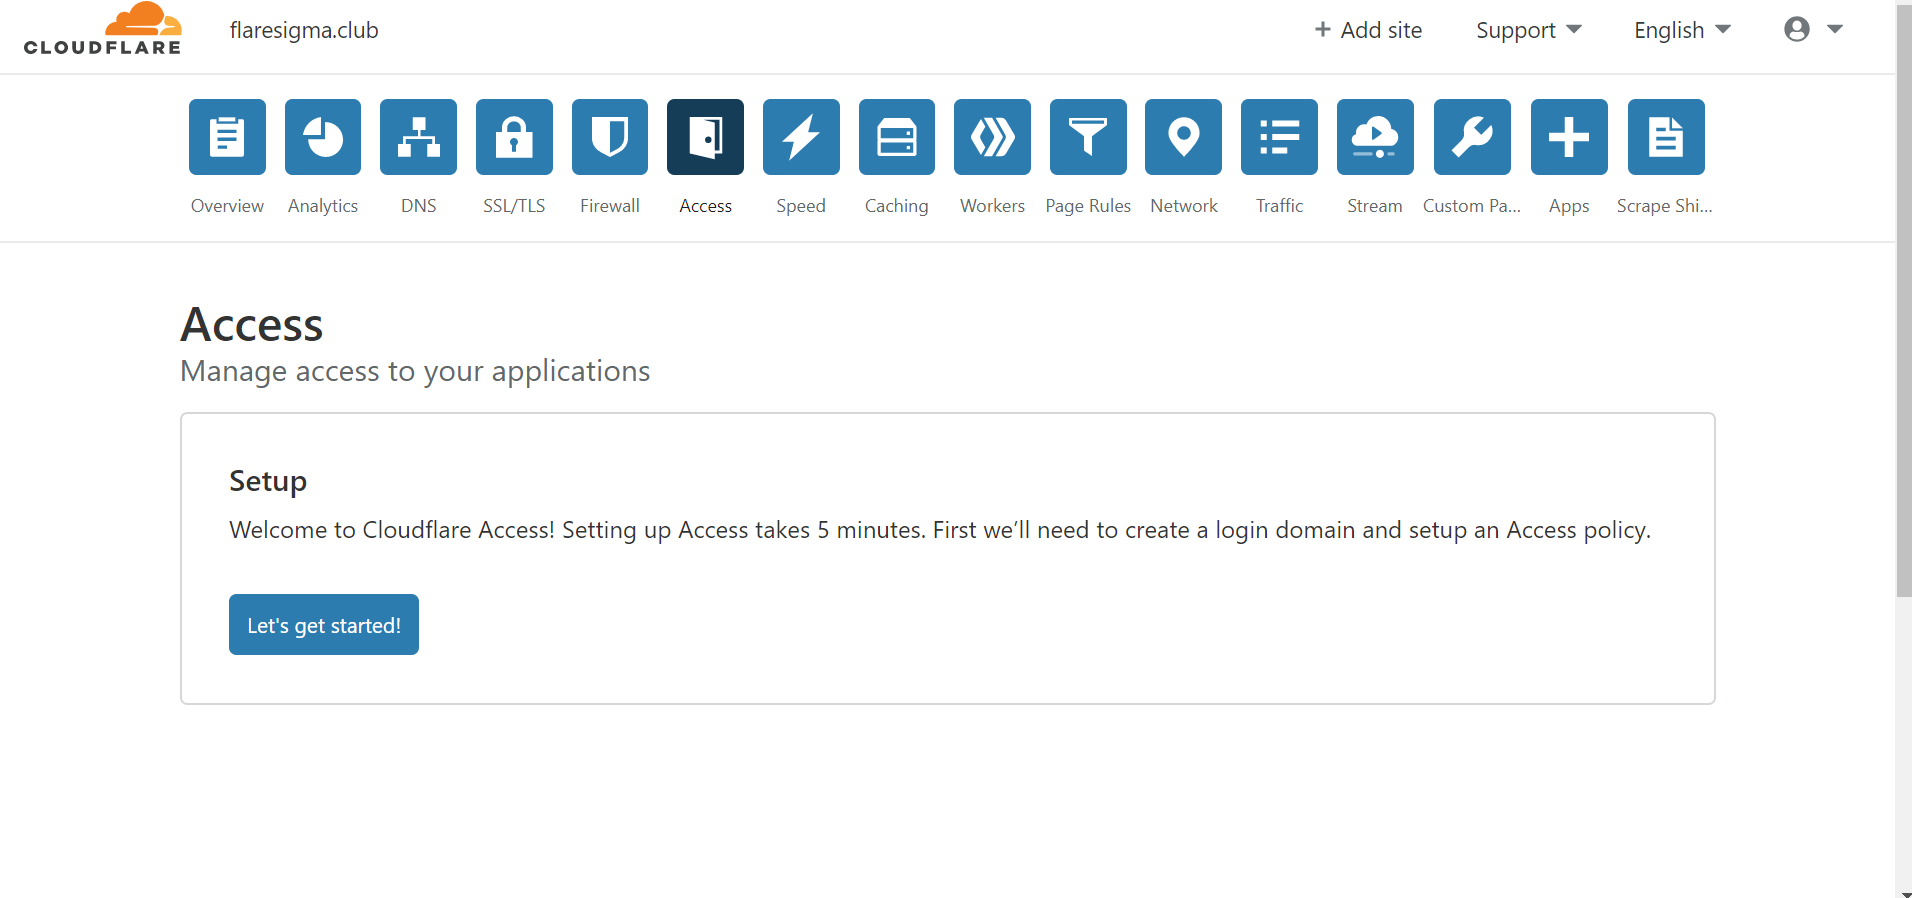
Once that is set up, from the dashboard of the Cloudflare account, I will go to the “Access” tab. Here, we will find all the necessary configurations that are required to be set to completely secure our web application.
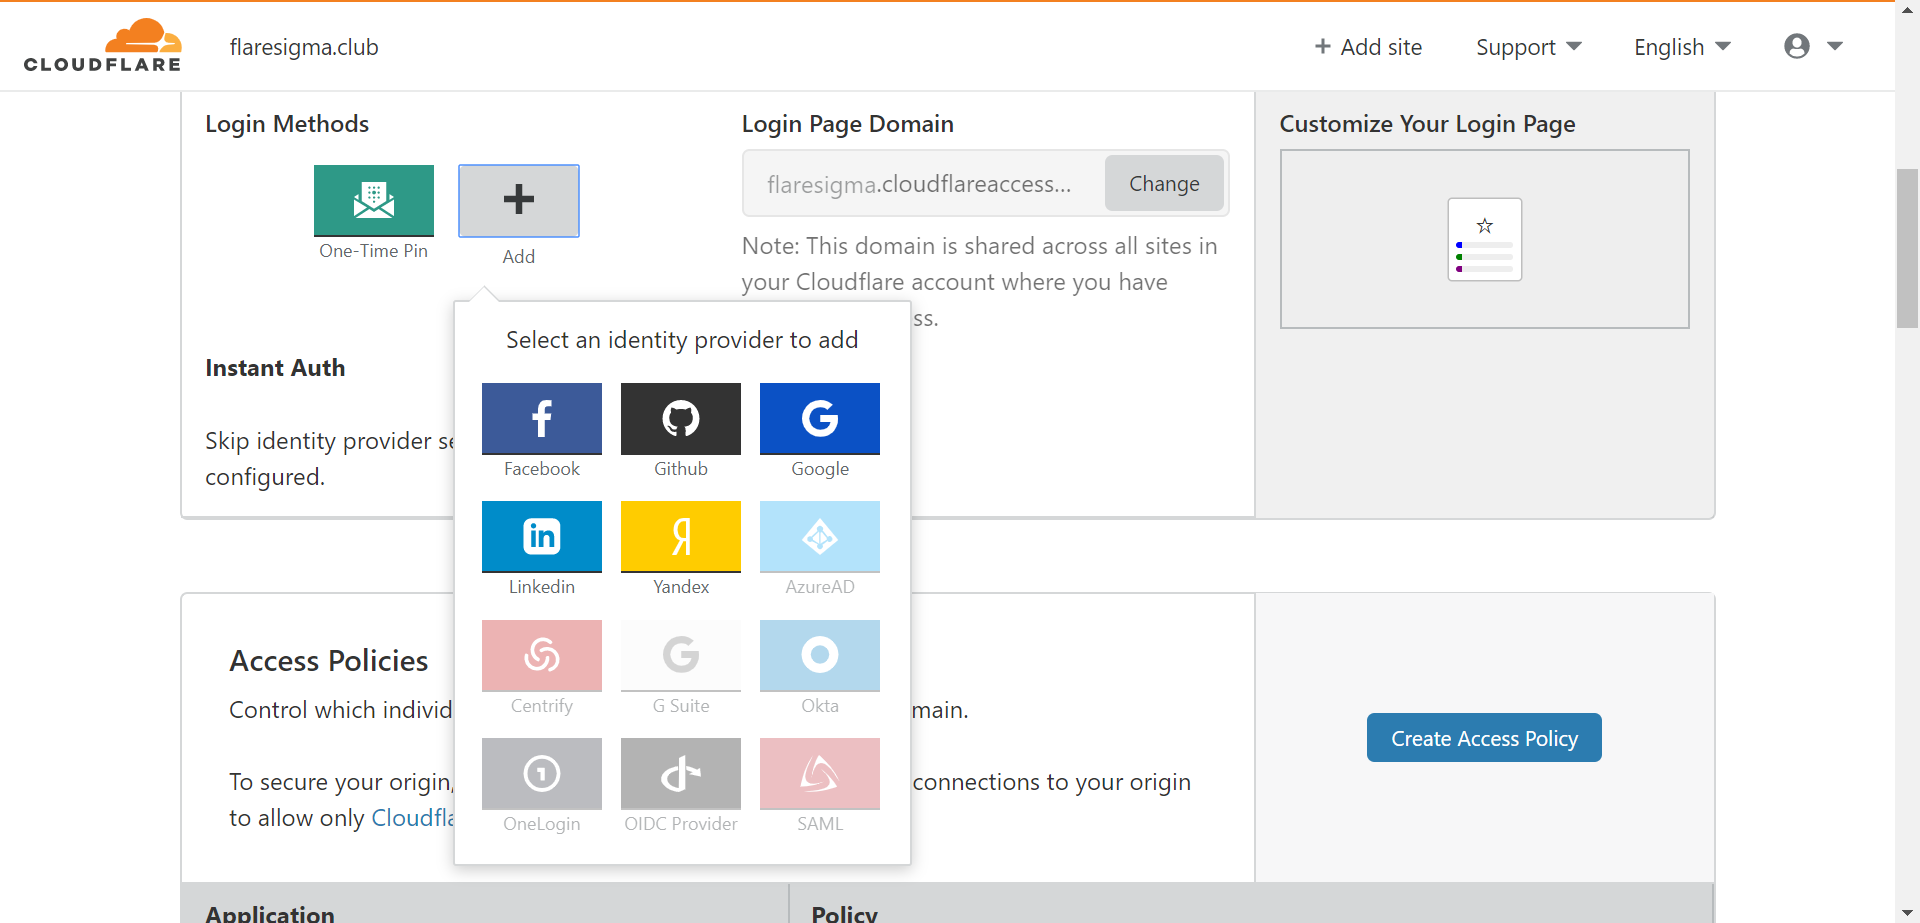
Login Methods:
There are various methods with which a user can authenticate himself to access the required tools. Based on organizations, those authentication methods may differ. For example, one organization might be using Google Suite to authenticate while others might just use an OTP (One Time Pin) based mechanism. Cloudflare gives a variety of options including but not limited to Facebook, Google, LinkedIn, G Suite, Okta, etc.
For my server, I am using ‘One Time Pin’ methods for access.
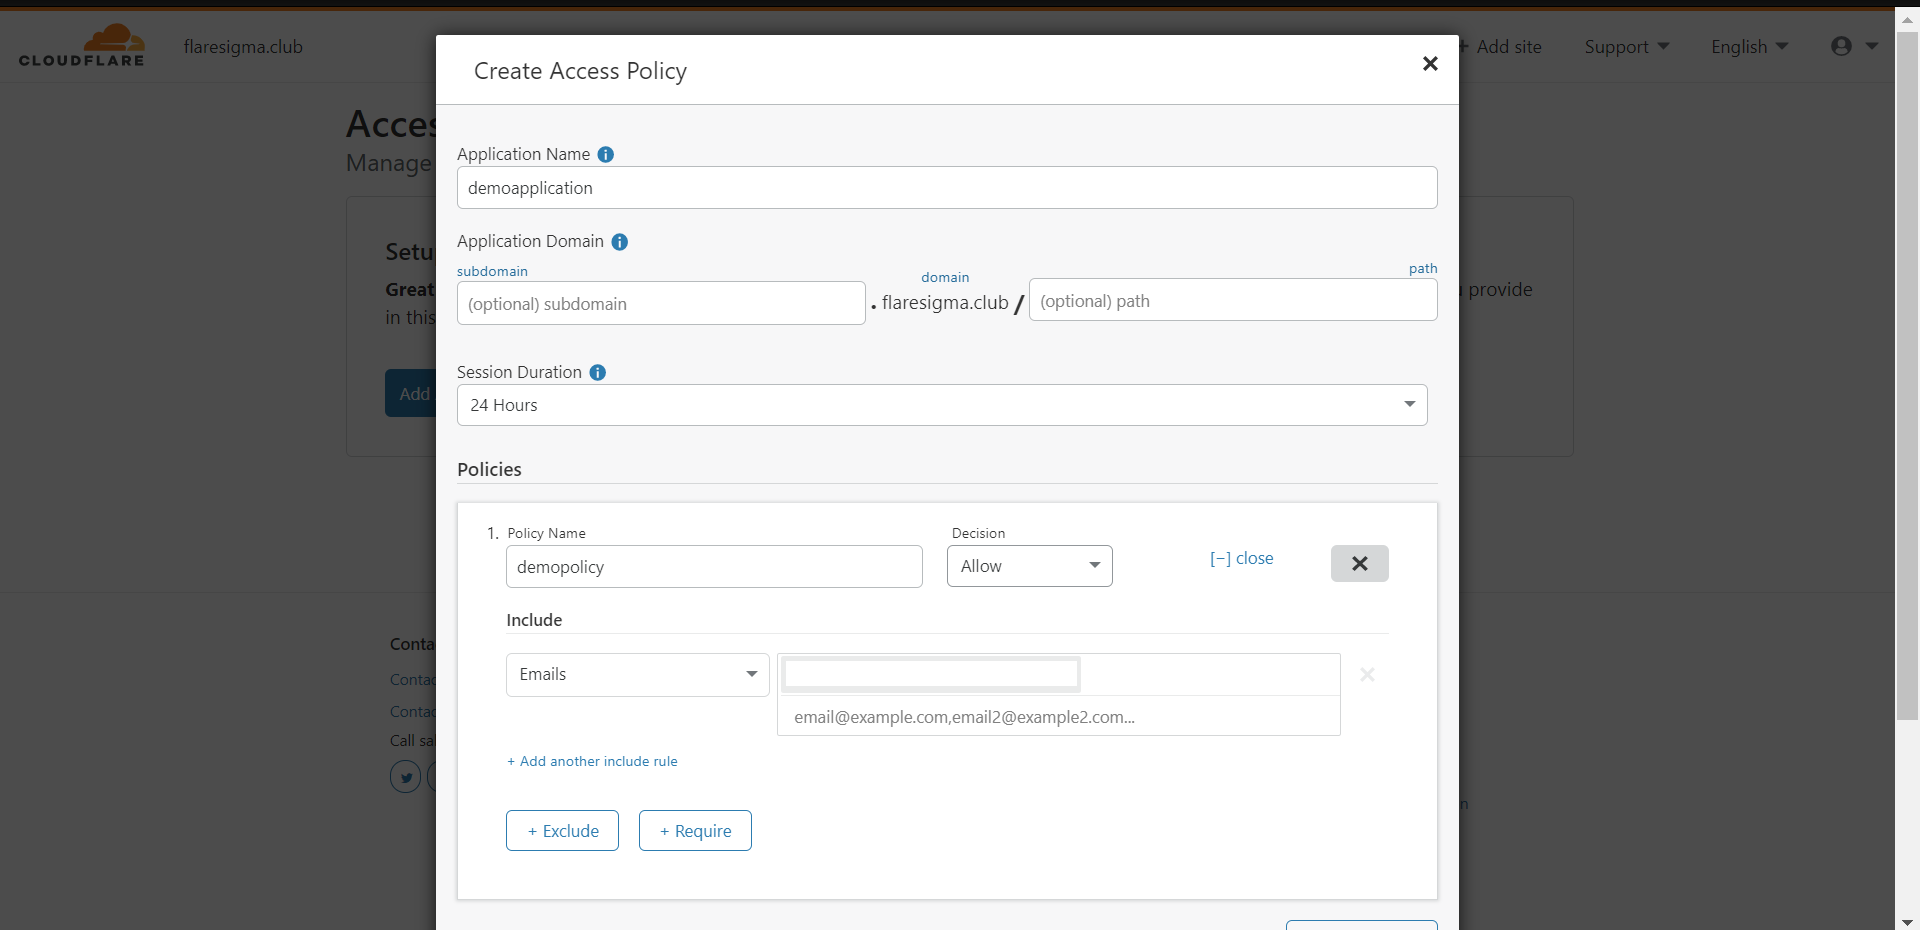
Access Policy:
With access policy, we can control who gets access to the designated application. I am going to create an access policy for the homepage of my Nginx application.
- Click on “Create Access Policy”
- Give it an application Name – “HomePage Access”
- Application Domain: I am going to leave that empty since I want to apply the policy on my homepage.
- Session Duration: I am keeping it 24 hours for one session.
- Under the policy, we can create policies for this application Domain.
– Giving policy name as “accessPolicy” and decision as “Allow”
– Include – “Emails” -> “abc@gmail.com”
With the above policy, only “abc@gmail.com” can access the application.
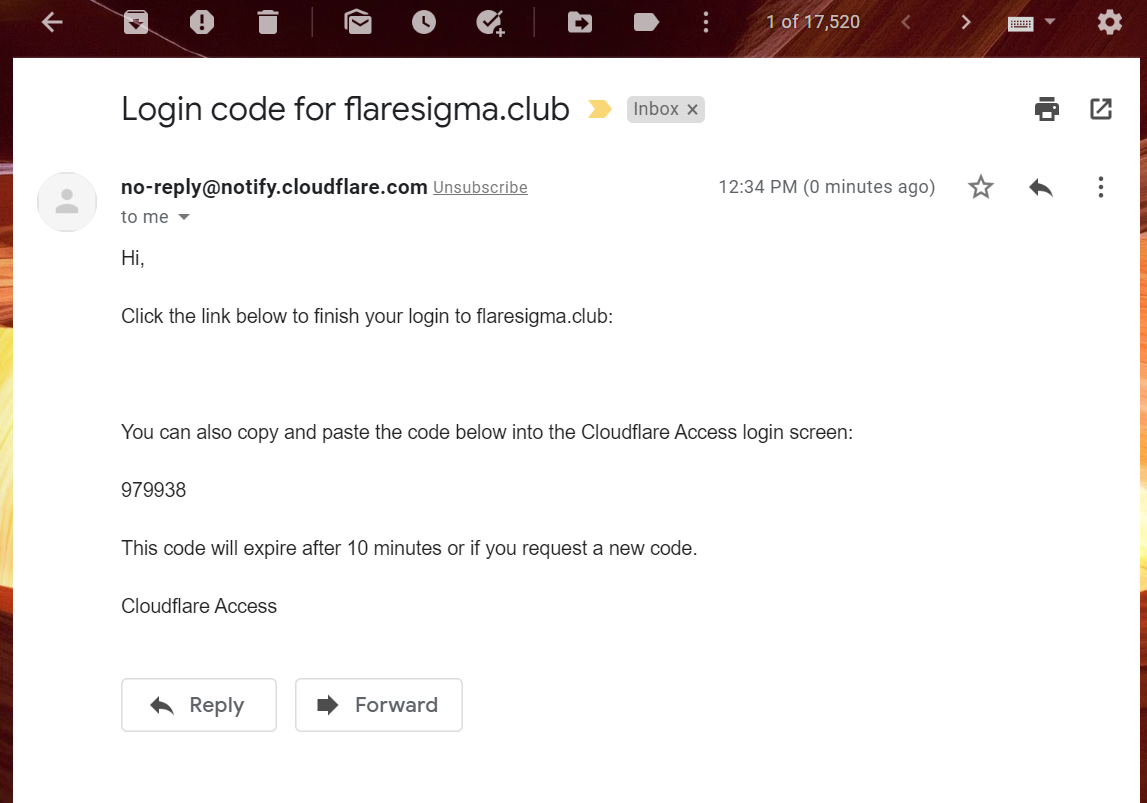
Now when I access the homepage on <myDomain.com>, I get a login page to access it.
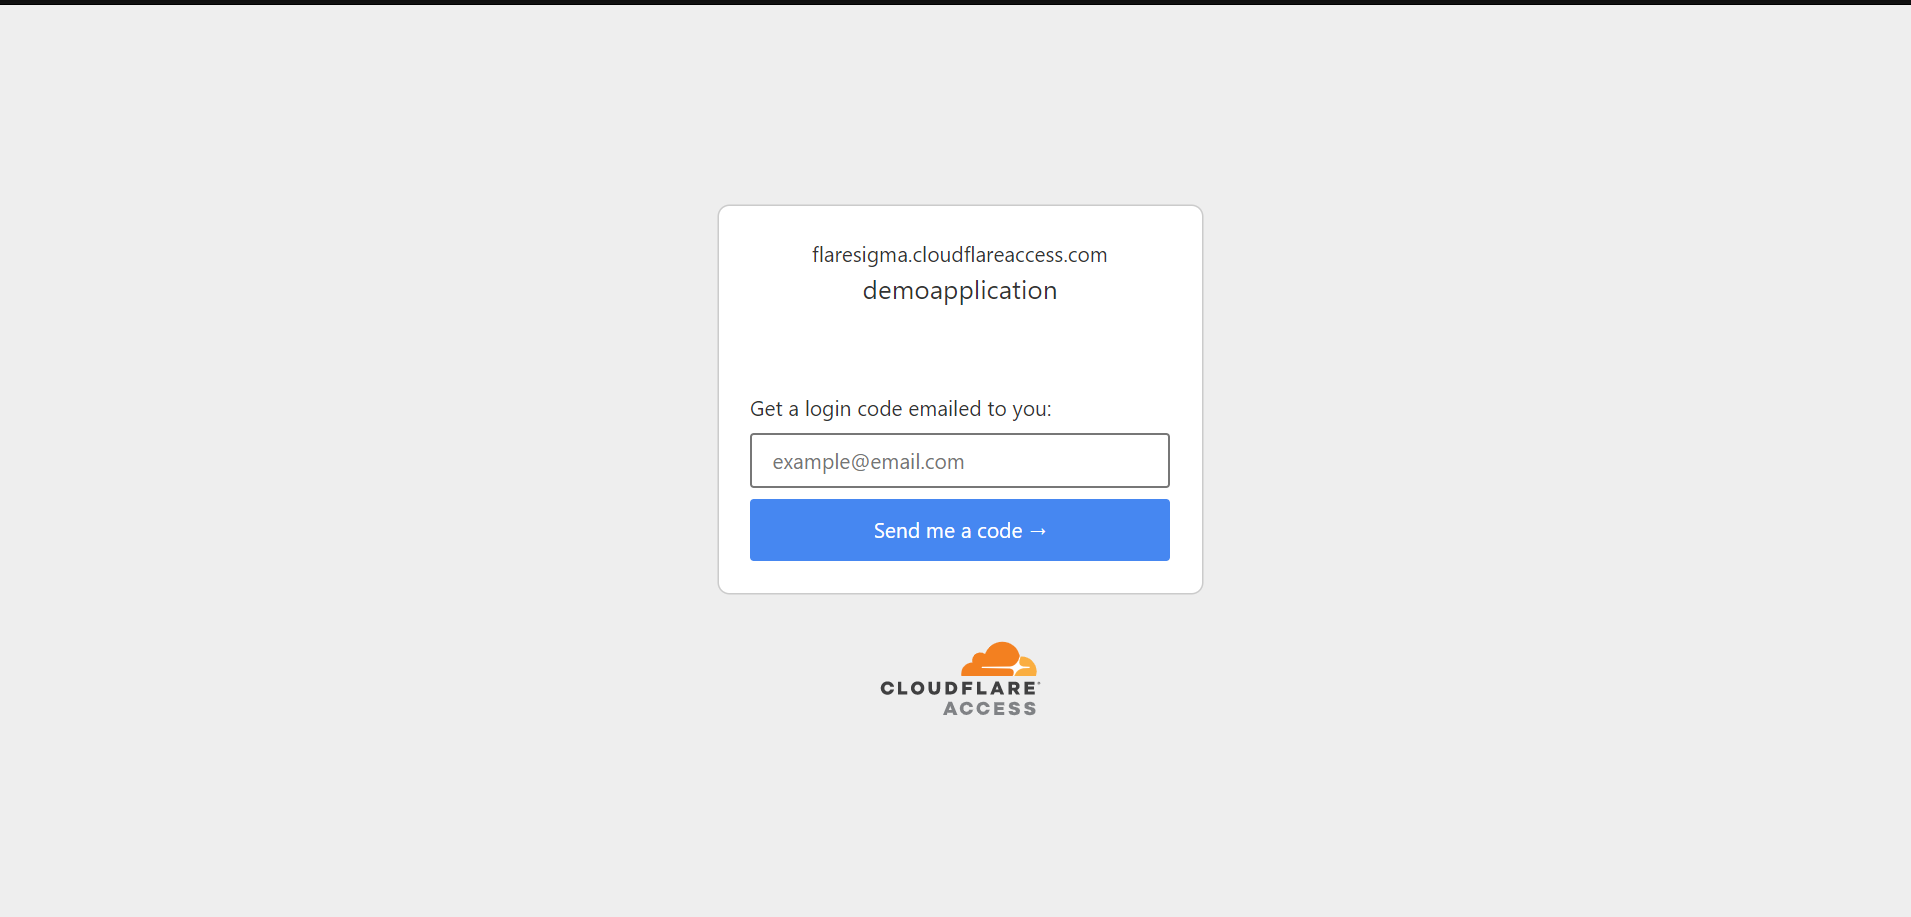
Only when I will enter the OTP I receive after entering my email address, I will get to access the application.
And we are completely secure!
And don’t forget – until September 1st, Cloudflare is providing this service for free.
- Removing Spaces in Python - March 24, 2023
- Is Kubernetes Right for Me? Choosing the Best Deployment Platform for your Business - March 10, 2023
- Cloud Provider of tomorrow - March 6, 2023
- SOLID: The First 5 Principles of Object-Oriented Design? - March 3, 2023
- Setting Up CSS and HTML for Your Website: A Tutorial - October 28, 2022