

Go is a statically typed programming language. Originally designed by Google, Go shares similarities with C in terms of syntaxes. However, in functionality, Go comes with additional features like memory safety, garbage collection, structural typing, etc. Over the past few years, Go has been gaining incredible popularity.
This guide will go over the steps of building and installing Go programs with the help of a demo Go program.
Go Building and Installation
Before jumping further, let’s have a quick breakdown of what building and installing means in the context of Go programming.
In Go programming, building refers to the process of translating the source code into a binary executable. The executable will contain the necessary support codes so that it can run independently on the target platform. Unlike Ruby/Python programs, Go binaries generally don’t require any system dependencies to run on a new system.
Putting the Go binary in an executable file path on the system is referred to as installing the program. As mentioned earlier, this guide will demonstrate the running, building, and installing of a simple Go “Hello world” program.
Prerequisites
Before starting, let’s go over the prerequisites you will need to fulfill to follow the tutorial:
- A properly configured Ubuntu 20.04. Check out how to install and configure an Ubuntu server.
- A non-root user with sudo privilege. Root permission is required to perform system-level changes. From this tutorial you can learn how to grant sudo permission to a non-root user.
- Properly configured Go programming environment.
First, we will quickly go over installing and configuring the Go programming environment. For a more in-depth step-by-step guide on installing Go check here.
Installing Go
Go is available on all the major platforms (Windows, Linux, and macOS). It’s officially available directly from Golang. Because of the website’s name, Go is often referred to as Golang. Here, we’ll always refer to the Go programming language as Go and the Golang website as Golang.
Golang offers detailed documentation on Go installation for all the supported platforms. However, the official method describes manual installation. Each time a new version is released, you have to manually update the installation to the latest version. Instead, we can directly install Go using APT (from default Ubuntu repos) or snap (from Snapcraft).
● Installing Go using APT
Go is directly available from the official Ubuntu repos. However, it’s not always the latest version of Go. There are also two variations of Go available from the Ubuntu repo: golang-go and gccgo-go. While golang-go is the official version from Golang, gccgo-go is the Go frontend for GCC (as a part of GNU compiler). Generally, golang-go is the preferred choice.
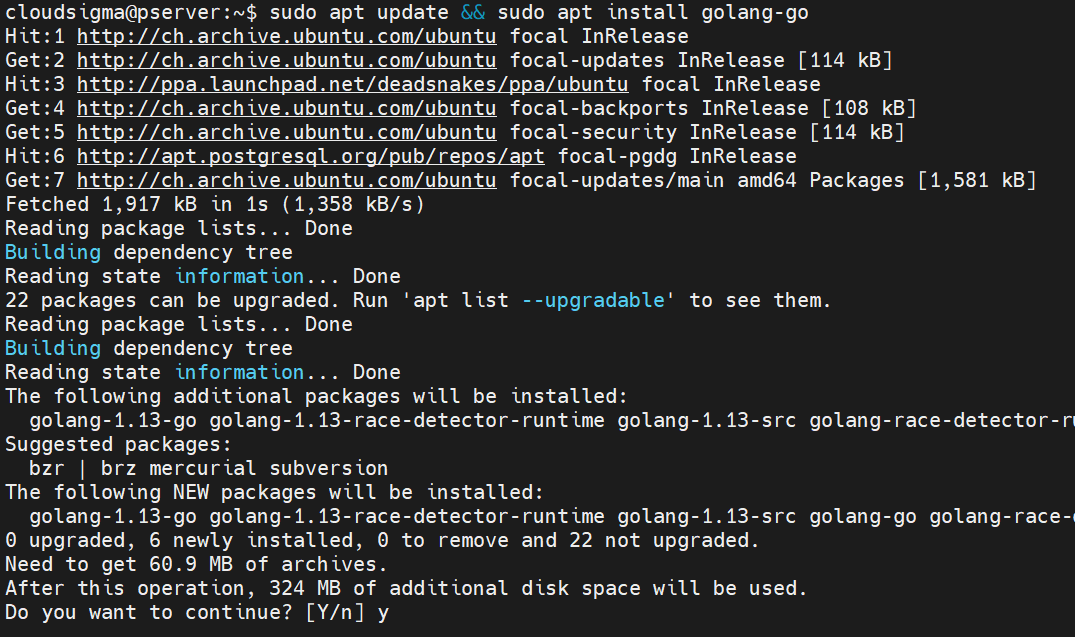
To install
golang-go, run the following APT command:
|
1 |
sudo apt update && sudo apt install golang-go |
Check the Go version:
|
1 |
go version |

● Installing Go using snap
Snaps are universal Linux packages that can be installed on any supported distro. Snapcraft lists all the supported distros with installation guides. On Ubuntu, snap support is enabled by default. Go is also available as a snap. You need to keep in mind that it’s not officially maintained by Golang. The snap package is managed by a third-party provider.
To install Go snap, run the following command:
|
1 |
sudo snap install go --classic |

Then, check the Go version:
|
1 |
go version |

Setting up a Go Project
Our system has all the necessary tools to start developing apps in Go. Time to establish our demo project. First, create a dedicated directory for our project:
|
1 |
mkdir -v demo_project |

Next, change the current directory to the newly-created directory:
|
1 |
cd demo_project/ |

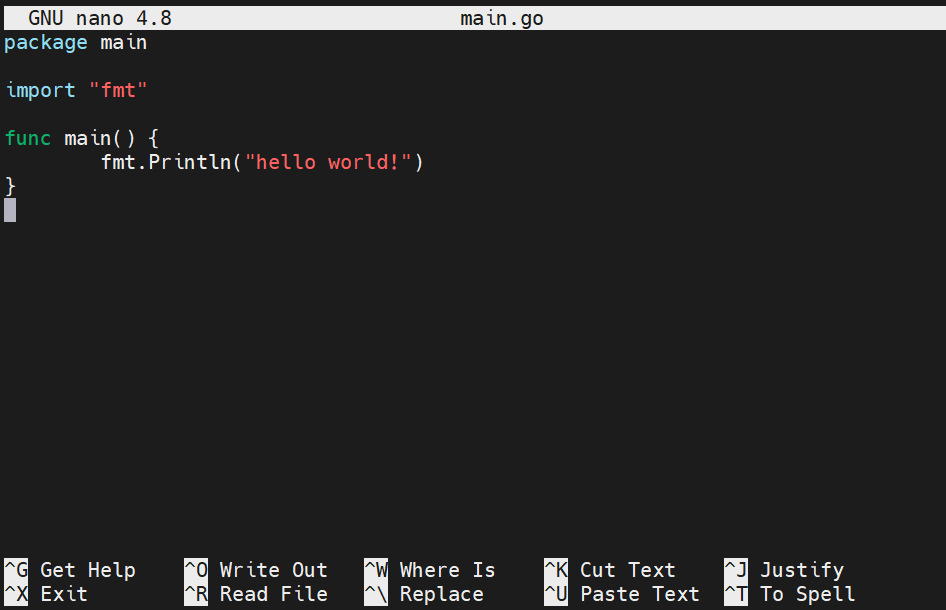
Here, create a new text file named
main.go:
|
1 |
nano main.go |
The following code features a simple program that will print “Hello world” when run. Copy the code:
|
1 2 3 4 5 6 7 |
package main import "fmt" func main() { fmt.Println("hello world!") } |
Save the file and close the editor. Verify that the code is functioning properly:
|
1 |
go run main.go |

The Go compiler built the source file into a binary file and executed it. It also verifies that the program is functioning successfully.
Go Workspace Configuration
In order to properly install Go programs, we need to configure Go workspace and GOPATH.
First, create the directory structure:
|
1 |
mkdir -pv $HOME/go/{bin,src} |

Next, we need to declare the value of
GOPATH and add it to
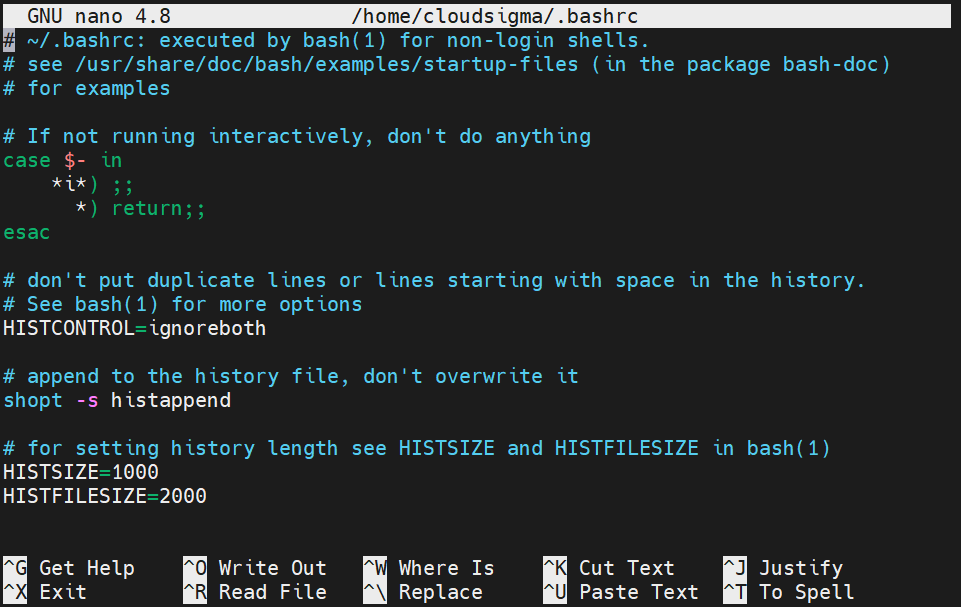
PATH. Open the
bashrc file:
|
1 |
nano ~/.bashrc |
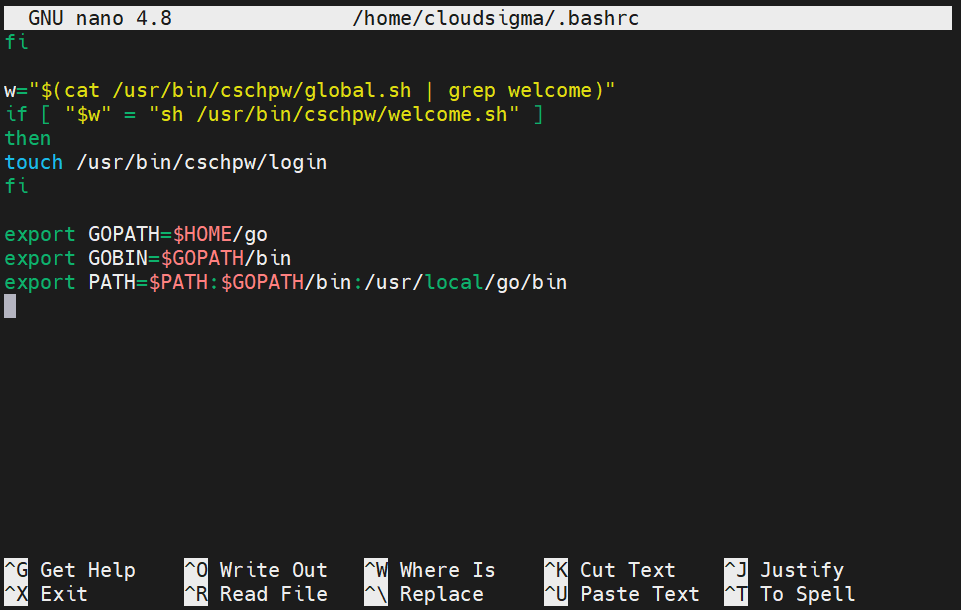
Add the following lines at the end of the file:
|
1 2 3 |
export GOPATH=$HOME/go export GOBIN=$GOPATH/bin export PATH=$PATH:$GOPATH/bin:/usr/local/go/bin |
Reload
bashrc:
|
1 |
source ~/.bashrc |
Verify if the change was successful:
|
1 |
echo $PATH |

Building Go Binaries
This section will demonstrate compiling Go codes into a distributable standalone binary file. The binary will contain not only the Go code but also additional system codes to run the binary. To compile our code, run the following command:
|
1 |
go build main.go |

If there are multiple Go code files, then use the following command:
|
1 |
go build |
If no file is specified, Go will search for Go files in the current directory and compile all of them. Each binary file is named after its source Go file. In this example, Go built the program
main. Run the program:
|
1 |
./main |

This program is ready to be distributed to other computers.
● Changing binary name
Whenever building, Go will automatically select a name for the executable file. There are two possible options when it comes to choosing the name.
- If Go modules are used, then the executable will use the last part of the module’s name.
- If no Go module is used, then Go will use the name of the current directory or the source file’s name.
Working with more complex programs requires a different naming convention. In such scenarios, these default naming methods aren’t very useful. In such a situation, the best way is to customize the output using the flag
-o. Let’s have a quick demonstration. Build the Go program with the flag
-o to designate a different filename:
|
1 |
go build -o bin/hello |

The -o flag tells Go to match the output with the given argument. In this case, the executable will be located under the directory bin and be named hello.
Next, test the new executable file:
|
1 |
./bin/hello |

Installing Go Programs
So far, we’ve demonstrated building distributable Go binaries from source files. We can distribute them on other systems, deploy and perform tests. However, they can’t be executed outside of their source directories. If you’re planning to actively use the program, then this constraint can be very annoying. To make things easier, we can install the Go programs and access them from anywhere throughout the system.
To install the program, run the following Go command at the source directory:
|
1 |
go install |

This command behaves the same way as
go build. However, instead of leaving the executable file in the source directory, it’s placed into the following directory:
|
1 |
$GOPATH/bin |
The variables
GOPATH and
GOBIN tell Go where to look for Go workspaces.
GOPATH default is the location
$HOME/go. We manually set
GOBIN to
$GOPATH/bin. To check the location of
GOPATH and
GOBIN use the following command:
|
1 |
go env GOPATH |
|
1 |
go env GOBIN |

Check the content of
$GOPATH/bin. Our program should be there:
|
1 |
ls $GOPATH/bin |

Time to verify if the installation was successful. Change the current directory to a different location and try to run the Go program:
|
1 |
demo_project |

Finally, you should be able to take your programs and install them into your system. You can use them from wherever and whenever you need them.
Final Thoughts
In this tutorial, we successfully demonstrated how to use Go toolchains to build executable binaries from source codes. These binaries can be used on other systems even without any Go configuration. Finally, we demonstrated how to install the Go program to be available from everywhere in the system.
For developers, CloudSigma offers Go API support to manage your cloud servers. It allows editing resources, and infrastructure scaling.
Happy Computing!
- How to Deploy WordPress with Persistent Volume on Kubernetes Cluster - March 17, 2023
- Deploying Applications on Kubernetes Using Argo CD and GitOps - October 26, 2022
- Using Node.js Modules with npm and package.json: A Tutorial - October 6, 2022
- Using Ansible to Install and Configure WordPress with LAMP on Ubuntu - September 23, 2022
- Creating Views in the Django Web Application Framework - September 22, 2022